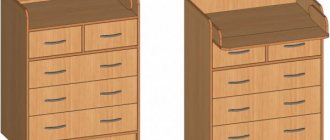
Is it possible to make a chest of drawers with your own hands at home?
Of course you can! You can make a simple chest of drawers from laminated chipboard yourself at home. The main thing is to take all “dusty” processes outside the apartment. Namely, cutting parts.
I advise you to order cutting of chipboard parts, rather than cutting them yourself. This service is inexpensive - about 200-300 rubles per sheet in companies that sell sheet materials. And it saves a lot of time and effort.
Imagine how much effort it would take to cut a whole sheet of paper with a jigsaw. The details of the chest of drawers are not very large and it won’t be too much to “lead” the file away from the outlined line. But it will still take some skill to avoid crooked saws. And then you still need to sand the cuts and sand them in order to get a cut that is smooth enough for gluing the edges. Do you need it? It’s easier to give 300 rubles and not suffer.
You can glue the edge yourself if you buy melamine tape. The process is simple - run a heated iron over the surface until it is completely glued, and then carefully cut off the edges with a shoe knife and sand it. The savings are significant.
But a plastic edge, PVC 1 mm thick, is still more practical. It is more durable. You can’t stick it on at home, but you can also order it and cut it. “Take a price” and decide what is best for you based on the materials estimate. I will provide it at the end of the article, along with a list of all the materials, components and hardware that will be needed to make a chest of drawers with your own hands at home.
Manufacturing
The step-by-step scheme for making any chest of drawers includes a number of stages. The main ones are: cutting and processing of parts, frame assembly, installation of partitions and drawers. Secondary: attaching handles, decorating. Each of the points must be performed in accordance with the rules, then the product will turn out to be of truly high quality.
Material cutting
Cutting chipboard and similar sheet panels can be done on your own or using special machines. Professional cutting services are offered by distributors of tile building materials and furniture manufacturers. When choosing this option, the cost of a homemade chest of drawers will increase slightly, but the ends of the sawn elements will be more accurate.
Functional chests of drawers for the kitchen, current materials, styles, colors
When cutting chipboard yourself, you should remember the need for 1–2 mm of margin on the edge. In such cases, the jigsaw must be electric, the support of the sheets must be stable and level, and the furniture maker’s movements must be smooth and precise. The stage ends with checking the model, adjusting the parts and drilling holes for the confirmations using a drill 0.5 mm smaller.
Edge processing
At this stage, the ends of the parts are carefully inspected for defects and covered with self-adhesive edges. Step-by-step actions:
- Chips and similar irregularities are covered with wax.
- When planning to use the chest of drawers in conditions of high humidity, the ends are coated with sealant.
- After eliminating possible defects, the ends are covered with a protective film, heated with a hairdryer or iron.
The edge is heated in small sections, carefully pressed and ironed, the excess is cut off with a stationery knife.
Frame assembly
Any model of a chest of drawers is assembled with your own hands according to the general principle:
- In pre-marked areas, drill holes for screws of slightly smaller diameter.
- The parts are joined and connected with confirmations using a screwdriver.
- To check possible deviations, a square is applied to the corners of the assembled structure.
- Directly during assembly, lines are marked on the side parts for attaching the guides, starting from the bottom, with a mandatory 3 mm gap between adjacent drawers.
Beginners should choose a chest of drawers with drawers of the same height. In such models, the distances between the axes of the guides are completely symmetrical; checking the correctness of their location is not difficult.
Installing the table top and bottom
The assembly of any product begins from the bottom, with sequential fastening of the sidewalls and transverse shelves (if any). And only then, after checking the angles of the structure and marking the guides, the tabletop is screwed to the chest of drawers. There are no problems when working with simple, flat surfaces. The upper part is attached using confirmations and plastic furniture corners from the inside. Any additional elements of the chest of drawers (shelves, folding table) are fixed at the end, after checking the stability and correct assembly of the entire structure.
Attaching legs or wheels
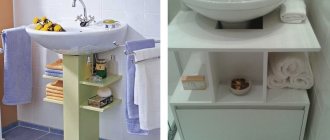
Cabinet furniture made from lightweight board materials in most cases does not need legs. Problems with joining the walls are solved using a recess at the bottom of the chest of drawers on the reverse side. But it is advisable to equip heavy, frequently moved or stylish models with supports, thrust bearings or wheels. Such elements are screwed at a distance of at least 50 mm from the corners, at an equal distance from each other. The method of fastening depends on the type of leg and is specified before assembling the chest of drawers. In some cases, corresponding holes are pre-drilled in the bottom.
Rear wall installation
The back part is fixed with confirmats and finally strengthens the structure. Not only the corners, but also the diagonals of all the main elements of the chest of drawers must be checked. Deviations from the specified sketch of more than 1 mm are not allowed. The part is screwed in the absence or after elimination of any defects.
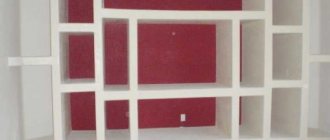
Photos of chests of drawers in the interior, variety of models, current colors
Assembly and installation of boxes
This stage begins with assembling the boxes:
- The side parts are connected first and only then, after checking the diagonals and angles, the bottom is attached to the boxes with self-tapping screws.
- The second part of the guides is mounted to the sides.
- The pull-out elements are sequentially (starting from the bottom) inserted into the chest of drawers, pulled out and pushed in. Correctly assembled and installed boxes move smoothly, without displacement.
The given instructions allow you to make your own chest of drawers both from chipboard and from any board materials, including plywood or solid wood. The difference when working with denser varieties appears insignificantly, namely in the grinding of the ends and the use of more reliable fasteners. It is also necessary to remember that when assembling a chest of drawers on confirmed mats, there is no need to coat the joints; when using tongue-and-groove elements or mounting on dowels, the opposite is true.
What's next?
After you take the parts from the cut, with a ready-made edge or edge it yourself, purchase the accessories according to the list, what remains is:
- Drill out the blanks for confirmations.
- Screw on the guides and bearings.
- Assemble the frame of the chest of drawers and drawers on confirmations.
- Nail the back wall and bottoms to the drawers.
- Install and adjust the guides.
- Carefully “distribute” the facades, screw them and install handles.
Drilling parts is also a rather dusty process. But in fact there are not many holes in the chest of drawers. Therefore, it is enough to free the room from what cannot be washed and close the door. And, of course, arm yourself with a vacuum cleaner to immediately remove shavings and wood dust before it scatters throughout the apartment.
Solid oak chest of drawers
In the life of every person, sooner or later there comes a day when the spouse asks to do something useful for the home. Sometimes you get incredibly lucky and it's a cutting board, kitchen shelf or knife holder. I can’t boast of fabulous luck, but I already have a cutting board... In a word, my wife asked me to make a chest of drawers.
Well, since the obsession with making home furniture on my own has not left me for a long time, I decided to approach the issue creatively. I took the dimensions of the place where the chest of drawers would stand, made a sketch on a piece of paper and agreed on the project with the customer (that is, with my wife).
Considering the expected costs for material and accessories, I wanted to be sure that the project would look decent, and other than that, of course, I wanted to make a technically correct product. High-quality, beautiful and comfortable furniture. I had to go beyond just drawing with a pen on a piece of paper.
From the official website I downloaded the SketchUp program for volumetric modeling. After watching several video tutorials, I drew the appearance of the chest of drawers and, not being sure of the correctness of the design, consulted with friends on social networks. Initially, the project had a slightly different look. The drawers were the same, the proportions were slightly different, the height and shape of the dresser legs were different. Using some wise advice from Andrei Dubovoy and Anatoly Evdokimov (for which, by the way, I am very grateful), I thoroughly adjusted the appearance and began to draw in detail.
I selected the required amount of 30mm boards. thick. When selecting the board, I made a small reserve, selected more than needed. This is in order to be able to reject part of the material that has knots, strands or sapwood. A significant part of wood defects can be hidden during the work process, at the initial stage, simply by turning the part with the bad side inward or letting the knots “cut.”
Initially, the board was simply jointed on both sides, boards that were not suitable for work were rejected, and the rest were sorted by type and marked by end, so that in the future there would be no confusion - which board was for which type of parts. The design of the chest of drawers itself consists of two massive sides, five frame bars, a chest of drawers lid (tabletop), a back wall and five drawers. The parts of the frame, grille and sidewalls are not very difficult to manufacture. The thickness of the grating parts is 20mm, which allows them to be made from ordinary oak boards without gluing the thickness. The parts are seated on the insert tenon and glued together. The grilles can be made from almost any type of material, since only one edge of the grill covers the front side of the chest of drawers.
The blanks for the gratings were initially made larger, and then, after gluing, the entire grating was sawn on both sides to the final size on a sawing machine. This gave high dimensional accuracy and the correct angle of the workpiece 90 degrees.
Making the sidewalls will take a little longer. The cross-section of the chest of drawers legs significantly exceeds the thickness of even an unplaned board, so we had to re-glue them from three boards. To ensure that the gluing points were not noticeable, I glued thick veneer (2-2.5mm) to one side of the leg. In the future, this side of the leg will go to the front side of the chest of drawers. After gluing, the protruding excess veneer is cut off, in my case with a cutter with a bearing.
The sides of the legs were selected and marked before further work. The most successful type of wood texture was determined to be on the front side of the chest of drawers, less successful options - on the reverse side, towards the back wall.
The frame inlays (panels) of the sidewalls were made from plywood. The plywood was also covered with thick veneer. Then, I assembled the side frame “dry” - without gluing and sawed off the tabs exactly to the size of the frame. I made a 6mm groove around the perimeter of the manufactured tab for the key. I made a groove of the same size in the frame.
I would like to draw your attention to the fact that only one tab is installed on the key. The second tab is attached in a different way, but more on that later.
I cut off the legs of the chest of drawers a little at the base and decorated them with a small groove. The frame of the sidewall was seated on the insert tenon and re-glued together with one tab. As usual, the blanks were made with a small allowance, and after gluing they were filed on both sides, although there was no significant distortion of the blanks during gluing.
The tab was drilled out and countersunk, then attached to the frame with screws; the screw heads were covered with a glazing bead from the top. I installed the tab quite accurately, but I still “softened” the sharp edge of the glazing bead, where it meets the frame and the edge of the frame, a little manually with abrasive. It seemed more beautiful to me.
Subsequently, I revised this element of the chest of drawers. I plan to change the tabs a bit in the published drawings. It seemed to me that this method was quite complicated. In the new version, the chest of drawers will be thinner and lined with 0.6mm veneer. rather than a deck, both internal and external will be removable.
Well, that's all, work with the chest of drawers is completed. The body, table top, drawers and drawer fronts were all made at the same time. Preparing the material, then cutting, gluing... It is much easier and faster to do everything at once if the project is already ready, understandable and the material has been calculated. But I deliberately divided the production into several stages, this in order not to introduce unnecessary confusion into the article. And so - Tabletop.
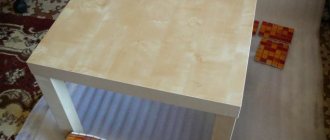
Making a table top.
I used 19mm thick MDF as the base for the tabletop. I milled a 6mm groove along the perimeter of the base and covered it with a block of cross-section that is slightly larger than the thickness of the base. In my case, the MDF perimeter is 19mm. surrounded by a 20x20mm thick block. The protruding excess bar was ground flush with the base until the plane was completely achieved. You can also cut off excess wood with a router, if you are not too lazy to make a special device. I used a sander, it was faster and easier.
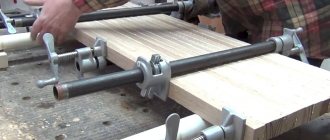
Next, the resulting structure was lined with a 3mm deck. thick on both sides. The protruding excess deck (“overhangs”) was cut off with a cutter with a bearing, then the edge was milled with two radius cutters to obtain a beautiful profile.
Please pay attention to the photo with clamps. The bars in this photo are bent at 45 degrees, only from the front edges of the dresser top. The back sides are joined differently. Otherwise, after milling the profiles, a burr may come out on the back side, because we do not mill the side of the tabletop adjacent to the wall.
I will describe in more detail how to veneer a workpiece with a “Deck”, as well as how to make this “Deck”, in the article “ Veneering (Working with Veneer) ”, so as not to repeat the same thing in each article.
Manufacturing of drawer fronts.
When I started making the boxes, I did a lot of digging, choosing a veneer pattern. The facades and countertops are the most important aspects; they should be exactly as the author of the project intended. I typed the “shirt” onto the entire front part, marked and cut the “shirt” into the rough size of the panels for the facades.
Then I cut the plywood with a small allowance and lined the blanks on both sides. You can use less beautiful veneer on the back side of the facades, but in any case, the second side will have to be veneered.
To scrap the façade (cladding), I made several oak blocks. I made the bars long, the entire length of the board. It’s easier for me to do all the operations on a long workpiece, even grinding, and only then trim the workpiece into small parts. Both the facing and the panels (filling) were made together.
After veneering and sanding the panels, I milled a groove in the lining blocks. The groove was milled in two passes. First, I “cut” a small groove, about 1.5-2mm. and then to full depth. This is to avoid chipping.
For the next operation I needed more precision, so I used an electronic depth gauge to align the cutter. To tell the truth, I now use it all the time, of course, while the battery is new. He sits down quickly. The panels were sawn to final size and milled from the back, taking into account the resulting groove. In other words, when milling the panels, he drove them under the trim.
After working with the panels and the trim groove, and a cutter for cutting out the quarter, I formed the profile of the drawer fronts. In my work I used a template to tilt the workpiece. The profile was also milled to the full length of the workpiece (length of the board). The whole process was described in more detail in the article “ How to make a glazing bead.” "
The moldings were trimmed to size with an allowance of 10-20mm. The carriage in the photographs is “oncoming”. This is not very good - there are significantly more chips when burring workpieces, but it is much easier to do and maintain. To reduce chipping, I raised the circular saw blade as high as possible and sawed at a very slow feed.
To be completely sure of the reliability of the connections of the trim (frame), using a Domino df-500 dowel router, I milled holes for the insert tenon. In truth, this operation could have been avoided altogether by making the panel larger and the groove in the trim deeper. I think that a simply glued facade would be no less reliable and durable, but for now I used the method that is familiar to me. For this operation, I placed the router stationary on the work table, supplemented with stops for pressing the workpieces.
The drawer fronts were glued together using band clamps. The glue was applied along the entire perimeter of the panel's contact with the trim, in the groove and at the joints of the trim. The glue was applied carefully, so as not to stain the front side of the facade. Excess glue that appears is removed immediately after the glue has hardened a little.
I marked the facades so as not to confuse the sides when adding. I wanted the veneer pattern to look like one whole piece on the entire front part.
Making boxes.
I pulled the blanks together with clamps in pairs, with their front edges facing each other. The protruding excess strip and the glue that has come through are removed with a sanding machine until a plane with plywood is obtained.
The walls of the box were veneered with 0.6mm natural maple veneer. at both sides. The walls were sawed off on all sides, including “cleaned up” on the side of the slats. The blanks were veneered in long strips, and only then, after veneering, were they trimmed to size with an allowance. Then I sawed them down to the final size of the drawer parts. I sawed a groove in the side walls for the bottom of the box.
The boxes were fitted using the same Domino df-500 dowel router, insert tenon - 5x30mm. Since the front of the drawer and the walls are different in color, I decided that it would be easier for me to paint them separately from each other, so the boxes were glued together after finishing. I sealed the joints of the box parts with masking tape, which I removed immediately before gluing the box.
In order not to damage the facade and the varnished walls of the box, I used plywood spacers. There is no need to pour a lot of glue, and it is better to remove excess glue that appears on the joints after it has hardened a little, otherwise it will smear and may stain the walls of the box. And if the glue is not removed in a timely manner, it will harden completely, which is also not very good.
After assembling and gluing all the boxes, I marked the bottom and secured it with screws (4x20 galvanized screw with a countersunk head) to the back wall of the box. From the bottom, to the bottom of the drawer, using a screw (3x10), I installed the latches for the guides. On the back side of the box, you need to drill a hole in the back wall. This is a 6mm non-through hole. 6-7mm deep. — for fixing the guides at the rear wall. Then the guides are simply inserted into the hole and latch until you hear a characteristic click.
Hidden type guides. In this case I used different types of Blum guides. Partial extension guides on the bottom three drawers and full extension guides on the top two. Partial extension guides are noticeably cheaper, but the tabletop protrudes directly above the two top drawers, and partial extension guides are not suitable in this case.
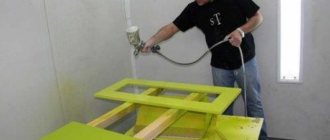
Well, that's almost all. The chest of drawers was painted in a completely traditional way, completely disassembled. I have already covered the methods of painting in the article “ Working with a spray gun ”; I cannot add anything new to what has been said. After finishing, the chest of drawers was reassembled and the drawers were installed.
I would like to pay special attention to the connections of vertical and horizontal elements on the front side of the chest of drawers. The fact is that the entire perimeter of the niches in which the boxes are installed has these “edge softenings”. To make this possible, I had to mill these parts in assembled condition. The chest of drawers was assembled completely and then, using an edge router, an R2mm cutter. I walked the entire perimeter of the front side of the chest of drawers. Thus, the connection points remained intact.
Later, drawing conclusions from the work done, I decided that the radius was 2mm. it's too much. In the drawings that I will publish later, the radius of the perimeter of the niches will be revised from 2mm to 1.6mm. (minimum possible), the radius of the perimeter of the facades is 2mm. by 1.6mm. and the gap between the chest of drawers and the fronts of the drawers from 2.5mm to 2mm.
The glazing bead on the sides was installed after finishing. My air gun (more precisely, a “micro-hair gun”) is a budget one, so it leaves decent marks from the striker. In order to slightly reduce this effect, I used a soft material - foam. Actually it could be anything. Foam rubber or fabric will also work fine. In this case, the glazing bead does not fasten or fix anything - it is simply a decorative element. The panel is fixed with screws, and the glazing bead simply covers them from above.
Further, after the product was delivered home, the question of choosing handles arose very urgently. Of course, this issue should have been resolved before all the work began, but, as usual, the choice is not easy, and the decision was postponed “for later.”
I could never have imagined how important the issue of choosing accessories for women is. All the options I proposed at the family council were rejected. I had to go shopping. The choice of handles for furniture, as it turned out, is simply enormous, as is the cost. Hundreds and hundreds, in a variety of types, finishes, styles, materials and colors. But finally an option was found that suited everyone in the family. I purchased relatively inexpensive pens, produced by the Brass company, if I’m not confused - RS081BAZ 3/96.
Well, that's all for sure now. The article turned out to be quite lengthy. Traditionally, I post several pathetic angles to complete the story. The drawing of the product, and it seems to me that I can continue to adhere to this order (Photo of the product, briefly the manufacturing method and drawing), will be published a little later, when I correct it taking into account the manufacturing experience and correct some shortcomings.
As promised, I am posting a drawing of the product. With this I say goodbye to you, I hope it was interesting.
DIY chest of drawers, drawings and assembly diagrams
And now I will provide all the necessary calculations, drawings and assembly diagrams so that you can assess the amount of work and its principle.
Let's consider a slightly non-standard model of a high chest of drawers with 5 drawers. According to the calculation principle that I will give, you can recalculate it to other sizes - make it lower, wider, longer or smaller. Or order an individual calculation from me, using the services of a furniture designer.
DIY drawing of a chest of drawers with overall dimensions.
The diagram for assembling a chest of drawers with your own hands is quite simple. In fact, you will have to assemble the frame itself and five boxes of the same type.
At this height, I recommend installing a stiffener on the back wall, under the fiberboard, so that the stand (sidewalls) do not bend and it is easier to adjust the drawers. If the chest of drawers is lower, the stiffener may not be installed.
Scheme and drawing
When making any piece of furniture, it is necessary to make a drawing. For a chest of drawers, the standard sizes are:
- width from 80 to 120 cm;
- height – 80 cm;
- depth from 30 cm.
When making parts, it is worth considering that the tabletop is made 2 cm deeper to ensure it overhangs the facades.
Attention : when designing higher models, it is recommended to additionally attach them to the wall so that when opening the drawers the product does not turn over.
Calculation of parts for the chest of drawers and cut card
The most convenient way is to hammer the detailing onto the chest of drawers with your own hands into a specially prepared plate. The formulas will automatically calculate the quadrature of the parts themselves and calculate the length of the edge.
If you lay out the parts on a laminated chipboard sheet of 2440x1850 format, almost the entire sheet will be gone with a small remainder.
Please note that the facades are not included in the general cutting on laminated chipboard. The front part determines the overall design of the furniture and is usually made from more “noble” materials - MDF, solid wood, acrylic, veneer. Or they play it out in a contrasting design. But in a budget version, you can make it in one color, in the same cut as the body.
What are the sizes of chests of drawers, and their main parameters
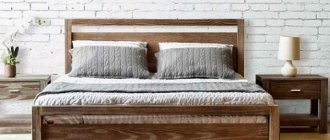
Organized and orderly storage of things and clothes determines how neat and clean the house or apartment will be. Functional furniture helps to free up useful space in the room and organize things compactly. A chest of drawers for a bedroom, living room or nursery is a convenient and practical piece of furniture with spacious drawers in which you can store home textiles, bed linen, underwear, and clothes. It is important to remember that the chest of drawers has different sizes, but there are certain restrictions on the dimensions of the furniture so that it can be used comfortably.
The nuances of drilling and self-assembling a chest of drawers
I will provide drawings of the drilling diagram for the dresser parts.
IMPORTANT! In the drawings, the parts are shown in one position for drilling. But it is clear that they will need to be “mirrored” - the mirror frames of the dresser body itself and the sides of the drawers are drilled.
The drawing of the chest of drawers shows markings for fastening the guides, but does not indicate the dimensions. This was done intentionally to avoid confusion - after all, these holes are not through and will not be on the outside, but on the inside of the chest of drawers.
Also, the position of the fasteners depends on what guides you purchase.
- A cheaper option is roller guides. They are attached to the bottom of the box.
- A more practical and durable option is full roll-out ball guides. They are attached to the center of the side of the box.
Particular precision is not required when distributing boxes along the sidewall. The main thing is to maintain alignment - symmetrically fix the parts of the guides on the stand of the chest of drawers and drawers themselves. Mark the approximate position of the drawers along the facades so that they do not overlap each other. And then determine the most optimal position of the fastener.
The chest of drawers is attached from the inside, through the top strips, using 4x30 self-tapping screws.
The fronts of the chest of drawers are first secured with double-sided tape to ensure that the gaps are evenly distributed. And then they are also attached from the inside using 4x30 screws. Handles are installed through the front and inner wall of the drawer. You will need long screws for the handles. In some cases, the length of the screws may be too short or too long. Then they are either recessed, countersinking the holes, or washers are placed (can be metal, can be silicone).
Calculation of drawers
To avoid confusion and misunderstanding, let’s define the initial data:
The furniture is made of laminated chipboard with a thickness of 16 mm; fibreboard with a thickness of 4 mm is used for the bottom.
- Width of the cabinet/cabinet (external dimensions) = X.
- The height of the niche for installing drawers in the cabinet/cabinet (minus the overhead countertop) = Y.
- Depth of the cabinet/cabinet stand (sidewall) = Z.
Calculation of the drawer front
Whatever one may say, the calculation of the inside of the box largely depends on the front part.
The facade can be internal (rolled over the side walls of the body) or overhead.
As you can see from the drawing, the choice of overlay or internal front can affect the depth of the drawer. In the case of an inset one, it is rolled deeper to the thickness of the facade (-20 mm from the depth of the stand).
The height of the drawer front usually varies between 150-200 mm. It all depends on what will be stored inside. For documents and stationery in office cabinets, smaller drawers are made, 120-150 mm deep, rarely 180 mm. The linen drawers of the chest of drawers are designed deeper, ranging from 180 mm to 250 mm. For toys and bedding, drawers can be even deeper along the height of the facade, but in this case it is necessary to reinforce the bottom with a stiffener or partitions.
The size of the drawer fronts, taking into account the technological gap, is calculated by analogy with other doors; you can read more in detail here. In short, 2-3 mm is subtracted from the dimensions along the outer perimeter; the gap between adjacent facades is also 2-3 mm.
An example of how to calculate the fronts for two drawers relative to our cabinet with dimensions X*Y*Z.
- Internal facade: ( X-16*2-3) x(( Y-16*2)/2-3)
- Overlay facade: ( X-3) x( Y/2-3)
The height and length of the facade can be swapped if there is a texture and the desired direction of the pattern - longitudinal or transverse. When edging PVC facades around the perimeter, it is necessary to take into account the thickness of the edge!
How to calculate the side of a box
Drawer guides are available in 50 pitches, ranging from 250 mm to 550/600 mm. Hardware manufacturers always have a similar layout in their catalogs, which can help you navigate the dimensions and markings for fasteners.
roller guide dimensions
ball guide dimensions
Thus, the depth of the sides of the drawers is taken in increments of 50. For the shallowest drawers, 250 mm, and further, correlating the depth of the standing cabinet/cabinet with the length of the suitable guide - 300, 350, 400 mm, etc.
The narrowest side of the cabinet/cabinet for built-in is 260 mm for the overlay facade and 280 mm for the internal facade (for a 250 mm guide). The required clearance at the front edge for installation is usually 2 mm. The gap at the back is arbitrary, from 1-2 cm to 5 cm. If there is more left, it is better to purchase longer guides so as not to waste space behind the drawer. It turns out:
(drawer depth) = length of the guide and less than Z by no more than 50 mm.
How to calculate the front (front and back) of a drawer
If we again turn to the manufacturers' catalogs, we can see that the gap between the sides of the cabinet/cabinet body and drawers is about 12.5-12.7 mm.
In fact, when calculating, these numbers are rounded by subtracting 13 mm. This makes the drawer move more freely and is easier to adjust.
In the drawing, the calculation diagram for the box is clear and understandable. Thus, to calculate the “forehead” of a drawer, you need to subtract the thickness of the chipboard from the dimensions of the cabinet/cabinet 4 times (2 on each side) and a gap of 13 mm, also on both sides. 16*4+13*2=90. It turns out:
(forehead length)=X-90mm.
How to calculate the depth of a drawer
There are no special standards regarding depth. Usually 10-20 mm are left under the facade (Z5), and 30-80 mm above the facade.
Thus, if, for example, the height of the facade is 150 mm, then the depth of the drawer will be about 80-100 mm. I base my calculations on the cut cards. If reducing the depth of the drawers allows you to more compactly place the parts on a sheet of chipboard, then this is worth taking advantage of. There are situations when several parts fit onto a new sheet, but if you “play” with such unprincipled dimensions of the parts, you can save on buying a whole sheet with a huge remainder!
Fiberboard bottom calculation
There are two ways to install the fiberboard bottom - overlapping and in a groove. In the first case, the bottom is nailed to the drawer frame from the back side. In the second, it slides into a special groove.
- When fastening with an overlap, a gap of 2 mm is taken away. That is ((length of forehead)+16*2-2)x((depth of drawer)-2).
- When the groove depth is A, mm on each side is added to the internal dimension (A-2) mm on each side. That is ((length of forehead)+ (A-2)*2)x((depth of drawer)-16*2+(A-2)*2).