28735
Sometimes it’s not necessary to throw out your old closet. If the owner has taste, then the item can be given a new life. And what satisfaction comes from furniture restored with your own hands! For it to truly become a source of pride, you should carefully study how to paint chipboard furniture at home. This knowledge will help you inexpensively refresh the appearance of a table, bedside table, living room wall, bed, chest of drawers or stool. The tips in this article are universal for any objects made of particleboard.
How to choose the right paints and varnishes
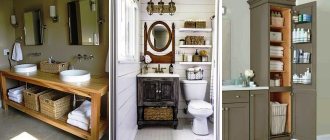
Before choosing tools for working with objects made of chipboard, evaluate the type of restoration object and its original color. Decide whether you will simply refresh it or give it a new look. When choosing the second option, carefully consider how the other color suits the environment in the house.
Use a professional palette of tones and shades if you have difficulty choosing.
To decide how to paint chipboard furniture, you need to familiarize yourself with the offers of hardware stores. Don’t be lazy and go around a few - perhaps your choice will be cheaper and of better quality. Be sure to look at the release time of the coloring agent and its composition. It is necessary to calculate its consumption, taking into account that the coating involves applying more than one layer.
To do this, measure the area of the facade and multiply the amount of paint by 2, since you will need to do 2 layers for even coverage.
Do not buy compounds containing lead - inhaling their vapors is hazardous to health. Alkyd is more environmentally friendly and dries faster.
Alkyd paints are easier to thin to a uniform color.
The varnish must be purchased either transparent or tinted.
Give preference to warm tones if you plan to give the surface a natural wood color.
Check the selected chemical compositions on a neutral section of the plate. After each application of the product you need to let it dry. Evaluate the resulting result and decide whether it is suitable for restoration.
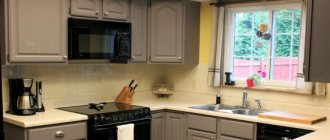
Painting chipboard furniture in a different color can visually make it look expensive and stylish.
How can you paint laminated chipboard?
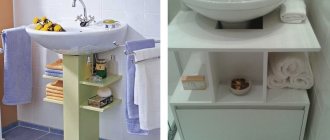
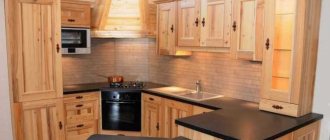
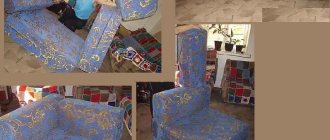
The design of furniture has not changed much in recent years. Unlike design. Wardrobes, cabinets in bright shades and contrasting colors are in fashion, while cheap imitation solid wood is becoming a thing of the past. But you don’t have to throw away old furniture made of laminated chipboard - you can give it a second life by changing it beyond recognition by repainting it in a different color.
When choosing what paint to paint laminated chipboard furniture, remember safety. At home, you can only use materials that do not emit toxic substances into the air. Water-based paints meet this requirement. Eg:
- Cretaceous. The base of chalk paint is lime, which is mixed with pigments, resins, silicates or other binders. It lays on any surface and creates a thick matte layer on them. Combines with Provence style or popular shabby chic.
- Dairy. This is a type of chalk paint. Its base is milk casein, which reacts with lime to form a hard, semi-matte, non-fading coating. Milk paints adhere well to glossy surfaces without pre-treatment.
- Acrylic. Acrylic-based paints have the same qualities as chalk and milk paints, but they have a significant drawback - they do not lie on the laminated chipboard surface without first matting it with sandpaper.
Laminated furniture painted with water-based paint is only suitable for dry rooms. To place it in a bathroom or toilet room, choose alkyd enamel. It dries quickly, but has a strong smell. To paint products with it, you need to choose a well-ventilated area and use personal protective equipment.
Attention! Alkyd enamel is toxic only at the time of painting. Once hardened, it becomes safe.
Necessary means at hand
From paint and varnish materials, choose alkyd ones - they are the most suitable for models made of chipboard. They lie flat, do not leave obvious gaps on the surface, smell less and dry quickly.
You can choose an aerosol type container so you don't have to use a tray, spray bottle, rollers or brushes.
You will need acrylic putty and an adhesion-based primer, which must be used to prepare the surfaces.
The putty and primer must be special for wood.
List of additional materials:
- Solvent to remove remnants of old paint and varnish;
- Detergent for degreasing chipboard;
- Rags or flannel napkins;
- Gloves;
- Construction tape;
- Sandpaper;
- Glue.
Necessary tools.
It is better to choose rubber gloves, otherwise the paint will saturate the fabric and remain on your hands.
If you use rags, you can remove prints with a solvent.
When buying brushes, focus not only on price, but also on quality. The restoration will become useless if hairs remain constantly on the surface. The roller should also be of high quality, with well-fixed foam rubber and a handle that does not wobble.
The hardware store has an assortment of any rollers and brushes for working with acrylic paints.
To carefully prepare chipboard and paint it, set up a work area in advance. For bedding, use old newspapers, construction film, or cardboard from a large box.
It is better to do the work on a closed loggia - there will be no drafts and the unpleasant smell will not seep into the apartment.
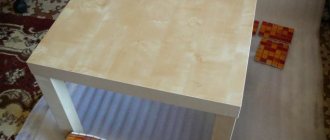
Preparing the base
You can remove the old coating from a chest of drawers in various ways: using washing liquids or a hair dryer. Both options are quite effective.
Using flushing fluids
To remove old coating from the wooden surface of a chest of drawers, it is convenient to use removers. This may be the well-known drug Antikras-Universal. The optimal temperature for working with the composition is from 8 to 25⁰C.
To remove grease, it is necessary to treat the surface with a solvent, and to remove dirt, it is enough to rinse thoroughly with water. After cleaning the surface from dirt, treat it with a remover, then leave for 5–15 minutes.
When the paint begins to bubble and crack, you can begin to remove it. To do this you will need a metal spatula. Old paint must be removed within 2.5 hours. Otherwise, the remover will dry out, making it difficult to remove.
After the paint is completely removed, re-treat the work area with solvent.
Many substances are highly toxic or have an unpleasant odor. Do not forget to use personal protective equipment and ventilate the room well.
Using a hair dryer
In order to get rid of paint using a hair dryer, you need to heat the paint layer, moving from bottom to top. Due to the hot air, the temperature of the paint will increase and it can be easily removed with a spatula. This must be done with a hairdryer until the surface has cooled down.
Putty
After you have cleared the chest of drawers of old paintwork, it’s time to start puttingty. Wooden furniture often contains cracks, fallen knots, chips and other damage. Such defects must be puttied, otherwise after painting the chest of drawers they will come out. Acrylic putties are best suited, and they can be applied using a rubber or steel spatula.
Grinding
After puttying, the surface will have various types of unevenness and roughness. For this reason, sanding is necessary to remove visible imperfections. Sandpaper No. 160–200 is suitable for this. If possible, it is put on a grinding machine, and if there is not one, then the surface is leveled manually.
Required Tools
Preparation for the process must be thorough. To work you need the following tools:
- Putty knife;
- Knives – carpenter’s and stationery;
- Screwdrivers;
- Construction hair dryer;
- Brushes, foam rollers for canned paints;
- Scissors.
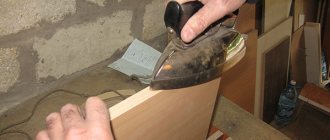
A hacksaw may be useful to trim the cracked ribs of the slab. They also need to be sanded with sandpaper.
Required materials and tools
To remove the old layer, you need a spatula or scraper, a medium-hard metal brush, an emery sponge or grinding equipment, and a rag. Paintwork can be easily removed with a hair dryer. Masking tape is required to protect surfaces. The fittings and decorative elements are removed and screwed back in with screwdrivers or a screwdriver.
To paint furniture you need to prepare:
- small trays;
- brushes with natural bristles for oil and alkyd compositions, made of artificial fibers for acrylic or latex paint;
- paint rollers for painting facades and countertops;
- A paint sprayer will reduce work time and apply an even layer.
It is advisable to apply acrylic paint with a painting brush. Elastic nylon bristles leave no marks and create an even layer.
Furniture painting and varnishing technology
Before processing the parts, you need to disassemble the structure and unscrew all the fittings. After this, remove the remnants of the original coating using a solvent and a spatula. The old layer may not come off easily. In this case, saturate the board with solvent and let it swell a little. Then use a spatula to remove any loose debris.
You can remove the old paint with a spatula, having treated the surface with a remover in advance.
Remove grease and dirt using detergent. Dry the stove. Then sand it with sandpaper to create a rough surface. Fill cracks and cavities with putty. Let it dry. Look to see if there are any other uneven spots. Prepare the primer and apply it to the slab. It plays a big role in painting.
When purchasing a primer, try to choose a shade that is as close as possible to the color you want your furniture to be.
Primer is the main character in updating the facade of furniture. You don’t need much of it to work, but it brings great benefits, leveling the surface and saving the consumption of paint and varnish. Makes the coating much stronger. It is better to use it in two layers so that the base is more reliable.
After priming, leave the workpiece to dry or speed up the process with a hair dryer.
Check the condition of paints and varnishes: dilute excessively thick compositions with solvent. Apply paint evenly to the surface and smooth with a roller. Touch up the raised joints with a brush. Using an aerosol or spray bottle makes the task easier, but it leaves a lot of splashes on other surfaces. In this case, you need to protect the work site with impenetrable barriers. To do this, you can use large cardboard or stretch plastic film.
To dry the first layer, leave the slab for a day, sometimes it takes longer.
Then apply a second coat and let dry as well. Repeat the same with the varnish. If a design or ornament is intended to be applied, it must be done before varnishing. To apply the print, prepare a stencil. Carefully secure it while working using construction tape.
You can cut the stencil from an old file folder.
After the chipboard has completely dried, begin assembling the structure. Don't forget about the accessories. After completing the work, choose a place where you will place your updated object so that it looks most advantageous.
The restoration will be successful if you don’t rush, trying to get everything done by a certain deadline.
Additional materials on processing particle board surfaces can be found on the Internet.
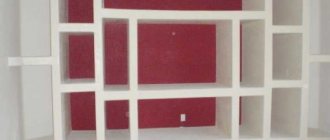
Decor elements
Often objects made from chipboard are refreshed through decoration. Drawings, ornaments, contrasting inserts, parts of the facade made of fabric or wallpaper - just a small list of ideas for giving a piece of furniture a new look. Other suitable materials include decoupage napkins in Provencal or Victorian style, straws, artificial glass, colored paper, newspaper (magazine) clippings and much more.
The combination of the main color of the facade and the insert or print should be harmonious.
You can enliven the coating with the help of contrasting colors, skillfully selected to match the overall style of the room. Brown tones (all shades of natural wood), yellow and blue, red and green go well together.
You can decorate an old cabinet not only with simple painting, but also with painting. If you know how to draw, this is one of the chances to put your talent into practice and show your imagination.
The facade can be given a vintage look by applying patina or special craquelure varnish. You can choose unusual fittings that make the cabinet more interesting and create the look of noble antiquity.
The craquelure method creates an antique effect.
An alternative to painting is to cover furniture with self-adhesive film. You can find a suitable shade (possibly with a pattern) in any hardware store.
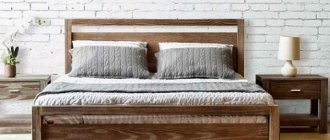
Updated items often become stylish pieces of furniture.
An exclusive look will serve to reconsider the attitude towards a used item as obsolete. Don't rush to send it to the landfill. See what you can do with a cabinet, table or cabinet. Then you won't have to spend your budget on expensive furnishings.
You can combine different styles and not be afraid to experiment.