Approximate Dimensions
Before you think about how to make a table for dolls yourself and from what material, you need to decide on the dimensions. You need to start from the height of the doll itself and the size of the house. The interior will look beautiful if all the furniture is approximately the same scale and style.
The easiest way to make all objects proportionally the same is to calculate the scale. You need to divide the average height of a person by the size of the doll. You will get a number by which you will subsequently need to divide all the real sizes of the furniture to get the doll sizes.
For example, the height of a doll is 20 cm. We divide the average height of a person 175 cm by 20 cm = 8.75. The actual dimensions of human furniture must be divided by this number to obtain the dimensions of doll furniture.
On average, dolls have a size from 7.5 to 15 cm. If the doll for which this or that piece of furniture is made fits these parameters, you can use the following sizes:
Double bed - 13−16 cm.- Single bed - 7.5−16 cm.
- Chair, stool - the back should be approximately 7.5 cm high. Place the seat at a height of 4 cm.
- Wardrobe - 16−17 cm in height.
- Sofa - 4 cm in height.
- Table - height from 7 cm.
DIY upholstered furniture for dolls, step by step with photos
We present to your attention a tutorial on how to create a very realistic doll sofa.
For work you will need: micro-corrugated cardboard, scissors/stationery knife, foam rubber, a simple pencil, padding polyester, a ruler, thick fabric of two colors, thread and needle, tape (paper), PVA and Moment glue, cotton lace, buttons.
Make markings on the cardboard as indicated in the drawing. Red lines for ease of construction, solid black lines for cutting, dotted lines for folding. The dotted lines need to be creased - pre-pressed so that the fold is even. The rounded end of a ruler or knife is suitable for this.
We cut out the details of the future sofa from foam rubber and synthetic padding.
From padding polyester:
- Armrests - 2 pcs. 12×10.5 cm;
- Sofa back (back) - 1 pc. 18×11 cm;
- Sofa back (front) - 1 pc. 7.5×15 cm;
- Seat - 1 pc. 9.5×15 cm;
- Side from seat to floor - 1 pc. 3x15 cm.
From foam rubber:
- Seat - 1 pc. 7.5×13 cm;
- Front part of the back - 1 pc. 5.5×15 cm;
- Back part - 1 pc. 16×9 cm;
- Armrest tops - 2 pcs. 2×8.5 cm;
- Outer sides of the armrest - 2 pcs. 4.5x8.5 cm;
- Inner sides of the armrest - 2 pcs. 1.5x8.5 cm.
We cut out the cardboard blank along the lines, crease and bend it.
We fold the workpiece along the fold lines and apply it to the fabric, as shown in the photo. We trace the outline, not forgetting to leave allowances for the hem. Cut out the part.
We glue the armrests to the bottom of the sofa with PVA glue.
We coat the bottom of the sofa with PVA glue, wait 1-2 minutes, and then apply it to the fabric according to the markings and fix it.
We assemble the armrests: we glue the outer foam sides to “Moment”, after which we glue the tops of the armrests. It should look like this:
From the back side, we cut the fabric and glue the allowance.
We glue the corresponding padding polyester parts onto the armrests. Let's use the moment. To give the glue time to harden, we secure the parts with pins.
Then we pin the fabric to the armrests in the same way and begin gluing the back side allowances to the base.
After this, we flavor the base of the armrest with PVA glue and attach the “wings” of the backrest to it. Fold and glue the front side seams.
Additionally, we cut out two strips of cardboard twice as long as our armrest and 2 cm wide. We bend and glue them, as shown in the photo.
We insert the internal parts of the foam armrest. We bend the fabric allowances and secure them with glue, cover the armrests with fabric to the end, secure them with pins, and glue the fabric to the base at the bottom. We fasten the joints of the armrests and backrest with a thin layer of Moment glue.
Then generously coat the additional strip with Moment and glue it to the armrest.
Now let's start assembling the seat. To do this, we place a padding pad between the cardboard and the fabric, and then glue the allowances.
We straighten the corners of the armrests with a toothpick with a drop of PVA. We lubricate the back of the seat with the same glue.
Glue the seam allowance to the seat. On the cardboard part of the front of the back, mark and cut off the corners.
Under the cardboard blanks, we cut the corresponding parts from foam rubber and padding polyester.
We cut out the parts from the fabric, not forgetting about the allowances (2-3 cm). And we assemble the parts of the back and seat, gluing the allowances inside.
We make a relief: we fasten the thread with paper tape on the reverse side and sew on buttons.
Make sure that the buttons are at the same distance from each other and the edges of the back.
Generously cover the parts with PVA glue, let them soak in a little and glue them to the bases.
For reliability, we recommend stitching the upper joint of the backrests and the joint of the backrest and base.
Finishing touches: measure the lace taking into account the allowances (+3 cm). Apply a thin line of PVA glue to the joint of the backs and glue the lace. We grease the allowances with glue and hide them between the armrest and the back, tucking them in with a toothpick. We also attach the lace under the seat.
We stitch the joints of the armrests and the facade. Cut out two circles (1.5 cm in diameter) from cardboard, a padding polyester ball and fabric (1 cm allowance). We sew these details.
We sew the parts to the armrests.
All that remains is to glue the legs to the “Moment”. For this, 4 identical lids, caps, etc. are suitable. To prevent the sofa from scratching the surface, you can cut fabric pads for the legs. The sofa is ready.
Furniture for dolls made from matchboxes
This is just a godsend for creating a dollhouse environment. You can create a huge number of pieces of furniture from them:
- Chest of drawers, bedside table. You just need to glue the boxes together and decorate them with gift paper or simply paint them with paint. Beads can become handles. To understand how to make a bedside table for dolls, you need to look at a real bedside table and make an exact copy of it from boxes. You can decorate it using paints or wrapping paper.
- Table. In the same way you can create a desk, coffee table or dressing table. It can be with or without drawers. The connected boxes need to be sealed with self-adhesive tape or painted. You can decorate them using decoupage technique. The mirror on your dressing table can be a piece of foil or a DVD.
- Sofa. Glued matchboxes can be covered with soft fabric to create a sofa.
- Kitchen set. Glued matchbox blocks make a great work surface for a kitchen with lots of drawers.
How to assemble and how to paint a plywood house shelf for dolls?
Assembling furniture from plywood with your own hands has its own specifics, but is not much different from the standard methods used for furniture panels. Most often, craftsmen use furniture dowels for internal fastening with gluing. It is not as fast as assembly with self-tapping screws, since you need to wait for the glue to dry. But more accurate.
The accuracy of gluing and the process itself will speed up the use of clamps. With their help, you can clamp the parts in the desired position until the glue dries completely.
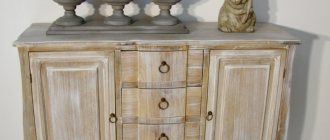
If you planned to paint your own plywood doll house in different colors, then it is better to do this before gluing. Water-based paints and varnishes are used for coloring; they are absolutely non-toxic and safe for use in children's rooms. These can be acrylic paints that can be mixed. Before painting, the surface of the shelf parts must be sanded, sanded and primed so that the paint applies evenly.
Options for cardboard crafts
An excellent material for making a doll set is cardboard. It is very easy to cut and is glued with regular PVA or hot glue. From an old cardboard box you can make all the furniture in the house. The only drawback of cardboard is that without decoration and finishing with some material on top it does not look very nice.
Corrugated packaging cardboard will not last long, as it wrinkles quite quickly and loses its shape. It is better to use cardboard for scrapbooking or just thick cardboard.
Gluing a bed out of cardboard is quite simple. You need to cut the bed walls to the required size and connect them with glue. The back can be decorated with wrapping paper or decorated using decoupage technique.
You can make a bed without glue. The walls will be fixed using grooves cut in the walls.
DIY furniture for dolls made of cardboard, step by step with photos
Cardboard toy furniture is one of the most popular options. Such an environment will be very durable, it will be easy to make, and it will not require a lot of money. We invite you to make a cute doll sofa out of cardboard with the following step-by-step tutorial.
For work, prepare:
- Scissors and pencil, ruler, PVA glue;
- Thick cardboard and two oblong cardboard boxes;
- Fabrics of different colors, filling (cotton wool, padding polyester, etc.), needle, thread;
- Six caps or other suitable items of the same size (for the sofa legs).
Depending on how you attach the soft parts to the cardboard, you may also need hot glue or fabric velcro tape. Cardboard boxes can be covered with fabric, covered with scrap paper or self-adhesive film.
Select the boxes so that the sofa and the doll sitting on it look harmonious. In our case, the box had to be shortened.
We glue the boxes. Cut out the back of the required size from thick cardboard. Using the workpiece, measure the fabric or self-adhesive with a 1 cm offset on each side. We completely cover the back.
Carefully glue the base of the sofa, and then attach it to the back.
We make the soft part: we measure the fabrics of the selected colors according to the size of the back and seats and sew “pillows”. You can make several square ones, or you can sew long ones, as shown in the photo. If desired, you can make ottomans-armrests. We attach it to our workpiece in a way convenient for you.
All that remains is to glue the legs to the base of the sofa. In our case, these are toothpaste caps.
At this point, the sofa can be considered finished.
Making furniture from paper
If it is not possible to buy ready-made doll furniture, you can make it from paper. How to make a chair out of paper so that it is strong and does not immediately wrinkle? Roll the paper into tubes! Craftsmen have long been weaving anything from newspaper tubes. Sets for dolls will be no exception. Weaving patterns can be found on the Internet . Such items will decorate the house and look very cozy. In addition, they will be quite durable if painted or coated with several layers of varnish.
To make paper furniture you will need:
- Old newspapers or paper.
- PVA glue or glue gun.
- Threads.
- Paints for decoration.
- Varnish.
You need to roll thin tubes out of paper. This can be done using a knitting needle. They should dry well. Then the tubes need to be glued lengthwise using glue. It is better to use a hot gun, so the connection will be stronger and the paper will not get wet.
DIY plasticine furniture for dolls, photo
Furniture for small figures is usually made from plasticine. This is a rather labor-intensive process, but this setting looks cute and unusual.
Plywood doll products
A doll's wardrobe for clothes can also be made from plywood. He will serve his owner for a very long time. You can connect the walls and shelves together with hot glue or PVA. A hanger bar can be made from a wooden skewer or a Chinese stick. Hangers are made from straightened paper clips.
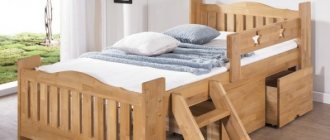
The bed, table and chairs can also be made from this durable material. Some craftsmen even carve beautiful patterns on such furniture, imitating carved furniture. It looks very nice. The plywood needs to be painted or covered with fabric.
It is better to stuff the sofa with cotton wool or foam rubber so that it takes shape, and then cover it with fabric.
The table can be made either square or round using a jigsaw. The legs will be wooden skewers or sticks. Chairs are made using the same principle.
A house for dolls made of plywood with dimensions and assembly diagrams, a crib made from leftovers
Waste optimization is the best way to make plywood furniture with minimal investment. When all the material is left without a trace, you can be sure of maximum savings.
But you can always “put” the leftovers into action. Let's consider this case using the example of a drawing of a dollhouse as in the photo.
How to make a doll house shelf out of plywood with your own hands
A scale drawing and assembly diagram with dimensions will look like this.
In order not to miss details when calculating and to take into account the nuances of connections, it is better to immediately number all the elements on the assembly diagram.
When calculating the detailing and cutting it into a sheet of plywood measuring 2440x1220, it becomes clear that complete with a dollhouse for Barbie dolls, you can also make a crib.
Parts with figured cuts can be made by hand using a jigsaw, file, chisels, sandpaper and other carpentry tools. But first you need to draw a life-size template.
Also, such figured cuts are made by hand automatically, using a CNC machine. In this case, the templates are drawn in special vector programs.
Cardboard box furniture
From one TV box you can make all the furniture in the house. To create it you will need:
- The box itself.
- Double sided tape.
- Scissors.
- Regular wide tape.
- Glue gun or PVA glue.
- Materials for decoration.
All furniture must be cut out, cut into the necessary parts and glued together.
Next begins the most interesting process - finishing. Cardboard can be painted, covered with wallpaper or paper . to the front of a cabinet or dressing table, imitating a mirror. You need to put a tablecloth on the table, and pillows on the sofa - this will add coziness.
Be sure to involve the child himself in the decorating process. This is a great opportunity to feel like an interior designer and show creative thinking. Anything can be used: small stones, shells, beads, rhinestones, stickers.
Review of available materials that are found in every family
If you want to complement toys and houses with “real” sets, or give your dolls comfortable and original furniture sets, you should not throw away the following household waste that we are used to:
- matchboxes - they will be needed if you want to make full-fledged drawers in cabinets, dressing tables, bedside tables, and chests of drawers;
- plastic bottles;
- plywood scraps and wooden blocks;
- foil, flexible wire of different thicknesses;
- threads for knitting and embroidery;
- cardboard boxes for cosmetics, household appliances, shoes;
- sponges for washing dishes, viscose napkins;
- scraps of leather, fabric - the more beautiful scraps, the better;
- plastic food containers, egg cells.
If there are people in the house who do handicrafts, furniture for dolls made of cardboard can be decorated with beads, rhinestones, polymer clay, beads, lace - all this will help create a bright, colorful interior of a doll house.
Wooden furniture for dollhouse
Cardboard sofa for dolls
For example, scraps will be needed to sew upholstered doll furniture in addition to cabinet furniture. From various triangular scraps you can assemble a colorful bean bag chair, which is so popular in real life. The same material will be needed to create sofa and bed pillows, sheets, blankets and bedspreads. A room with a cardboard furniture set can be decorated with an LED garland - such lighting is appropriate for the game, and it is also fireproof.
Cardboard dollhouse
Two-story dollhouse
Cabinet made of wooden rulers
Another way to quickly create a doll closet. To make one cabinet you will need approximately six rulers. Also for work you will need a jigsaw and PVA glue .
Cut and sand the rulers to prevent splinters. Everything was glued with PVA glue. After the product has completely dried, it can be painted. For a beautiful, even color, you need to cover the cabinet first with a layer of white paint, and then with the desired color.
In the same way, you can make tables, chairs, bedside tables and other furniture for dolls.
How to make chairs for dolls from cardboard toilet paper tubes?
To create these chairs you will need cardboard tubes, scissors, paints, scraps of fabric and glue.
Seat the doll and measure how high the back of the future chair should be. Cut off the excess part of the cardboard tube. Carefully cut out the notch of the chair.
Inside the chair you need to place crumpled sheets of paper, newspaper sheets, scraps of fabric or cotton wool. Cover everything with duct tape in the color you want, or wrap it in a nice piece of fabric.
Now you need to paint the future chair and glue a cardboard plug on the back of the chair.
How to make a shelf house yourself?
It is quite easy to make such a design at home. To do this, you will need several boards, screws or nails, a screwdriver, a hacksaw, and quick-drying paint for treating wooden surfaces.
Tools for making a house shelf.
Children's shelf houses must be firmly made and free from burrs and roughness. Therefore, before starting work, thoroughly clean the surfaces. The frame is made first, and only then the roof.
Everything is attached with Euroscrews, making the structure stable.
If sections are proposed, then they are also made before installing the top. The roof does not have to be constructed from the main material. You can use a combination: the walls are made of wood, and the top is made of plywood or thick cardboard.
The railings are made from wooden rulers, and the fence itself is made from a decorative element glued in half.
Many parents are trying to make the standard model more interesting. Therefore, additions to floor models in the form of an attic, windows, side exits with doors, carved railings, and staircases are possible.
The roof can be made in the form of tiles to make it look more interesting.
Decorations include garlands of multi-colored flags or an openwork roof. To a child, such a house seems like a fairy tale, and he enjoys spending time having fun.
The lantern for the attic is made of cardboard, inside there is a light bulb from a flashlight, two AA batteries are hidden in a niche under the roof, the switch is located on the front wall.
Interior additions include doll furniture, curtains, mini lamps, toy kitchen utensils, etc.
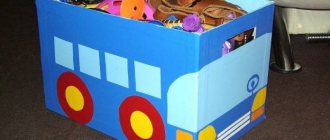
Such a house can be used both for games and for storing toys or other items.
For a girl it will become a dollhouse, and a boy can use it as a multi-level garage.
Building a house with your own hands will cost you much less, and it is also possible to make the structure more original than the one purchased. Materials can be purchased in specialized stores, on online platforms or from wholesale companies.
Shelf in the shape of a house for boys and girls.
An interesting idea for a play rack for dolls, cars and books.
In addition to the task of entertaining a child, this piece of furniture also has a purely practical function - all the dolls and toys are in one place, and not scattered around the room. Thus, a sense of order is instilled in a son or daughter from an early age.
By making a shelf house with your own hands, you will give it uniqueness and originality.
This house is guaranteed to please its little owner.