A staircase is a mandatory attribute of multi-storey private houses and two-level city apartments. This structural detail takes up quite a lot of space, so designers try to include the space under its flights in the project, using it as an additional functional area. One of the most common options is a closet under the stairs. It can be given any shape and solve the problem of organizing space. Let's look at simple and creative options for cabinets and shelving that you can create with your own hands.
Features of accommodation
Cabinets under the stairs are a popular solution that has long ceased to surprise ordinary people. This design move has the following advantages:
- Use of additional usable space. If you take the built-in model, then not a single extra centimeter will be lost.
- Original design. Cabinets don’t have to be “boring” with simple fronts. They can be decorated with decoracrylic, painted, combined with a shelving unit, or alternate closed shelves with open ones.
- Organization of space. A large number of shelves under the steps will help to put things, shoes, and kitchen utensils in order (depending on the functional purpose of the cabinet). This solution also has its drawbacks:
- The difficulty is in selecting a ready-made model. In 90% of cases, home owners have to order a built-in wardrobe with individual proportions, since stairs are different.
- From this same point follows the following feature of designing a cabinet under the stairs: the need for careful measurements.
In addition, the design of the cabinet should in no way interfere with the staircase itself or create additional stress for it.
Materials
Usually a closet under the stairs to the second floor is installed in a private house. The most popular manufacturing materials:
- Tree. Suitable for making frames, doors, drawers, shelves. The stairs themselves are made from it. The material is strong, durable, environmentally friendly, but must be treated with moisture-resistant impregnations.
- MDF. The material is a good substitute for wood. It costs less, but is strong, durable and safe for human health. Contains a small amount of harmful formaldehyde, has no specific odor, and does not absorb moisture. It looks beautiful in appearance and has an interesting texture.
- Chipboard. The material is inexpensive, which causes a constant high demand for furniture made from it. It looks quite attractive, is versatile, and is suitable for making different types of cabinets. To order, chipboard products are made quickly. The surface can be painted in any color. The material lasts for at least 10 years, but breakdowns of individual pieces of furniture made from chipboard are possible.
- Rattan. A cabinet made from it looks interesting, exotic, one might say, and durable. The intertwined surface of such furniture looks good in a country house, in a rustic interior, in country and Provence styles. The material is expensive, but it is suitable for making products that will be used daily. Not afraid of moisture and direct sunlight.
- Bamboo. The material is moisture resistant, completely natural. A cottage with such furniture will acquire a special, natural flavor. Even when heated, bamboo products do not emit substances harmful to humans. They do not fade under the influence of sunlight and do not rot.
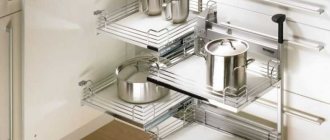
- Metal. The cabinet frame, shelves, fasteners, and fittings can be made from this material. The metal is durable and is not afraid of almost any impact, even moisture. Very durable, withstands significant loads, does not require complex maintenance. Sometimes such a cabinet is installed in attic rooms.
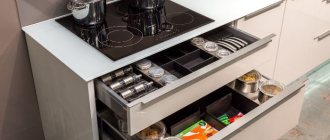
Classification of cabinets for washing machines, features of models
Facades can be made of plastic or glass. The latter material is environmentally friendly and harmless. With elements made from it, products become more elegant. A cabinet with glass fronts is universal, suitable for any style, from rococo and loft to minimalism. The surface can be transparent, matte, colored. Modern technologies make it possible to create durable glass elements that are difficult to damage.
Plastic facades are practical, inexpensive options that are popular. They allow you to embody any design ideas. The material is malleable and can take different shapes. Can imitate other surfaces, such as marble or wood. Plastic does not rot and is not afraid of moisture. It is easy to care for - you just need to clean the facades from dirt, using detergents.
Tree
MDF
Chipboard
Metal
Accommodation options and ideas
Cabinets under stairs can take on a variety of shapes and be used for a variety of purposes. Here they set up storage rooms, “exhibitions” of collection wines behind glass display cases, small libraries, dressing rooms, shelves for shoes, bedding, and children’s toys. Everyone designs this space “for themselves,” focusing on the lack of places to store certain items. A country house with its own garden usually accumulates a lot of preserved food. Instead of a cellar, jars of jam and pickles can be placed on special stands in a neat cabinet under the stairs. If the height of the steps allows, then here you can create niches for storing kitchen utensils and build in a refrigerator. This option is ideal for those homes with small kitchens. If the staircase communicates with the living room, then under it there is a niche for a TV, complemented by shelves for books and photographs.
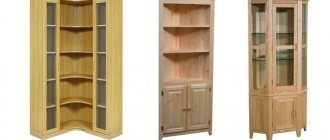
Open shelving
An open shelving unit under the stairs is the easiest option to implement. It is easy to build such furniture yourself. Typically, solid wood (boards) is used as the main material. Its derivatives (chipboard, MDF) will look a little “cheap”, especially when it comes to modern interiors. In such racks, either long shelves are made, or they are “cut” with transverse beams, exactly the length of the steps. Then the furniture will be organically combined with the design of the staircase. Here you can set up a library. Open shelves often alternate between orderly rows of books and magazines with potted indoor plants or small sculptures, collections of photographs on stands, vases, and other decor. For ease of use of the library, you can provide a seating area, organically fitting it into the design of the shelving. If the hall and staircase are combined with the kitchen, which is not uncommon in modern townhouses, kitchen utensils can be stored on open shelves. Another creative option is a double shelving unit with a row of hidden shelves. The front part moves away on wheels. On the “front” side you can store decor and books, and on the inside you can store personal items that should not be displayed.
Closet
The wardrobe under the stairs is also very popular. The main advantage of such furniture lies in the special design of the doors, which do not swing open, but slide to the sides on special “rails”. Thanks to this, the wardrobe does not take up much space and it does not need a “reserve” of free space for opening. Mirrored facades look stylish and modern. To diversify the furniture design, you can order etching of a pattern or ornament on the surface. Another option is to disguise the facades to match the color of the trim, so that the storage space becomes inconspicuous and blends into the interior.
Wardrobe with hinged doors
A cabinet with hinged doors under the stairs is rarely used. It loses in comparison with coupe models. If the owners nevertheless decide to install just such furniture, then it is usually divided into several vertical narrow sections. By the way, this makes it possible to stretch out the space and visually “raise the ceiling.” The original models are equipped not with simple horizontal shelves, which everyone is so accustomed to, but with pull-out modules. Such shelves go deep into the structure. This option is suitable for stairs with wide steps, where there is enough space for such shelves, which makes their use advisable.
Drawers
Drawers under the stairs are ideal for storing shoes and even outerwear. If a large family lives in the house, then this method of organizing space will save space in the hall or corridor. There can be many drawers, that is, several on top of each other. Then they are used to place small items. If the space under the stairs is divided vertically (under each step, one drawer), then the higher the steps, the larger the dimensions of the retractable shelf. In the small ones, shoes are laid out, in the larger ones, hooks for outerwear or special stands for umbrellas, canes, and shelves for hats are installed. All the traditional “filling” of the hallway can fit under the stairs, completely freeing up space at the front door.
Glass display cabinet
The glass display cabinet is a modern variation of the “Soviet” sideboards that used to be in every home, being part of the furniture “wall”. It is not at all necessary to store only grandma’s china or family sets “for the holiday.” Modern display cabinets are equipped with spot lighting, which emphasizes the shine of glass facades. Of course, this storage space is ideal for placing beautiful, expensive dishes, but you can go further and move your wine collection to the shelves or fill them with books or ceramic decor.
Combined methods
Combined methods of organizing space under flights of stairs imply a combination of all of the above options. For example, you can fit open and closed shelves, drawers and hinged or sliding compartment doors in one closet. In fact, such furniture is assembled like a construction set. First you need to study the content that will be placed inside. If these are things and books or dishes, then it is advisable to make some of the facades transparent or add open shelves to closed doors.
Installation technology for built-in wardrobes
Before making a closet under the stairs, you need to measure the space under it and determine how many compartments the built-in closet will have, the height of each of them, the type of drawers and shelves.
It is better to depict all the data on paper in the form of a diagram with marked marks for installing partitions and doors.
Figure 2. Layout of cabinets under the stairs.
To install shelves under the stairs you will need:
- wooden block 5x5 cm;
- Fiberboard, plywood, plasterboard or other sheet materials;
- furniture facade, laminated chipboard, etc. for doors or panels;
- fittings for installing drawers, hinges, mechanisms for sliding doors;
- electric saw or hacksaw;
- drill, screwdriver;
- plumb line and level, measuring tool.
The frame for the shelves and partitions will be made of a 5x5 cm bar. Based on the height of the side walls of each compartment, cut the material into paired parts of the required length for mounting vertical supports. Rice. 2. Fasten the bars closest to the wall using dowels in brickwork or concrete, and for a wooden surface, nails or self-tapping screws of sufficient length are suitable. Install internal partitions by attaching a block to the bottom of the steps at the top and to the floor at the bottom.
Figure 3. Cabinet assembly.
Attach horizontally located pieces of timber to the installed vertical supports. Their length is equal to the depth of the shelves or cabinet compartments. Some of them are usually used as a base for attaching shelves or drawer fittings, so the distance between the bars must be selected depending on the height of each tier.
Related article: Do-it-yourself hot stand made of fabric: master class with video
Sheathe the prepared frame from the inside with selected sheet material (plywood, plasterboard, etc.), forming partitions. If you planned to build an open shelving, then at this stage you can already move on to finishing the internal surfaces of the cabinet and installing shelves.
If the built-in cabinet needs to have doors or drawers, the work will continue. A sliding wardrobe under the stairs will require complex operations to install the mechanism for doors of different heights. To carry out such work efficiently, the best solution would be to invite a professional specialist.
How to make hinged doors or drawers
Even a home handyman can handle this work. Attach the bars for the door frame to the front vertical supports of the frame and the bottom of the stairs. Under the inclined part of the span, the box will have a complex shape, so you need to carefully measure the angles at which its vertical and inclined elements will join. Having achieved an exact match of the parts, you need to fasten them together with screws and mount the box under the span, screwing them to the frame with self-tapping screws.
When hanging doors, it is important to install the hinges so that the doors do not warp when closed. It is difficult to check the horizontality of the hinge on an inclined area, so you will have to focus on the visual coincidence of the top edge and the door frame.
Make horizontal boxes in such a way that there is a gap of 5 mm between their sides and frame. This is necessary for installation of fittings and free movement inside the cabinet.
After all the boxes have been made and tried on, the movement mechanism has been installed, you can proceed to attaching decorative facades to them. It must be remembered that the height of the outer panel should be chosen so as not to interfere with adjacent drawers, but also not to leave too much of a gap.
The facade must be fastened through the front wall of the box, screwing screws into pre-drilled holes. The length of the fastener should be 2-3 mm less than the total thickness of the material of the front wall and facade, so that the tip of the screw does not come out from the front side.
Related article: Swing knitting technique: master class with patterns
Vertical boxes are also installed using the same principle. Rice. 3. Unlike horizontal ones, they do not require a roller mechanism, since movement occurs thanks to wheels fixed at the bottom of the box. Therefore, when calculating and assembling the inside of the boxes, you need to be guided only by the ease of movement of these elements relative to each other.
The outer panel should be slightly wider than the front wall of the drawer to bridge the gap between adjacent elements, but not interfere with movement.
Typically, the width of the allowance is calculated as ½ the width of the desired gap between the drawers, minus 1 mm. If 2 panels are adjacent, in this case there will be a visually imperceptible gap of 2 mm, and the fronts of the drawers will not touch each other.
Install handles on facades, mirrors on wardrobes and other decor last.
These elements can repeat the style of fittings on the rest of the furniture in the room, thereby combining with it.
The best posts
- How to make a dinosaur from plasticine: rex step by step with photos and videos
- [Plants in the house] Dendrobium orchids at home: popular types and care
- Installing lighting in a plasterboard ceiling
- Do-it-yourself tile shower tray: installation technology
- Solid wood bed. Photos of wooden beds
- Veranda: how to beautifully design a relaxation area
- Toy Fox from the Little Prince knitted with patterns
- Door opening mechanisms: types of designs and installation features
Decorative finishing
Filling the closet under the stairs in itself serves as an interior decoration. In addition, the complex architecture of furniture will not tolerate a large amount of decor, which will make it look tacky. It is enough to limit yourself to lighting and mirror surfaces. Firstly, the space under the stairs is usually poorly lit, so additional light bulbs will not be superfluous here. Secondly, mirror surfaces will make this corner visually larger and more spacious. You can additionally use furniture fittings: unusual handles, decorative decorations for facades. Cabinet doors can be covered with thermal film with an image and create a real panorama on the surface of the cabinet.
How to arrange a closet under the stairs yourself?
Making your own under stairs cabinets is not that difficult. To do this, you will need material for creating shelves, as well as for external and internal decoration, and the necessary minimum of tools: tape measure, jigsaw, grinder, fastening material (nails, screws, etc.), ruler. The work takes place in several stages.
Let's look at what an approximate step-by-step instruction will look like, following which you can create a comfortable staircase-wardrobe with your own hands. (see also Single-flight staircase: a simple solution)
Preparatory stage
First of all, you need to carefully consider how many shelves and drawers you plan to make, how to arrange them, how much and what materials you need to purchase for interior decoration. It is important that all drawers and doors open and close well, so they must be equipped with a set of necessary fittings.
A wardrobe under the stairs looks very good, and sliding doors will help further save space in the hall or living room.
Important! However, sliding doors are somewhat more complex to install and often require professional installation.
Having decided on the project, you can begin making the built-in wardrobe. Before starting work, it is important to completely clear the space under the stairs from all kinds of household garbage and unnecessary things that very quickly accumulate in unused space.
Organizing the interior space of the closet under the stairs
An important part of the work is the creation of various partitions and shelves in the interior of the cabinet:
- Markings are made inside the future cabinet that will show how all the shelves will be located and how much space will remain between them. Measure the distances on both sides carefully. Usually the space under the stairs is divided into two halves: shelves are placed on one, and the second remains free for storing large items or outerwear. The partition between them can be made of plasterboard;
An example of a sketch of the under-staircase space
- In some cases, you can separate the lower space with a partition, in which drawers for shoes or other items are installed. A partition made of bars and plasterboard is installed horizontally, this will help to make the most of the space under the bottom of the stairs. Boxes can be replaced with baskets, this is practical and convenient;
Taking measurements and fastening bars
- Measure the width of the cabinet and saw off the required number of bars on which the shelves will be attached. Each shelf is attached to at least two bars, so their number should be twice the number of shelves themselves. The bars are attached to the walls using self-tapping screws, and it is important to calculate them so that they can withstand even a serious load if the shelves are very heavy;
- The shelves are laid on prepared beams and attached with self-tapping screws. Their thickness and strength depend on what you are going to store in the built-in closet. Typically, planed boards or chipboards are used for them.
Installation of bars and shelves
Door installation
If you are planning to install doors, then you need to prepare a door block of several leaves equipped with all the necessary fittings. Sliding wardrobes under the stairs are much more difficult to install than conventional hinged ones, because the metal guides must be positioned correctly so that the doors do not jam and open easily. In this case, it is easier to make custom doors and pay for professional installation.
Attaching a decorative door to a drawer
The sashes will have different sizes, so accurate calculation is more important than ever. To choose the right material and carefully cut out the door block, it is better to use the services of a professional carpenter; independent work may not give the expected result. The price for such work will not be very high, and in return you will receive guaranteed high-quality and smooth door leaves that will exactly fit the openings.
Installation of conventional swing doors is much easier. The door block and the hinges themselves are attached using self-tapping screws, the platbands are nailed with ordinary nails. As a result, you can get a neat and functional design.
It is important to choose the right size for doors, since there is no single standard. Each staircase requires precise measurements and careful work.
External and internal finishing
When the installation work is completed, you can move on to finishing the interior space and decorating the doors. The inside of the cabinet walls and shelves can simply be painted the same color, or the chipboard can be covered with a self-adhesive film that imitates natural wood.
There are quite a lot of options here, it’s important to just use your imagination and experiment. The color scheme should be in harmony with other details of the room's decoration. The traditional white color remains the classic option.
A staircase with cabinets will look good if the door fittings become an additional decoration of the hall or living room. You can choose elegant door handles, hang a mirror on the door, or place a printed photo on them. There are a lot of design options for decorating a space.
Decorative fittings for finishing
The video in this article will show you how to make a wooden staircase, under which you can place a convenient wardrobe.
With your own hands
It is possible to build a closet under the stairs yourself, but the work will take a lot of time. The main difference between this furniture and standard designs is the complexity of its shape and the need to “adjust” the dimensions exactly to the allotted space under the steps, which is also limited by them. Experts recommend occupying the entire area under the flight of stairs at once, because over time things tend to accumulate, which means more space will be needed to store them. Work should begin by drawing up a detailed project, which will act as a plan for the action algorithm.
We decide on the project: materials, size and dimensions
First of all, you need to take careful measurements of the space under the stairs and make a sketch of the future cabinet. First, they come up with a specific shape and determine the dimensions. The latter are usually fitted “butt” under the steps in order to make maximum use of the entire usable area. Then you should think about the contents and decide what type of storage system is needed specifically for this furniture. The cabinet is equipped with various sections: static shelves, drawers, niches, special holders and hooks. Next, they determine the type of facades, the opening/closing system, if one is planned at all. The optimal solution would still be a “coupe” with a monorail along which the door would “ride”. All this is drawn in the smallest detail on the sketch of the future furniture. The dimensions of the elements of the future structure are marked everywhere. The next stage is the selection of materials. The optimal solution would be solid wood and more budget-friendly variations (chipboard, MDF), you can assemble a metal frame and glass shelves. Before you go to the store for materials, you need to supplement your shopping list with fittings (handles, corners, hinges, brackets) and self-tapping screws, without which no furniture assembly can be completed. Then you need to stock up on working tools:
- Tape measure, pencil, level for taking measurements and creating a drawing.
- Screwdriver, jigsaw, drill for preparing materials and installing elements into one structure. An example is given for installing a wooden cabinet.
Frame assembly
First, the space for placing the future cabinet must be cleared of other furniture. The floor must be covered with durable material that will protect its surface from possible damage during the installation of new furniture. The frame is the basis of any structure. For built-in cabinets, it is assembled from metal slats. For conventional models, as a rule, chipboard and MDF sheets are used. The elements are connected to each other using a drill using confirmations. It is still recommended to work with built-in cabinets, as they save space as much as possible. The only drawback of these models is the inability to move it and put it in another place. This disadvantage is doubled due to the complex configuration of the cabinet under the stairs. When making such a product, be prepared for the fact that it will last for years and will not change very soon.
Internal filling
For internal filling, materials and components are purchased separately. For shelves it can be wood, chipboard, or glass. For outerwear, rods are installed under hangers and hooks. Internal vertical partitions are usually made of chipboard. For drawers, you will definitely need roller fittings or a system of guides for each shelf. The easiest way to make open shelves.
Door installation
Doors can be of two types:
- Hinged, attached to the cabinet “box” with hinges.
- “Coupes” that “ride” on two monorails built into the floor and ceiling.
In the first case, the hinges are selected depending on the material from which the cabinet is made and the thickness of its doors. Also, this essential element of swing furniture is classified into several subtypes, which have slight differences in design features. There are seven groups of loops: overhead, semi-overlay, inverse, inset, adit, piano and heel. The first option is most often used. Markings are made on the furniture for hinges. First, the “cups” are mounted into the frame, and then they begin to secure the connecting parts on the sashes. Installation of sliding doors is carried out according to a different algorithm:
- First, fix the guide to the ceiling.
- Fix the profile to the floor.
- A latch is installed that will securely fix the doors in the closed state, preventing them from moving apart.
- Adjusting the position of the shutters.
Finish the job by securing the buffer tape around the perimeter of the cabinet. This additional element will prevent dust from entering the furniture.
How to make a cabinet under the stairs with your own hands
First, make a detailed drawing of the future cabinet. Here you can show your imagination, because in this case you are your own director and builder. However, do not forget about materials and fasteners.
These can include plasterboard, fiberboard, chipboard, MDF or natural wood. Try not to use plastic materials, as they are easily damaged even during installation, and even more so during operation.
An example of a drawing of a sub-staircase cabinet with hinged doors
The advantage of independently arranging such a structure will be the freedom to choose fittings and finishes, as well as an unlimited field for the flight of your imagination.
So, a closet under the stairs in a private house is an irreplaceable thing. It’s quite easy to build it with your own hands, because the main thing is your imagination! Drawer, bookshelf, mezzanine, shelving or brackets - the choice is yours.
What can be arranged under the staircase space
Under the staircase space you can arrange a variety of storage spaces:
- Open shelving. Essentially, cabinets without doors on which dishes, books, magazine files, small decor or, for example, collections of dolls are placed if the staircase is located next to the children's room.
- Cabinets for things (towels, bedding) and kitchen utensils.
- Pantry. Another simple but very useful option. Behind its closed doors you can store food supplies, canned goods and homemade pickles. In such a pantry, jars will not become moldy, as often happens in basements and cellars.
- Wardrobe. An ideal option for small country houses where there is no room for this interior element either in the bedroom or in the attic. You can arrange a small dressing room for seasonal clothes and shoes near the hallway, or a full-fledged storage space for most things. The closet space is divided into sections: in the center there is a rod for hangers, on the sides there are shelves, and at the bottom there are drawers for shoes. Hinged doors from the inside are complemented with special holders for belts and jewelry. The finishing touch will be a small ottoman or bench, which, if necessary, can be pulled out and you can comfortably try on shoes on it.
- A bookcase or shelving unit with open shelves. This option can be supplemented with a free-standing couch or a seating area can be built in instead of a window sill if there is a window nearby.
- Part of a set with several vertices of the “working triangle” of the kitchen. For example, a refrigerator, oven, sink or stove. The remaining components of the kitchen set are placed side by side on the adjacent wall. The finished kitchen is very compact and ergonomic. This option is suitable for two-story apartments, which are designed according to studio principles.
In addition to storage space, under the stairs you can arrange a compact office, a mini-workshop for a needlewoman, and even a full-fledged bathroom. The latter option is very popular in large houses, where there is a bathroom on each floor. The original ceiling configuration will only add charm and creativity to a small room.
Here you can also install a pull-out bed, which, when assembled, is disguised as fake cabinet fronts. This option is suitable for those houses where guests often gather, but there is no separate room for receiving them.