Cabinets can be produced in the form of a separate case or built-in.
Built-in ones are mounted directly to the wall of the room at their location. The advantage of individual models is the ability to disassemble, move and place them in any place. Cabinet models always have a cabinet back wall. It isolates the interior space of the cabinet and makes it aesthetically pleasing, especially if the wall behind it is uneven and unfinished. The rear wall of the cabinet rigidly fastens the entire structure and holds it strictly in a vertical position.
The back wall of the cabinet is made of fibreboard (fibreboard).
For safety and reliability, it should be made from chipboard.
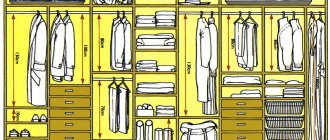
The wardrobe is divided into sections, drawers, shelves and is filled with things very unevenly. Under load, the wardrobe may become deformed. To prevent this, in addition to the rear wall, special stiffening ribs can be provided inside.
In addition to the rear wall, special stiffening ribs can be provided inside.
Wood-fiber boards have a good margin of safety.
What is the back wall of the cabinet made of?
The back wall of the cabinet is made of fiberboard (Fiberboard), laminated chipboard (LDSP).
One sheet may not be enough to cover the entire back surface.
Some people suggest nailing the backs of cabinets.
Fiberboard consists of wood fibers, synthetic resins, fillers, and water.
Varies:
- for general and special purposes;
- by hardness - superhard, hard, semi-hard, soft;
- by thickness.
Under load, the wardrobe may become deformed.
The use of a construction stapler is also not recommended.
The slabs can be smooth on one or both sides, varnished, covered with laminate film, or artificial veneer. They also differ in the degree of response to moisture, fire resistance, and exposure to sunlight. The most commonly used hard types are finely dispersed fraction (MDF) or hardboard and harder, modern HDF material made from coniferous wood.
To overcome the problems, you can design a compartment from sections, for each of which one sheet would be enough.
It is best to use self-tapping screws with a washer.
Chipboard is a mixture of sawdust and resins, which under the influence of high temperature and pressure turns into a homogeneous, durable material.
Fastening the back wall of the cabinet is not an idle question at all.
If laminated chipboard is used, then holes are first drilled so as not to split the board, and then self-tapping screws are screwed in.
Varies:
- by grades, which are determined by the appearance of the product;
- by the number of layers;
- according to the degree of surface roughness: unpolished,
polished, laminated;
- by density;
- according to some other indicators.
| Properties | Fiberboard | laminated chipboard |
| Price | Low | High |
| Thickness | 3-5 mm | 10,16,18 mm |
| Influence at strength designs | recommended for tall models | Significantly enhances strength |
| Reaction to moisture, scratches | One side with non-laminated surface may absorb moisture, deep scratches may damage the sheet | Laminated surfaces are moisture-resistant and scratch-resistant. cause significant harm to the material |
| Variety of colors | Five colors | Unlimited quantity, colors not different from color product body |
| Possibility of wall mounting of tall cabinets | Complicated due to small thickness slabs | Any fastening to the wall |
| Parts Compatibility | You can only put each other on friend that can be viewed | Tab into each other, organically and unnoticeably sides |
| Assembly | Assembly is done in "lying" position what does it require additional space | The cabinet is assembled in standing position almost on the spot installations |
The rear wall of the cabinet rigidly fastens the entire structure and holds it strictly in a vertical position.
Improves the rigidity of the entire structure and the fastening of sheets in the grooves selected using a milling cutter in the end posts, cover and bottom of the product.
As we can see from the table, what the back wall of the furniture is made of affects the appearance, ease of assembly, and strength. The back wall of the cabinet, the material of which is made of chipboard, is better in all respects, but also costs five times more. Naturally, its use significantly makes the product heavier.
It isolates the interior space of the cabinet and makes it aesthetically pleasing, especially if the wall behind it is uneven and unfinished.
You need to use multiple sheets.
In the case of tall models and heavy loads, for example, in the form of books, the question does not arise: what should the back wall of the cabinet be made of? For safety and reliability, this should be made from laminated chipboard.
Cabinets can be produced in the form of a separate case or built-in.
The sections are assembled separately, then they are connected to each other at the further location of the product and form a single structure.
In other models, the material from which the back wall of the cabinet is made can be fiberboard, which differs not only in thickness and density. Wood-fiber boards have a good margin of safety. You can also note the duration of operation (up to 30 years) while maintaining the original parameters, and the environmental safety of the slabs.
To prevent this, in addition to the rear wall, special stiffening ribs can be provided inside.
How to secure?
Let's look at the details of self-assembly of the rear part. There are several ways to do this, each of which is suitable in a specific case.
Overlap fastening
The most practical and inexpensive option for this method would be fibreboard (in common parlance “hardboard”). The thickness of the fiberboard should be 3-5 mm. This material is especially suitable for sliding wardrobes. You can also use plywood, OSB and other materials with a flexible structure. You should not use nails for fiberboard or chipboard - fastening with their help is unreliable, and the panel may fall off over time at the slightest impact.
Step-by-step installation instructions:
- Assemble the cabinet and open the back according to its size, but 2 mm less on each side. For example, for a structure measuring 1800x700, the fiberboard should be 1798x698 (the base is not taken into account).
- Secure the corners of the sheet to the body. Use screws measuring 3x16, 3.5x16 or 4x16 for this.
- Screw in the screws along the edges of the sheet. Their exact number depends on the size of the cabinet. For greater strength, the distance between the screws should not be more than 10-15 cm. At this stage, to save money, you can nail a small number of nails measuring 1.2×25 or 1.2×20.
Groove mount
Most often this method is used for kitchen wall units. In this case, the recessed wall does not prevent the cabinet from fitting tightly to the wall and is easily adjustable. This method is also suitable for furniture that is in plain sight. The back part inserted into the groove becomes invisible and the cabinet looks beautiful.
Installation in grooves with additional fixation with corners
Step-by-step instruction:
- Pre-make grooves 10 mm deep. in the walls, bottom and roof of the module.
- Now secure the back into the grooves. Assembly starts from the bottom and ends with the roof.
- If the width of the grooves is too small, you can slightly grind the edges of the back wall.
In the form of an internal insert
This method allows you to secure the back part from the inside without moving the cabinet. Most often used for large and heavy furniture. But a fiberboard sheet is not suitable for this. “Orgalite” demonstrates good strength during tensile deformation, but in this case the entire structure will compress the back wall, so it is better to choose laminated chipboard with a thickness of 6-10 mm, which will withstand such a load.
Step-by-step installation instructions:
- Cut the blanks a couple of millimeters smaller than the dimensions of the niches. The remaining clearance will be used for the seal. Do not forget to process the edges of the finished sheets so as not to scratch the inner sides of the walls and shelves;
- Before installing the panel, secure 4-8 metal corners in each niche so that the back side of the corner is flush with the end. This way you will place the wall evenly, and it will not fall out on the back side - the corners will hold it inside.
- After installing each sheet of chipboard, attach it from the inside. You can use rastex, canonical screed, plastic or metal corners. Read more about fastening methods.
The video below shows the homemade production of an inset back wall without the use of professional tools.
Butt-to-butt connection
This option is suitable when you need to install a back wall of several sheets on a two- or three-section cabinet or if the fiberboard sheets are narrow. In this case, the remaining edges of the sheets are screwed overlapping with self-tapping screws (see the first method).
How to install correctly:
- Attach the fiberboard sheets overlapping the edges of the cabinet.
- Use self-tapping screws at the joints. They are screwed between the fiberboard sheets on top of special plates that come with the cabinet, which will firmly press both sheets to the partition.
The plates can be replaced with ordinary metal washers or made independently. Stores also sell plastic connectors specifically for these purposes.
Connecting profile 2 meters long for the rear wall of the cabinet.
Branded fasteners
Furniture hardware companies often offer their own proprietary cabinet designs. They are easy to install, used in finished projects, and sold individually and in packages in hardware stores.
After installing the back wall of the cabinet, if it is placed in the center of the room, think about decor options.
How to strengthen the back wall of a cabinet?
Fastening the back wall of the cabinet is not an idle question at all. Some people suggest nailing the backs of cabinets.
The advantage of individual models is the ability to disassemble, move and place them in any place.
Yes, this method allows you to do it quickly, but such fastening of the rear walls of the cabinets reduces the rigidity of the structure and its strength. In this case, the material of the body and walls is destroyed, creating difficulties in the future when disassembling such a product. The use of a construction stapler is also not recommended. It is best to use self-tapping screws with a washer.
The back wall of the cabinet, the material of which is made of chipboard, is better in all respects, but also costs five times more.
If laminated chipboard is used, then holes are first drilled so as not to split the board, and then self-tapping screws are screwed in. Improves the rigidity of the entire structure and the fastening of sheets in the grooves selected using a milling cutter in the end posts, cover and bottom of the product. In this case, it is important that the dimensions of the sheet to be fixed coincide very precisely with the dimensions of the area to be closed.
Particleboard is a mixture of sawdust and resins.
Fastening is carried out around the perimeter:
- to partitions and end walls;
- to the ceiling from above;
- to the base of the structure;
- to permanently fixed shelves.
They also differ in the degree of response to moisture, fire resistance, and exposure to sunlight.
Cabinet wall decor
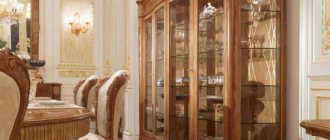
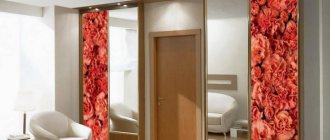
There is no need to decorate the backdrop in ready-made wardrobes, cabinets and chests of drawers - this element is decorated at the stage of furniture production (cutting, assembly). But if desired, the factory design can be changed using a mirror insert, which repeats the visible part of the backdrop in shape and size. This technique was used by Soviet furniture factories, but has not lost its relevance today.
A mirror located inside a china cabinet or cabinet, due to its reflective effect, will create the illusion of depth and help to more advantageously present the items on display. The reflective element can be attached to the backdrop with double-sided tape, liquid nails glue, special clips or thin strips nailed around the perimeter or along 2 opposite sides of the insert.
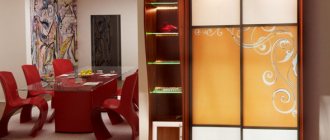
Other materials are also suitable for a cabinet with open shelves:
- Frosted glass.
- Glass with photo printing.
- Translucent plastic.
- MDF panels (painted, with patterns, textured embossing).
- Sheet panels for wall decoration (wooden, PVC).
- Wallpaper.
The original decor can be made from transparent epoxy resin with the addition of 1 or several color pigments. All these techniques can be used when decorating a free-standing or built-in wardrobe, assembled with your own hands. And additional lighting in open niches and above shelves will help emphasize the individuality and sophistication of the finished product.
How to fasten the wall at the joints?
One sheet may not be enough to cover the entire back surface. To do this you need to use several sheets. In this case, the following options for connecting sheets are possible:
- if the joint lies at the end of the partition:
– both sheets are pressed against the partition using self-tapping screws with a washer;
– the sheets are overlapped;
- if the joint does not fit on the end of the partition:
– both sheets are connected using a mortise strip into which they are inserted;
- the sheets are glued together.
The slabs can be smooth on one or both sides, varnished, covered with laminate film, or artificial veneer.
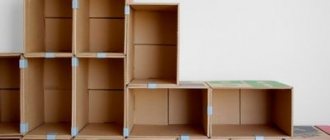
To overcome these problems, it is possible to design the compartment from sections, each of which would require one sheet. The sections are assembled separately, then they are connected to each other at the further location of the product and form a single structure.
Fiberboard consists of wood fibers, synthetic resins, fillers, and water.
Fiberboard
The sheet is mounted on the already assembled body in the “lying” position. Installation is carried out using nails or staples, overlapping. If installation is carried out on standing furniture, then the sheet is cut into pieces and mounted in fragments.
This option has only one advantage - low cost. There are many more disadvantages:
- The strength of a structure, especially a high one, is very relative.
- The surface of the fiberboard sheet is laminated or painted on only one side, so the material is susceptible to dampness.
- A small assortment of colors - about 5.
- Since the installation is overlapped, the material is visible from the end of the product.
- It is necessary to allocate a special place for installation. This is not easy in a small apartment.
- Often the material has a persistent unpleasant odor.
- Difficulties in attaching tall wardrobes to the wall.