Choosing the screen design we need
A lightweight DIY screen made from plastic pipes will not require much time to make, but it will fit perfectly into any interior and will last a long time.
The child treats objects and space as a resource, seeing in them opportunities for realizing his plans.
The screen can be made for different purposes - for fencing off space, for garden fairy-tale performances, for a tabletop theater, etc. The size of the product depends on the room in which it is intended to be used. The standard design has three sections, but a screen for zoning a large space should consist of at least 5-6 cells.
One of the interior details that can help in the creative development and organization of group life is a stylized screen.
Note! In order for the screen to be stable, its total length at the base should not be less than its height. Stability is also provided by an increase in the number of sections.
A frame is constructed from pipes, which is then decorated and decorated based on the purpose of using this item.
Choosing design and sizes
Depending on the purpose of use and the age of the children, various designs can be made.
This could be a large full-length theatrical screen.
Or a small tabletop version of the screen to independently show scenes with puppet characters.
An important factor is the lightness and versatility of the design: children really appreciate the rare opportunity to independently change the arrangement of interior items, using them not as a mandatory established order, but as a resource for realizing ideas.
This develops management skills and also gives more space for play and creativity.
As a rule, the standard model of a screen made of PVC pipes is made with three sections.
It is enough to collect 3 frames, connect them together and cover them with beautifully decorated curtains.
However, this is not a mandatory rule, and if you wish and have the material, you can make a larger number of frame components. The design of the fabric stretched over the frame depends only on personal preferences - you can choose it together with your children from several options by making removable covers with Velcro fastenings.
When choosing covers, you can show your imagination and creativity.
Different colors of covers can be associated with seasons or themed holidays. For example, a green background in the spring, yellow and orange - with the onset of autumn, blue or dark blue - in the winter season.
There is a lot of room for imagination here for the teacher.
Preparation of all materials and tools
Very often, plastic pipes remain after renovation of premises and can be used for folk crafts, including screens for kindergartens. If you don’t find any, the materials can be bought at your nearest hardware store, and they are inexpensive.
Making a screen from plastic pipes with your own hands will not require large expenses.
Before purchasing, you need to accurately determine the dimensions of the future product, make a drawing of the required frame, calculate the pipe footage from it, as well as the number of plastic corners (fittings) and double-sided fasteners.
You will need propylene pipes of various lengths, plastic corners and double-sided fasteners to connect the sections to each other.
- For example, a traditional three-leaf screen made of polypropylene pipes consists of flaps that require pipes of sizes 60-80 cm (top and bottom width, 6 pieces) and 100-120 cm (side height, 6 pieces). Thus, the total footage of the pipes should be approximately 10-12 m.
Note! As a rule, the standard length of plastic pipes in stores is 5 m. Keep this in mind when calculating the length of the required pipes for the product, because they all must be solid.
- For the standard screen in question, you will also need 12 corners, or fittings (4 for each section), as well as 6-8 double-sided connecting fasteners.
- For drapery in sections of the screen you will need fabric and materials for decoration.
You can use any available fabric to sew covers.
It must be remembered that it must be durable and easy to wash. The set of tools and materials for the work should include a hacksaw for cutting plastic, an iron for heating the ends of pipes before joining (or buy special glue for PVC), and alcohol wipes for degreasing the surface. Having a special plumbing apparatus for welding plastic pipes will greatly simplify the work.
A special machine for welding plastic pipes made of propylene, which is used by professional plumbers during installation, can be a good help.
Attention! A child can help in the process of making a screen, but work with glue or iron should only be carried out by an adult using all safety measures!
The process of making a screen from plastic pipes with your own hands
Having prepared the materials, you can immediately begin work.
Once the dimensions of the future screen have been determined, you need to cut the PVC pipes to the desired length.
First, you need to cut pipes of the required length, 4 for each section (2 for specifying the width, 2 for the height). The ends of each tube must be degreased with alcohol.
How to connect pipes correctly
- When connecting with glue, it is necessary to apply the product to the ends of the pipes, and after the plastic has softened (after 1-2 minutes), insert it into the hole in the corner. Excess glue should be immediately removed with a dry cloth.
- The ends of the tubes can also be heated using an iron. To do this, you need to place a sheet of paper on the cut of the pipe, and then press the sole of the hot device and hold for several seconds, after which you immediately insert the tube into the fitting.
We fasten the section frames using corner joints.
In this way, all sections are fastened from the tubes; they must be identical in length and width.
Connecting sections
The parts of the future screen need to be connected to each other, waiting 15-20 minutes after gluing the parts.
Here you will need either a special apparatus or a little physical effort to heat and insert the plastic pipe profile into the corner.
Double-sided fasteners are installed on one side of the section, after which the side of the next section is attached to them. The fasteners should be evenly distributed along the entire length (standardly there are three of them - at the top, bottom and in the middle).
Preparing and assembling the screen
Having prepared all the necessary materials and tools, you can begin assembling the structure. If the plastic pipes were not cut in advance, this must be done before starting assembly.
Connection of plastic pipes
The height of each section depends on the purpose of the screen, but there is no need to make it much larger than the child’s height. To assemble one section you will need:
- Two identical pipes that determine the height.
- Two pipes of the same length, defining the width of the section.
- Four plastic angles for connecting PVC pipes.
Cold or hot welding methods can be used to connect the structure. If you have at your disposal a special apparatus for heating polyvinyl chloride pipes, then it is worth using it. Otherwise, you need to purchase glue for connecting PVC pipes from a specialized store. This glue melts for a short period of time the section of the pipe to which it was applied, allowing you to quickly connect the parts.
The complete process of assembling one section of the screen will look like this:
- Clean and degrease the edges of the pipes.
- We apply cold welding at the joints - on the outer side of the edge of the pipe and the inner surface of the connecting corner.
- After the surface has softened, the pipe is connected to the fittings.
- After a few seconds, you can begin connecting the remaining parts of the section. Pipes of the same length must be parallel to each other.
- Excess glue is removed with a soft cloth.
- The remaining sections are assembled in the required quantity in a similar manner.
More detailed information on how to independently connect PVC pipes using cold welding can be found in this video:
Attention! If hot welding is used instead of glue, then the differences will only be in the method of heating the plastic parts. To do this, you should use a special soldering iron, which simultaneously melts the parts of the structure to be connected.
Connecting sections to each other
After all parts of the screen have been adjusted to size and assembled, it is necessary to fasten them into a common structure. To do this, you can use double fasteners for plastic pipes, and if they are missing, fastening can be done with plastic clamps.
In both cases, the screen doors will be movable, which will allow it to be conveniently moved and installed in rooms of various sizes.
Design and decorations
Designing a screen is the most creative and enjoyable part of the job, in which you can realize all your ideas. If the screen is intended for a kindergarten, it should be bright and attractive.
Fastenings made from Velcro tape or loops are sewn or glued along the top side of the future cover.
- To disguise the plastic, the finished frame can be painted with acrylic paints and dried well. Details can be made in different colors to make the product even more decorative and bright.
- The openings of the sashes need to be draped with fabric covers so that the screen acquires its main function - fencing off the space. It is better to take a material of natural composition so that the product does not become electrified and does not attract dust. The covers are sewn to the size of the sashes; they can be in the form of free-flowing curtains, attached only to the upper slats, or in the form of canvases, attached along the entire perimeter. Fastenings for fabric can be in the form of loops, fabric ties, decorative bows, Velcro, rubber tensioners, etc.
- The functionality of the screen is significantly expanded if the product is supplemented with patch pockets for storing toys and hanging clothespins for displaying children's drawings and crafts.
You can make drapes of different styles in order to use the screen for different purposes - for example, winter/summer decor, decorations for different types of children's performances and fairy tales.
You can stick colorful appliqués or sew small pockets onto stretched covers.
Master classes on creating screens
- A successful master class on making a screen from plastic pipes with your own hands embodies the idea of creating an entire children's house on its basis - for this purpose the door and windows are decorated on covers.
- Another master class gives advice on using screens for children's creativity - appliqués and children's crafts are attached to the covers.
- If paper wallpaper sheets are attached instead of fabric covers, the screen can be used for collective drawing by children, creating large posters - for example, for the holidays.
- The design can serve as a basis for activities with children; counting material, letters, and materials for the development of logic and imagination can be attached to it.
Use of plastic pipes
Craftsmen with great imagination can use almost any materials in the household. So, it would seem that specialized PVC products can be used exclusively for their intended purpose. But human imagination shows a completely different result.
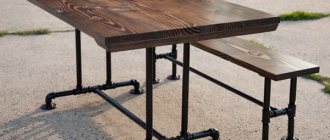
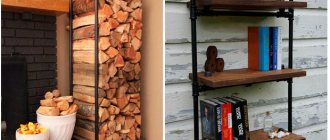
A variety of crafts are made from such a light but durable material - decorative elements for the garden, greenhouses for fruits and vegetables, stylish shelves for storing small items and much more.
The children's screen, which can easily be used at home or in preschool educational institutions, deserves special attention. This decorative element helps to separate a small comfort zone, which is especially important in a society with young children of different sexes.
But such a screen can be used not only for changing clothes. It can be used in creativity as a puppet theater or to fence off a small play area.
It may seem that installation work will require special skills or tools, but even a beginner can handle it. Next, we will conduct a small master class on making a simple screen from available materials.
