Active children's recreation most often requires considerable effort and labor on the part of parents. The restless nature and energy of real adventures and attractions. Of the entire list of children's swings that can be made and installed on a home or country site, the most interesting are the children's nest swings. They can be made without much expense, especially since most of the materials can be found in the garage or purchased on the market for little money.
What is the secret of the swing nest
The main difference between a hanging nest swing and ordinary bench or basket versions of carousel swings is the unusual round shape of the seat, for which the children's attraction received such an unusual name. At first glance, the swing nest is nothing special, but this is not entirely true.
Thanks to the specific shape of the support platform and the way it is suspended, children now have several additional options:
- The design allows you to swing both longitudinally and transversely, rotate and even jump;
- A round nest swing with a sufficiently large seat diameter can accommodate several people at once, which eliminates competition and children’s grievances;
- The oval version of the swing can easily be transformed into a regular hammock or a place for a child to rest during the day.
For your information! The load on the ropes and cords of the nest swing is several times higher than the force on the suspensions of conventional amusement rides.
Therefore, safe polypropylene ropes or metal chains with fabric braiding are used for the suspension system. Children like polymer ropes best because there is no bounce or shock absorption on the steel hangers in the nest.
Drawings and photos of garden swings made of wood
If we talk about universal designs, then a hanging swing, installed on A-shaped supports, will become a real recreational object for the whole family. Moreover, they can be installed both in large summer cottages and in small gardens near the house. And the process itself is not expensive in terms of time and effort.
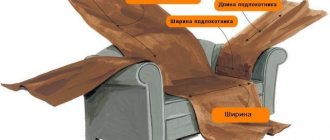
Swing chair design with soft cushion cover.
The list of required tools for work should include:
- tape measure and pencil (the tape measure can be replaced with a measuring tape);
- mechanical or electric jigsaw;
- circular saw;
- hacksaw;
- square for measuring angles (combined type);
- rafter pins;
DIY swing bed.
- test square;
- sawhorses;
- thicknesser and planer;
- hammer, screwdriver, clamps, wrenches;
- chisel (25 mm);
- electric drill with a set of drills (10, 8 and 4.5 mm);
- sanding block.
Note! Of course, purchasing a ready-made design in a store is much easier and faster. But in this case, it is unlikely to fully meet all your requirements in terms of design, size, etc. Creating a garden swing with your own hands from wood according to your own drawings will allow you to endow the structure with all the necessary characteristics.
A swing in a quiet corner of the garden will allow you to enjoy the aromas of greenery.
Children's attraction device
In order to make a swing nest with your own hands, you will need to make four main parts:
- A support structure made of wood and metal, to which the ropes and the nest itself will be attached;
- Hanging system with loops and rings;
- The central part of the attraction is the seat. For the home version, the easiest way is to make a round nest swing.
Most of the creativity and effort will need to be devoted to creating the nest itself. Children will agree to ride on simple suspensions like a car tire, but there will be much more positive emotions and joy if you don’t limit yourself to creating a fabric version, but try to make a round swing nest with a mesh in the central part of the seat.
Advantages of wooden swings
Wood has excellent technical and performance characteristics. Thanks to the properties of this material, you can create a truly comfortable and beautiful design.
Features of a DIY wooden swing:
- Environmental friendliness. Since wood is a natural material, products made from it are completely safe for human health;
- External aesthetics. The structures can fit into any landscape and garden design, since the main part of the environment consists of natural materials (stone, wood) and vegetation. Compared to metal products, structures made of wood significantly benefit in aesthetic terms and can support the exterior of any country house;
- Safety . Due to its softness, wood is convenient to work with and use, and can reduce the number of injuries. This advantage is most beneficial if you intend to design a children's swing;
- Simple installation system . Anyone with basic skills in construction and handling wood can start building a swing;
- Versatility. This type of material lends itself quite easily to various types of processing (grinding, cutting, cutting). Thanks to this, any of the DIY garden swings made of wood, the photo of which you like the most, can be made by you yourself without involving specialists in this process. Wood allows the construction of single-seat structures or swings with large capacity, made in the form of sofas.
How to make an attraction for the whole summer
In order to make the swing as safe as possible, without the risk of cuts or injury to hands and knees, the seat and suspension are covered with fabric, and the central part is woven from towing or climbing rope, which is very durable and flexible.
The choice of finishing options for the mesh and durable seat base is quite large, for example, patchwork, macrame or tatting. If you have the skills, you can even knit a cover for the nest from nylon threads, which can be easily removed and, if necessary, cleaned and put in order.
Make the main part of the swing
There are several options for making a nest, all of them equally follow the same pattern. In order to make a beautiful and at the same time durable and comfortable seat, you will need the following materials:
- Steel water pipe 3.5-4 m long or a pair of gymnastic hoops;
- Thin felt, synthetic tent fabric, preferably in bright colors, and a sheet of foam rubber, at least 30 mm thick;
- Climbing safety cord or repik, 5-6 mm in diameter. The amount of material will have to be selected experimentally, based on the density of the knitting and the size of the metal frame;
- Safety steel locks or carabiners with a mesh size of at least 50 mm.
Advice! The suspension mount can be made from three or four mounting clamps used to assemble exhaust pipes on small cars.
The mounting diameter of such ties ranges from 50 mm to 90 mm, so you will have to make several selections before you can choose the optimal size.
At the first stage you will need to make a steel frame for the nest. Despite the fact that it is planned to make a swing nest with your own hands for children no older than 10-11 years old, practice shows that older children also enjoy playing on the attraction. So an extra margin of safety won't hurt.
The simplest version of the nest frame can be made from folded steel hoops. The metal profile cannot be drilled to connect two hoops into a frame; it is best to use clamps or hinges. You will get a nest for a swing designed for the weight of one baby, but it is unlikely that he and you will be satisfied with this option.
If a swing requires a large diameter nest, for example, 100-150 cm, the ring frame can be bent from a steel pipe on a pipe bending machine. The optimal pipe diameter is 12-15 mm. After rolling and welding the ends, you will need to clean the seam, and at the same time the entire surface of the metal for painting.
In this version, the rings for hanging the seat from the swing frame can be made from steel wire and immediately welded to the steel pipe of the frame. It's time to make the swing frame and hanging system.
Material for making a swing with your own hands
To create a garden swing, three main materials are most often used. This list includes wood, plastic and metal. Undoubtedly, each of these materials has its own advantages and disadvantages.
Note! To make a swing at home, when constructing the product yourself, there are practically no restrictions in the choice of raw materials; anything that can be found on your site will do, be it metal pipes, old sofas or car tires.
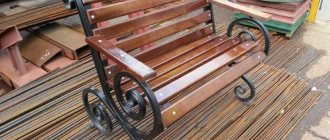
Wooden swing in the country.
Let us dwell in more detail on the main components used in the process of making a garden swing with your own hands:
Rope. Allows you to build a rope version in the form of a “bungee”. The most basic way to create a makeshift play structure for swinging is to just tie a long rope to a tree branch or crossbar, and attach a wooden seat or log to it from below, which you can grab with your hands.
Plastic. The material is used mainly for seats that can support the light weight of a child. To build a simple structure, just make holes in the plastic seat and attach it to a rope suspended on a branch or crossbar. Can be combined with other materials.
Metal. To work with this material you will need welding skills. The resulting structures are strong and durable. From the raw materials you can make both ordinary welded and elegant forged structures for the street. The only drawback of corrugated pipes is their susceptibility to oxidation, so the metal surface must be treated with special coatings.
Tree. Classic building material. With its help, you can make a design of any shape and complexity. At the same time, wood is easy to work with, which allows even an inexperienced beginner to create a beautiful swing that will fit into any garden.
Note! When it comes to drawings for garden swings, you will not find a more practical and convenient raw material than wood.
Drawing of a wooden swing of the optimal size for one person.
Wooden swings have only one drawback, which concerns the operation of any products made of wood. Such structures without the use of appropriate protective measures can be severely damaged by the influence of negative environmental factors.
These factors include the impact of:
- rain;
- snow;
- direct sunlight;
- fungi and mold;
- insects;
- sudden temperature changes;
- decay processes.
Helpful advice! To extend the service life of the product, it is necessary to treat the wood with special impregnations, varnishes, and paints.
Wood antiseptic for interior and exterior use: how to choose the best composition (read more)
How to attach a nest hanging system to a swing
After completing the hardest part of the work, the hands themselves are drawn to quickly finish the swing nest with a net and hang it on an anchor hook for the first test. In fact, there is no need to rush to do the finishing; you will still need to select a place, hook the slings to the seat and check the operation of the swing in the rough version.
To install a swing, it is best to make a classic support frame from timber with a cross-section of 100x100 mm or profiled steel pipe. To do this, you will need to make two supports in the shape of the letter “A” and one crossbar; you can use the same beam, but it is better to install a two-inch steel pipe. The distance between the supports is chosen equal to the height of the swing.
Suspension slings made of polypropylene rope or fabric-covered chain can be attached to the crossbar pipe in pairs.
Under the tied knot, you can make a lining of polyester fabric, this reduces abrasion of the rope. The socket itself is attached to at least four carabiners. If there are problems with the correct separation of the lines on the crossbar, you can make a suspension according to a combined pattern, as in the photo.
After assembling and hanging the nest on the swing, tests need to be carried out. To do this, it is enough to lay several boards on the frame hoop and load it with a weight of 100-150 kg. At the same time, it will be possible to determine how much to tighten the suspension lines in order to maintain the optimal distance to the ground.
Making a seat
If you want to arrange a fun attraction for children, it’s easy to build a Nest swing using step-by-step instructions. This can be done in 1-2 days.
What materials will you need?
When choosing components for making a seat, you need to calculate the expected load. If 1 child will use it, its weight is assumed to be 50 kg. For a group of children or an adult, this parameter is much larger - 100-150 kg.
In the first case, the seat will need a steel gymnastic hoop with a diameter of up to 1 m. In the second, the number of rings should be at least 2-3. To give the necessary rigidity, they are connected with clamps, electrical tape or tape. You can make a mold from a metal pipe with a diameter of 25-32 mm by bending it and welding the ends together.
To weave a mesh you will need strong flexible twine, rope, cord or various combinations thereof. It is quite difficult to calculate the required amount; it depends on the type of pattern, weaving method and cell size. The consumption for the simplest “spider web” is 25-30 hoop diameters.
To make the seat frame soft and safe, you need to purchase felt, padding polyester or foam rubber to wrap the ring. For decoration, pieces of multi-colored fabric, preferably waterproof, such as raincoat fabric, will be useful.
Step-by-step guide to making a seat
If you already have a ready-made gymnastic ring in stock, you can immediately begin weaving the net. In the case where the frame is to be made of metal, you need to bend the pipe with a pipe bender, weld the ends, clean the seams and the surface of the hoop. It is advisable to cover the structure with 2 layers of primer.
Weaving can be done using various techniques - macrame, tatting with a diamond-shaped or square cell, crochet. The simplest option is the “spider web” network:
- Attach 4 pieces of twine to the ring at equal intervals so that they cross in the middle. There should be 8 sectors. This is the basis for weaving jumpers. The number of sectors can be increased and made from 6 pieces of rope, then the pattern will be denser and the cells smaller.
Important. When weaving, it is recommended to reduce the holes from the edges to the middle. In the center, the cells should be such as to prevent the child’s foot from falling through (approximately 3x3 cm).
- Mark sections of the fixed cord into segments and weave in a circle, connecting the jumpers to the base of the “web”. For strength, the knots can be stitched with thread.
- Attach strong steel carabiners to the frame in 3-4 places.
- Wrap the hoop in synthetic padding or foam rubber and decorate the top with colorful bright fabric. You can sew a removable cover with buttons or Velcro, or wrap it tightly with a thick cord.
For comfort, place a soft pillow or blanket. The seat is ready!
Finishing and decorating the swing nest
In the classic version, such attractions are made like a swing nest with a net. Mesh weaving provides a comfortable fit on the seat, allows children to grab the ropes with their hands, does not collect water in the rain, and is almost impossible to slip off the nest mesh.
Weaving a seat can be done in several ways. The most popular option is “Web”, which is at the same time the simplest, strongest and most reliable.
Initially, you will need to pull two loops of rope tightly. For weaving, it is best to use jute ropes, since polypropylene has a lot of stretch. Each loop must be aligned so that the intersection is in the center of the socket and secured to the hoop. To prevent the ropes from weakening, the knot on the hoop can be impregnated with an emulsion of PVA glue and water. After all the loops of the nest are tensioned, you can make a braid of the web from a softer material, for example, a rope covered with soft fabric.
If desired, you can make other weaving options; on a swing they will work no worse than a spider’s web.
Before finally hanging the nest on the swing, the hoop is covered with a two-layer protection. Initially, foam rubber is glued to the metal, then polypropylene foam thermal insulation for pipes, after which the hoop is wrapped with rope, as in the photo.
The outer edge of the socket should be soft to prevent bruising and injury, and at the same time resistant to abrasion. Most of the load when children ride on a swing falls on the frame of the nest, so you can additionally make several replaceable covers from polyester fabric.
How to cut a tire for a swing
The procedure for manually cutting a tire requires quite a lot of physical effort. It is difficult to cut rubber 5-10 mm thick by hand even with a very sharp knife. Cutting a tire with a jigsaw is even more difficult. Rubber is difficult to cut, and the cord gathers and clogs the tool’s slide.
A simple cut on the tire can be made with a sharp knife moistened with soapy water.
Therefore, when making hanging swings from tires, two technological methods are used:
- A hole is drilled in the side, the size of which allows you to insert a knife blade. The knife is moistened with liquid soap or castor oil and, pressing one of the edges, a short cut is made. When cutting, force is applied when the blade moves toward itself;
- They cut with a grinder and a stone cutting wheel. The disc must penetrate into the thickness of the tire no more than 8 mm, otherwise the tool may break. The second pass cuts through the tire; if desired, the second cut can be made with a knife.
For your information! If you use a grinder to cut a tire onto a swing seat, then it is best to choose a place far from the house. When cutting, a huge amount of toxic smoke and soot is generated; if the disc overheats, the tire can catch fire.
True, cutting a tire with a grinder takes only 5-7 minutes, while manually cutting blanks from tires onto a swing for a playground will take at least an hour and a half.
An unusual swing option
For relaxation and active pastime at the dacha, you can make unusual versions of a home attraction - a cocoon swing. Initially, the design was conceived for use as an alternative to a rocking chair, but later the children were successfully able to make their own version of a swing out of it. If there is no swing nest at your dacha, you can make a cocoon in which it is equally comfortable to swing and relax.
Building a cocoon, unlike a nest, will require significantly more effort and money. It is necessary to bend a dozen arcs on a pipe bending machine, with a profile resembling a drop or a cocoon.
The most difficult thing is to weld the arcs in the form of half a cocoon. After assembly, you will need to correctly determine the line of the center of gravity and attach a suspension, preferably a cable or chain one. After painting and equipping with cushions, the swing chair can be fixed to the frame. Unlike a lightweight nest, the weight of a cocoon is several tens of kilograms, so the suspension must be done on a very strong floor.