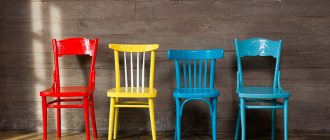
Types of decorative pillows
Interior pillows come in a wide variety of shapes and functionality. The purpose of the item depends on its size, shape, cover material and filling. Before sewing a pillow, you need to decide on its purpose, shape, and design.
Decorative pillows are:
- Sofas.
- Hanging.
- Pillows for the crib.
- Floor poufs.
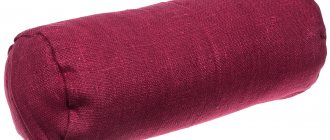
- Hard rollers.
Pillows aren't just for sofas.
The main purpose of pillows is to decorate the interior and create additional comfort. In this case, products can have completely different shapes:
- Round.
- Square.
- Oval.
- Clouds.
- Triangular.
- Roller.
Decorative pillows can come in different shapes and configurations.
The choice of form depends on the purpose. If the goal is simply to decorate the environment, then you should choose a classic square or round shape. A pillow in the shape of a cloud, flower or sun is suitable for a child's room.
If it is important that the pillow supports your back and provides comfort on the sofa, then you can choose a bolster or circle shape. Square pillows should be filled with fluffy filling - holofiber or down.
Square pillows can be filled with soft material.
If you plan to use the pillow on the floor and on the sofa and often sit on it, then it is better to choose a harder filler and a round shape.
Sofa cushions - photo gallery
Read: How to choose a computer desk?
Let's discuss this article together:
Click to cancel reply.
How to choose the right pillows
When choosing a pillow, in addition to the shape and purpose, the design is also important. It is important to consider:
- What material will the pillow be made of?
- Will it have a cover?
- What filler will be used.
There are several factors to consider when choosing a pillow.
Creating a pillow cover will require individual effort and time. However, this model will last longer. The removable pillowcase provides additional hygiene. It can be washed more often, and dust and small particles will not accumulate in the pillow itself. This is especially important for decorative pillows for children. If children live in the house, then using covers will protect them from allergies to dust or pet hair. In addition, you can sew several covers over time and change them.
It is advisable to use a removable pillow cover.
Creating cases will also help diversify the design. You can decorate the pillow:
- Applique.
- fringed
- Rhinestones
- Brushes
- Patchwork technique
- Fur inserts
- Thick cord edging
- Lace frills
- Additional details in the form of legs or handles
The cover can be decorated in all sorts of ways.
Advice. You can first practice by creating simple covers for ready-made pillows. Then move on to complex products with applique, tassels or piping. After gaining the necessary experience, you can move on to creating pillows of complex shapes.
How to make decorative pillows with your own hands
It is not difficult to sew a pillow with your own hands for decoration. To do this you just need to follow a few simple steps:
- Choose design, material, filler.
- Prepare tools and materials.
- Create a pattern.
- Sew and stuff a pillow.
- Make and decorate a cover.
Sewing a pillow with your own hands is not at all difficult.
Important! For comfortable work it is necessary to prepare a workplace. It should be a wide table with a smooth surface. You should also think about where to put small tools, needles and scissors so that they don’t fall out. A separate place must be prepared immediately for garbage.
Design selection
Nothing inspires the creation of a soft work of art more than visualizing a beautiful object in the interior. The choice of pillow design is limited only by the author’s imagination, which has no limits. However, here you should follow simple principles:
Start with simple ways:
- Fur inserts.
- Lace frills around the perimeter.
- Using ready-made fringe or tassels.
- Large rhinestones.
One of the simplest ways to decorate a pillow is to trim the perimeter with lace.
More complex decoration methods are best left for later:
- Multi-layer applications in the form of eyes, faces or landscapes.
- Embroidery.
- Decoration with small rhinestones and sequins.
- Decorated with cord edging around the perimeter.
It's a little more difficult to make a multi-layer applique.
Preparation of tools and materials
To produce a soft product you will need the following tools:
- Graph paper.
- Roulette.
- Large line.
- Chalk.
- Threads.
- Needles.
- Scissors.
- Sewing machine.
For sewing you will need scissors, thread and other tools.
The list of materials needed for sewing a pillow with your own hands for decoration is simple:
- Light fabric for the pillow: calico, chintz.
- Thick fabric for the cover: tapestry, satin, satin, velvet.
- Filling: foam rubber, down, holofiber or another option.
To sew a pillow, you need to choose a fabric.
Advice. It is better not to use woolen fabrics for decorative items, as they quickly become electrified. Because of this property, the products will accumulate dust, animal hair, and hair, which will give them an unkempt appearance. In addition, when a person wearing synthetic clothing touches such an object, a slight electric shock may occur.
Types and forms
The shape of a sofa cushion with your own hands is the main parameter that should be determined before starting work. They are:
- square (dumka);
- bolster pillow;
- round;
- in the form of toys.
Square thoughts are easier to transform with your own hands than others. Products in the form of flowers look original, especially if they are large and bright. You can do the decoration for sofa crafts with your own hands, following the master classes described below. Even if you didn’t succeed in sewing a beautiful craft the first time, you shouldn’t give up, because you learn from mistakes. It’s worth trying to make patchwork-style products from scraps.
Knitted
Knitted or crocheted items always attract attention, and pillows are no exception. This type of decor is more difficult to do, but the result is worth it. Knitted crafts can be washed in a machine; this will not spoil their appearance. The cover can be knitted entirely with your own hands or decorated with individual elements.
Drawings, embroidery, appliqués
If you decide to decorate with embroidery, you should remember a few rules. This:
- Do not embroider with beads. It is uncomfortable to sleep on, and problems may arise when washing.
- You should not embroider with satin stitch, it gets very dirty and slips.
- It is worth embroidering a wide edging along the edge. It is good to hide the last seam behind it.
To transform pillowcases, you can use easy methods - applying patterns or appliqués. In the first option, just pick up markers of different colors and use your imagination. In the second, you need to cut the fabric into small pieces and sew it to the pillow. The shape of the segments should correspond to the decorating style.
For children
To make your child comfortable, choose eco-friendly, hypoallergenic materials. For children, the shape of the product, its color, hanging legs, pockets and other small details are more important. You can sew a sofa cushion in the shape of letters, numbers or toys. You can also make a cat, owl or elephant for games.
From old things
If you have a limited budget, you can come up with a design using improvised materials. By choosing some clothes from old things, you can sew some good sofa cushions with your own hands. Making a pillowcase is simple - stitch along the outline of a sweater or jacket, leaving a hole and you're done.
Filler selection
The softness and weight of the pillow depends on the filler. Material options here could be:
- Cotton wool. Natural, inexpensive material. Its disadvantages are that it is heavy and quickly falls into clumps.
- Natural fluff will make objects light, delicate and soft. However, it is expensive and difficult to care for.
- Sintepon is a budget synthetic material. It has great softness and light weight. However, over time it clumps into clumps.
- Holofiber is a universal, artificial, modern filler. It's inexpensive and will last a long time.
- Foam rubber should be chosen for decorative elements or pillows with a certain shape.
- Silicone granules make the pillow pleasant to the touch. This model easily adapts to the shape of the human body, it is pleasant to wrinkle and squeeze.
- Comforel is a filler made of small balls. The properties are very similar to silicone granules. It is more pleasant to the touch than granules, but is more expensive.
- Buckwheat husk is a natural analogue of comforter or silicone granules. It's not cheap. However, this pillow is pleasant to use and easily relieves stress. In addition, buckwheat husk is one of the most environmentally friendly and hypoallergenic materials.
- Aromatic herbs create a pleasant atmosphere, fill the room with delicate aromas, relieve tension and spasms. These pillows are useful for people with back or joint pain. Herbs are an addition to any other filler.
There are many options for filling a pillow.
Pillow pattern
The method of cutting the fabric depends on the shape and complexity of the pillow. Simple square or rectangular shapes are easy to cut by eye. In this case, the sides of the product can be created from several squares or rectangles of fabrics of different textures.
When calculating the size of squares or rectangles, it is worth remembering that after the product gains volume, its length and width decrease. Therefore, you should make a margin of 10 cm for both sides.
For simple-shaped pillows, a pattern on paper is not necessary.
You can also create a round pillow pattern using chalk directly on the fabric. To do this, you will need to draw a square on the fabric, and then draw a circle inside it. After this, all that remains is to cut out two identical circles and sew them together. For a voluminous round pouffe pillow, you also need to cut out an additional insert strip between the circles. The length of the insert is calculated from the ratio of the circumference and diameter, or the number Pi. Pi is 3.14. That is, to calculate the length of the insert, you need to multiply the diameter by 3.14.
The most complex are the patterns of soft toys:
- Sun.
- Little cloud.
- Hearts.
- Flower.
One of the most difficult is the pattern of the sun pillow.
To cut fabric, you first need to draw a shape on graph paper, then cut it out, pin the paper to the fabric, and cut it out.
It is not worth tracing the shape and cutting out the fabric without a rigid paper base, as the material will move, which will ruin the final shape.
Round products
Wonderful round pillows can be crocheted in different ways.
If you knit zigzags from threads, sew them or knit them in a circle, you will get excellent textured pillows.
These pads are made as shown in the photo below.
Pillows tied with openwork patterns also look amazing. A contrasting color cover successfully emphasizes the beauty of crocheted lace.
These pillows are made from round knitted motifs. Below are beautiful patterns of motifs.
Sewing pillows
The pillow can be sewn in two ways:
- Simple stitches across the edge of the seam.
- On a sewing machine.
A hand stitch is suitable for simple shapes. It will be inferior in strength to a machine seam, so this method can be used for pillows in the living room or bedroom. For children, products should be more durable to withstand all their pranks.
The pillow can be sewn either by hand or by machine.
Machine stitching should also be used for pillows with additional details around the perimeter: ruffles, cord piping, fringe.
To carefully sew such details, you need to fold the patterns with the right sides together and insert a decorative part between them. The element needs to be basted by hand and then sewn on a machine.
We sew round pillows using the bubble quilt technique
I received an order for round pillows for a stool (marshmallows, as one of my clients called them) and discovered that there are a lot of tutorials on the Internet on the topic of sewing blankets, rugs and other products using the bubble quilt technique I love, but mostly in a rectangular shape. In this connection, I decided to publish my own master class on this topic.
I would like to immediately apologize for the quality of some of the photos. I work mainly in the evenings, I have to shoot in artificial light 
The pillow sketch looks like this:
The diameter of the finished product is 37-38 cm.
I made the pattern myself by trial and error. Print on A4 sheets, cut without allowances.
The details of the lining layer can be cut out from any unnecessary fabric, as long as it does not show through the main fabric. For the outer layer, I recommend dense (not see-through) types of cotton. For just one pillow we need:
| the name of detail | Outer layer, quantity | Lining layer, quantity |
| Center | 1 | 1 |
| Inner circle | 8 | 8 |
| Outer circle | 16 | 16 |
The output looks like this:
We chop off the details of the lining layer with the details of the outer layer at the corners:
We begin to form folds. To do this, fold either side in half and slightly compress it, using both layers of fabric - the outer and lining (cotton “remembers” its shape well). We straighten the parts, the resulting “edge” will be the center of the fold.
We form folds in any convenient way. Mine looks like this:
Similarly, we form folds on each side of the part.
We sew on a machine at a distance of 3-5 mm from the edge.
We connect the resulting parts of the inner circle in pairs, the outer circle - 4 each. We lay the stitch at a distance of 7 mm from the edge (we make all subsequent seams at the same distance from the edge).
We mark the central part from the wrong side. Marks are placed 7 mm from the edge of each side.
We chop off the paired parts of the inner circle with the center part and attach them from mark to mark.
Next, we attach the quadruple parts of the outer circle to the paired parts of the inner circle.
We chop and stitch together the resulting sectors from the central part to the outer edge of the product.
This is what the resulting top part of the pillow looks like.
We pin the ribbon ties.
We pin, baste and attach the bottom, leaving a sufficient hole for turning (take into account that the already stuffed product will be turned out!). We remove the mark.
Next, we cut each “marshmallow” from the wrong side.
We fill the pillow through the resulting holes (I use holofiber in the balls), turn it inside out, and check that all the “marshmallows” are evenly stuffed.
Turn it inside out and sew up the “marshmallow” holes using a hand stitch “over the edge.”
Fold and baste the edges of the opening to turn it inside out.
Turn the pillow right side out and sew up the hole with a blind stitch.
Our pillow is ready!
Methods for decorating pillows
Various forms of decoration are used for decoration. For children's models, you should choose a design that will be difficult to tear off. Not suitable: rhinestones, beads, beads, tassels.
Important! For a crib pillow, you need to choose a decor that the child cannot tear off and swallow.
For products in the living room, it is better to choose bright, large elements.
You can decorate the living room from large elements.
Applications
The simplest form of registration. It will require fabrics of different colors and textures. The applique pattern is created on paper and then transferred to fabric. The details are easily sewn on by hand.
The applications are quite easy to make.
A more complex option is to create relief applications.
Step-by-step technique for creating rose appliqués:
- Cut a strip of fabric 40-50 cm long and 7 cm wide.
- Cut wavy petals from one edge.
- Gather the strip into a flower by rolling it in a spiral.
- Sew a flower to the pillow.
You can decorate the pillow with a voluminous rose.
In this way you can make several flowers, or you can create one large one in the center or on the side.
Form, fragments
Additional pieces of different shapes will make the pillows more fun and funny. It can be:
- Legs.
- Pens.
- Flower petals.
- Triangular ears.
Pillows with sewn-on fragments, such as animal paws, look funny.
They are made in the same way as figured pillows: a pattern is created on paper, the fabric is cut and the product is sewn. The pieces are then sewn into the finished product.
Important! First, additional fragments are prepared and filled with filler. After this, a pillow is created along with additional elements.
Knitting, embroidery
Decorating fabric with embroidery or knitted elements is the most difficult method that requires perseverance. Making such a work of art can take several days. But she will become the pride of the whole family. First, embroidery is created on the fabric according to the selected pattern or decorative elements are crocheted and sewn on. After this, you can connect the pillow elements.
Embroidering a pillow will require perseverance, but it will become a source of pride for you.
Relief
Decoration with relief puffs is the most complex. It is better to take it on if you already have experience in sewing. For decoration, it is better to take satin fabric, as the drapery will create beautiful shimmering glossy surfaces.
First, a puff pattern is created on paper:
- Squares that will be drawn together in a sequential or checkerboard pattern.
- Triangles.
- Stars from several triangles.
To design with embossed puffs, you will need a lot of sewing experience.
The pattern is transferred to the fabric from the wrong side. According to the pattern, mini-folds are laid and tightened with thread. The puffs are ready, all that remains is to sew a pillow with your own hands for decoration.
Beautiful pillow with puffs
A master class will help beginner needlewomen to master the technique and create a simple but very beautiful pillow. It describes step by step the formation of the pattern and assembly of the product.
We will prepare everything you need. Choosing the right fabric. You will need two cuts. Each cut is 150x150 cm. Threads in the color of the fabric, a needle, scissors, chalk, sewing pins, a ruler and two beautiful decorative buttons.
We will make the pattern according to this scheme.
The edges of the fabric need to be finished. We will overlay or hem them.
We choose the scheme according to which we will make the puffs. On the wrong side we draw a grid of 2.5x2.5 cm cells.
We transfer the pattern diagram onto the lined fabric.
We mark the points of the diagrams with a pen, since the chalk is erased during work.
The fabric needs to be folded in half. From the edge we count an even number of cells and as close to the fold as possible. Leave 1 cm allowance and cut off the fabric. We process the cut using an overlocker.
Fold the fabric in half again. To keep everything smooth and neat, we fasten the lines with pins. The fabric needs to be stitched. Then the pins can be removed.
To make it clearer, let's consider the formation of puffs on another fabric.
Thread the needle at point 1.
Now we thread the needle at point 2.
We tighten the thread and points 1 and 2 are connected.
We fasten the connection of these points with threads.
We thread the needle at point 3. The thread does not need to be tightened. This is a transition to the next element of the pattern.
At the third point we make a knot.
Related article: Birthday collage with wishes made from sweets
We thread the needle at point 4.
Tighten the thread and connect points 3 and 4.
We fix the connection of the points with threads.
Let's move on to the next point. We do not tighten the thread in it.
At odd points there will be transitions to new elements. At even points we will tighten the threads and thereby form folds of the pattern.
The thread fastenings are visible only from the wrong side.
We begin to give the pillow its shape.
We need to make folds along the edge of the workpiece.
We draw imaginary lines from the connected points of the puffs and mark the tops of the folds with pins.
We thread the needle through the drawn vertices.
We tighten the thread a little so that the folds become clearly visible.
We form beautiful folds one by one and give them direction.
We tighten the thread.
On the front side we straighten the folds beautifully and fix the thread from the back.
Sew a beautiful button in the center.
Fill the pad with padding polyester.
Both on one side and on this side, we thread a needle at the tops of the folds. We begin to tighten the thread and form beautiful folds.
Fix the center with a thread and sew on the button. It turns out to be a pad with puffs.
Using pillows in the interior
The decorative use of a pillow depends primarily on the style of the interior and the purpose of the room.
For a classic living room in solid colors, bright sofa cushions of simple square or rectangular shapes would look appropriate. For the Baroque or Rococo style, products richly decorated with tassels or fringe are suitable. They will add pomp to the room.
In a classic living room, multi-colored bright rectangular pillows are appropriate.
For an Art Nouveau style interior, round rollers and square models made of plain fabrics, stuffed with hard filling, are suitable.
For a bedroom or room in the Provence style, models with bright, printed, floral prints and lace frills along the edge or in the center of the pillow would be appropriate. For the bedroom, it is better to choose models of different sizes and shapes, this will create a picturesque look. It is recommended to add lavender flowers to the filler; its aroma will promote relaxation and deep sleep.
A variety of different pillows look picturesque in the bedroom.
For a kitchen sofa, it is better to choose round or square pillows made from simple, smooth fabrics that are easy to wash. Products with silicone granules are well suited for the kitchen. They will help you relax and improve your mood before eating. It is better not to use buckwheat husks to fill kitchen pillows, as they absorb odors well.
It is better to make a large number of pillows of different shapes and colors for the nursery. In this case, it is recommended to use fabrics of different textures: smooth, satin, hard, fleecy and filler of varying hardness. A variety of textures will develop a child's tactile sensations. Pillows of different hardness will be convenient for games: hard ones are comfortable to sit on, while light and soft ones are comfortable to throw around. You can build castles and houses from foam pillows of the correct shape.
You can put a lot of different pillows in the nursery.
Small pillows made of buckwheat husks and also with lavender will suit your baby's crib. A pleasant, relaxing scent will promote deep sleep. Essential oils of the plant will be the best preventive remedy for respiratory diseases.
How to sew covers for sofa cushions
Detailed instructions for sewing a pillowcase. It is better to take colorful fabric for this work so that the item turns out beautiful.
The photo shows an example of bright crafts that can be made using the technology described below.
To sew a cover for a sofa cushion, take:
- small pieces of fabric;
- pins;
- threads of suitable colors;
- scissors.
We measure out the bedding. We multiply the resulting value by two - we get the width of the segment, and the length is cut to the size of the pillow. Don’t forget to add 3 cm to the seams in width, and 1 cm in length.
Laying the wrong side up, fold one edge of the fabric and iron it thoroughly. Then we wrap it again and iron it. We machine stitch the folded edges closer to the inside. We do the same with the second opposite edge. The pillowcase for the sofa cushions is ready.
Fold one side of the rectangle halfway. Then we turn the workpiece over and bend the second edge so that it overlaps the first. We do this in such a way that the middle part is equal to the size of the pillow.
Stepping back a centimeter from the edge, sew from the top, then from the bottom. You can additionally go through a zigzag.
Making a pillowcase for a sofa cushion is coming to an end. All that remains is to turn the craft inside out and put it on.
Having straightened all the edges, turn the finished product over and place it on the sofa. You can start making the next pillowcase.
These are the beautiful things you can make with your own hands.