How to make a plasterboard partition with your own hands
You can begin work on the manufacture and installation of a plasterboard partition if the plaster and screed in the room have dried, that is, all “wet” work has been completed. The air should not be humid. Otherwise, this will cause the material to become damp and deformed.
When starting to build a partition yourself, it is important not to lose sight of anything.
It is not recommended to start work immediately after purchasing a plasterboard sheet. The warehouse where they are usually stored is not heated and the gypsum boards must be allowed to dry for about 24 hours, or preferably several days.
Scheme and drawing
Making a plasterboard wall with your own hands is quite simple. It’s worth starting with a planning drawing of the room. Namely, it is necessary to determine the optimal placement of the partition and its dimensions in order to avoid errors during installation.
The drawing must contain all the information. This includes not only the size, but also the gap that will need to be observed. If recesses, shelves or “windows” are planned on the product, then it is also better to indicate them on the diagram.
When planning a partition, you must first draw it.
After marking on paper, the lines will be easy to transfer to the plasterboard, floor and ceiling. You should not skip this stage, since the quality of further work depends on it.
Materials and tools
You will need quite a lot of materials and tools, so you should prepare them immediately before work.
Walls are often built from plasterboard.
- Plasterboard sheet of the required thickness.
- Profiles PN and PS
- Mineral wool
- Screws
- Dowel-nails
- Reinforcing tape
- Sealant and sealing tape
- Primer
- putty
- Level
- Painting cord or chalk thread
- Mechanic's pencil
- Square
- Metal scissors
- Screwdriver and hammer drill
- Several bits for drilling
- Drywall knife
- Plane
- Brush
- Putty knife
Before starting work, check that you have all the necessary tools.
Partition markings
To mark, you will need a level (laser or bubble) and a painting cord (chalk thread). First, you should schematically mark the place for the partition, following the previously prepared drawing.
Having decided on the place to build a plasterboard wall with your own hands, you can start making it.
Using a level, transfer the outline to the walls and floor, you should get a straight line, the outline of the future structure. A plumber's pencil and a square will help with this. If the partition involves a recess for the door, then on the line it is necessary to mark the place where it will be located. The profile will be recorded there.
For zoning, you can use a plasterboard rack.
Transferring marks from floor to ceiling
When the time comes to transfer the bottom lines from the floor to the ceiling, it is better to call someone for help. It will be difficult to cope with this alone, since you will need to simultaneously control the location of the plumb line and set contour points.
One person holds a plumb line, the other puts points, as if on a ruler. After checking for coincidence, they can be connected to obtain a straight line.
Marking a plasterboard partition
The marking should be completed by checking that all lines match. Even with the smallest irregularities, the structure will be unreliable and crooked. Using a laser level, all guides are aligned.
With complex structures, everything needs to be measured accurately.
You can also check whether the sheet of drywall itself is even.
Profile installation
It is better to start attaching the profile guides from the floor. The installation site is sealed with sealing tape to ensure good sound insulation in the future.
The profile is attached to the wall using dowel nails.
You will need dowel nails or screws for fastening.
Guide
After gluing the sealing tape to the back side, align the PN along the internal marking line on the floor that was made earlier and fix it.
Embedded elements are pre-installed into a wall or partition made of plasterboard.
Fixation occurs using dowel nails if it is a concrete base and self-tapping screws if it is a wooden base. Holes are drilled through the profile in the floor. You can cut off the excess length using metal scissors.
Rackmount
The vertical stand is fixed along the edges of the profile. They should be cut so that there is a gap of 1 cm for the building to shrink between the top of the support and the profile on the ceiling.
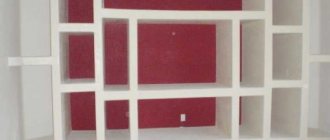
You can make different shapes of partitions from plasterboard.
Upon completion of the cutting, each stand is attached to the lower profile, like a cylindrical fixed support, and the free ends are carefully tucked into the upper guide. This is followed by vertical alignment and screwing to the guide profile.
Not only the height and width of the room where the partition is erected are important, but also the dimensions.
The installation technology is the same for those forming the base of the doorway and ordinary racks. The axial marking of the row rack starts from the edge of the wall, then to the center of the first rack and the central axis of the other supports, 600 mm each. If the chamfer of the outer gypsum board is cut off, then the distance will decrease to 550-500mm.
What materials are needed for the partition?
First of all, you need to select plasterboard sheets. In order not to make a mistake, it is necessary to consider the options in more detail.
Materials used in the work process are affordable
Table 1. Types of plasterboard sheets.
| View | Designation | Characteristics and Application |
| Standard | GKL | A suitable option for interior partitions in rooms with low humidity levels. |
| Fire resistant | GKLO | It is distinguished by the presence of reinforced reinforcement, the color of the sheets is pink. The material is also allowed to be used only in rooms with an optimal level of moisture. |
| Moisture resistant | GKLV | Contains special water-repellent additives, and the sheets are treated against fungus. The panels are green or blue. This material can be used in toilets and bathrooms. |
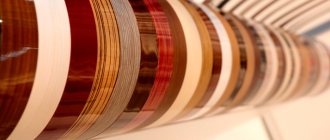
Prices for drywall and sheet materials
Drywall and sheet materials
There are other types of plasterboard sheets: combined types, resistant to moisture and fire , flexible . Of course, such panels will cost more .
GKLV
For installation, in addition to the sheets themselves, you will need the following materials:
- Wood profile and bars ( 7.5 centimeters if it is planned to lay soundproofing material between the panels and 5 centimeters if there is empty space or thin material) for the partition frame. It is worth noting that the thickness of the partition will depend on its width.
- Fastening elements for bases and wooden parts.
- Reinforcing mesh to strengthen connections.
- Gypsum putty, for rough work and finishing. It will be needed to cover the joints, and then level the surface if there are defects.
Note! Professionals note that working with plasterboard panels does not contribute to room pollution, as is the case with concrete. This greatly simplifies the cleaning process after installation is complete.
The quantity of certain materials is determined only after preliminary measurements. However, it is recommended to purchase them with a reserve of 10%.
What tools are needed to install a plasterboard partition?
In addition to the above materials, some equipment will be required during the work process:
- Screwdriver – will be needed to tighten a large number of screws, because it will be difficult to do it with a screwdriver.
- Metal ruler (long) – will be needed during preliminary measurements, marking, and also when cutting gypsum board panels.
- A bench square will also be required during the preliminary marking process, as well as for measuring the location of sheets during the installation process.
- Spirit level - will be required when measuring the correct location of the vertical frame parts.
- A cord plumb line is necessary to determine where to attach the frame parts when aligning the markings on the surface of the ceiling and floor.
- A simple pencil is used for making marks.
- Metal cutting tool - will be needed for cutting metal profile blanks for the partition frame.
- Jigsaw – needed for quickly cutting wood and plasterboard panels (if there are shaped parts).
- Tool for caulking joints.
- Fine-grained sandpaper - will be needed for processing joints after the putty has dried.
- Primer - needed to treat the surface at the final stage before applying paint.
- Loop saw with small teeth for gypsum board sheets.
- A stanchion with an oblique blade for processing edges.
- Riveter - this tool is necessary for connecting parts from a metal profile. Its use simplifies the installation process several times.
- Electric drill with drill bits.
- A studded roller is required if you plan to give the gypsum board panels a three-dimensional shape.
- Tape measure.
- Impact tool for fixing fasteners, screwdrivers for installing frame elements.
Tools used during installation of frame and plasterboard panels
It is worth noting that the above devices are sold in specialized stores and markets.
Prices for popular hammer drill models
Hammers
Features of frame reinforcement
You can strengthen the partition by connecting two profiles of a vertical post for fastening. This will make the structure much stronger and be able to withstand weights of up to 50 kg. They are connected with self-tapping screws or dowel-nails. But this method is not always reliable, since not all materials retain their practicality and stability.
Serious structures must be strengthened.
For the next method you will need wooden blocks of the same size. The width of the block should be slightly smaller than the profile, since they are placed inside. For greater reliability, it is better to secure them with self-tapping screws. It is important to monitor the support; it should not deform during the strengthening process.
The support for the partition must be strong.
If you don’t want to experiment, then it’s better to use the third method. It involves reinforcement using ready-made certified parts, which are made specifically to increase strength. They look like wider and thicker metal profiles. The good thing about this method is that when choosing the most durable ready-made amplifiers, a structure made from one sheet of plasterboard will be stronger than from two.
Fastening and processing drywall
Fixation of gypsum boards is carried out as standard:
- According to the markings, we cut the necessary fragments using a hacksaw or a painting knife. Using a knife, cut the cardboard along the marking line on one side of the sheet. We carefully break the drywall and turn it over to cut through the cardboard from the back side.
- At the junction points, the fragments must have chamfers. It is recommended to shape them before attaching them using an edge plane or a paint knife.
- We fasten the drywall to the frame with metal screws. A special gypsum board bit for a screwdriver will greatly facilitate this process. The pitch between the fastening elements is 10–15 cm.
On the sheets being joined, the fastening points are spaced apart.
- If necessary, drill holes in the plasterboard surface for sockets and switches.
- We glue the joints with reinforcing tape and seal them with putty. After it dries, we rub and prime the surface.
At the end of all operations, a strong and even partition is obtained, ready for further finishing.
Making a doorway and installing crossbars
Using a guide profile, the upper part of the doorway is formed. It is cut 25-30 centimeters longer than the designed length. The outer side is marked at a distance of 15 centimeters from the edges of the crossbar.
The doorway can be of any size.
Risks should be visible on the side profiles. A cut is made along them from the edge of the sidewall to the marks on the bend. Afterwards, the profile edges are bent on both sides at an angle of 90. The end result should be a crossbar in the shape of the letter “P”. It can be easily moved along the racks and attached with self-tapping screws. The joint of the plasterboard sheet should be at some distance from the post on which the door frame will be attached.
An interior partition made of plaster is a common construction.
Horizontal cross members are made using the same principle. They perform the function of compacting the frame and joining gypsum boards if the partition height is large. In this case, 2 to 3 rows of horizontal crossbars are used.
The tails of adjacent planks need to be bent in different directions and the crossbars should be placed in a checkerboard pattern. This way, adjacent horizontal joints will not coincide, and there will be no seams in the form of crosses.
Attaching to the frame: step-by-step instructions
Procedure for covering the frame with plasterboard:
- Start work from the corner.
- It is recommended to cut the edge of the gypsum board at an angle of approximately 30° (by a third of the thickness). This is necessary to press the putty inside the seams. There is drywall on sale, the edge of which already has the desired shape. On trimmed workpieces (for example, when finishing openings), cuts along the edges are mandatory.
- Set the screwdriver to medium speed and put a self-tapping screw on the bit.
- Place a stand up to 1 cm thick under the first sheet to create a gap.
- Press the gypsum board tightly to the frame.
- Screw in the screws so that they are recessed into the surface by approximately 1 mm. Then the caps are easy to putty. The step between the screws is no more than 20 cm; if the sheathing is made in two layers, then the first layer can be made up to 75 cm. The first layer is additionally fixed with self-tapping screws that secure it to the second. The distance from the top or bottom of the sheet to the screw is 15 mm, on the right and left they retreat by 10 mm.
- Sequentially fasten all sheets of sheathing. Each is attached to at least three profiles; the edges of the gypsum boards should fall exactly in the middle of the rack. Small cuttings can be fixed to only two profiles. When installing the top sheets under the ceiling, also leave a gap.
On adjacent sheets, the screws are placed with a slight offset. If the cladding is carried out in two layers, then the second one begins to be installed only after the putty has dried in the seams of the first.
GKL sizes
Standard dimensions of wall plasterboard: 2500 or 2700 mm by 1200 mm, thickness 12.5 mm.
If the distance from floor to ceiling is more than 2.7 m, then take sheets 3 m long. For cladding walls on which heavy objects will hang, choose high-strength plasterboard with a thickness of 15 mm. There are also small-format sheets on sale - 1500 x 600 mm. It is convenient to work with them alone. The downside is more seams. For a two-layer finish, you can buy gypsum boards with a thickness of 9.5 mm (ceiling).
How to dock
If the length of one sheet is not enough to cover the entire height of the wall, then the upper parts of the sheathing are fastened so that the seams between them do not coincide with the joints between the lower ones. Otherwise, you will not achieve sufficient strength. The seams are sealed with putty and reinforcing tape.
When performing double cladding, the joints on the first and second layers should also not coincide. If the distance between the frame posts is 60 cm, then the seams of the first layer are made on even profiles, the second on odd ones. If it is impossible to meet this condition, then the displacement is performed arbitrarily - a minimum of 5 cm.
How to fasten
The gypsum boards are attached to the sheathing with special plasterboard screws for metal or wood (selected to match the frame material). The screw should protrude at least 10 mm from the back of the sheathing. This also applies to self-tapping screws for the second layer of double skin. For fastening a standard wall gypsum board (12.5 mm) in one layer, the optimal screw length is 25 mm, in two layers - from 40 mm. The minimum consumption of screws is approximately 20 - 25 pcs per 1 m2 of sheathing.
Distance
Gaps of 5 - 10 mm are left between the plasterboard sheathing and the floor or ceiling. This is necessary to compensate for the effects of possible shrinkage or temperature changes. For the same purpose, leave a distance of 1 - 2 mm between adjacent sheets of plasterboard cladding.
Frame covering
The hardest part is over, all that remains is to cover the frame with plasterboard. If the previous steps are completed correctly, then there should be no problems when installing gypsum boards. Installation begins on one of the sides, which is closer to the wall or corner. One side of the plasterboard sheet is cut to 4-6 centimeters. This is done to ensure reliable formation of joints.
The frame sheathing is made of plasterboard.
A knife or saw will help you cut well. For a more even cut, it is better to perform the procedure on a table. It will not be possible to completely cut off the fragment, as it may come off unevenly; it is better to cut on both sides and break it.
Next, a sheet of plasterboard is applied to the frame so that the lower edge is 1 centimeter from the floor. The plasterboard sheet is fixed to the frame with self-tapping screws, a step of about 14-15 centimeters, with an indent of 1-1.5 centimeters from the edge.
Drywall can be covered with wallpaper.
Properly tightened screws will ensure reliable fixation, so this point must be strictly monitored. It should enter the sheet 1 centimeter without breaking through it.
For easier puttying of joints, it is important to monitor the connection of the edges of the gypsum board. They connect only on the PS. Correct joining means that the attachment point and seams do not match. The screws are twisted staggered, the panels are laid, displacing the seams. There is an alternation of whole sheets and individual strips.
Drywall is easy to work with.
When the upholstery on the first side has come to an end, it’s time to move on to the second. But first, a panel is placed in the resulting space, which will perform the function of sound insulation or heat preservation. Places for sockets and switches are outlined, taking into account further wiring. The second side is mounted according to the algorithm of the first.
Features of door installation
When all parts of the partition are ready, you will need to begin securing the frame to install the door leaf.
This is what the structure should look like after installation is complete.
The installation process has the following sequence:
- A frame made of wood with hinges is measured with a plumber's level and fixed to the vertical parts of the frame with several fasteners.
- The self-tapping screws must be “recessed” into the wooden structure; to do this, recesses are made for them in advance.
- After securing the box, you can use the standard method to hang the door on its hinges. Just keep in mind that the fabric is chosen with minimal weight in order to reduce the load on the partition. If you carried out the installation correctly, then there will be no problems using the door.
- If the calculations are incorrect, the opening will be larger than the door frame. In this case, the box is fixed to the frame with spacers (wooden), and the remaining space is filled with polyurethane foam sealant. After drying, the sealant will need to be cut off with a knife, and then continue finishing. Using the same method, it is necessary to seal the gap under the threshold.
Advantages and disadvantages of the design
The advantages include:
- Reasonable price. The cost of a sheet of drywall is less than other materials and it is easier to find it in the store’s assortment.
- Thermal insulation and fire resistance. The material is not inferior in these parameters to gypsum or foam concrete structures. At the same time, it allows air to pass through and the enclosed room is not stuffy.
- Smooth surface. Sheets do not require additional alignment. After installation, they are immediately painted, covered with wallpaper, and tiles are laid.
- Good flexibility. Thanks to this, structures of various shapes can be made from gypsum plasterboard.
- Easy installation. It is much more difficult to erect and remove a partition made of brick than from gypsum plasterboard.
Drywall has pros and cons.
The disadvantages include:
- Waterproof. A slight increase in humidity does not deteriorate the material, but direct contact with water has a negative effect. Therefore, gypsum board is not suitable for installation in bathrooms.
- Insufficient strength. The sheets cope only with objects of medium weight and in this they are inferior to concrete and brick partitions.
Working on a plasterboard wall should be done with extreme caution. This material is very fragile.
General arrangement of plasterboard walls
Before making a wall from gypsum plasterboard, you need to familiarize yourself with the rules of its manufacture and the characteristics of the materials that are used.
Construction of plasterboard walls:
- Frame. As a rule, CD and UD steel profiles are used for its manufacture. The metal is resistant to mechanical stress, temperature changes and humidity.
- Wall gypsum board. Depending on the working conditions, ordinary, waterproof or fireproof material is used. To make the walls, slabs with a width of 120 cm, lengths of 200, 250, 300 cm and a thickness of 12.5 mm are used.
- Filler of the internal space of the walls. As a rule, the construction of such walls requires the presence of electrical wires, socket housings and switches. To prevent possible fire, mineral wool slabs are used. This material has excellent thermal insulation and acoustic properties.
- Layer of plaster. It is designed to protect the fragile surface of gypsum boards from moisture and mechanical damage. It is the basis for applying the final finish.
Before you make a plasterboard wall, you need to plan this event. First of all, a diagram is made. It shows the frame and the placement of drywall slabs on it. Based on the received drawing, construction materials are calculated and the need for tools, equipment and fixtures is determined.