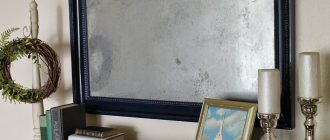
Sometimes the old interior gets boring and you want to update the decor with new interesting elements. The question of how to update a kitchen set becomes very relevant in this case. Especially if the old kitchen furniture functions quite well, and there is no desire to change the set to similar analogues. There is no point in turning to specialist restorers when you can remake kitchen furniture with your own hands at minimal cost. Designers will reveal the secrets of a unique headset upgrade.
It doesn't take much effort to breathe new life into old kitchen furniture.
Accessories
Repair of kitchen units must first begin with an inspection of the hinges, guides, handles - all the fittings that are responsible for ease of use and functionality. It often happens that in the places where the mechanisms connect to the façade, the holes become wider than necessary or a part of the canvas is completely missing. Then the headset door becomes loose and lopsided. Dismantling and moving the fittings to a new location will help correct the situation. To work you will need:
- putty;
- screwdriver or screwdriver;
- putty knife;
- sandpaper;
- new fittings;
- varnish or paint to match the color of the headset.
Marking the hole for a new handle
Updating a kitchen set begins with dismantling the old mechanisms. It is better to remove the doors completely for ease of repair. Old holes are no longer suitable for fixing fittings, so they must be sealed with putty in 2-3 layers. It is better to choose an acrylic-based substance that matches the color of the facade for good camouflage. After the material has settled a little, it must be sanded with sandpaper so that there are no irregularities and bulges and opened with varnish or paint.
Next, you need to drill new holes and install the appropriate fittings. It’s not difficult to select it yourself: just show the old part to a sales consultant in a hardware store - and he will immediately offer a suitable analogue. In drawers, when the guides fail, it is recommended to update the roller mechanism with a new ball mechanism, because it is more reliable. If you need to update your handle, it is advisable to choose it according to style and material. For example, a plastic product looks out of place on a wooden kitchen facade, so it is better to opt for a metal handle with wooden or glass inserts.
Perhaps someone will like mortise handles, ideal for a modern style kitchen
Options for “new things”
Since the set itself is not yet falling apart, it is necessary to update the facades. This will benefit both the appearance and protect the material from moisture. There are two options for updating facades:
- Ready-made self-adhesive film
- Individual photo printing on adhesive paper
The owner of this kitchen settled on the second option, after which he indulged in thinking about the topic of photo printing. The original option with a separate picture for each door was rejected: the overall look would be too colorful. After some more thought, it was decided to choose a print with nature, “breaking” it with an apron would not affect the perception of the picture.
When searching for a suitable print, the picture should be selected with the maximum resolution - only in this case it will not be blurry.
Vinyl film
Pasting kitchen facades with self-adhesive film is the most budget-friendly option for updating an old kitchen set with your own hands. Manufacturers offer a wide range of self-adhesives of different colors and textures: matte or glossy, textured and smooth, with or without patterns. The service life of such coating is on average 3–4 years. The material is characterized by good moisture resistance and resistance to temperature changes. It is noteworthy that it is possible to update the kitchen façade using this method even on plastic coverings. In order to transform old furniture, you will need:
- scissors;
- plastic spatula or scraper;
- vinyl film;
- soft centimeter and ruler.
Before you restore your kitchen set, you should take measurements of all doors and cabinets in order to understand how much vinyl film you need to purchase to update your kitchen set. It is advisable to purchase a little more self-adhesive so that you can correct possible mistakes. Next, you should disassemble the facade and number each part to facilitate the final assembly of the set. Using a ruler, measure the required pieces on paper and cut with scissors. For ease of use, there are usually markings on the back side in the form of 1x1 cm squares. When cutting out parts, it is recommended to leave a margin of 2 cm on the sides and be sure to take into account the bends.
Cutting is usually done from the wrong side, where there are markings, but when adjusting the pattern, it is more convenient to cut from the front side
Before updating the facades of an old kitchen, you should thoroughly wash the surfaces of the furniture from grease and soot, otherwise the film simply will not stick. After washing, the parts should be degreased and allowed to dry completely. The next stage of work is directly pasting the film. It is necessary to remove a part of the protective layer from the wrong side of 5–10 cm and press it to the surface. The film must be immediately straightened and smoothed with a spatula or scraper so that there are no unevenness or bends. The resulting bubbles can be pierced with a needle. It is necessary to glue from top to bottom, gradually removing the protective layer and at the same time smoothing the self-adhesive. If something goes wrong, the film can be removed and re-glued, but not more than twice, since the adhesive will quickly lose its properties. The film is strongly attracted to the surface after 5–6 hours, so there is a chance to correct errors and update the headset at the proper level.
Restored kitchen facades with film-covered panels
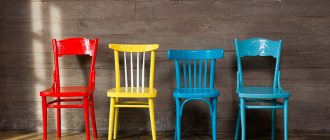
After work, the kitchen fronts can be installed back and the fittings can be screwed on. A bright, stylish set will certainly refresh the interior and add a touch of originality and style. You can take a pattern that imitates wood or marble, or you can simply choose a plain coating. Designers recommend combining 2 colors when gluing a set: for example, white hanging drawers and a brown lower tier. Photos of updated kitchen furniture with your own hands are presented on the website.
Decoupage
For an interior in an ethnic country style, Provence restoration of a kitchen set may involve the decoupage method, which is widely used by modern designers. Hand-made things are in particular demand because they reflect the inner world of the owner, her talent and skills. As a material, you can use fabric or oilcloth with a pattern or ornament you like, for example, “Gzhel” or “Petrikovskaya painting”. For work you will also need:
- spatula and paint brush with a long narrow brush;
- sandpaper;
- putty;
- PVA glue;
- solvent.
Preparing the facade for priming
Before updating the facade of the kitchen unit, you should sand the surface first with coarse-grained and then fine-grained sandpaper. A grinding machine will help make manual labor much easier. If there are cracks in the headset, they should be repaired with putty. After applying a thin layer, you need to wait until it dries completely and sand again so that the surface becomes smooth and even, without depressions or bumps. The solvent will help degrease the facade so that the future material is well attached to the panel. By the way, the decoupage technique can be used not only for wooden, but also for plastic and glass kitchen sets. It is necessary to treat only those parts of the surface where the new material will be attached.
Applying primer to the surface
After drying, you should glue the fabric with regular PVA glue, and then open the surface with acrylic varnish. For this, a narrow and flexible brush with long bristles is suitable so that there are no gaps or pale spots on the facades. The varnish is applied to the set in 3-4 thin layers. Each layer dries in about 1–2 hours, and the set will be ready after a day.
Applying a thin layer of decoupage glue
The rattan fabric on the facades looks very interesting. To work, you need to measure and cut the desired piece and soak the material in cold water. After half an hour, it will swell and increase slightly in size, which will make it easier to update the product. Wet rattan must be applied to the surface, smoothed, stretched and secured at the edges with a furniture stapler. This fastening is more reliable, but if desired, you can use superglue or PVA. After this, you should attach the planks along the perimeter, join them to each other at an angle of 45 degrees and nail them with nails without heads. Such moldings will cover visible fasteners and give the headset a holistic and harmonious appearance. After the rattan dries, it will look like a stretched string.
Restored facade with rattan inserts
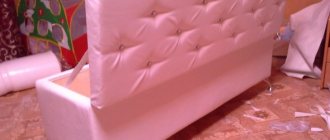
There is another interesting way to update your kitchen set with your own hands. If the hanging cabinets do not have doors or are transparent, you can upholster the interior of the kitchen furniture with fabric. The material should be selected from the overall concept of the interior so that it is in harmony with other elements. First, you need to take measurements of the cabinet and cut the fabric into the required pieces, leaving a small gap. Next, the fabric is tightly stretched at the corners of the niche and fixed with self-tapping screws or a furniture stapler. This restoration of kitchen furniture will make the room more comfortable and homely. In addition, dishes and decorative items on decorated shelves look very elegant than on a plain background, especially in Provence or country interiors.
Use of decorative inserts
If the decision has been made to paint the doors or even completely replace them, decorative overlay inserts made from wallpaper, self-adhesive film, ceramic tiles and rattan will help add individuality to the decor. As with gluing and painting, the canvas is laid horizontally and any dirt on the surface is removed.
It should be taken into account that ceramics are fixed to the facade using tile adhesive, and not for paper-based materials.
The peculiarity of installing rattan is that it must first be wetted, then cut and secured to the door facade with framing wooden or plastic strips. The strips that will secure the rattan should be prepared in advance. Pay attention to the edges; they need to be filed at an angle of 45°. To work you will need furniture nails without heads, a hammer and acrylic varnish. Rattan looks beautiful if you place it not across the entire width, but only in the center of the door facade.
Painting and moldings
Peeling paint, cracks, chips - all these are the consequences of long-term use of the kitchen set. You can eliminate them and update the furniture yourself using regular painting. Designers recommend choosing auto enamel, which in terms of properties and characteristics is significantly superior to acrylic paint. The substance makes the surface more durable, moisture-resistant, wear-resistant and resistant to mechanical damage. The advantage of acrylic paint is its low price (100–400 rubles per 1 liter), while auto enamel costs 2–3 times more. However, the acrylic surface will deteriorate much faster, so before restoring an old kitchen set with your own hands, you should carefully weigh the pros and cons.
Car enamel in cans dries quickly and is more convenient to use than with a brush
To work you will need:
- sanding machine or sandpaper;
- putty;
- primer;
- solvent;
- wooden planks;
- paint or enamel matching the color of the original appearance of the product;
- brush or roller.
It is better to treat the surface of the panel with a grinding machine, but the relief milling will have to be cleaned manually
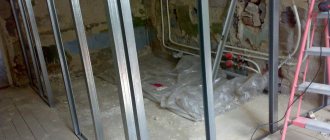
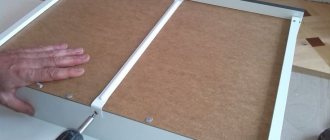
Before starting work, it is necessary to dismantle the facades and number each part of the set for ease of subsequent assembly. It is advisable to comfortably equip your workplace by covering it with newspapers or oilcloth so that paint does not get on the floor or other furniture. If there are decorative elements on the facades, it is worth sealing them with masking tape, like other fittings, including hinges. Then the surface should be sanded with a machine or sandpaper to remove old varnish or paint. If the set is covered with PVC film, it is recommended to use a hair dryer. This will melt the coating and make it easier to remove. While working, you must wear a respirator, since the smell from the film will be very pungent and toxic. Next, you should putty and prime the surface in two layers and leave to dry.
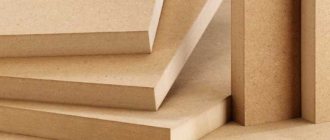
MDF or chipboard are porous materials that require priming before painting
During this time, you can prepare the moldings. They can be smooth, textured, with imitation stucco - it all depends on the desires and capabilities of the owner. The wooden panels must be sanded and joined to each other at an angle of 45 degrees to form an even rectangle or square. After this, they should be applied to the dry surface and glued with construction adhesive or secured with nails without heads. The facade is degreased with a solvent, and the painting process begins.
It is recommended to apply paint or auto enamel with a brush in one direction, or you can use a soft roller if the surface is large enough. To update the headset, you can use an aerosol, but during operation you must wear a respirator and goggles. After the layer has completely dried, the procedure should be repeated 1-2 more times. After a day, the parts can be installed in place.
The ends of furniture doors are painted especially carefully.
Painting is a simple method to update a set
An acceptable method for updating a kitchen unit yourself is the method of painting surfaces. To do this, you need to have a spray gun so that the composition applies evenly, and a coloring agent.
Before starting work, you should remove the fittings and dismantle the fasteners, but first mark them so as not to confuse them later. Then all elements are thoroughly washed with a damp cloth to remove grease, dust and other contaminants. Surfaces are wiped with a dry waffle towel.
Paint comes in a variety of colors: some types have virtually no odor and dry quickly, but others can cause dizziness and require a long drying period. It is better to carry out work with open windows or in the fresh air. Facades are not laid on newspapers or other thin paper surfaces, but on corrugated or film elements. This is necessary to prevent the work area from sticking to the door. Paint is also applied to the curves of the facades.
Varnishing, glisal or stain treatment
Sometimes ordinary coloring seems very banal - then glisal comes to the rescue. This is a thick translucent paint with a glossy finish. It must be diluted with water in the proportion specified in the instructions. The working technology is the same as conventional painting, however, while the layer is not dry, the surface of the set can be given an unusual texture. Using polyethylene or a damp sponge, move it chaotically along the facade, leaving behind fancy patterns and lines. If you don’t like some of the drawings, you can remove them with a roller. This method of updating kitchen facades with your own hands will appeal to lovers of decoupage and ethnic style.
Painting a wooden facade with glisal
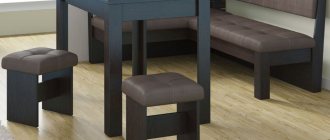
For a wooden set, regular varnish is suitable. Such restoration will help preserve the original appearance of the product without disturbing its structure and design. It is advisable to do the opening with varnish on the street or in a non-residential premises, since the substance has a sharp and pungent odor. The same goes for stain. This is a coating with which the set takes on a retro look. Aging furniture will also suit a Provence or country interior. Both stain and varnish are applied to a previously cleaned and sanded surface. After work, you need to leave the set to dry for a day.
Lacquered kitchen sideboard with painted elements on the panels
Tabletop restoration
The question of how to update a kitchen countertop is one that comes up most often, since the surface is systematically subject to mechanical damage and quickly becomes unusable. The most budget-friendly options include painting and varnishing, but a more practical method would be decoupage and finishing the set with ceramic tiles. It’s good if the material is combined with the finishing of the apron - then the interior will look stylish and harmonious. The tiles are glued to the base using a special glue, which firmly fixes the parts and dries quickly.
When it comes to restoring a kitchen table, varnishing and painting are also suitable here. If the product is made of fiberboard, you can use film gluing and decoupage techniques.
Small scratches and gouges can be repaired with wood putty.
Polishing the tabletop with a felt wheel
DIY kitchen renovation ideas
How to breathe new life into old kitchen furniture? There are quite a few ways:
- Decorating with stickers will help hide minor scratches and chips.
- Covering with film will hide more serious damage.
- Painting gives a completely different look to the facades of kitchen units.
- Applying varnish is usually used to restore and protect furniture made from natural wood.
- Decoupage is the application of appliqués or raised patterns.
- The use of moldings and decorative overlays made of wood or plastic.
Decorative stickers Facades covered with film Kitchen updated with varnish Painted facades from MDF Decoupage Decorative furniture overlays
To achieve a better result, these methods are combined. Let's take a closer look at restoration methods and features of restoration of different types of facades.