Why do you need a router table?
To operate the router, it must be securely fixed to the surface of a metal plate attached to a stationary table. After all, it is more convenient to work with a rigidly fixed tool than to hold it in your hands. Purpose of the router: curly processing of edges, selection of grooves. It can be used to process slabs of any type of wood and drill holes of different depths and diameters.
Moving the workpiece along the surface of the tabletop is much more convenient than holding the tool suspended. Fine-tuning the cutters helps to increase the accuracy of the lines drawn on the workpieces.
For reference! Online stores offer a wide selection of milling tables. A particularly wide range of models with complete equipment is presented by the German company Bosch.
You can buy a milling platform or try to make it yourself from fiberboards. A homemade table will cost much less than its industrial counterparts. The following is a look at how you can make a table for a router at home.
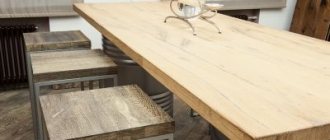
Tabletop drawing
Instructions
When assembling a homemade table for a router with your own hands, it is recommended to use the proven instructions below. Try to repeat all the given steps exactly.
First of all, we take pre-prepared bars and trimmings of boards. We turn them into legs. On the right side you need to cut a hole for the start button. It will be attached to the router.
Using prepared plywood you need to build a table top. It should be made so that it can rise with the router. To do this, you need to attach loops and provide additional support.
Read here - How to make plasticine with your own hands: recipes and methods for making homemade plasticine. Step-by-step instructions for creating smart plasticine + master class!
In the resulting tabletop, you need to cut something like a groove so that you can move the workpiece that will be processed smoothly. As a result, we attach the metal profile to this groove.
Now you should make a longitudinal emphasis. To do this you need to use cutting boards. You need to make it adjustable around the gap cutter.
In order to achieve mobility, you need to make nests in the upper part of the stop and attach it to the finished tabletop. In the middle you need to cut a hole for chips and waste. You can make it at your own discretion, but it should not be too large.
The next step is to take a metal plate approximately 16mm in size. You should screw it to the countertop so that it is flush with the surface.
Be sure to ensure that the edges do not extend beyond the tabletop area. Otherwise, the parts you are processing will cling to them.
Take a router and attach it to the plate. To do this you need to use bolts. It is recommended to make holes for them first.
We take the prepared jack, with the help of which we need to change the height of the cutter. Try to be as precise as possible when performing this step.
The last step is to remove the handles from the tool, screwing the aluminum guides in their place. They need to be connected with a jack.
Do-it-yourself sewing machine repair: rules for operating a sewing machine. Problems with sewing machines and step-by-step instructions on how to fix them yourselfDIY sewing machine: primitive models and tips on how to build a machine (100 photos and videos)
How to make a crossbow with your own hands: step-by-step description of making small arms (video + 95 photos)
If you repeated all the points exactly as in the instructions, then in the end you will get a wonderful milling table with an adjustable tabletop.
If something did not work out or turned out wrong, re-read the instructions more carefully and look for an error in your actions.
What is a milling table: design
The simplest homemade milling table for a manual router should consist of a working surface and a bed. It is complemented by limit strips and adjusting devices.
A do-it-yourself router table with drawings can be found for free on the Internet. Schemes are given in three types:
- small structures that can easily be installed on any work surface;
- side tables with fasteners to another work surface;
- stand alone from other devices, with multiple operating functions and tool storage.
In any of the designs, the base of the table is a strong, smooth tabletop made of hard materials, with fasteners for fixing the router with the possibility of adjustment. Wood and chipboard sheets are suitable for making countertops. The supports can be made of solid timber with dimensions of 40*40 millimeters.
Tabletop small table
All parts are fastened together using screw conveyors. The device must be stable, rigid in shape, able to dampen vibrations, and at the same time be light in weight, so that it does not make it difficult to change location.
A hole is cut in the surface of the table, onto which a metal plate is placed that can protect the wood from possible damage.
Small milling table made of wood
This design is equipped with a lifting mechanism, which consists of a system of levers and a lead screw. A drill or screwdriver can be used as an electric drive.
The idea of making a compact table for a hand router with your own hands belongs to the author of the YouTube channel FACIL LH.
Necessary materials:
- MDF;
- wood screws;
- wooden blocks;
- threaded rod;
- nut and socket head.
The first step is to make a lever system for the lifting mechanism. It consists of three main parts.
To make hinged joints, the craftsman uses wooden blocks. However, it is easier and more convenient to make these parts from plywood.
In any case, to cut sheet materials you will need a circular saw (manual or stationary).
We connect the assembled elements of the lifting mechanism together, as shown in the photo below.
We make a tabletop from MDF sheet. We drill a hole in it for the cutter. We screw the base of the homemade product - a manual router - to the bottom of the working surface.
The next step will be to install the assembled lifting mechanism under the tabletop. We screw in the lead screw (threaded rod), onto the end of which we screw a nut.
Next you will need to make the support legs. For this we use wooden blocks 50x50 mm. We attach the support legs from the bottom of the working surface.
The homemade table for the router is ready! As you can see, it is not difficult to assemble. You will have to get a little confused only at the very beginning - when manufacturing the elements of the lifting mechanism.
We put a socket head on the nut that is screwed onto the lead screw. You can adjust the offset of the cutter manually - using a socket wrench or a screwdriver.
The step-by-step process of making and assembling a milling table with your own hands can be seen in the video below.
Among the main advantages of this design, it is worth noting the low cost - you can use used materials that are left over after construction, renovation or other projects.
The ability to quickly adjust the reach of the working cutter using a screwdriver is also a useful option.
Main parts of a milling table
Before starting to manufacture the device for installing the router, a drawing is developed detailing all the elements and fastening points. The basis of the design is a frame that fits tightly to the floor surface. The working surface is attached to it using bolts. A pump is also attached to the base, supplying the cooling mixture to the device, and a container for collecting it.
Schematic drawing of the device
The mechanism can move in vertical and horizontal directions. High-alloy steel is used for the manufacture of guides. For the vertical direction it is attached to the front wall of the frame, for the horizontal direction - to the top.
When processing edges, a stop with parallel bars, a movable carriage, and fine-tuning and locking screws are used to move the cutter in a straight line. The guide rail is similar to a rip fence. Its advantage is that it can be installed at the angle desired by the master.
The tire and stop are attached to the frame using special clamps. The guide bar can be made at home from 2 wooden blocks securely fastened to the workpiece.
Groove Tool
All processing of parts is carried out with milling cutters of different shapes and sizes equipped with a cutting surface. The relationship between the gearbox and the cutting tool occurs using a thermally hardened steel spindle.
Important! The milling device produces a lot of dust during its operation, which poses a threat to the health of the person working on it. To remove dust, an ordinary home vacuum cleaner is adapted to the homemade device.
Without a dust collector, an expensive tool can quickly become unusable.
The dust collector usually becomes clogged with dust within 5-10 minutes. To prevent this from happening, craftsmen came up with a device with a water filter to catch the smallest particles of debris.
Water filter for a vacuum cleaner made from an aluminum pan and a plastic bottle
On the front side of the panel there is an input switch, as well as mode and cooling switches. There are start and stop buttons to turn the spindle on and off.
To increase the working area of the table, you can attach folding wings on supports to it using furniture hinges. Designs with drawers and shelves are very convenient. Dimensions depend on the workshop space.
Convenient, compact design, where everything is at hand
How does a milling table work?
The main differences between a milling table with a finished machine and a home-made machine for the same purpose are as follows:
- The table is made according to the design of a vertical milling machine with a bottom drive, while a homemade machine can be both vertical and horizontal. However, the latter does not provide any tangible advantages over the vertical one at home.
- The milling table can be easily equipped with a lift - a device for smoothly and possibly quickly adjusting the protrusion of the cutter above the work table.
- The workpiece stop system of a milling table can be improved compared to a home-made machine to improve the accuracy and cleanliness of processing.
- The table-mounted milling machine is reversibly modified (see below) so that it can be removed for manual work.
How a simple milling table for woodworking works is shown in Fig. Cabinet (bed) - any sufficiently strong and stable design, because The main vibration damping is carried out, except with the router itself, by the base plate. Therefore, the cabinet in this case is not actually a bed, because is simply a supporting structure.
Setting up a homemade wood milling table
On a simple table it is difficult to achieve high-quality processing of workpieces with a large width-to-height ratio. A completely flat board on an equally flat table suddenly, for no apparent reason, moves jerkily, the cut turns out to be uneven, or even the workpiece is bitten by the cutter. The reason is longitudinal, i.e. horizontally propagating elastic waves in the workpiece material. The comb vertical stop (see below) does not have time to absorb them, and antinodes (foci) of vibrations appear on the workpiece, spoiling the whole thing.
The horizontal stop is designed for such a situation, see next. rice. It is always performed with a comb, because is primarily a vibration absorber. For the same purpose, a second vertical comb stop is added.
The device of a wood milling table with the ability to process wide workpieces
In Fig. a table with 2-sided stops is shown, designed to feed the workpiece back and forth, see below. For a homemade table for ordinary carpentry work, it is better to make one-sided stops (see below): they are technologically simpler and can be made from ordinary hard, fine-grained wood (oak, beech, walnut). In any case, the most critical structural components of a homemade milling table are:
- Support (work table) and installation (mounting) plates;
- Stops – comb and blind (simple);
- Milling machine lift.
Plates
The base and mounting plates of a milling table are structurally identical to those of the same machine. An example of the design of a base plate for a milling table made of 2 layers of 19 mm plywood is shown in the figure:
Construction of a base plate for a homemade wood milling table
Its main disadvantage is its high cost: birch plywood (bakelite is even better) of grade no lower than Ib. Meanwhile, having spent a little more time and labor on gluing a multilayer plywood “pie”, it, and even better quality, can be made, as for a milling machine, from cheap 4-mm construction (grade II) or packaging (non-grade) plywood. The required wear resistance and strength are ensured by impregnating the sheet with a water-polymer emulsion before cutting (a full-fledged substitute is the construction primer EKO Grunt), and vibration-absorbing properties by layers of PVA glue. Dried assembly (reinforced) PVA produces a viscous elastic film that perfectly damps vibrations, but even without that, the height space in which the elastic wave can gain strength is reduced by five.
Note: plywood is glued from veneer sheets with cheap casein or similar synthetic glue, which has vibration-damping properties only to a small extent (its layer is hard and brittle). Plywood glued with PVA would be completely unprofitable.
The design of an installation unit with increased vibration damping for a milling table is shown in Fig. and exactly the same as for a milling machine (see the corresponding article).
The device of a vibration-damping installation unit of a milling machine for a homemade wood milling table
And the procedure for making the base plate is the same: a sheet of plywood is impregnated 2-3 times on each side, then cut out (immediately with cutouts for the router). It is better to make a car window round or with rounded corners. The bag is glued according to the glue instructions and dried for at least 2 days under dispersed pressure for approx. 100 kg/sq. m slabs; a very good load - stacks of books and/or magazine files.
Plate for the router and its modification
The installation (mounting) plate of the router is made of fiber-laminated vibration-absorbing thermosetting plastic: textolite, fiberglass. Massive thermoplastic materials - hardboard, etc. - are somewhat worse at absorbing vibration. Thermoplastic plastic may warp when heated during operation and the machine will lose accuracy. Massive (ebonite, bakelite) or layered thermosetting plastics (getinax) are unsuitable - they very soon delaminate and crack due to vibrations and heating.
How the machine is modified for installation in a milling table is shown in the figure:
Reversible modification of a manual router for installation in a router table
The lock of the standard sliding work table (shown by the arrow on the left in the figure) is released (pressed out). The standard table is then removed and placed on compression springs (in the center) with a total force of approx. 1.5 car weight. The base of the standard table (shown by the arrow in the center) is removed, and a mounting plate is attached in its place (on the right in the figure). Restoring the machine for manual use is done in the reverse order.
Stops
Since a homemade milling table is capable of providing better accuracy and cleanliness of processing than the same machine, it is advisable to modify the stop system for it. Stops, as in the machine or in Fig. above with a picture of a simple table, are suitable for the manufacture of non-facade (decorative) parts, because The straight L-shaped blind stop still strongly transmits vibrations back into the workpiece and makes it difficult to feed it (a workpiece made from ordinary industrial wood can jam).
Drawings of oblique comb and blind vertical stops for a homemade wood milling table are shown in Fig. Structurally, the comb stop for a table is somewhat different from that for a machine (all teeth are the same), because The whole unit doesn't shake as much anymore. Maple is one of the best vibration absorbers, but seasoned, without defects, knots, twists and cross-layers, commercial maple wood is an expensive and scarce material. It can be completely replaced by oak, beech, hornbeam, and walnut.
Drawings of vertical stops for a homemade wood milling table
Note: an even better vibration damper is elm wood. But defect-free mature commercial elm is practically not available for general sale, because All of it goes into lasts for sewing expensive leather shoes and important machine parts.
Fixing the comb stop of the milling table with a locking block
The comb and blind stops are installed in pairs (the blind stop is the first along the workpiece), see the inset in the center in Fig. They are fixed with a locking block (stopper), highlighted in red in Fig. on right. However, placing a comb with a capercaillie before the cutter along the course of the workpiece when feeding it, as shown there, is still wrong: the main “shaking” occurs behind the cutter. But installing 2 pairs of comb-grouse, before and after the cutter, is not prohibited and is useful for processing accuracy.
Back and forth emphasis
Workpieces made from homogeneous high-quality materials (MDF, post-forming for kitchen countertops, selected thin-layer wood) are often milled using the back-and-forth method: the part is pushed onto the cutter and immediately, without turning off the router, pulled back. The combination of up and down milling in one pass (see the article on the milling machine) gives the cleanest surface.
Note: parts milled back and forth are quite suitable for veneering and lamination.
However, it is impossible to place a pair of oblique combs turned in opposite directions for milling back and forth: the workpiece will jam on the incoming ridge. For back-and-forth milling, the workpiece is supported by pairs of vertical and horizontal straight combs (see figure above): their ridges (and grooves between them) are perpendicular to the working surface, and the working parts of the combs are trapezoidal in plan with bevels 60 degrees from the perpendicular (30 degrees from the sole of the comb). Unfortunately, the choice of materials for making straight 2-sided combs yourself is limited: defect-free, seasoned commercial maple, elm, teak.
Note: on sale there are straight combs for wood routers, cast from polypropylene. I don’t know how they work, I haven’t tried them.
Elevator
The simplest elevator designs for a wood milling table are a rigid cam (pos. A in the figure) and a wedge (pos. B).
Cam and wedge lifts of wood router table
Their common advantage is the ability to make the base plate folding for easy access to the router. But the overall huge drawback is instability, the machine slides down due to vibration. In fact, after 1.5-2 m of cutting, the elevator has to be reinstalled. A cam elevator, in addition, in terms of ease of use, is not much better than a homemade milling machine elevator that is adjustable with washers and rubber.
The optimal design of the milling machine elevator in the table is screw, see next. rice. If the lower flange nut is additionally secured with a lock nut (or a self-tightening flange nut is installed), the cutter offset is held firmly. And it can be truly adjusted, literally while the workpiece is being processed.
The device of a screw elevator of a milling machine in a homemade milling table
Types of milling cutters
Milling cutters vary in power, number of motor revolutions, milling depth, processing method, and weight. Lamellar ones are intended only for cutting grooves. Filler holes - paired holes in furniture parts. Rational ones work not only on wood, but also on drywall, plastic, and ceramics.
The best option is trimmers, as they are the most functional. They can create grooves, grooves, and remove chamfers. The most versatile are submersible. They can do all the operations inherent in other types of router.
Preparing for work
You can make a milling table for a manual router yourself. The materials you will need are: wood or rolled metal, wooden beams, angles, self-tapping screws, bolts with washers and nuts. For the countertop, use laminated chipboard or thick sheet plywood. The finished stand for the milling machine resembles a table for a circular saw.
Before you start processing parts, it is worth checking the operation of the device at idle speed, without load.
Some rules:
- The working area should be 2 times the dimensions of the router.
- There should be no fuels and lubricants in the room.
- The device itself must be in good condition.
- Nothing should prevent the spindle from rotating.
- Check the presence of coolant mixture supplied to the milling cutter.
Important! We must not forget to lubricate the friction points of parts in a timely manner.
Milling table design
It is customary to take strong sheet material as the basis for the design. It could be:
- MDF board;
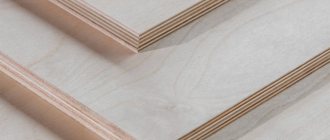
- thick plywood;
- board made of boards of any thickness.
For each type of table, a material that is convenient for processing is selected. But it is logical to assume that the working part itself (the cover) or the plane receives the most load. Therefore it must be made of metal. Stainless steel is the ideal option.
Important! The working surfaces of the structure should not absorb moisture or the resin of raw wood.
To install a manual router, use a classic workbench or assemble a separate structure. The latter must be as stable as possible, since vibration during operation is guaranteed.
The tool itself is installed at the bottom of the table or workbench, so they provide such a position so that it is easy to remove and put back the hand router. After all, stationary milling machines are increasingly used for woodworking not on an industrial scale. In theory, nothing complicated: they assemble the stand, mount a power tool (drill, not a new router). If you try, then such an installation will not be inferior to the commercial version, because the master prepares the device for himself.
Manufacturing stages
Before assembling the structure, you should prepare all its components and check their compliance with the dimensions indicated in the drawing. Step-by-step manufacturing instructions:
- making a frame, coating wooden parts with paint and varnish, priming metal parts before painting;
- securing the working surface to the bed;
- making a recess in the frame for installing a metal plate with a slot for a cutter, onto which the tool itself will be attached from below;
- insertion of guides for mounting the stop.
Note! All connections must have a countersunk head and not rise above the work surface.
For safety reasons, the on and off buttons are installed on the side surface of the frame.
Marking the tabletop for the profile, mounting plate, grooves
How to make a table for a router with your own hands?
For example, consider a full-fledged workbench with a chest of drawers for placing equipment. Of course, before starting work, you need to sketch out a drawing (according to the dimensions of your hand router) and make a list of materials:
- Boards or wooden blocks for making a frame.
- Chipboard sheets or solid wood panels for side panels and drawers.
- Hardboard sheet (fibreboard), or thin plywood for partitions.
- Two sheets of plywood 18-25 mm thick, or a finished kitchen countertop.
- Screws, bolts, confirmat, steel angles for assembly.
- Measuring tools: tape measure, ruler, angle.
- PVA glue.
Woodworking tools: circular saw, drill, plane, wrenches, screwdrivers.
We are preparing the supporting structure of the bed. Before tightening the screws, coat all connections with glue.
We assemble the frame on a flat surface. We check the geometry: everything should be parallel and perpendicular.
We install partitions (they will act as stiffeners) and assemble the box for the router. The box is needed to prevent shavings and sawdust from being scattered around the room. In the future, the socket of a construction vacuum cleaner can be adapted to it to remove debris.
We install the main element - the working plane. It can be made from two sheets of plywood by gluing them together. To prevent vibrations, the thickness of the table should be at least 5 cm.
You can use a ready-made kitchen surface (available in furniture stores). The main thing is that the top layer is durable and smooth.
A steel plate is installed on the tabletop, flush with the surface, to secure the router base plate. Also, it is advisable to embed profiles into the table to fix the guides.
It is advisable to fill all free niches with boxes in which equipment and devices for fixing workpieces will be stored. Some boxes are replaced with stands for cutters: holes are drilled in the thick bottom of the board according to the diameter of the shanks, and the cutters will not touch each other.
To ensure safety, it is advisable to install a safety cover in the working area, as on industrial models.
A cutter sticking out of a table is a serious danger. If your hand slips from the workpiece, you may get injured. Another way to ensure safe work is a foot pedal switch. A simple circuit is assembled: a socket is installed between the power cord of the electric router and the common network cable, which is turned off with a pedal. Approaching the workbench, you press the pedal and the motor turns on. After finishing the work, or in an emergency, the foot is removed from the pedal and the milling machine stops.
The finished table looks aesthetically pleasing and allows you to properly organize your work area, even in limited space.
Lift for hand router
In normal operation, the operator of a manual milling machine lowers the shaft with the cutter using the tool handles. We are talking about using the device without a machine. When the router is suspended upside down from the tabletop, the router is in what is called parking mode. A mechanism is required to lift the machine into the working position.
If there are several options:
- Fixing screw rod. Using a threaded rod, the required penetration depth of the cutter is set. If necessary, it can be changed.
- Lever mechanism. Allows you to more quickly change the height of the tool, even during operation. Expands the capabilities of the machine: in a sense, the router becomes three-dimensional.
- Helical trapezoid. Many craftsmen use a regular car jack as a lift. You raise the cutter strictly to the required height. It is convenient, and the position fixation is quite accurate.
The considered option includes all the nuances of manufacturing a table for a router. You can use the method 100%, or adopt only the necessary technologies.
How to make a mounting plate
Along with metal, plexiglass and textolite are suitable for working plates. It is worth remembering that the size of the cutter overhang depends on the thickness of the plate.
Please pay attention! Materials such as hardboard or getinax are not suitable for making a mounting plate. They do not tolerate vibration and high temperatures emanating from the motor.
Approximate marking of the mounting plate
When assembling the structure, fasteners and bolts with special heads inserted into the frame openings play an important role. Without them, rigid fastening of the workpiece to the working surface is impossible. The number of motor revolutions and the rotation speed of the cutter depend on the drive.
Safety at work
Working with a router without following safety precautions is associated with the risk of injury. The first thing you need to do before turning on the machine is to read the instructions for use. It doesn’t hurt to check the serviceability of the electrical part of the machine and cutting tools.
There should be no defects on the cutters. They must be securely fastened with a vice or other clamp. The cutter is replaced only when the plug is disconnected from the socket. Do not forget that even when the electrical power is turned off, the cutter continues to move by inertia for some time. There is no need to rush, it is better to wait until it stops completely.
When working with the machine, you must use goggles or a special shield to protect your eyes, and your respiratory system - a respirator or dust mask. Hearing is protected from excessive noise with headphones.
Important! You should not work as a milling cutter in a house or apartment, exposing your loved ones’ breathing to dust and their hearing to loud sounds.
Making a homemade tool will delight you with its low price, ease of operation, ease of assembly and maintenance.