Needlework
06/02/2018 Anastasia Prozheva
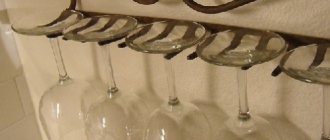
There should be a clothes hanger in the hallway of any apartment.
In various sources you can find a lot of information on how to make a hanger in the hallway with your own hands. For its manufacture, you can use a variety of materials.
What tools are needed
To make a hanger for the hallway, you need skillful hands, the simplest tools and materials. You can use twigs and twigs for various elements; they will give an unusual and creative appearance.
You can't do without them!
To make a hanger you need to prepare the following:
- screwdriver and screws of a certain diameter;
- grinder saw for cutting boards;
- if you plan to install a wall structure, then you need to prepare dowels;
- drill;
- building level;
- pencil for marking;
- sandpaper for cleaning uneven areas.
To make some models, you need to prepare metal corners and a jigsaw designed for cutting out beautiful individual elements. In some cases, when creating a monumental metal structure, the use of welding equipment is required.
DIY clothes hanger: 16 creative ideas
The comfort in the house depends on us - this truism is known to many needlewomen and craftsmen who, wanting to increase the comfort of their stay in it, constantly resort to independent production of decorative items - decorative vases, pillows, rugs, etc. Today we’ll talk about what a DIY clothes hanger might look like and what it can be used for.
DIY clothes hanger: types and options
Hangers are different. We use some of them for clothing, others for hanging small items and accessories. Moreover, among them we can distinguish wall and floor hangers. Be that as it may, in both the second and first cases, it is quite possible to do them yourself, even without having special knowledge. Here are some interesting ideas:
Materials for production
Assembly diagram.
A do-it-yourself hallway hanger can be made from various materials. The most common are boards, plywood, bars or scraps.
Wood boards can be used for production; for a beautiful appearance, it is better to take one with a laminated surface. In general, wood is great for such structures and looks great in any interior.
You can come up with a rather unusual type of hanger. If there is an old floor lamp in the apartment, then it can be used for a floor-type design.
To do this, you need to remove the floor lamp with lamp mounts, and paint the remaining part in a suitable color. It is important not to forget to attach metal hooks to the top.
A hanger in the hallway is a very important piece of furniture. It should be large and comfortable; it can be purchased at a furniture store, or you can make it yourself.
Article on the topic: Mushroom Amanita. Crochet amigurumi
Drawing of a floor hanger.
It is better to use natural materials, they are environmentally friendly and have a beautiful appearance. It is ideal to use wood, it is easy to process.
You can use the most unusual objects as hooks. For example, unusual options include using teaspoons bent in half or aluminum forks; in any case, the wide part should be used as hooks.
It’s a good idea to use thick wire as hooks, which can be decorated with a variety of decorative elements, such as beads or beads.
Tall hanger in the hallway
If there is no space for a wardrobe in the hallway. You will need more space, especially during the off-season, to place outerwear in the hallway. Here a high wall hanger 170-180 cm high will come to the aid of the housewife. Its width must be at least a meter. Even a teenager can do it with his own hands. Its only disadvantage is the high cost of the lining.
You can use platbands for interior doors for external decoration. This material is cheaper, looks very attractive, and has a large selection of colors.
The disadvantage is that it is not designed for heavy weights. In order for the hanger to be not only a decoration, but also a functional piece of furniture, it is necessary to use durable pressed material or blocks of natural wood for the crossbars located behind the decorative boards.
Article on the topic: Making a play house - a tent for children on the balcony (+32 photos)
For a hanger you will need 6-7 platbands. They will be attached to the crossbars with self-tapping screws that hold the hooks. You can fasten the vertical elements parallel to each other, or you can allow the hanger to expand at the top. In this case, it is necessary to mark the center of the shelf for the hooks, and begin installation from the central board. After which it is necessary to fasten the elements in pairs on both sides of it. To facilitate installation, you can first fasten the transverse elements to the wall, and then fasten the vertical elements.
When creating a strictly rectangular vertical hanger with your own hands, you can attach the slats starting from the edge. Here it is necessary to maintain the interval between elements. The hooks must be secured with long self-tapping screws in the places where the boards pass, creating the stiffening ribs of the structure.
It is the board, and not the top decorative layer, that will hold the hooks with outerwear. The more rows with hooks, the more natural wood behind the outer façade.
Wall hanger
A wall hanger in the hallway is a specific shield, most often made of wood. There are hooks on it.
Drawing of a wall hanger.
You can make it solid or in the form of a lattice. The latter option is more convenient because it uses less material and also weighs less than a solid one.
Progress:
- Two parallel horizontal boards are attached to the wall using dowels.
- After this, attach vertical boards to them, to which you then need to attach hooks.
- The size of the hanger can be varied, it all depends on the size of the hallway. The hanger can be decorated with decorative elements or the surface can be covered with a special solution.
- If desired, a metal corner is installed on top, which will serve as a shelf for hats and caps.
- If the design is provided for the entire length of the wall, then in this case an original bottom shelf for shoes or some things will look relevant.
Small and large iron structures
There are no standards regarding the size of wrought iron hangers. The dimensions of the future product should be determined based on the area of the room and its technical features .
You should also take into account the stylistic and color characteristics of the room. Analysis of these indicators will allow us to produce a forged hanger that will organically complement the space.
Reference. Photos of forged hangers are presented in the corresponding section of the kovka-svarka.net gallery. Products of various shapes, types and sizes will allow you to make the best choice and bring your idea to life.
floor hanger
A do-it-yourself floor hanger for a hallway should have a thick base and it should not rotate.
Assembly stages.
To make such a design, you must perform the following steps:
- For the base, take a heavy material; the bottom of a floor lamp or any other structure that is stable on the floor is best.
- If there are no such items in the house, then you can put together a cross from wood, for which various bars or boards can be used.
- After this, we make a hanger post; for this you need to take a block, the length of which will depend on the intended design.
- If wood is used, then the block must be sanded, then varnished; if it is metal, then a welding machine will be needed for the work.
- Attach hooks to the top of the hanger.
Related article: Crochet New Year's toys: master class with diagrams and videos
How to make (forge) with your own hands: preparation, equipment, manufacturing, painting; video
The production process of forged hangers consists of several stages :
- sketch development;
- manufacturing the required number of parts or purchasing ready-made elements;
Reference. You can purchase ready-made parts for making hangers from specialists. Manufacturers offer a wide range of products of this type. Using the elements, products of various styles and designs are created.
- assembly;
- forging painting;
- installation.
The reviews presented below will allow you to study the production process visually.
Forged wall coat hanger, decorated with monograms, houndstooth pattern and texture, DIY hot and cold forging. Part 1
This two-part review is dedicated to making a forged wall-mounted clothes hanger.
When producing the product, the master uses 12 mm strip and rod.
On the blanks, the performer marks with chalk where the textured surface will be.
The bottom strip, on which the hooks are located, as well as the side parts with monograms, are made from a textured strip. Volutes are created from a rod.
The texture is applied using a homemade stamp; the parts are first heated in a forge.
The shape of the ends of the workpieces: a crow's foot on the strip and a curl on the rod - is given with the help of a hammer and an anvil.
After punching the texture, the pattern is marked along the edges with stripes to highlight the boundaries; this is done with a cutting wheel.
On a snail machine, rods with texture are twisted into curls. The procedure is carried out without heating, since there is a possibility of metal breaking in the places of cuts.
Forged wall coat hanger, decorated with monograms, houndstooth pattern and texture, DIY hot and cold forging. Part 2
Volutes are also made from rods, the tips of which are offset so that they do not interfere with the fit.
Hooks are made from 6 mm rods.
All elements are prepared, the master begins assembly.
At the very beginning, a corner (bracket, side part) is assembled, to which monograms are then welded. The second bracket is assembled in a similar way.
The hanger shelf is made of rods with a diameter of 8 mm. The elements are grabbed to the side parts.
The volute pattern and the bar on which the coat hooks are located are attached to the product.
The master performs the final welding and cleans the seams.
Holes are drilled in the legs for attaching the hanger to the wall.
Moose antler hanger
Walking through the forest, you can see an amazing find - moose antlers. This material makes an original and very beautiful product in the form of a hanger. How to make a hanger for the hallway with your own hands?
The manufacturing scheme for such a design requires the preparation of the following tools:
- needle file;
- sandpaper;
- varnish;
- brush;
- self-tapping screws;
- screwdrivers;
- drill.
However, the antlers need a nice, dense base. A round cut of a tree with bark will look unusual. You can use a cut at an angle of 45° or 60°. Dried wood should be used, which can be processed to suit any taste.
Apple or pear trees provide a beautiful pattern and shade of wood. The combination of these breeds and antlers gives a very beautiful and unusual product that will decorate the hallway.
Before starting to make the structure, the antlers must be processed, since they become covered with moss if they lie in the forest for a long time. The needle file is used in the part that is adjacent to the head, this is the shaped part; the needle file should be processed in the direction along the grooved elements. The rest is cleaned with sandpaper.
If the antlers did not spend the winter in the forest, they will not darken much and will have a beautiful ocher shade. After processing, the horns are covered with a thick layer of varnish so that the final structure has a shine. It is best to do several layers.
After processing the horns, they begin to work on the base. It is also better to cover it with a protective layer; for this you can use varnish of various beautiful shades. After this, a small hole is made at the base of the horns; you can also make several in diameter.
They are necessary in order to attach the antlers to a wooden base using self-tapping screws or self-tapping screws. If the horns are too heavy, then special dowels are used for fastening.
When making a hanger for the hallway yourself, it is important to think about what the design will be like, what color is best, and also choose the material for production.
Related article: DIY letters for school from any materials with photos and videos
Only in this case will you get a beautiful and unusual interior detail.
Children's hanger "Town". Master Class
Seeing the very familiar silhouettes of multi-colored houses on the banner of the “Cozy Houses” theme week, I suddenly remembered the homemade children’s hanger that my husband and I made last summer for our grandchildren. No, I had never seen these houses before - it just so happened that mine turned out to be very similar to them.
I did not prepare this MK specifically and therefore I apologize in advance for the not very detailed description.
Having come to visit our dacha last summer, my city twins were interested in everything that was new and unusual for them, but the washstand attracted special attention. It hung high, and after a detailed and lengthy study of the principle of its operation, the children had to be changed - the clothes were completely wet.
After this incident, it became clear that it was necessary to organize their own “mud hole” place for the children.
We decided to start with the hanger - although this is not a theater, it is also an equally important thing in such a place. The simplest option is to hammer a couple of nails into the wall, but this is neither interesting nor aesthetically pleasing.
The first thing I thought about was buying a piece of wood and making a vintage hanger, but I had to go to town to get it, and that would waste precious time. Although I really like shabby chic, we have more than enough of it at our dacha, and it’s the real thing. Therefore, we decided to make everything ourselves and paint it brightly, but succinctly, so that everything would look in harmony with the bright yellow washbasin we already had. Moreover, all the necessary materials and tools at the dacha are always at hand.
Our grandchildren are a boy and a girl, so we didn’t make flowers or cars, but chose a neutral “town” theme with colorful houses.
For the work you needed basic materials and tools:
- sheet of plywood
- pencil
- ruler
- sandpaper and file
- PVA glue
- paint in aerosol cans - red, blue, yellow and green
- threaded hooks
- a jigsaw - preferably with a man who knows how to hold it in his hands, and who likes not only to go fishing on weekends, but sometimes to cut and plan.
- and not the basic ones: paper, scissors and a drill.
On the base (a sheet of plywood measuring 45x30cm), the upper corners were rounded and painted in two colors, first green, and then, adding a drawn and cut out outline of the clouds, blue. We drilled two holes on the sides - you can hang them on nails or tie a rope to them.
On another sheet of plywood measuring 45x15cm, I drew houses with windows and doors and went to work in the garden, and instructed my grandfather to cut according to the drawing, which he carefully did. I sanded all surfaces to avoid splinters.
The houses were painted in different colors with acrylic paint from an aerosol can, allowing them to dry first and covering the adjacent ones with a sheet of paper.
Separately, they cut out a machine similar in silhouette and color to the one that was the grandson’s favorite at that time.
All parts were glued together with PVA glue, pressing with a press. Two 45x5cm strips were glued to the bottom - the houses stood on one, and the car drove along the other, the “road”. Threaded hooks were screwed to the lower slats. You can choose any accessories to your liking.
The wall hanger turned out to be bright and very practical - it’s easy to hang it in any place you like, and you can take it home for the winter - use it in the hallway, bathroom or children’s room.
A hanger is only the beginning of arranging a washroom; there is still something to think about: you need a sink, a shelf for soap and other accessories. And we haven’t finally decided on the location yet, but that’s a task for next season, but for now everything looked like this -
The chair was conceived and made for working in the garden, but the children immediately liked it, it came in handy and fit well into the overall composition.
I think that everything else will be done just as colorfully, so that the washing process is fun and enjoyable.
So - to be continued...