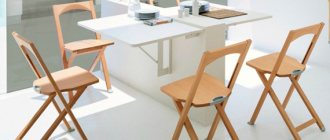
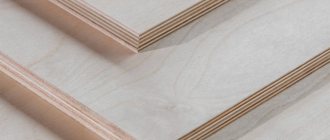
Plates made from this material are widely used in the construction and finishing of buildings, in shipbuilding and aircraft construction. They are used to make furniture and use them to cover the bodies of trucks.
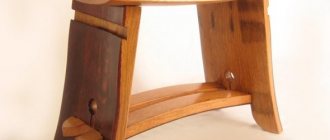
And with some skill, you can make a comfortable stool out of it in a short time.
Features of the material
Widespread use has given rise to a large number of varieties of plywood . They differ from each other in the following ways:
By type of wood used:
from deciduous trees (mainly birch);- from coniferous trees (mainly pine);
- combined (includes both hardwood and coniferous veneer).
By brand (they differ in the adhesive composition used):
- FBA – albumin casein;
- FC – urea;
- FB – bakelite;
- FSF – phenol-formaldehyde resin.
By grade (depending on the presence of various defects):
grade E (elite material);- first;
- second;
- third;
- fourth.
By environmental safety class:
- E 1 (releases no more than 10 mg of volatile formaldehyde per 100 g of dry weight, acceptable in residential premises);
- E 2 (for exterior use only).
Reference : the thickness of the slab depends on the number of veneer layers and ranges from 3 to 30 mm.
To make a stool, we choose combined plywood, since it is not inferior in strength to birch, but is much cheaper . Let's take FBA or FC brand. These types, although less moisture resistant than FSF and FB, are included in class E 1 for environmental safety, which means they are acceptable for use in residential premises. We will choose the first or second variety, since the elite one is too expensive, and the third and fourth have many defects. Let’s take the smallest sheet 1220×1220 mm; by the way, it will make two stools, 18 mm thick.
Stool and materials
It's all about the materials that are used in the manufacture of different types of stools. A traditional stool is usually made from wood or metal, rarely glass. Dense woods are quite strong, and therefore suitable not only for a simple stool, but also for the other two types.
The same story applies to the metal from which the legs and, possibly, the frame for the base are usually made - a durable material that can easily cope with loads, which will also be different for different sizes.
When thinking about where to buy a stool made of plywood, you may be faced with the fact that there are only simple small stools made from this material.
When you start making a stool from plywood with your own hands, you will understand that this material cannot be used like wood, because it is not for nothing that it is supplied in sheets.
When used correctly, plywood is a fairly durable material that can make a quality stool, but the design must be correct for this to happen.
Scheme and drawing
Many stool furniture manufacturers apply the following standards:
- Height – 450 mm
- Seat – 300×300 mm
Tip : These sizes can be reduced or increased if the product is intended for a specific person and you want to provide him with maximum comfort.
Let's look at creating a sketch using the example below.
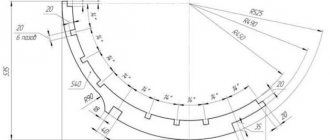
We mark out the parts of the future stool and start with the leg, as the most complex element:
- Draw a rectangle according to its dimensions on a sheet of plywood.
- We connect the middles of the long sides with a line.
- We retreat the same distance to the right and left of them and make marks on the middle line.
- We connect these points with the vertices of the rectangle.
- We select any round object (cup, saucer), combine it with the lines at the intersection and connect it with an arc.
We continue to draw the outline of the H-shaped leg with straight lines and round off their connection with each other with objects of suitable diameter.
Tools
To make a stool with your own hands you will need special tools and materials:
- jigsaw;
- electric drill;
- sander;
- shoe knife;
- mallet;
- a set of sandpaper of various grain sizes;
- square;
- roulette
- pencil;
- brush;
- furniture varnish;
- wood glue.
How to do it?
Before you start cutting the material, familiarize yourself with the secrets of cutting plywood. It always leaves chips at the cut site, which will then take a long time to sand and, possibly, putty.
Important : to reduce this defect to a minimum, you should cut with a jigsaw only from the front side of the plywood and always with a new sharp blade. Then the main chip will come from the wrong side.
Or you can, in general, get rid of chips. To do this, you need to cut through the top layer of veneer with a shoe knife along the entire contour line of the part. Then, retreating to the thickness of the jigsaw blade, cut a second line parallel. Do the same on the other side of the sheet and there will be no chips guaranteed.
Having cut out and carefully polished the three components of the product, we proceed to assembly:
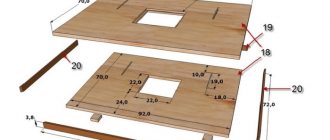
We connect the legs of the stool to each other through a groove in the center of the crossbar. The width of the groove should be equal to the thickness of the plywood sheet, and the depth should be half the width of the crossbar.- We place the stool cover with the wrong side up and attach the legs to it, with the spikes facing down. Align strictly in the center of the lid and outline the spikes with a pencil.
- Cut holes and check fit. The connection must be made with difficulty.
- We disassemble the product, coat the joints of the parts with wood glue and, using a mallet, assemble it completely.
- After the glue has hardened, coat the stool with furniture varnish in two layers with intermediate drying.
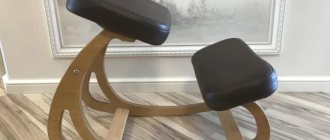
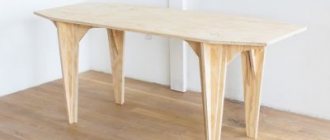
Tip : if you want something more comfortable, then instead of a stool you can make a chair or rocking chair. In general, you can even make a table or cabinet out of plywood!
Manufacturing workshops
After the drawing with dimensions is completely ready, it is necessary to cut out the material and cut out the patterns. Beginners will be able to make their own wooden kitchen stool, a plywood version, and a rotating model. A detailed description of the work process will help you make a solid design and avoid common mistakes.
Kitchen wooden
A wooden stool with a square seat is a classic model that has retained its relevance today. For work you will need boards 30–40 cm long and 2.5 cm thick, bars 3 x 3 cm. The tools you need to prepare are a screwdriver, a saw, a plane, emery, paint and varnish compounds, and brushes. The work is carried out in stages:
- The bars are sawn into 4 pieces of equal length, the parts are processed with a plane, and polished. These will eventually become the legs of the stool.
- The seat is assembled using boards measuring 40 x 20 cm. The area of the seat should exceed the parameters of the base by at least 10 cm. The surface is carefully sanded.
- The drawers are prepared in the same way as other elements; they are connected to the supports using a screwdriver; you can also use furniture hinges.
- Fix the footrests, the length of which coincides with the parameters of the drawers.
- Secure the frame and seat of the stool using a screwdriver.
- The finished structure is checked for smoothness and, if necessary, sanded again.
Homemade and chemical compositions for cleaning chair stains, stages of work
Making a wooden stool with your own hands is completed by painting. Aerosol formulations are suitable; using a stencil, you can apply any design to the surface. After drying, the product is coated with 1–2 layers of varnish.
From plywood
To build a stool from plywood, you need to prepare 3 parts with grooves. You will need an element for a seat with a diameter of 35 cm and a pair of legs 42 cm high, 20 cm wide at the top, 35 cm wide at the bottom. Tools and consumables will include a screwdriver, a grinder, wood glue, and self-tapping screws. The work is carried out according to the instructions:
- The plywood sheet is cut, all elements are cut out, and processed using a sanding machine.
- The base is secured using special grooves and additionally treated with glue.
- The seat and legs are connected with self-tapping screws.
After completing the main work, all edges are cleaned with a grinder or sandpaper. The finished plywood stool is coated with colorless varnish with your own hands. When the product is dry, you can use it for its intended purpose.
Prepare 3 pieces with grooves for the legs and 1 piece for the seat
Connect the supports by inserting the grooves into each other
Check the reliability of the fastenings, if necessary, apply wood glue to the joints
Connect the seat with the legs with self-tapping screws, using an embedded part for this.
The finished plywood stool can be coated with colorless varnish
Rotating
Chairs that can swivel are often used when working at a computer or while playing the piano. It is difficult for a polisher to make a screw stool, since the mechanisms have a rather complex structure. The work uses suitable schemes; you will need pieces of wire rod, a metal pipe, a pin, steel daisy washers, bolts, a piece of plywood, and rubber plugs. In addition, a rotating stool cannot be made without a drilling machine and welding machine.
Rules for selecting chair height for adults and children, standards
The process of creating a design includes several stages:
- The supports are bent from pieces of wire rod.
- 4 holes with a diameter of 8.2 mm are drilled in a metal pipe. It is necessary to retreat no more than 80 mm from the edge.
- The supports are welded to the pipe. Washers are fixed at the ends of the latter, then rubber plugs are inserted.
- An M12 thread is cut on a steel rod and the product is given the shape indicated in the stool drawings.
- 4 holes are made in the metal plate and shaped like the letter “P”.
- A hole is drilled in the middle of the pin to install a metal ball.
- A U-shaped plate is fixed to the opposite end of the pin.
- All elements of the mechanism are connected together and the seat of the stool is secured. The work is done using countersunk bolts.
If desired, the seat can be made soft during assembly of the structure. To do this, glue a suitable piece of foam rubber onto the plywood base of the stool. The upholstery fabric is stretched over the top and secured with a furniture stapler.
Photo
Ideas for decorating the resulting furniture can be seen in the following photos:
Stool decoration
And the final stage is registration. It directly depends on the room in which it will be used. You can take a stencil to apply a design to the surface. The most convenient way to do this is to use an aerosol can. Of course, be sure to apply varnish on top.
Another option is to make decoupage. This is a complex process, but it is quite possible to do it yourself. To do this, you will need PVA glue, napkins with a beautiful pattern, and acrylic varnish. If you don’t want to spend a lot of time on decoration, just decorate one seat. And for inspiration, look at the photo of plywood stools.
Source: fb.ru
