Stools with three or four legs, attached to a hard or soft seat using threaded metal axles through a metal frame or curved metal plates, have become widespread. Usually, to make the stool more stable, the legs are installed at an angle, which leads to uneven load on the threads, the legs unscrew, the threads deteriorate, and they begin to wobble and fall out. To avoid damage to the threads, if any weakness is detected in the fastening of the legs, they must be tightened in a timely manner.
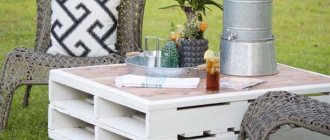
When beautiful kitchen fronts became available, I replaced all the doors and drawer fronts with modern MDF ones. The color changed and Soviet-made stools with rectangular seats the color of blue sky and dark legs began to stand out, introducing disharmony into the kitchen design. I decided not to buy new stools, but to remake the old ones; fortunately, the old kitchen façade still had doors in good condition made of laminated chipboard in a suitable color.
According to the shape of the seat, the stools could be made round or rectangular, with right corners or rounded. The choice fell on square-shaped seats with rounded corners. It is more comfortable to sit on stools with seats of this shape, they are easier to manufacture, the corners do not damage the walls and doors of kitchen cabinets when they touch, and it is easier to cover the ends of the seats with furniture edges.
Decoupage stools: master class for beginners
The decoupage technique was known back in the 17th century. Then, as now, paper or fabric were used as materials for decoration. Today, three-layer napkins are a popular material for decoupage.
Before you start decorating the furniture, you need to do some preparatory work and put its surface in order.
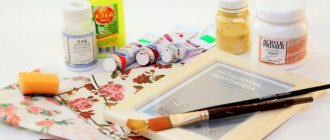
You can purchase special napkins or cards for decoupage in specialized stores, art stores and online stores.
Over time, stools in the kitchen become unusable. Many people do not like to part with old furniture - it can be convenient to use. Such furniture can be brought back to life. To do this, you need to decide on the materials and style in which the restoration will be carried out. Even a novice craftswoman can make decoupage. But first you need to familiarize yourself with the step-by-step actions.
Master class on decoupage of a wooden stool:
- Clean the surface of the stool from old varnish and paint.
- Sand the surface of the furniture with sandpaper.
- Seal cracks, if any. To do this, you should use putty, which can be bought at any hardware store.
- Cover the stool with acrylic paint - the color should not be too dark.
- Cut out selected images from napkins. Separate the top layer from the two bottom ones. Stick to the surface of the stool.
- Cover the stool with decoupage varnish.
The pasted image can be outlined. One of the options for additional decor could be coating the stool with craquelure varnish. The choice of decor style depends on the overall design of the room in which the furniture will be located.
Repair of stool leg fastenings
Before moving the legs from the old stool, you need to check the reliability of the legs, depending on the fastening design, to the mounting frame or slats. If, when screwing the stool leg until the thread stops, it continues to turn, then you can try to restore the rigidity of the fixation by winding a thick thread or flax fiber onto the thread, which plumbers use when threading metal pipes.
If you cannot firmly fix the leg in the mount using thread sealing with thread or flax, it means that the thread is completely damaged and the stool mount needs to be repaired.
Repairing the stool fastening can be done in two ways, using a stud with an M10 metric thread and a nut, or using an M10 bolt instead of a threaded stud. The final result of the repair will be the same and which method to use depends on the presence of nuts or bolts.
Fastening the stool leg with a nut or bolt
Depending on the hardness of the materials from which the stud and fastening strip are made, the threads may be damaged either on the stud or in the strip and this can be easily determined visually. If the thread is damaged in the bar, but is in good condition on the stud, then simply unscrew the stud from the stool leg by 10 mm, insert it into the fastening bar and screw the nut onto the stud.
You need to unscrew the stud using pliers, placing a piece of leather between their jaws and the thread of the stud so as not to damage the thread. If you can’t unscrew the pin from the leg with pliers, then you need to make edges for an open-end wrench on opposite sides at a distance of a few millimeters from the end of the pin, or, by holding it in the pin in a vice, unscrew it.
If the thread on the hairpin is completely damaged, you can unscrew it from the leg and screw the damaged end back into the leg. Thus, the thread at the fastening point will be new again, and if the thread in the fastening strip is still good, then it will be possible to do without fastening with a nut.
If, when repairing a stool using an old pin, it was not possible to securely fasten the legs, then you can fasten the leg to the seat of the stool using a bolt.
The thread in the stool leg is metric M10. Therefore, it is enough to tighten a bolt about 80 mm long instead of a stud. Thanks to the presence of a hex head, the bolt can be easily tightened with an open-end wrench with the required force.
After repairing the fastening elements of the stool legs, you can begin installing them on the new seat that was made. Usually, when removing the fastening elements of the stool legs from the old seat, the screw slots deteriorate, and often the screws themselves are covered with rust. It is better to replace them with new modern self-tapping screws 12 mm long. Before screwing them in, it is advisable to drill out the places where the screws are screwed in to the depth of its length with a drill diameter equal to half the diameter of the screw. Then, when screwing, a bump will not form around the screw, and the fastening strips of the legs will fit snugly to the plane of the seat.
The gap between the mounting strip of the legs and the seat of the stool is usually small and you will need to make a hole in the seat for the heads of bolts or nuts. The sample can be drilled using an electric drill with a perk-type drill. But be careful not to drill through the seat. If you don't have a drill, this job can be done with a chisel.
Repairing a cracked stool leg
After modernization, the stools served for more than 10 years, and suddenly I discovered that the leg of one of them began to sway.
When analyzing the cause, it turned out that the wooden leg had cracked at the thickened part along its length. As a result, the pin was not firmly fixed in the leg.
The hairpin was about eight centimeters long, the leg had a crack on only one side, and therefore in this case the easiest way to repair the stool was with epoxy resin.
Five milliliters of epoxy resin was prepared in a plastic bottle cap. Epoxy resin hardens within a few hours, so you can work without haste.
Next, all the prepared epoxy resin was poured into the threaded hole of the cracked wooden stool leg. The resin is quite thick, so I had to help it flow off with the flat blade of a screwdriver.
Now all that remains is to screw the leg onto the hairpin. At the base, the stud also needs to be lubricated with epoxy resin. A day later, a check showed that the leg was firmly held on the pin, and I hope it will last for many more years after repair.
Quick do-it-yourself decoupage of stools
The decoupage technique is quite easy. Of course, it requires careful execution at all stages of decoration. But you can make decoupage in just a few hours. The main thing is to decide in advance on the style and appearance of the images.
One of the nice things about this technique is that you don’t have to spend too much - after all, decoupage can be made from available materials
Every housewife can decorate a stool on her own. To do this, it is not necessary to have a specialized decoupage kit.
You can make decoupage using available materials. For example, instead of three-layer napkins, you can use simple photo paper. Images for decoration can be found on the Internet and then printed on a printer. It is important to note that printing is best done on a laser printer - the image will be of higher quality.
Quick decoupage from paper:
- Clean the surface of the stool from old coating and dirt.
- Putty the surface, make it as smooth as possible.
- Prime the stool several times.
- Create a background using acrylic paint.
- Prepare printouts of the image.
- Layer the paper sheet.
- Paste the image on the stool. Smooth out using a brush or roller.
- Cover the stool with varnish.
The decor of the stool can be made in different styles: vintage, Viennese, Provence, maritime, etc. It's interesting to select pictures yourself. On the Internet you can find many images that will allow you to realize the most original ideas.
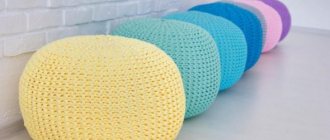
Do-it-yourself padded seat for a stool
You will need:
- ready-made fabric with a stitch or hand-sewn from cotton fabric with padding polyester or foam rubber backing
- white lace
- thin strap for decoration
- needles, threads, scissors, sewing machine
- Cut a square from the canvas and trim the corners according to the diagram below. When working, proceed from the size of your chair.
- Sew the corners of the seat with a 0.5 cm indentation from the edge.
- Hem the edges of the cover using a sewing machine or sew with a zigzag stitch.
- Sew the lace, forming small folds.
- The seat is ready. It can be decorated with accessories - for example, rivets with lace, buttons or beads.
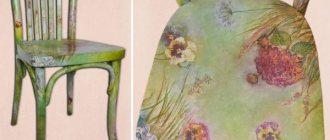
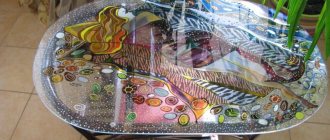
Vintage decoupage on a stool
Vintage style stools can be used to decorate a dining room, kitchen or veranda. Old stools or new furniture, for example, purchased from Ikea, are suitable for decoupage. Vintage style involves transferring images from a napkin to the surface of a wooden or plastic chair.
Cracks, scratches, chips - all these moments are characteristic of the now fashionable vintage style in the interior, so your decorated stool will look very impressive
If you are decorating a wooden stool, the first step is to clean it, putty and prime it.
It is better to select a picture for decoupage in advance. You should take into account the style of the room in which the furniture will be located. To make the decor look harmonious, decoupage the stools can be made with wallpaper, the same as on the walls.
How to make vintage decoupage:
- Prepare the surface of the stool.
- Preparation of pictures. Separate the top layer of the image from the two bottom ones.
- Paste the images in the chosen order. Smooth out and remove bubbles.
- Coat the stool with varnish.
You should take into account the quality of the material used to make decoupage. If the decoupage paper is too thick, it should be peeled off. You can skip this step, but then the thick paper will stand out, which sometimes gives the impression of a not very carefully done job. An image that is too protruding can be lightly sanded with sandpaper and then varnished.
Upholstery
It will sit softly. Photo: womanadvice.ru
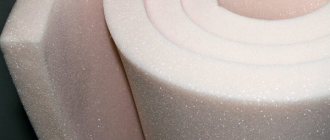
You can make a soft new one from an old hard stool. We will need:
– furniture stapler
- textile
– foam rubber
- screwdriver and screws
– plywood
First we cut out the base from plywood. It should be the size of the stool seat.
We spread the fabric, put foam rubber on the fabric, and put the base on the foam rubber. You will get a kind of sandwich. We stretch the fabric and fix it with a stapler. If you tighten it properly, the foam inside will not dangle.
We place the resulting pillow on the stool and screw it on from below with self-tapping screws. Everything is ready, you can use it.
Using upholstery to improve the appearance of a stool is very easy. Photo: kitchen.cdnvideo.ru
Simple decoupage of an old stool
If the room is decorated in Provence style, the stool can be decoupaged in the appropriate style. To do this, you need to decide on the color of acrylic paint that will be used to create the background, and also find suitable images on napkins or print them on photo paper. The design can be simple natural motifs or patterns. If there is a staircase in the room, then you can choose a similar color for the stool - then the staircase will harmoniously combine with the stools.
The simplicity and comfort of the French Provence style can be created by decorating several interior items in decoupage at the same time
It is important to note that decoupage in the Provence style should not be done in too dark colors - it should be airy and light.
The set of decorating tools does not differ from the standard one. The materials you can use are fabric, three-layer napkins, paper, newspapers or decoupage cards. Based on the ease of work, it is better to work with napkins or newspapers.
Decorating a stool with napkins:
- Clean the surface of the stool and sand it with sandpaper.
- Level the surface of the product with putty.
- Apply the main background using a brush and acrylic paints.
- Cut out the selected images, separate the top layer and stick it on the stool.
- Cover the surface of the stool with decoupage varnish.
Provence style is simple and natural. You should not make bright decor. Stools look beautiful if you choose a light tone and minimalist images to decorate them.
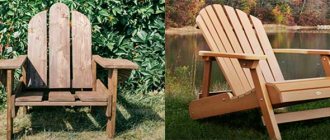
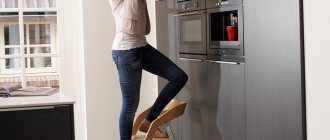
Painting
Perhaps the fastest and easiest option for changing the design of a stool is painting. The peculiarity of paints and varnishes is the variety of colors. This means you don’t have to limit your imagination. The main thing is to arm yourself with the right tool. For preparation and further finishing work, you will need sandpaper, paint of the desired color or several shades, a brush, and varnish.
Conventionally, the whole process can be divided into three stages:
- Sanding the stool with sandpaper will get rid of the old paint.
- Painting all surfaces (legs, back, if any, seats) with new paint. It will be a monochromatic option or some kind of pattern - you decide for yourself.
- Coating dried painted surfaces with varnish to fix the result.
You can diversify the painting using stencils; this will allow you to apply any chosen design with the highest quality and beauty. This method of updating a stool is perfect for wooden and plastic products, folding and office chairs. The main thing is to choose the right color. Chalk paint is more suitable for painting stools. To obtain a better result, it is worth using a primer, which is used after the stage of cleaning the surfaces to cover them. This will allow you to achieve the result of factory painting - high-quality and durable. If you decide to paint individual parts of the stool, you should use masking tape. As a finishing coat, you can use not only varnish, but also melted wax.
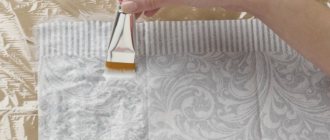
Newspaper decoupage stool
Decoupage with newspapers is a simple and cheap way to give a product new life. Everyone has old newspapers in their house. They will give the product a special charm.
Decorating furniture with old newspapers is the most economical and at the same time extraordinary type of decoupage
It is important to pay attention to the fact that before gluing newspapers, they must be soaked in warm water for one minute.
The technology of decoupage with newspapers is almost no different from covering the surface with napkins. For ease of use, newspapers can be cut or torn into pieces. The tools for the job remain the same.
Tools:
- Sandpaper;
- Putty;
- Brush;
- Acrylic paints;
- Glue;
- Varnish.
Decoration must be done carefully. It is important to ensure that newspapers do not roll and lie flat. A regular construction roller will help smooth them out.