Wall-mounted computer desk: step-by-step manufacturing instructions
The desktop computer desk has practically no disadvantages.
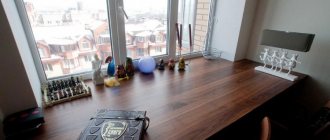
An equally comfortable model is a wall-mounted computer desk. It occupies a small area and can have different heights, depths and shapes depending on the user's preferences.
Wall-mounted models are made from a variety of materials, but most often they are made of oak or glass. They are attached to the wall using hooks or other fasteners.
The advantages of this model are:
absence of legs; functionality; compactness; attractive appearance; easy and convenient installation.
Manufacturing instructions
In addition to the tools and materials listed above, to make a wall-mounted computer desk with your own hands, you will need several metal L-shaped brackets to attach it to the wall.
Step 1. First you need to decide on the length and width. After this, cut the prepared material according to the calculated dimensions. You can also use a tabletop from an old computer desk.
Step 2. If non-laminated raw materials are used, they should be pre-treated with an antiseptic. The visible ends of the tabletop are finished using edging tape.
Step 3. L-shaped brackets should be fixed to the wall at the same level and at the same distance from each other. In addition to screws, additional fasteners may be required. It all depends on the materials from which the wall is made.
Step 4. The prepared tabletop is attached to the brackets.
4
Linear computer desk - from simple to complex
You can try and create a corner computer desk with your own hands. But while we are just learning, let’s put aside sketches of complex products. For the first time it is better to focus on linear structures.
The easiest way to make a linear table
Specialized literature provides formulas that allow you to calculate the optimal dimensions of furnishings, depending on the individual characteristics of a person. In fact, furniture factory designers have long calculated the dimensions for any furniture, including tables:
For a tabletop, the average length is considered to be 60–70 cm; Stand for the system unit. The dimensions of this element vary from 22 to 30 cm; Product depth – 65 cm. This allows us to include in the design a bedside table for various small items and a monitor stand; Keyboard shelf: depth – 40 cm, length – 65 cm; Table height 75 cm – standard value for furniture of this type; Monitor stand. Height – 12 cm, width – 50 cm, depth – 30 cm.
Based on these average parameters, we will assemble a computer desk with our own hands. You can take the drawings from online resources and adapt them to suit yourself, or you can design future furniture yourself. It is preferable to use a ready-made project - after all, this is our first product of this type.
An excellent material for making furniture is “A” category plywood, 1–1.2 cm thick. The price is not much different from chipboard, but it is much more reliable. And with proper processing, its appearance will not be inferior to the pattern of natural wood or laminated MDF panel. Of course, the latter is able to withstand high temperatures and resist moisture. However, computers and office equipment have an extremely negative attitude towards such conditions, and it is not recommended to place equipment in such places.
Stage 2. Eliminate defects
If you find various defects on the surface of the table top or legs, they must be eliminated, as they can become a serious obstacle during further work. Most often, chips and cracks are found on old furniture. In order to eliminate them, you can use the following methods:
- Fill with putty, which can be purchased at a hardware store. To do this, you simply need to apply it to the uneven area with a spatula, and after drying completely, sand it well.
Important! Today, the choice of putty mixtures is so large that you can choose a color similar to wood, so that the treated areas do not stand out in the future.
- Using a wood primer or a special solution.
Important! To prepare the solution, you need to mix small particles of wood with varnish.
- You can pour turpentine into the damaged area, then cover it with a metal plate and apply a hot iron.
Once you have prepared the table, you can proceed directly to remodeling it.
Make a computer desk yourself
corner computer desk connected to a niche with shelves
Usually, high-quality furniture always costs a lot of money. But you don’t have to spend it to get a good computer desk. With certain skills and the availability of tools, you can do it yourself.
The advantage of making it yourself is that the corner computer desk can be given any shape and size, as well as equipped with all the necessary shelves and drawers. In addition, you will have the opportunity to select materials according to your wishes and capabilities.
Initial design stage
corner computer desk drawing
Before you start making a corner computer desk, you need to think through its design and draw up a small drawing. It is important to draw up a list of equipment and its equipment that will be placed on this table. Typically the standard kit includes:
keyboard; monitor; system unit; computer mouse.
It should be noted that almost all elements will be connected to each other by wires. They must be securely fastened and located in such a way as to prevent their accidental disconnection or tearing.
the necessary set of tools for making a computer desk yourself
Also, when installing additional elements of computer equipment, for example, a printer or scanner, you need to provide a place for their installation.
In order to draw up a table drawing, the following factors should be taken into account:
A computer desk should be comfortable and functional, have a sufficient number of drawers and shelves to accommodate equipment; The dimensions of the computer desk should take into account the dimensions of the computer chair. Typically, chairs are produced in standard sizes, but some deviation in size is possible; The height of the legs can be selected individually, depending on the height of the person. The most optimal height for an adult is considered to be 700-750 mm. For a child it may be a little smaller. When planning the size of the table, it is important to take into account the size of all the equipment that will be installed. It would be a good idea to measure each piece of office equipment before planning the placement and dimensions of the shelves and the countertop itself; The size of the room where the corner computer desk will be installed plays an important role. For comfortable work it is necessary to place it correctly in relation to the lighting and other pieces of furniture. The computer desk should move freely away from the table, without touching other pieces of furniture, and allowing free access to the table.
Stage 1. Preparatory work
Restoring old furniture, although a creative process, nevertheless requires special care. It consists of several stages, which we will discuss in more detail later.
There are a huge number of ways to remake an old table with a minimum amount of financial and time costs.
Important! If you use your imagination, you can make a truly original and unique thing.
Before starting the restoration process, the product needs to be prepared so that subsequent layers of decorative finishing lay smoothly and last a long time. To begin with, objectively assess the condition of the table, since it will be very disappointing if you waste your time, and in a month it simply falls apart. Check the wood itself, as well as the fittings. If you find any defects, it is advisable to eliminate them at this stage.
Important! If there are drawers in the table, you need to make sure that they are working properly.
Next, you should remove all decorative accessories (if any), as well as other protruding elements. If the table has previously been covered with paint, it must be removed using a solvent and sandpaper.
Important! When removing an old layer of paint with sandpaper, you first need to use coarse-grained sandpaper, and then use a softer one. This is necessary to ensure that the surface is smooth.
What kind of desk should I make for a PC?
With all the variety of finished products, general-purpose computer desk designs come down to 3 types: corner (pos. A in Fig.), straight (pos. B) and combined (pos. C), or computer-writing desk, KPS. You should specifically choose the type of table for yourself based on the following considerations:
We recommend: How to make a horizontal bar for your home or apartment with your own hands - drawings, dimensions, how to mount it on the wall
General requirements for workplace ergonomics. The degree of computer use during work. The location of the windows in the room and their orientation to the cardinal points. The required quantity, range and degree of availability (price) of materials for the table.
Computer desk diagrams
From pp. 2 and 3 can be understood immediately; the rest will have to be given special attention. As you know, when working with printed text, images, etc., which is called information on solid media, the light should fall obliquely from the top left; for left-handed people - on the right, obliquely at the top. And at the same time, direct sunlight on the display screen is much more harmful than it seems. Widespread use during the transition from large buzzing electronic devices to PCs with “bubble” monitors borrowed from TV, which produce glare in almost any lighting and with any screen coating, then gave rise to a real pandemic of visual and mental disorders. It was possible to cope with it only by switching to flat screens, which glare only from direct bright rays.
In addition, the phosphor of LCD, TFT and LPD displays when exposed to sunlight fades (fade) many times faster than that of old “tube” displays. Therefore, the table with the display must be positioned so that the sun does not hit it no matter how the windows are positioned. However, placing a desk for working with papers near the north or northeast window is also not an option: there will be not enough light for non-computer work. The optimal solution is a western or northwestern window with vertical blinds on it. South and south-west windows should be avoided: strong light, direct or diffuse, caught by peripheral vision, is no more useful than glare from the screen.
Angular
For tanks, airplanes, adventure games, racing games and hanging out on the Internet (which is mostly combined, since all modern computer toys are online and interactive), a corner computer desk is most suitable. It is simpler and cheaper than all others; This is exactly what a diligent incompetent can build in an evening, spending something like 1300-1500 rubles. We’ll discuss how later. In addition, a corner table takes up minimal space in the room and can be placed in south-oriented corners without risking vision if there are curtains and vertical blinds on the windows.
But for more or less serious work, a corner table is not very suitable, although it can be furnished with peripherals, as they say, I just can’t, see below. Firstly, there is nowhere to put hard originals (sources): you’ll get caught with your elbow and, working with them, you have to squint your eyes all the time. Secondly, there is simply nowhere to take these same eyes to take a little rest during busy work; From a psychophysiological point of view, a corner is actually a closed space, pressing and forcing you to spend a lot of effort to concentrate. When, as they say, all ears are in the virtual world, it doesn’t matter. But in enterprises and institutions, it is prohibited by labor safety rules to equip workplaces based on corner tables.
Note: a corner PC desk is definitely not recommended for schoolchildren and junior students. A long stay in a psychologically closed space alone with the virtual environment makes the risk of developing computer addiction very high. And it is difficult to get rid of it; with a strong degree, changes in metabolism are observed, characteristic of drug addicts using hallucinogens such as LSD, STP, psilocybin, mescaline.
Straight
A straight computer desk is actually a desk, zoned in width and height to suit the requirements of computer ergonomics, see below. The degree (depth) of zoning can be different, from simply pushing the display into a corner away from the window, to complex multi-level furniture complexes designed for professional work. A straight PC table is appropriate in 2 cases:
When the PC is used sporadically in the evening and at night: look at email there, rummage through social networks, play airplane tanks. For professional or semi-professional work with graphics, video and CAD (Computer-Aided Design Systems, computer-aided design). Here, most often, a minimum of hard sources is needed; reading the original or manually entering large amounts of data, as in modeling, is rarely required. But you need to very carefully monitor the picture on the screen, without squinting your eyes every now and then.
A straight table will require approximately twice as much materials as a corner table. And to assemble it yourself you will need some, albeit very basic, woodworking skills.
KPS
A combined computer-writing desk is, one might say, an ideal desk for a computer, if you have the right place to place it. In addition to all of the above, it is the only one of all that is completely suitable for professional or generally quite extensive work with text, when the user dives for a long time either into hard sources or into the electronic information environment. It’s much easier to use CPS and 3D graphics: while it’s rendering there, you can be distracted by something else without moving too far. Rendering (the final stage of creating 3D scenes) is a delicate thing. Suddenly it malfunctioned and did not have time to stop it in time - it would take a long and difficult time to redo it.
Manual wood router
The materials required for the KPS will be approximately 30-40%!b (MISSING) more than for the direct line, because Plates, drawers and panels (furniture boards prepared for assembly) with curved contours will generate more waste. And for their precise sawing and preparation for assembly, you will also need a special tool: a jigsaw and, possibly, a manual milling machine for accurately selecting grooves, quarters and lumps. The latter is a rather large and expensive device (see Fig.), if it comes down to it, it is better to rent it.
About the rear cross member
The design of the straight table and the CV joint must necessarily provide for a longitudinal force connection - the rear cross member, see fig. on right. It is this that provides the lion's share of the overall rigidity and stability of the structure. The “butt” (simply, in carpenter’s style) can, unlike all other parts, be made cheaply, from chipboard. It does not stick out in plain sight and is attached to the mating parts only at the face, never at the end, so the fragility and rough texture of the chipboard do not play a role here.
Rear cross member table
The width of the rear cross member is approximately a third of the height of the lowest cabinet, but not less than 1/5 of the highest. Thickness – the thicker the better. It is highly advisable to select rectangular recesses in the vertical support elements associated with the “back” exactly to the size (width x thickness) of the cross member. It is also a good idea to soak it with a water-polymer emulsion on both sides an hour and a half before installing it in place.
Manufacturing materials
To make a computer desk with a system unit, the easiest way is to take a ready-made product as a basis. It can be a wooden desk, a computer or a regular model. If you plan to integrate a ventilation system, speakers, or electrical sockets into the structure, it is advisable to choose the option with side panels. A table with a metal frame is also suitable for work. During the manufacturing process, it is covered with plexiglass. The tools you will need are a jigsaw, a screwdriver, a drill, a ruler with a level, and a heat gun. Before starting work, the parts of the system unit itself that will be mounted into the system must be prepared.
Tempered or organic glass (plexiglass) is used to transform the table and decoration. The latter material will be required in two types: 5 mm thick (for partitions) and 10 mm (for the back panel, bottom, tabletop). It is not advisable to use thin plexiglass for horizontal panels, since it may not withstand the weight of heavy objects. In addition, a complete set of materials is required:
- LED Strip Light;
- wires;
- screws, self-tapping screws;
- carbon sheets;
- paints;
- chalk or washable marker;
- construction adhesive;
- sandpaper;
- voltage regulator;
- cooler
It is recommended to take fasteners with a reserve so that their deficiency is not discovered during assembly.
LED Strip Light
Carbon sheets
Strained glass
Voltage regulator
Coolers
Deciding on design and construction
First of all, the harmony of the design with the furniture in the room is important. You can choose options on the Internet, but you need to take into account the size of the space allocated to the table. The design must be selected based directly on the functionality of the table. If you need a computer desk for a stationary PC, then for the system unit you will need a special niche, a shelf for the keyboard and space for the monitor. If the table is intended for working with a laptop, you can make additional shelves instead of niches where things will be stored.
Often, to save space in a room, you need to optimize space as much as possible; this can be done by creating a table project with a large number of shelves, including doors.
It is important to understand that the main goal is to create a comfortable workplace, therefore it is preferable to immediately outline the approximate dimensions of all components, based on this parameter. It should be easy for you to reach the things you need on the shelves, while the lower part of the table should be able to withstand maximum loads.
First of all, the harmony of the design with the furniture in the room is important.
Technology for creating a computer desk with your own hands, diagrams and drawings
Almost everyone now has a computer that must be installed in order to work on it comfortably. A special computer desk is required, with compartments for the system unit, monitor and keyboard. You can purchase this product in almost any furniture store, where they are presented in a wide range. But if you wish, you can make a computer desk with your own hands; the diagram drawings can be viewed in the selection.
Model selection
Before you start making a computer desk with your own hands, the photo of which is presented below, it is worth finding out what design will be needed and for what purposes it is planned to be used. A list of the remaining computer components will allow you to determine the size of the product. In addition to the main components, there may be additional ones - speakers, a printer, a scanner, various cords, elements necessary for full operation.
We recommend: How to hang a shelf on the wall
Before starting to draw a drawing, we select the type of future table:
straight type; corner view; combined type.
Straight
Angular
Combined
Straight tables are classic furniture options. They are similar to ordinary written products. Linear models of this type are suitable when you have to use a computer to do a specific job. It can be placed along a wall or near a window.
Corner options are suitable for people who sit at the computer for a long time.
The advantages of these models are as follows:
a small amount of material for manufacturing; finished structures take up little space; installed in places in the room that are not used; the ability to place all the shelves side by side, which will create additional convenience when working.
However, this option is not suitable for important work. This is due to the fact that it is not possible to place many items on it.
Combined models are a combination of the first and second table options. This model is considered the best option, but takes up a lot of space in the room. It has many additional elements that allow you to store many items and various accessories.
Drawings and diagrams
Before you start making a computer desk with your own hands, you need to make drawings and diagrams. They will help you properly build a computer desk. You can make them yourself or take them already prepared.
Length
The necessary parameters of a future computer desk should be as convenient as possible for the owner of this product. The length should not be too short, but at the same time, the length of the furniture that is too long will be inconvenient.
Length dimensions depend on important factors:
area of space for the owner. Many experts advise leaving a space of 60-70 cm for this; area for installing the system unit. A suitable solution would be to locate it in a niche, which will have a size of 22 to 25 cm. If this component element is installed along the table, then you will need spaces with dimensions of at least 26-30 cm; the presence of a rotating tabletop space for products with a corner design. If you do not have experience in constructing structures of this type, then it is better to focus on the recommended parameters - 55-60 cm; space for installing a cabinet. It is advisable to include this item in the design; its presence will ensure convenient use of this furniture. This item will free you from purchasing additional furniture to store various computer accessories; everything can be placed in the drawers of the cabinet. The cabinet will require about 30-40 cm, which will need to be added to the total length of the furniture.
On average, the total length for corner products will be 160-170 cm, a compact model can be laid at 130 cm, a straight model can be made with a length of 100 cm.
Depth
The dimensions of the computer desk depend on the depth of the product. Depth calculations are quite simple to perform. When calculating the parameter, it is worth considering several important factors:
if there is no extension, then the permissible minimum should be 45 cm; if the table is equipped with an extension, then the depth should be at least 60-70 cm; if there are drawers - at least 65 cm; corner type models that have shelves at the bottom, the depth size should be at least 85 cm.
Height
Calculating the height parameters for a computer desk is simple; there should be no difficulties in this matter. The standard height is usually 75 cm from the floor.
If you are short and only you will use the table, then the height needs to be adjusted to your height parameters. The main condition is maximum convenience. In these cases, the height parameters are calculated according to the formula: height parameters * 75/175 cm. If the height is 1.82 cm, then the calculation will be 182 * 75/175 = 78 cm.
Monitor stand dimensions
Stands can be of several forms:
rectangular elements are classic elements and can be placed in the center of the table or placed slightly to the side. The location of these elements can be chosen only to your taste, the main thing is that they provide the greatest ease of use of the computer. Suitable parameters for stands: height 120 mm, depth 300 mm, length 500 mm; corner type - stands of this type provide an original design for all designs, and also save countertop space. The main thing is that when constructing an element of this type, it is necessary to ensure its maximum stability so that the monitor does not unexpectedly roll off it. The size of the depth and height of the corner stand should be 400 mm, the height should be 120-130 cm.
Keyboard shelf
A special shelf for the keyboard is an integral part of this furniture. The presence of this element will provide positive aspects in using the design:
free space for the mouse and keyboard; additional free space on the countertop; the keyboard will be installed at the correct level, so there will be no feeling of fatigue or discomfort when working; constant free access to the keyboard and mouse.
All these positive qualities can only be achieved through the correct sizes. Computer desks have the following dimensions: depth – 400 mm, length – 650 mm, length of guides – 350 mm.
Shelf for system unit
Another important condition for the normal functioning of the computer is the provision of a shelf for installing the system unit. It is worth creating maximum conditions for this main component that will ensure the extension of the life of the computer.
The main conditions for the correct placement of the system unit are the following recommendations:
there should be no heating devices nearby; There should be no source of high humidity near the system unit; It is mandatory to have a special shelf or niche in which this element is placed.
Thanks to the presence of stands, the following advantages are provided:
There is virtually no dust accumulation in the system unit; least influence of humidity; the risk of damage to the system unit is reduced.
Requirements for a shelf for a system unit:
rollers with guides or supports with an adjustable system should be used as supports; The shelf width should be 280 cm; height is 120 cm; length – 50 mm.
How to make a computer desk with your own hands
When creating a computer desk, you will have to perform the following operations, following which you will easily understand how to make a computer desk with your own hands.
Material selection
Another important point is the choice of material from which the computer table will be made. It must be durable so that the product can serve for a long time. Chipboard sheets are often used. This is an inexpensive material, but at the same time it is durable and wear-resistant.
Chipboard
Tools and preparatory work
Of course, you can see how to make a table with your own hands from the photo, but if you decide to make it yourself, then you should know all the nuances.
For the manufacturing process you will need the necessary equipment:
for sawing - a jigsaw or hacksaw; drill, there must be drills; For fastening you need a screwdriver or screwdriver; grinding type machine; presence of a chisel; pencil for notes; For measurements you will need to prepare a tape measure. Its size is at least a meter.
Tools
Cutting out the details
The instructions recommend first cutting out all the necessary parts for assembly. In order to assemble the table you will need the necessary elements, which you can order from furniture factories or make yourself:
side-type racks - the dimensions of these elements should be 735x465 mm, 2 pieces; central type rack with dimensions – 735x380 mm, 1 piece; tabletop - 1200x580 mm, 1 piece; rear wall – 1090x290 mm, 1 piece; pull-out keyboard stand – 830x380 mm, 1 piece; shelves of internal type, the dimensions of these components are 450x250 mm, 2 pieces.
Cutting out the details
Assembly
When everything is ready and the parts are cut out, you can begin assembling the entire structure. How to assemble a table of this type? You can find out all the features of this process below.
Assembling a computer desk consists of the following steps:
to begin with, holes are made in the side and central wall for the lower shelf; you need to measure 50-70 mm and draw a horizontal line using a simple pencil; after this, 2 holes are made in a parallel position in the area of the horizontal line; The result is 2 holes in the side wall, 2 holes in the central one. Everything is held together with self-tapping screws; everything is also done for the top element. But here the distance level from the beginning of the board to the shelf should be 100 mm or more; holes are made, the shelf is attached; The back wall is screwed on - it must be placed exactly with the upper end of the side and central walls. Holes are marked, the wall is screwed; then the second side wall is connected to the back one. 2 holes are made in the back panel, everything is screwed with self-tapping screws; We fix the guide element rail. 50 mm is measured from the top of the side and central walls, straight lines are made. After this they are fixed; then the keyboard shelf is secured to the places of the guide elements; We install the tabletop - holes are made in the side walls. They also need to be made on the countertop; the dowels must be coated with PVA glue, insert them into the ends of the frame; We install the table top in place of the dowels. The dowels must fit into the grooves; if shelves on top are required, they are secured with dowels.
We recommend: Design of a living room in an apartment - choice of color, style and materials
After this, you can install the finished structure in a prepared place in the room. Don't forget to varnish all table elements. The result is a full-fledged computer desk, which is made independently. Of course, the whole process is quite complex and there is no way to do it without additional knowledge.
Assembling a cabinet for the system unit
Stand for system unit
Screwing the back wall
Fasteners for pull-out shelves
We fasten the guides
Glue the dowels
Place the tabletop so that the dowels fit into the grooves Gluing the edge tape The finished table
Video on how to make a computer desk yourself
The video shows the technology for making a computer desk yourself.
Source: www.abkhazeti.ru
Features and advantages of furniture with a built-in computer
The placement of the monitor and keyboard on the table surface, and the system unit on the open bottom shelf is familiar, but not entirely practical. That is why designers have developed different furniture options that include a built-in PC. All important mechanisms are located inside the structure. Many models are equipped with a glass tabletop through which the contents can be seen. Such products have many advantages:
- The modernized table looks aesthetically pleasing and is a unique decoration of the room.
- By placing the main parts under the tabletop, space on the floor is freed up. This creates convenience when working.
- The degree of dust and contamination of the built-in computer mechanisms is reduced, which means the service life of the equipment is extended.
- The monitor is located at a certain level, which is selected individually according to the height of the owner of the table.
- If there is backlighting, the workplace has an additional light source. This reduces the load on the visual organs.
- You can mount additional equipment that is necessary for work on the table with the system unit.
Stages of creating an original table from a profile pipe with your own hands
The height of the piece of furniture and the level of installation of the monitor are selected individually for a specific person. Therefore, if other people use this workspace, they may experience inconvenience. The way out of this situation is to use a chair with adjustable height.
Functional designs are additionally equipped with shelves and containers for storing disks, books, and folders.
Corner computer desk: step-by-step manufacturing instructions
Corner models are suitable for those people who spend most of their time at the computer.
The advantages of such models include:
require a small amount of material for their manufacture; the finished product occupies a small area; the possibility of installation in unused parts of the room; the permissibility of placing add-ons and shelves, which will add more comfort during work.
A huge disadvantage is the lack of chance to move them to another place.
Corner structures can be with or without superstructures.
When making such options, the recommended values must be observed. Exceeding the maximum permissible limits causes inconvenience in work.
Table 1. Recommended sizes of corner computer desks.
| Corner table element | Minimum width | Optimal width |
| Tabletop | 50 cm | 60 cm |
| Tray sections | 20 cm | 25 cm |
| Drawers | 45 cm | 60 cm |
| Overlaps | 5 cm | 5 cm |
The dimensions of the structure are calculated based on the parameters given in the table.
The depth of the corner should not exceed 50–60 cm. The total length of the product is 160–170 cm, compact models can be placed at 130 cm.
Manufacturing instructions
Step 1. Based on the selected drawing, all elements of the future product are drawn on the material and cut out. When using non-laminated raw materials, it should be pre-treated with a disinfecting solution.
Drawing of a corner computer desk
Step 2. Assemble the side posts. In the selected drawing, there is a large section on the right. If it is intended to accommodate drawers, then guides must be fixed on the inner side walls. They also install drawers to which guides are attached.
Step 3. Mount the corner support. A rectangular frame is installed on it, and space is provided for a retractable shelf where the keyboard will be located.
Step 4. Holes for dowels are made in the table top, on the side posts and on the corner support: 2 for each side panel and one on each side of the corner support.
Step 5. Glue is applied to the dowels and installed in the side posts and corner support.
Step 6. Mount the countertop. The sections at the back are covered with fiberboard walls.
Step 7. Make the drawers and install them in place. If there are shelves, they are hidden behind the door.
Step 8. Finishing. The finished computer table is coated with varnish or paint. In cases where laminated wood sheets are used, only processing of the outer ends is necessary. For this purpose, a special edge tape is used. It is made from various materials and is available in a wide range of colors.
The edge gives the product a finished and beautiful look and prevents the release of formaldehyde, which is dangerous to humans, from the chipboard.
The edge tape is glued to the sections of the product using a regular iron.
1
Furniture for yourself or creating a computer table with your own hands
As you know, demand creates supply. But, unfortunately, manufacturers, having released several successful models, stop further development. Smaller companies, adding a few parts, pass off a product from a large manufacturer as their own model.
A homemade computer desk can become an interesting interior detail.
As a result, the same type of designs, differing in price, quality, and color, reach the consumer. And such a computer desk does not always fit into the interior of the apartment. The originality of the interior in this case is also in question.
Alternatively, you can order furniture from a workshop, but its cost will be higher than the market average. But in fact, this is a homemade computer desk that you can easily make yourself.
We recommend
Making a countertop from artificial stoneDo-it-yourself kitchen table - types and manufacturing technology Doors for a sliding wardrobe - how to assemble it yourself?
Choosing a place to install a computer desk
first stage - marking the tree
Before you start making your own table, you need to determine where it will be installed. Its size and functionality depend on this. A small table will take up little space and will not clutter up the space, but at the same time it will be inconvenient and not functional.
There are several simple rules for placing a corner computer desk in a room:
It is advisable to place the table in close proximity to sockets and electricity. The use of a large number of extension cords and tees is not advisable. The ideal option would be to use equipment equipped with grounded sockets to power the equipment from the network;
cutting MDF boards to specified sizes For comfortable work, the workplace should be positioned so that natural light enters from the left side. To prevent equipment failure due to overheating, it should be located away from heating and heating devices. The placement of shelves should not coincide with any protruding or decorative elements on the walls. Such shelves and add-ons will not perform their functions and it is unlikely that it will be possible to place anything on them.
using confirmats to connect table elements
Several different tables
So we got to the actual tables. We hope that the reader, now with full knowledge of the matter, will be able to choose the appropriate one from them or find a sample to repeat on his own.
Simple straight
Here in Fig. – a simple straight table with only 9 parts, not counting the guides. It is assembled mainly on dowels, only the rear cross member 9 and the side of the cabinets 4 and 5 are attached with confirmations. Therefore, the author of the design, using an additional influx of the tabletop, managed to achieve an exquisite laconic design, which is visible even in unimportant phone photos. The assembly procedure is clear from Fig; Keyboard shelf 7 is placed next to last, and table top 1 is placed last.
Simple straight computer desk
Corner
This section contains drawings of 2 corner tables, well thought out both in terms of general ergonomics and acoustics. On the left is a table for a laptop-based workstation, which we will recall below; on the right – for a general-purpose desktop computer; There is no cabinet with drawers, like in the table described above. Both tables can be made of wood or plywood: despite the significantly upwardly developed architecture, the number of vertical seams is minimal and they have almost no effect on the overall strength of the structure.
Drawings of corner computer desks
Combined computer desk
KPS
And here in Fig. on the right is a fully functional and at the same time quite compact combi table. Like the previous ones, it is thoroughly thought out from all sides and can be made from any wood materials, because... There are no vertical seams that affect the overall strength.
Finishing and lighting
Decoration and installation of the LED strip is carried out during the assembly of the computer desk. Instead of LED strip, you can use spot LEDs. Their number, as well as the length of the glowing cord, is determined by the dimensions of the tabletop, as well as the size of the parts that want to be illuminated.
Criteria for choosing a laptop table for a bed, the best brands and models
The LED strip is laid around the perimeter of the housing and fixed. If desired, you can equip the motherboard, card reader, video card and other parts of the PC system unit with backlighting. Illuminating the computer inside the desk creates a beautiful visual effect that is especially loved by gamers. If the LEDs are combined with a stereo sound system, the effect of light music is obtained. An additional bonus of the backlight is the softening of the light radiation coming from the monitor in the absence of overhead light. Reducing the negative physical impact on the visual apparatus preserves the vision of a person working at a computer.
Secrets of the design of a table with an infinity effect, types of lighting
A table made of wood or chipboard is coated with paint. For minimalist, high-tech designs, black, gray, silver, and brown colors are used. For rooms in more democratic styles, for example, fusion or modern, a table painted in lighter or richer colors is suitable. The surface is dried for 15–20 hours. To improve the appearance, the structure is covered with carbon sheets.
A desk with a built-in computer is an exclusive model that is made individually. The fully finished product is distinguished not only by its original appearance, but also by its convenience for long-term work at the monitor. In addition, parts of the system unit hidden under glass collect less dust. This definitely extends their service life and makes maintenance easier.
