How to make a sofa out of a bed: conversion options
How quickly everything becomes boring and boring.
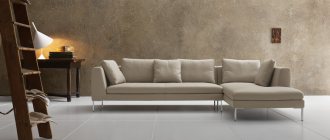
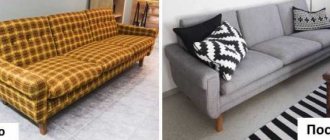
For example, the same furnishings, the same walls, furniture. True, frequent repairs are not particularly acceptable. And it’s not possible to change furniture every six months. But it’s not at all necessary to throw everything away and buy something else. The interior can be spruced up even if one key element is replaced or remodeled. With a little skill and imagination, you can easily figure out how to make a sofa out of a bed. Then bulkiness and clumsiness will disappear from the interior, and the room will turn out to be more functional. Don't rush to throw away old furniture. For example, you can easily make a new corner sofa from an old frame bed.
Transformable furniture looks very interesting when it is a bed at night and a sofa during the day. But making a sofa bed is not that easy. This requires special hinge mechanisms. Therefore, first it is worth considering the process of turning a bed into a sofa.
Sketches of sofas with dimensions
Similar articles
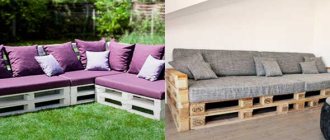
- Do-it-yourself furniture from pallets - methods for making furniture from a pallet (+photo)
Not everyone can afford to buy a new furniture set. However, today an excellent alternative has appeared, the implementation of which will require... - How to make a carpentry workbench with your own hands - making a carpentry workbench + photo
A carpenter’s workbench is usually called a table of a special design with a hard and durable surface that allows the attachment of various devices and… - DIY forged fence - manufacturing methods (+photo)
When improving your plot at a dacha or country house, the main attention should be paid to the fencing. Today the construction market...
Rework options
Elements of a folding sofa: 1 - Sidewall; 2 — additional pillow; 3 — back cushion; 4 — pull-out mattress; 5 - support beam; 6 — stool-stand; 7 - base box.
Several variations are possible, as a result of which you can make a sofa out of a bed. It depends on what kind of bed you actually have.
First, check the frame under the mattress. If there is a board nailed on top of it, on which the mattress lies, you are in luck. This conversion will be a bit of work.
The option, if the mattress needs to be inserted into this frame, is also quite simple. Prepare the necessary tools and materials immediately so that everything is at hand:
- wooden bed for remodeling;
- Chipboard (or plywood sheet) according to the size of the back;
- Chipboard according to the size of the sofa;
- plywood sheets according to the size of the back and seat;
- foam rubber and fabric for upholstery;
- hammer and wallpaper nails;
- drill;
- furniture screws and screwdriver.
You need to prepare a sheet of chipboard (cut to the size of the bed). Then, using screws or nails, it must be screwed or nailed to the frame.
If you do not want a very high back, you should take the height of 0.5 m and add the height of your frame to this figure. You can make it higher. In this case, you will simply need more foam rubber and fabric. It needs to be screwed/nailed to the part of the bed that is facing the wall.
Converting a bed frame into a sofa.
Measure the seat. How you will design the soft part of the future sofa directly depends on the design of the old bed. The board may be nailed to both the top and bottom of the frame. In the latter case, it is worth making higher pillows so that there is a protrusion above the frame of about 10 cm.
The back and seat can be solid, or they can consist of many parts and pieces. It is very convenient when 3 pillows are placed in the seat, then the backrest can be made of two long ones. There may also be an option for 3 pillows.
Next you will need to cut out several rectangles from plywood. Their size will depend on which option for laying the pillows and the appearance of the soft part you prefer. Foam rubber is cut out based on the shape of plywood blanks. Expect that you will need 2-3 pieces for each pillow. In order to make a sofa, thick sheet foam rubber is especially suitable. It can be found at a hardware or furniture store. When you finish preparing all the pieces, they need to be fastened together in several places using thick threads.
Cutting fabric. So, when you unfold the pillow, you should end up with 2 squares each with seam allowances for the lower and upper elements and the tape. Its width should be the same as the thickness of the foam insert, and its length should be equal to the perimeter of the square. Please note that the seam allowances are folded over twice on the side of the tape that will need to be connected to the bottom or back of the pillow. Therefore, it would be better to make them wider.
Depth of mattress insertion.
Those parts that will be on top (a square with a stripe) need to be stitched. To do this, do not forget to fold them right sides together. It is also necessary to stitch the free edges of the strip along the wrong side. There you will also need to cut off the corners, and then turn the pillow out. When you put foam in it, it is better to fasten the top of the pillow with the padding in several places.
The plywood sheet must be covered with fabric. This can be done in two ways: either nailed with wallpaper nails or glued. In both cases, do not forget about the allowances; they will need to be folded to the other side.
Next, the pillow is placed upside down. And the top is covered with a sheet of plywood, which you have covered with fabric. Now the strip allowances need to be folded twice. You can nail a strip of wallpaper 5 cm apart to a plywood sheet using wallpaper nails. All other pillows will need to be sewn in the same way.
After that you can post them. Those for sitting need to be placed on the frame, and those for the back can be placed. Sometimes pillows are also made for the sides.
How to make a Eurobook sofa
Everyone knows what a sofa book is, but few people know what a Eurobook is. Essentially, this is an improved model of an ordinary folding sofa. The design of this model allows you to install it close to the wall and even in the middle of the room. The method of transformation is also different, since the seat moves forward and the back rests on the free space. Another pleasant feature of the Eurobook is that when unfolded, such a sofa is in no way inferior in comfort to a bed, since there is no deep depression in the middle, and the 2 halves are the same size, almost flat.
There are not so many disadvantages, but one significant one is worth mentioning: when the seat is pulled out, the sofa legs sliding along the floor can scratch and even ruin the floor covering.
Frame assembly
First, we will make frames for the soft parts of the future sofa. To do this, we will need 4 two-meter straight beams without knots 40x40 mm, and from the same beam 14 pieces of 72 cm each.
Sections of bars are screwed to the four bars along the edges - they will play the role of amplifiers. To fix the frame we will use 4.2×70 mm wood screws.
Now you can assemble the frame, but for now use 1 screw per corner.
A sheet of plywood 5 mm thick, prepared to size, is placed on the assembled frame. It needs to be fixed on the narrow part of the frame with self-tapping screws (or staples), and then level the frame and check that the plane of this part is level. Then you can screw the sheet completely.
Now it's time to secure the crossbars. If they are attached to the seat at equal intervals, then one rib should be installed in the back in the center, and 2 - spaced 195 mm from the edge. The rest are attached arbitrarily.
Making a box
For the drawer you need to make 2 guides from 40x40 mm bars. Cuts are made on both sides, reducing the height by 15 mm.
We will use the same 40x40 mm bars as legs. We grind down their corners a little.
First, we will step back 50 mm along the edges from the top of the sidewall, since we have a boss 50 mm high. If you have a different boss, then the distance should be equal to its height.
We screwed the guide, then screwed the legs flush against the guide. The second side is done in exactly the same way.
Then the longitudinal part is taken, the whole thing is laid on a flat surface and twisted with 50 mm screws.
A jumper is screwed to the finished box, and then a plywood bottom.
Having installed the box on the legs, on one side we will make an amplifier for the hinge from a block.
Sofa legs
Now we will make the legs for the sofa. It will be necessary to make two legs for the seat. For this purpose we also use a 40x40 mm block. The length of the leg will be equal to the height of our box from the floor. We retreat 8 cm from the edge and grind down the edges. We treat the edge with stain to make it beautiful. We do the same with the legs and on the box.
If desired, the legs can be upholstered in leather, and a plastic heel can be nailed underneath, which will easily slide across the floor.
So we assembled the frames of the back and seat. We sew the back frame on the back side of the fiberboard. We do not trim the seat frame. In addition, we will screw blocks onto the seat frame, which will act as supports for the legs.
Seat assembly
Now let's start installing the drawer. We take our drawer and lay it flat. Where the blocks pass, you will need to make cuts. We mark a little with reserve the places where the boards will pass. Cutting depth 40 mm.
Having made cuts in the drawer, we install it on the seat and screw it on. The height of the drawer should not be less than 150 mm.
Now the legs are screwed on. Additionally, the fastening can be strengthened with a furniture screw.
We cut out this figure from the remains of plywood. Its size can be arbitrary. Then we cut out exactly the same second figure using it.
Each part is attached with 35 mm screws to the frame and leg.
The remaining fiberboard can be used to smooth out the transition by attaching it with staples.
Now you can start covering.
Drawer lining
We will cover only the front and sides of the box with fabric.
Let's start nailing the fabric from the top of the front wall. Then the side ones.
Having nailed the fabric, a strip of thick cardboard 15 mm wide is nailed on top of it.
The fabric is stretched over the body, the box is turned upside down, and the fabric is secured from below.
Making foam pillows
To complete the work, you will need 3 sheets of foam rubber, with a density of at least 30, 1×2 m in size and 40 mm thick. You will also need a small piece of foam rubber 20 mm thick.
We cut foam rubber for our pillows. To do this, use a sharp knife and a ruler.
We will make a second layer from foam rubber scraps, resulting in a mattress thickness of 80 mm. If the weight of the person who will sleep on this sofa is more than 90 kg, then it is better to use foam rubber with a thickness of 50 mm.
To glue foam rubber, it is best to use glue that is specifically designed for this purpose. You can also use Titan glue, which is sold in hardware stores. It will also glue the foam rubber well, but it will just take a little longer to dry.
And now, the foam rubber is glued. At the back the foam is flush with the base, and on the sides and front it protrudes 2 cm.
The protrusions of the pillow foam are made in such a way that these voids can be sealed with 2 cm thick foam rubber.
Having covered the frame with foam rubber, you can begin further work.
Seat cover
Let's consider 2 options for upholstering the sofa seat. One of them is sewing a cover on a sewing machine. Using another option, you can cover the sofa with a single piece of fabric without using a sewing machine. To do this, the fabric is assembled in the front part with an accordion and nailed in this state. From the back of the pillow, the fabric is simply laid so that the excess is inside, and also nailed.
We will use a ready-made cover with drawstrings sewn to it.
Having pulled the cover over the front part, use wire to pull the rope out through the drilled holes.
The cover is adjusted to the sofa.
Having upholstered the sofa, you can start tightening. Each rope is pulled up from the reverse side so that all points are lowered to the same depth. After adjustment, the edge of the rope is stapled to the bottom of the sofa.
Back upholstery
Now you can start lining the back. Just like the seat, the foam rubber will be glued on the inside along the edge of the backrest, and its side parts will have a protrusion of 2 cm.
In those places where the mattress protrudes above the base, we glue 4 cm strips of foam rubber 2 cm thick.
We make markings on the top of the pillow for tightening, and cover the bottom with batting.
We do not sheath it all the way to the bottom, since there will be a box there and there is no need for sheathing there. In addition, if you sheathe it to the bottom, it will be inconvenient to install hinges.
Now let's put on the cover.
Having secured the cover to the back, you need to take another piece of fabric and upholster the back part over the trim.
When using a standard cover, the upholstery is done in the same way as the seat upholstery.
Hinge installation and assembly
The middle loop is screwed in the middle using self-tapping screws. When attaching the outer hinges, the lower self-tapping screw goes into the block. The upper holes are secured with screws, since there is no block in that place.
After we have screwed the hinges onto the box, we lay out our sofa in the way it should be when unfolded. That is, we put a box, we put a seat on the box. We push the seat forward as far as possible so that the bosses rest against the front wall.
Why do we lay the backrest in a lying position so that it lies flat next to the seat. You need to measure the distance from the edge of the back to the drawer. In our case it turned out to be 21 centimeters.
Turning the back over, we place the box on it and set the distance that we measured, that is, 21 cm.
Now all that remains is to screw the hinges to the back with self-tapping screws.
At this point, the assembly of the Eurobook is completed, and the product can be used.
Eurobook sofa drawing
Sofa with tick-tock mechanism
The manufacturing process of such a sofa is not much different from similar ones. The main difference is the use of a tick-tock mechanism, the operating principle of which is shown in the video.
Drawing of a tick-tock sofa
Comfortable sofa
Drawing of a frame for a sofa.
There is an interesting option to make a sofa using a couch or using a bed element such as a metal armored mesh. For this you may need the following materials:
- wooden beams;
- foam;
- hammer and wallpaper nails;
- drill;
- furniture screws and screwdriver;
- sewing materials and upholstery fabrics;
- accessories (zippers of different sizes) for a cover, 21 cm long, and 3 zippers of 7 cm each for pillows;
- metal mesh and corner.
Take the following approximate dimensions of the future sofa: height - 90 cm, full width - 95 cm, width of the soft part - 80 cm, length - 185 cm.
Sofa assembly option.
To make the frame of the product, you need to connect 6 wooden boards, 1500 mm long, with three vertical boards, 660 mm long, using screws. The corner connector should be made 20x20x190 mm.
The top edge of the base should be 20mm below the top edge board. The support bars must be secured to the back and behind the front panel. They will be the load-bearing parts of the seat.
The back itself must be fixed to the base very firmly, using thick metal corners. Choose its inclination yourself, as it is convenient for you.
After this, you can fix the mesh from the bed to the wooden base using metal brackets. It will serve as a kind of support grid on the frame of the sofa to hold the seat cushions.
You can also glue several transverse beams onto the longitudinal ones. This will add reliability.
The foam rubber is cut to the specified size of the back of the sofa, the main thing is that it is no thinner than 15 cm.
Make two such blanks. They will need to be sheathed with the chosen fabric and connected with a zipper. Mattresses are attached to the structure with decorative tape. Upholstery material and Velcro are suitable for its manufacture. One end of it is attached with small nails to the frame, and the other to the cover. Next comes the turn of the pillows. Covers for them are sewn from the same material, using zippers and foam rubber. As a result, you should have 3 pillows.
Making a sofa from a bathtub
Although such a structure can hardly be called a sofa, the structure still has a right to exist.
So, to make a sofa you need an old cast-iron bathtub, which is time to throw away. The first thing you need to do is clean it of rust and debris.
Now let's unscrew the legs. If the nuts do not budge, then they need to be moistened with kerosene and waited for half an hour. If they still do not unscrew after this, the procedure should be repeated.
Let's start marking the bath. To do this you will need a marker.
Using a grinder, we cut off the unnecessary part according to the markings.
The cut must be processed by rounding the edges.
We will paint the bathtub with blue paint.
Let's make the legs yellow.
When screwing the legs to the bathtub body, use new nuts, not forgetting to add a washer.
In order for the paint to adhere well to the inside of the bathtub, it needs to be sanded.
We will paint the inside with white enamel, but you can choose any color that suits you.
To make the mattress we will use 50 mm thick foam rubber, and we will sew a cover from fabric.
All that remains is to install our mini sofa and put the mattress inside.
Video: how to make a sofa from a bathtub
Simplified version
If you still dare to make such a product, try the simplest option. Take chipboard sheets, bars, boards and foam rubber with upholstery fabric as a basis.
You will need a base box, 2 side panels with support bars, a pull-out mattress on a hard base and back cushions. Assemble a box measuring 2000x800 mm from boards 20 mm thick and 150 mm wide. Nail a sheet of plywood 3 mm thick from the bottom. To increase rigidity, install wooden corners at the joints of the boards.
The main requirement in order to make a strong, reliable, beautiful and durable sofa or sofa bed is the presence of a good and durable frame. A new homemade piece of furniture will definitely delight you and serve as a reason for pride.
Simple DIY sofa bed
The issue of saving space never ceases to be relevant. Bulky furniture is going out of fashion and is being replaced by more compact and multifunctional options. You can make such “smart furniture” with your own hands.
This sofa bed is made of natural wood. You can also use thick plywood, since it is not always possible to find a board of suitable width. The author used wooden slats as slats. Due to their location, the sofa folds out, turning into a full-fledged bed.
In order to make a sofa bed with your own hands you will need:
Materials:
1. wide board for the frame; 2. bars for the base under the lamellas; 3. slats instead of slats; 4. furniture screws; 5. oil for wood treatment (for example, Danish clear or linseed oil); 6. wood furniture glue; 7. wooden dowels; 8. wood putty; 9. ready-made sofa cushions.
Tools:
1. miter saw; 2. drill; 3. grinder; 4. screwdriver and 2 drills: according to the diameter of the screws and dowels; 5. large vice; 6. jig for drilling holes at an angle; 7. several clamps of different sizes; 8. spatula for filling holes for screws; 9. lint-free fabric for wood processing; 10 square, pencil, construction tape.
Step one: preparing the parts
The author uses a fairly wide board in his project. The evenness of the cut is very important in this case. Therefore, in order to trim parts, use a miter saw.
Saw the boards into pieces of the required length. Prepare 6 parts for a volumetric shelving with shelves. The back, like the second piece, consists of two parts.
Cut the base parts for the lamellas from the block. Prepare two sets of slats: for the sofa itself, and also for its folding part.
All parts should be thoroughly sanded using a sanding belt with a grit of at least 220. Pay special attention to those parts that you plan to treat with oil. If you use stain, the surface should be perfectly smooth.
Step two: assembling the main frame
The frame is assembled on dowels. The author uses a grooveless method of fastening parts joint to joint. To make inclined holes for screws, use a special drilling jig (see photo). Also select a drill bit that matches the diameter of the dowels you are using. The dowel should fit into the groove quite tightly. If you use a hammer to place it in the hole, then the drill bit is correct.
Assemble and glue the back and flat side of the sofa as shown in the photo. Be sure to use clamps while drying.
Step three: puttying and oiling the wood
The holes for the screws must be filled with putty. Use a putty knife to quickly smooth out the putty. Let the mixture dry and sand.
The author uses Danish oil from Watso. It dries quickly enough and protects the wood well from moisture. Colorless oil emphasizes the texture of wood, preserving its original shade. You can also purchase tint oil. Apply 1-2 coats of oil with time to dry. Remove excess oil each time with a dry, lint-free cloth. To apply, use a wide brush, cloth or regular kitchen sponge.
Attach the slats to the base. In order to correctly calculate the distance, between two lamellas place one lamella flat and two on the edge, as shown in the photo. In the final version, when folding the sofa bed, the slats should converge with a small gap.
Secure the narrow board flush with the slats using glue.
Options for converting a bed into a sofa
When planning to make a sofa out of a bed, keep in mind that its size and shape will directly depend on the dimensions of the bed and its external characteristics.
The design of the headboard, the method of fastening the parts, the material used in the manufacture - all this matters and influences the selection of options for converting the bed into a sofa. There are several available ways to modify a bed on your own.
Let's look at the simplest and least expensive, but suitable for novice craftsmen:
- Straight two-seater sofa with wooden elements. This option is suitable for those who have an antique sleeping bed, with a beautiful wooden and carved headboard. If the bed is broken, tired or does not fit into the updated interior, you should not throw it away. Update and remake it into a Provence style sofa. We use the headboard as the back of the sofa, the opposite part will go to the sides of the updated product. A comfortable seating depth for the sofa is from 70 to 100 cm. Adhering to the given dimensions, saw off everything unnecessary from the sleeping area. Fasten all the elements, strengthen the frame if necessary. The wooden base for the sofa is ready. All that remains is to sew the seat covers and back cushions. Cut out the thick foam rubber prepared in advance and cut the covers according to its size.
- Straight single sofa made from a crib. A good way to add something that has gone out of use. The children have grown up, but they don’t get around to putting them in the attic. With the help of simple manipulations, the crib will turn into a comfortable place for an older child to read or play. All you need to do is unscrew the front wall of the crib, leaving the back and sides in place. Additionally, place a sheet of chipboard cut to size on the seat, fasten the structure with bars or metal corners. This is necessary for the stability and strength of the product, since the children's bed is not designed for heavy loads. Place the mattress in place. It will become a soft seat. Several pillows of different colors and sizes will add special comfort.
How to make a sofa out of a bed
For this option, a single or double bed with a solid wooden base is best suited.
REFERENCE! The average dimensions of such models are 120 x 180 cm. Such dimensions will provide a good seating depth, and the length of the sofa will be enough to comfortably fit three people.
Tools and materials
For such a transformation you will need a certain carpentry skill. You need to be able to hold a jigsaw and screwdriver in your hands and know how to use them. Prepare in advance a simple hammer, drill, furniture stapler (staples for it) and furniture screws.
Selection of drawing and calculation of materials
You can create drawings and diagrams yourself by hand, remembering school drawing lessons. A simpler solution would be to choose a ready-made package of materials. The first option is preferable for experienced craftsmen, the second for beginners. The easiest way is to independently depict a sofa with a carriage screed; it is compact and simple in shape. In any case, when developing a project it is necessary to take into account:
- transformation mechanisms;
- dimensions;
- model, depending on which the assembly of the sofa will involve certain nuances;
- materials - they have different mass and density, and they are all designed for varying degrees of load.
How to convert a sofa into a bed with your own hands: step-by-step instructions
Today, folding sofas are in great demand: you can always put bed linen in them, they are easily transformed and take up minimal space. However, a bed mattress is clearly not enough for normal sound sleep and daily rest. That is why people living in small apartments are often interested in how to convert a sofa into a bed with their own hands. This knowledge will allow you not to overpay and at the same time get a full-fledged sleeping place.
Required tools and materials
The base with legs and partially the remains of foam rubber will be used from the old sofa. You will also need to additionally purchase a number of products:
- a plywood sheet with a thickness of at least 1.5 cm (if the condition of the legs leaves much to be desired, it is recommended to take a 4x4 cm block);
- foam rubber or padding polyester, the density of which is 3–5 cm;
- leatherette to decorate the surface;
- universal or wood glue;
- screwdriver;
- sandpaper;
- decorative nails with screws;
- ruler for measuring;
- marker;
- drill;
- scissors;
- hammer.
Manufacturing materials
Models with a spring block often use fine-wool felt. It is laid between the spring block and polyurethane foam. As an additional element, padding polyester fabric is used. It is placed between polyurethane foam and felt.
The strength and reliability of this model is also achieved due to the frame of the product made of natural wood.
Various types of fabrics are used for upholstery of sofas:
- Pile fabric (flock). She is the most in demand. It is distinguished by high quality, softness, durability.
- Tapestry. The texture is lint-free, smooth. The type of scotchgard fabric has more beautiful patterns. They are applied by thermal printing.
- Velor fabrics. Shinile fabric with a velvety surface is particularly strong and durable.
An important advantage of sofas of this type is the presence of a wide sleeping area when unfolded and compact dimensions when assembled.
Tick-tock sofas come in a wide range of different colors. They are selected taking into account the style and interior of the room.
In order to unfold a tick-tock sofa, you do not need a margin of centimeters between the wall and the back of the product, unlike a Eurobook.
Step-by-step instruction
After preparing the necessary tools and materials, you can safely begin the process of converting the sofa into a bed:
- First, the railings are dismantled: the sleeping place is completely unfolded and checked for integrity and stability. You should press on the corner parts of the structure and make sure they are strong.
- Mark the places where the mount in the form of legs will be installed. A tape measure is used to measure parameters.
- Additional block legs are cut off and then sanded using sandpaper. The legs are installed on screws and glued to the most reliable places in the structure.
- The length of the outer frame sides is measured. Taking into account the data obtained, strips are cut out of plywood elements, the width of which should be at least 30 cm.
- Installation of outer panels is carried out along the outer part of the base (glue and screws are used for this). To prevent the wood from accidentally cracking during screwing, it is recommended to first drill a hole, then apply glue and screw in the screw with a screwdriver.
- Several long strips are cut out of leatherette, the width of which is 5 cm greater than the outer panels. Strips of thin foam material should be 2 cm wider than the boards.
- The outer panels are glued with foam rubber. All this is decorated with leatherette. This material is attached to the lower panel part, slightly stretched and secured with staples at the top.
- Then you can proceed to the headboard: any shape is cut out of plywood.
- Wood glue is used to secure thick foam rubber to plywood.
- A piece of leatherette is cut out several centimeters larger than the dimensions of the plywood for the headboard.
- Using a furniture stapler, the decorative element is secured to the plywood back.
- Places for fastening are marked with decorative nails.
- A layer of fabric or rubber is used so that the decorative element is not damaged by nails. Using screws and a drill, the headboard is carefully attached to the sleeping area.
The bed is ready! All that remains is to choose a good mattress and new bed linen.
Thus, making a bed from an old sofa will be an excellent solution for budget-conscious people. If you follow all the rules and instructions, you will be able to produce high-quality furniture.
Everyone chooses the appropriate option for themselves
How to make a sofa out of an old bed cannot be answered in monosyllables; one drawing will not suit everyone. It all depends on what piece of furniture is intended for remodeling and what you need to get as a result.
First of all, look at the frame underneath the mattress. If the mattress is on a board, there won't be much work to do. The option of fixing the mattress in a frame is also quite simple.
Rice. 1. New corner sofa, made on the basis of a frame bed
In addition to having our model for work, you need to stock up on:
- Chipboard according to the size of the sofa;
- foam rubber and upholstery fabric;
- Chipboard or plywood sheet according to the size of the back;
- plywood sheets according to the size of the back and seat;
- hammer, wallpaper nails, drill, furniture screws and screwdriver.
Rice. 2. An example of converting a bed into a sofa
Rice. 3. Laying depth of the mattress
Scheme for converting a bed into a sofa
The following operating procedure can be taken as a basis:
- Preparation of a sheet of chipboard, cut to the size of the bed. Then attach the sheet with screws or nails (not a desirable option) to the frame.
- For the backrest, take a height of half a meter and add the height of the bed frame to it. If you wish, you can make the back higher, but keep in mind that such changes in the design will increase the consumption of fabric and foam rubber (which are screwed or nailed on the side of the sofa that is pushed towards the wall).
- Take measurements from the seat. If the board is nailed to the frame at the top, make taller cushions. It is advisable to have a protrusion above the frame of 10 cm.
- The finished sofa can have a solid back and seat, but it can also be made from several parts. Designs of 3 pillows in the seat and 2 long ones in the back are often used. The backrest, consisting of 3 elements, is slightly less popular.
- Cutting rectangles for pillows from plywood. The dimensions of these parts depend on the chosen option for laying the pillows.
- Foam rubber is cut out according to the dimensions of the previously prepared blanks. It can be assumed that 1 pillow will use 2 to 3 pieces. For sofa cushions it is better to use thick sheet foam rubber. We recommend fastening the prepared pieces in several places with thick threads.
How to make a bed from a sofa with your own hands
Tired?
Everyone knows this feeling. Irritability, fatigue and laziness most often arise due to the fact that a person did not sleep enough, or his bed was too uncomfortable. Researchers have proven that on average, each person spends 24 years sleeping in their entire life. So let's together make this time spent in sleep mode convenient and comfortable. It is recommended to sleep exclusively on beds, because sofas are not so comfortable and do not follow the curves of your body. And if you have an old sofa that just begs to be thrown into the trash, but it’s such a shame to throw it away, then this is a great option for creating a new comfortable bed. You will learn how to make a bed from a sofa with your own hands by reading this article.
The bed consists of two posts (at the head and at the feet), equipped with legs and a directly connecting part of the bed, where the mattress is placed. Currently, when making furniture, experienced manufacturers equip beds with places to store bedding and other decorative elements, including lighting, but for sleeping this is not the main thing, the main thing is convenience and comfort.
If there is a need to purchase additional material, and given that the sofa is old, there will be such a need, then take high-quality materials:
- wooden boards must be at least 2 cm thick so that they can support the weight of a person, and if the bed is double, then the weight of two;
- legs - made of thick bars 5 × 5 cm, for strength and reliability of the structure;
- It is better to take foam rubber at least five centimeters, because over time it will settle a little and you need a small reserve so that in the end you do not hit your bones against the boards of the bed.
Prepare additional tools in advance:
- drill;
- saw;
- screwdrivers;
- screwdrivers;
- sandpaper (sandpaper);
- self-tapping screws;
- nuts;
- washers;
- screws;
- furniture stapler with staples;
- roulette;
- pencil.
If you are planning to add decor to your bed, then think through every detail that you will need.
By the way, it is now very fashionable to combine colors, so you can cover the walls of the bed using leftover fabrics purchased in the store; such fabrics will cost much less.
Pros and cons of the tick-tock mechanism
Main advantages:
- the ability to install in any sofa model;
- high strength, reliability, wear resistance and durability;
- possibility of daily use;
- the ability to quickly and easily lay out and assemble furniture with virtually no effort;
- preservation of the decorative floor covering (no need to roll out furniture on casters);
- comfortable rest on a wide sleeping bed.
Thanks to the convenient transformation mechanism and small size when assembled, the sofa can be installed anywhere: in the center, against the wall and even in the corner.
The tick-tock mechanism has some disadvantages. The main disadvantage is the high cost. If a device fails, repairs are expensive.
All sofa models are equipped with decorative pillows and bolsters, which decorate not only the product itself, but also the room where they are installed.
Sofas with a transformation mechanism have undeniable numerous advantages. Models with different mechanisms are available. The main thing when choosing is the optimal combination of quality, price and comfort.
Each model, although different in design, has rounded corners despite the straight lines of the frame itself.
How to make a bed from a sofa with your own hands
So, instructions for making a bed from a sofa at home.
- We take the old sofa and remove all the upholstery from it.
- We carefully check the quality of the foam installation. Under no circumstances should you make a mattress out of pieces of foam rubber, it will be uncomfortable for you; it is better to immediately purchase a high-quality piece of foam rubber from a specialized store or buy a ready-made orthopedic mattress, and leave these pieces as decoration or make pillows from them.
- It’s a good idea to use the sofa’s handrails and the backrest as a stand at the head of the future bed.
- If the back and seats of the sofa are good, then they can be connected (it would be great to put them in a large mattress pad) and used as a mattress, but only if the foam is of high quality and well preserved.
- Press down on the corner parts to make sure the structure is secure and reinforce such areas if necessary.
- Take measurements with a tape measure and mark with a pencil the places where you will install the legs.
- Cut the legs to the same size (you will need four of them) and sand them well.
- Measure the total area of the sofa where the mattress will be and cut out strips of plywood about 35-40 wide, the number of strips will depend on the width of your sofa.
- The outer parts at the head and at the feet also need to be measured and glued with strong glue, and secured on top with screws. To prevent the wood from bursting due to the screw, use a drill with a small drill to make a hole and pour glue into it, let it dry, and only then screw in the screw.
- If you want to make the side walls of the bed soft, then use old pieces of foam rubber from the sofa, place them on glue and press them to the walls, decorate them with decorative fabric or leatherette, pressed with curly decorative nails. Attach the material at the top and bottom with staples in a taut state.
- Use screws to securely attach the bed walls to the sleeping area.
- Place a mattress on top and cover with clean and fragrant bed linens. Your new bed from an old sofa is ready.
If your imagination works well, then it is advisable for you to decorate the wall at the headboard by adding curly nails, and you can also make a canopy. The wooden fragments of the bed can be cut out figuratively or burned into a pattern. A variety of decor models can be found on the Internet, for example, make a transformable bed, let your imagination run wild and don’t be afraid to experiment.
It would be nice to install such a miracle bed even in a country house; it will serve as a wonderful sleeping place for guests and for the owners themselves. As you can see, converting an old sofa into a new bed does not require much effort and large financial costs. Now your room will change beyond recognition.
How to sew a cover
Making the body of a sofa is already a lot, but it is also important to trim it beautifully. Considering the fact that the fabric is expensive and cannot be bought in reserve, it is important to make the right patterns and sew a cover from them.
Which fabric to choose?
Depending on where and under what conditions the sofa will be used, a suitable fabric is selected. Let's look at a few examples.
| Where is the sofa | Type of fabric |
| In the living room, the sofa is often used, and not only by people living in the apartment. Guests often sit on it while eating, so there is a high probability that a cutlet or a piece of fish in vegetable oil will fall on it. Taking this into account, it is better to use synthetic fabrics, since they practically do not absorb moisture, including fats, and they wash well. | |
| In the bedroom, the sofa is used to sleep on or just relax. Instead of synthetic fabrics, it is better to use natural materials, or those containing at least 50% natural fibers. Flock is often used, as this type of fabric is durable, does not cause allergies and does not lint. | |
| If you are concerned about your child's health, it is better to use cotton fabrics that do not cause allergies. This type of cladding has one significant drawback - it gets dirty easily, which makes it impractical. The quality of the fabric can be improved by using Teflon impregnation. | |
| In the area where you regularly eat, there is a high probability of contamination of the sofa upholstery with food products. Using fabric is impractical and unprofitable, so it is better to use high-quality leatherette, which is made specifically for these purposes. Low-quality leatherette will very soon begin to peel off from the base. |
How to cut
When repairing an old sofa, you can use the removed fabric as a pattern, but when upholstering a new sofa you will have to cut it yourself. How to make the right pattern?
Covering with a single piece of fabric
This technology has already been briefly mentioned in the article, but now we will describe the entire process in detail. For example, we will use a sofa seat and instead of a single piece of fabric, we will demonstrate it using a piece that was left after sewing the cover.
So, in order to upholster a separate element of upholstered furniture, you need to cut a piece of fabric that could be used to wrap the piece so that the edges can be secured from below.
Having stretched the fabric onto the parts, it needs to be stapled in front and behind. Then the hanging corner at the front is pulled tight and secured at the bottom. The fabric is laid out in folds so that they converge at one point and nailed with staples.
The back of the seat will be turned towards the wall, so you can not lay it out, but simply fold it, leaving the excess inside, and secure it in this state.
Sewing a cover for a non-folding sofa
The described technology will allow an inexperienced person to cut and sew a cover not only for a new, but also for an old sofa.
Sewing this cover took 3.5 meters of fabric and a spool of thread.
So, you need to throw the fabric over the sofa, wrong side up, positioning it in the same way as the finished cover will be located.
We will put marks so that we can then cut the fabric according to them.
In these places we cut the fabric all the way to the sofa.
The seat piece needs to be fastened to the back fabric.
Using needles, you need to pin the fabric along all the supposed seams. Instead of needles, you can use pins or sew with a basting stitch.
Next we apply the future frill, which will be gathered into folds.
Having fastened all parts of the cover, remove it.
After basting the seams, put the cover on the sofa - it should fit without much effort, fitting the product being covered. If it turns out to be too tight or too loose, then this needs to be corrected by removing it.
Now you can sew the cover.
Then a frill is sewn onto it. If the cover is intended for upholstery of a sofa, then there is no need to sew on the frill, as it will be inconvenient to fix the fabric. The frill can be nailed on later if the need arises.
The result is such a cute sofa. Based on this example, you can cover any sofa, but for a new one it is better to sew separate covers for the back and seat.
As you can see, making a sofa and upholstering it at home is quite possible.
