Features and advantages of the technology
Making a table decoupage with your own hands means using imagination and a little patience to create an original work. This option for updating furniture consists of choosing a pattern of a certain theme and decorating the table surface with it. Afterwards the product is varnished and dried well. The advantages of decoupage furniture are:
- ease of operation;
- use of inexpensive special materials or improvised means;
- extending the life of furniture;
- giving the item attractiveness and originality.
There are 5 types of decoupage in total:
- Straight. Gluing the image directly onto a surface, which can be glass, wood, metal, plastic.
- Back. Gluing the design to the glass surface from the back side.
- Volume. Three-dimensional materials are used for decoration: textiles, eggshells, beads, stones, etc.
- Art. In this case, the line between the background and the picture is erased by using different techniques, resulting in the creation of a single hand-painted painting.
- Decopatch. This variation involves gluing small pieces of paper onto the table surface. Paper is used that imitates different surfaces (wooden, textile). You can work with regular napkins or special decoupage cards.
- Sospeso Tresparente. A pattern is glued to a special thermal film; when heated, the image takes a three-dimensional shape.
Straight
Back
Volume
Art
Decopatch
Sospeso Tresparente
There are different styles in decoupage, the most common of which are:
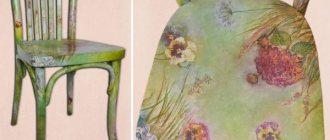
- Provence. Appeared in the French province, expresses romanticism and rustic simplicity. Drawings of delicate flowers and scenes from village life are glued onto the surface of light shades. Aging is often used.
- Ethnic. It is distinguished by the use of bright elements that relate to a particular country or culture. Decoupage is made with fabric, ornaments, and animalistic motifs are used.
- Victorian. The style owes its appearance to Queen Victoria. Characterized by a combination of the luxury of palace life and classical elements.
- Shabby chic. It is an imitation of antiquity using light pastel colors and patterns with flowers and blurred images.
- Simple City. Expresses a rustic urban style using pieces of old newspapers or magazines. In this case, any available materials are used.
- Printroom. Works in this style look very effective. It is made using photocopies of old images in black and white on a light background.
The decoupage technique originated in the 12th century in China, when peasants, trying to decorate lanterns, windows and other household items, began to cut out patterns from paper and stick them on surfaces. Decoupage as an art form was later mentioned in the 15th century in Germany. In the 17th century, the technique gained popularity in Venice, when inlaying furniture pieces in Chinese and Japanese styles became fashionable. In the middle of the 19th century, many countries became interested in the decoupage technique, and in Russia it appeared at the beginning of the 21st century.
The decoupage technique is great for people who don’t want to say goodbye to their favorite furniture. An updated decorated table will last a long time.
Provence
Ethnic
Victorian
Shabby chic
Simple City
Printroom
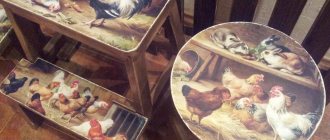
We create stylish children's furniture for your baby
Decoupage of children's furniture will never go unnoticed. An ordinary children's cabinet can be turned into a work of art. And if you make it with your favorite cartoon characters that the child really likes, then you can be proud of such a thing, since it will be a child’s favorite thing. As an example, take a look at this children's table.
Read our article about how you can not only decorate furniture, but also create it yourself.
Selection and preparation of materials
Before you start creating a unique table, you need to decide on its purpose. The choice of materials and details for decoration depend on the functional load of the furniture:
- Kitchen. To decoupage the kitchen table, durable materials are used that are easy to clean, since this furniture in the kitchen is often exposed to aggressive environments.
- Dining. The table, as a rule, is served with dishes of different colors, so the decor should be dim and calm.
- Writing. It is important here that there is an atmosphere of concentration. Typically, work desks contain many small items that are needed for work, so the decoupage of a desk should not contain a large number of decorative elements. It is not recommended to use glossy coatings on the table where the computer is installed, as they reflect the rays too actively.
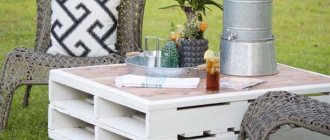
- Magazine. This table performs mainly decorative functions. Therefore, when decoupaging a coffee table with your own hands, you can experiment with texture and color. This type of furniture is the best option to unleash your creative potential.
- Toilet. Any materials and colors are used here. It is important that they correspond to the taste and disposition of the owner. The finish should not be colorful.
- For the dacha. Bright floral motifs or soft pastel colors are best suited.
The image is selected according to the design of the room, otherwise even a very beautiful table will create disharmony in the interior.
Kitchen
Dining
Writing
Toilet
Magazine
For the dacha
Napkins
Use special three-layer napkins for decoupage or regular ones. When working with napkins, pictures need to be carefully cut out and laid out on the table surface in such a way as to create the desired pattern. Today you can find napkins with absolutely any image theme. Another advantage of this material is its affordability.
Textile
To get an interesting design, it is better to use large pieces of material. You can choose any type of textile. Old curtains are especially suitable for these purposes. The material must be thin and light.
Paper
You can cover the surface with wallpaper left over from the renovation. Take a whole piece or separate fragments. Favorite photographs, geographical maps, pieces of old newspapers, comics, magazines, and posters are also used for decoration.
Guipure
Furniture decorated in this way will look very beautiful. A piece of cloth covers the entire surface of the table. Then, with your hands, carefully straighten out all the existing wrinkles. After this, the spread out material is covered with spray paint.
Shell
The eggshell is placed on the surface and broken into small pieces with your fingers. Then it is distributed using a match or tweezers. Such voluminous decor can be used to frame drawings and table borders. In addition, the shell can be painted in different colors, for example, mother-of-pearl.
Leaves
This technique uses skeletonized leaves, which can be purchased at the store. You can take ordinary specimens brought from the forest or park. Before gluing the leaves, they must be ironed.
Aging
A very original way to update the table. There are different ways to artificially age an object; you can choose according to your taste. To do this, use a regular paraffin candle, the “dry brush” technique, and spraying. You can resort to craquelure and patination.
Tools and consumables
To create decoupage, you need a table surface, as well as elements from which the image will be obtained, depending on your own preferences or the design of the room. Also for work you will need:
- Primer. Useful if the surface is unable to absorb paint.
- Glue. Used to stick an image to a surface.
- Paints. Needed for drawing additional elements.
- Varnish. It is used for finishing the picture so that the image lasts a long time and is more expressive.
- Sandpaper. Used if the surface is uneven and requires cleaning.
- Brushes. You will need two brushes: for painting on the details of the design and for the final varnish coating.
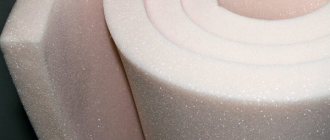
- Sponge. Used for stewing.
- Pencil. To make marks, circle the pictures.
- A reservoir of water and soap for cleaning the surface.
- A container of water for placing an image in it.
Craquelure varnish is often used to create decoupage. The product gives the item an antique look. One-step craquelure looks like a cracked layer of paint, through the cracks of which old paint or the surface of furniture can be seen. A two-step varnish creates a network of cracks on the surface of the design.
Decoupage with fabric
Instead of paper or special napkins, you can use a single piece of fabric. Cotton textiles with a tight weave and a bright pattern are best suited. The advantage of such decor is that over time the table will not lose its brightness and color saturation, even if it is placed on a balcony, terrace or anywhere else in the house.
Decoupage with fabric is more suitable for furniture made of wood, chipboard or plywood. Plastic options are not entirely successful. Preparing the table surface is the same as when decorating with napkins. First of all, you should thoroughly sand the countertop. Then apply putty (if necessary) and primer. You can paint the surface of the table with acrylic paint in several layers.
The fabric is glued with PVA glue, which must first cover the entire tabletop. A slightly damp cloth is applied to the product and ironed from the center to the corners. Next, you should dry the table and start varnishing. Varnishing is done using a brush or spray can in several layers, each of which must be thoroughly dried. After varnishing, the surface of the furniture will become slightly darker.
Decorating a table with your own hands using the decoupage technique is an interesting and exciting activity for creative people. To transform the interior and update the environment around you, you don’t have to buy new expensive furniture and accessories. It is enough to give life to old things using various methods and techniques.
Decoupage with paper step by step
To make decoupage of an old table with your own hands, you need to adhere to certain rules:
- Surface preparation. All furniture parts are sanded if they are made of wood.
- Coated with acrylic varnish. It needs to be covered on all sides.
- Primer. Using a brush, roller or sponge, the surface is covered with white acrylic paint.
- Painting. Applying the desired tone.
- Preparation of material. Cutting out fragments from napkins, wallpaper, photographs, newspapers, printed sheets.
- Building a composition. Laying out individual elements on the table and tracing the outlines with a pencil.
- Varnishing pictures. The cut parts are placed in a container of water for a few seconds, removed and placed on the fabric with the wrong side up. Then the image fragments are varnished.
- Placement on the surface. All elements are placed on the finished contours and rolled with a rubber roller. Make sure that all the air comes out.
- Drying. You need to wait time for everything to dry thoroughly.
- Applying abrasions. For aging, sandpaper removes some of the top paint.
- Applying shades. Dry fine pastels of various tones are used. It is rubbed near the elements of the composition.
- Finish coating. Acrylic aerosol varnish is applied.
The unique table surface is ready after the final coating has dried. Most often, decoupage is used only for the tabletop. But as a rule, the legs also require updating. You can simply coat them with varnish, but it is better to choose a paint that matches the tone of the countertop.
Surface preparation
Painting
Preparation of material
Building a composition
Varnishing pictures
We use fabric in decoupage instead of napkins using the example of decorating a tea house
This master class can be called “textile decoupage”. For a long time I tried to learn how to do decoupage, but unfortunately I lacked accuracy in working with the thinnest napkins, which tore, crawled and did not want to look beautiful on the surface being decorated. Maybe I just lacked the skill or I did something wrong, I don’t know, but one day I came across a master class at the Crafts Fair, where a woman decorated an old tabletop with beautiful fabric. Based on this idea, I decided to use textiles in the decoupage of my tea house. Please don’t judge harshly, I don’t think I discovered America, but this is my first master class in my life. This technique, I think, is suitable for beginners. So, for work we will need: 1. Fabric of two shades - for the roof and for the walls of the house (in my case it is cotton), but in general any fabric will do, from the finest silk to burlap. 2. PVA glue. 3. Brush (any brush, I have a thin, regular pony). 4. Ruler. 5. Decoupage varnish 6. Acrylic paints (in case you decide to paint the inside of the house). 7. Scissors and stationery knife. 8. Blank for decoupage. In my case, this is a tea house.
I assembled the house and glued it together using Crystal Moment glue. After that, the inside was painted a soft lavender color. This color can be obtained by mixing 2 parts white paint, 1 part red and 1 part blue paint.
After drying, I coated the inside of the house with varnish and set to work on the cladding. I chose two scraps of fabric I liked from my supplies and, having measured the length and width of all the walls of the house and adding 5 mm for the seam, I cut off the scraps of the length and width I needed.
I did not use primer, since my fabric had sufficient density, and the dark edges from the laser cutting of the workpiece were not visible. Next, having coated one side of the house with PVA glue, I glued the fabric to it.
Here it is important to smooth everything out well and stretch it, without fear that the fabric will tear. Make sure that no bubbles or wrinkles form. In this way we glue all 4 sides of the house. Glue the remaining 5 mm of the seam with an overlap and carefully smooth it out.
We dry our workpiece, and after drying we cut off the excess fabric, freeing up the hole for the bags
After this, we coat the house with varnish. We do the same procedure with our roof.
Ready!
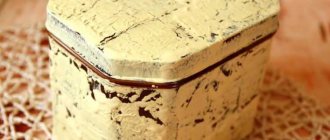
If desired, you can glue decorative elements to the house. If something goes wrong in the work, we simply tear off the fabric “in one piece,” quickly and with little effort, and work on the decoration in a new way, taking into account the mistakes. This trick will not work with napkins - removing the glued napkin and after coating with varnish will take much more time. I also attach a photo of a tea box with decoupage using the same textile method.
Happy creativity!
Master class on decorating with fabric
To decorate an old table with fabric, it is better to use the master class presented below to make it neat, beautiful, and original. Before you begin, you need to prepare the working surface of the table; this involves removing old paint and sanding. Then come the following steps:
- Stain coating. It is applied to the legs and underside of the table, the top of the table is not covered.
- Preparation of material. Take a beautiful bright scarf or piece of fabric and iron it well.
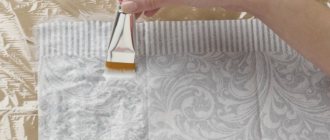
- Gluing. When fixing the fabric, you need to move the brush from the middle to the edges to straighten out the folds and the pattern. The edges of the material are tucked under the tabletop.
- Drying. It is best to dry it outside.
- Final application of glue. Acrylic glue is applied in 6-7 layers. In this case, each layer must dry well.
The updated elegant product will be ready in 3-4 days, after which the table can be used. The decoupage technique can be used to work with any furniture. If you decorate a table, chairs, and chest of drawers in the same color scheme and theme, you will get an original set.
Stain coating, material preparation
Gluing, drying
Final application of glue
Sealing the edges
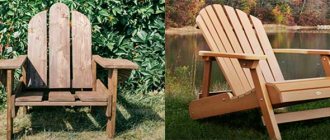
Ready table
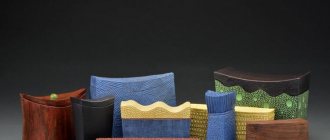
Decor of small interior items
Create a small craft using the decoupage technique with your own hands. This will be an interesting addition to the interior. The made souvenir will also be a good gift for family or friends. Ideas for decoupaging small items can be different; you can use old family photographs or vintage pictures.
Most often they decorate such items as:
- bottles;
- boards;
- dishes;
- lamps;
- watches and much more.
Decoupage wooden hanger
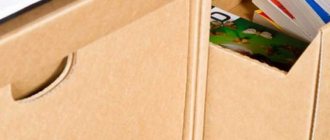
Decoupage boxes
Decoupage table lamp
Bottle decor
Painting plates using decoupage technique
In general, the principle of operation is the same as when decorating furniture. In addition to the file method, there is another way to apply a picture. It is applied to the surface of the object and generously smeared with glue on top of the image. First glue the middle, and then carefully move to the edges. This method will not work for large items because folds will appear. Before varnishing, you can write a cheerful wish or a Latin aphorism on the gift.
Learn to make crafts with your own hands, they will definitely bring a smile to your loved ones. There is no need to spend a lot of money to decorate your home. You can decoupage old furniture or create original decor.
Ideas for decoupage of wooden objects (2 videos)
Decoupage of furniture and interior items (36 photos)
Decoupage table lamp
Painting plates using decoupage technique
The best posts
- Design of a modern attic bedroom (+40 photos)
- Hat for girls: knitting pattern and description
- DIY Easter egg made from plywood and thread with photos and videos
- DIY frameless furniture: frameless sofa
- DIY keychain made from a cartridge case
- How to replace a laminate board without dismantling the floor: replacement procedure
- Dielectric boots and galoshes
- Openwork blouses with knitting needles: Japanese cotton models with photos and videos
Related article: Easter egg decoupage technique: working with egg whites