Materials for production
To create a small box, you can use waste and trimmings of wood and its derivatives.
In addition, an interesting little thing can be glued together from thick cardboard.
The original decor of various storage containers with a creative approach will allow you to turn them into original designer boxes.
You can also use the remains of various household packaging in your work. For example, a sleeve from adhesive tape.
You can get ideas for creativity on the Internet by looking at photos of beautiful homemade boxes.
Wooden boxes
To work on the box you will need some starting material. Therefore, they are often made from wood residues or its derivatives.
We recommend reading:
- DIY hairpins: step-by-step guide + instructions. 100 photos of finished hair jewelry. Master class for beginners
DIY brooch - the best step-by-step instructions with description. Photos of finished products, as well as a master class for beginners
- How to weave rubber band bracelets with your own hands - a review of the best weaving patterns. TOP 100 photos of different methods and beautiful weaving patterns
Wooden box
To create a classic wooden box, you will need a small scrap of wood.
A small box can be made, for example, from the remainder of a wooden block.
To work you will need:
- jigsaw,
- sanding machine or sandpaper,
- figured chisels,
- clamps,
- brush,
- wood glue.
Operating procedure.
- The first step is to saw off the part for the lid about 2 mm wide from the workpiece.
- Then parts of the main storage container of arbitrary shape are cut from the blank.
- The resulting elements must be cleaned to obtain a smooth surface.
- The seams of the parts are carefully covered with wood glue. When working, it is important to ensure that excess adhesive does not extend beyond the boundaries of the seams. They are difficult to remove.
- The body is tightened with clamps, preventing distortions.
- A groove is cut on the edge of the lid and the upper edge of the body for connection. This will allow the lid to close tightly.
- The bottom is glued to the body.
- Attach small furniture hinges to the top wall and lid.
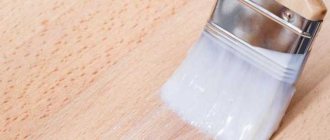
The product requires surface treatment. To do this, you can use wax; it is ideal for dark wood. Light wood species are treated with linseed oil.
We recommend reading:
DIY headband with flowers: 120 photos of the best ideas. Simple instructions with real examples and full descriptions. Master class and secrets from craftswomen- DIY satin ribbon bows: TOP-200 photos of the best options. Step-by-step instructions + master class with description (video lessons + diagrams)
DIY pendant - step-by-step master class with instructions. Photos of finished works with an unusual design. Schemes, new items, recommendations from craftswomen
Plywood box
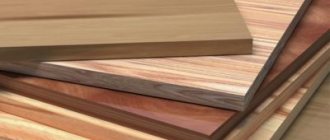
You can make a convenient box with your own hands from the plywood left over after the renovation. The design and dimensions of the product depend on the individual needs and imagination of the craftsman.
It’s easy to come up with diagrams for making a box with your own hands from plywood yourself or copy it from the Internet.
To work you need to prepare:
- plywood about 6 mm thick,
- sawing machine,
- sandpaper,
- router,
- brush,
- wood glue,
- plain and double-sided tape,
- pencil.
The procedure for making a plywood box can be considered using the example of working on a product measuring 10 X 14 X 7 cm.
Step-by-step instruction.
- Cut out two pieces 10 x 14 cm for the lid and bottom of the box.
- Paired parts measuring 10 x 7 cm and 14 x 7 cm form the walls of the product.
- Cut the cuts with a router at an angle of 45 degrees.
- Clean their surface.
- Lay out the side parts one by one on a flat surface and glue them with construction tape.
- Turn the resulting tape over and apply glue to the seams.
- Carefully assemble the body, glue the bottom and lid. Secure with tape.
- After drying, the lid is cut off at a distance of about 2 mm. The tape is removed.
- You can make small partitions inside the case. While the glue dries, it is convenient to fix them with small pieces of wood.
- Treat the product with oil, attach the hinges for the lid.
We recommend reading:
- Paper orchid: the best step-by-step instructions with real examples. Master class + video lessons for beginners (100 photo ideas)
DIY beaded jewelry - an overview of the most beautiful options (120 photos). Instructions and techniques for making original beaded jewelry
- Hair jewelry - 120 photos of original ideas. Instructions on how to make a beautiful decoration with your own hands (master class + video lesson)
After completing work on the body of the box and processing the wooden surfaces, the product must be decorated, giving it a beautiful appearance.
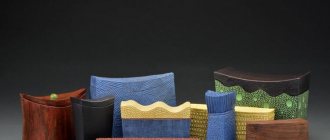
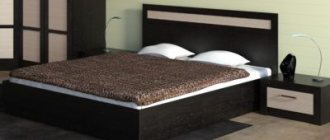
What's the secret?
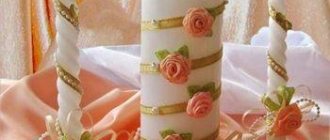
Such different boxes in Fig. something in common. A seemingly simple little thing - a box - combines the requirements for the strength and reliability of the base, quality, durability and durability of the finish, originality of design, combined with a subtle style, and therefore traditionally costs a lot of money. 5000 rub. for a good box in the middle price segment, that’s still a little, and therefore there are more than enough people willing to make boxes on their own. Well, just a box with a lid, what's in it? But in reality it turns out that making a box with your own hands is not so easy. The work of making a box is simple, but painstaking. The key to the most exquisite beauty is a solid foundation. Michelangelo complained that it sometimes took him longer to find a suitable block of marble than to sculpt a statue. This is in Italy, whose marble is considered the best in the world. Therefore, this article is not in the vein of: N photos + M videos = K ideas, although it is, hopefully, sufficiently supplied with illustrations and video materials.. And not in the spirit of: “We take a tool called scissors in our right hand (follows a detailed description of what it is such, with a classification worthy of Linnaeus into types, genera and species). In this publication, the emphasis is given, firstly, on how to see the weak points of the structure in the intended product and strengthen them. Secondly, how can you still make someone beautiful and unique without having an artistic education?
Note: the article, unfortunately, does not cover boxes made of carved stone and forged metal. To make them, in addition to a delicate taste, a sharp eye and a faithful hand, complex production equipment and solid skills in using it are required.
A nuance with the material
So, we will make a box from what is at hand at home. You may have to think about purchasing high-quality material if you are planning a jewelry box made of precious metals with real stones, natural or synthetic (cubic zirconia, garnetite, etc.). Jewelry can be stored in a regular box with several compartments, see below.
What's the matter? The first is the abrasion of the jewelry base. Jewelry gold of 583 samples, of course, rubs less than 9999, but it still wears out. Therefore, you cannot line a jewelry box with any fabric or make it cardboard (see below). Fibers of cellulose, wool, silk and nanoscale polymers are good abrasives.
Second, in the microclimate of the box. It should breathe like a wooden house, and the material of the box should not emit the slightest bit of harmful fumes. Not harmful to humans, but to stones. Insignificant impurities of some organic substances that are constantly present in the air can spoil the water of even ruby or sapphire, and the color of microporous stones (agate, jasper, turquoise, lapis lazuli, malachite, selenite, etc.) will certainly be affected over time. Silver and its alloys are known to darken in air, and excessive cleaning also causes abrasion of the metal.
It’s a surprising coincidence, but the conditions for storing jewelry at home are almost the same as those for... smoking cigars. If you come across an empty cigar box or humidor, this is a ready-made base for a jewelry box. Humidors are made from Spanish cedar, but linden is no worse. Birch will also work, although its fibers are harder than linden fibers. The wood, of course, must be room-dry (up to 12% humidity), seasoned, and free from defects.
Note: Siberian cedar as a plant is not actually a cedar (Cedrus sp.), but a pine pine, Pinus sibirica. For humans, furniture made from cedar pine boards is certainly useful; definitely not for jewelry either.
Wooden box decor ideas
The textured surface of the wood suggests different types of additional decor.
The surface can be treated with stain and coated with colorless varnish. It is allowed to paint the surface in different colors and artistic painting of the product.
An original wooden box can be covered with fabric or the decoupage technique can be used.
You can complement the design with wood carvings and inlaying the surface with various elements.
Types of jewelry boxes
Beads, rings, bracelets, chains and earrings should be organized. Jewelry chests have been popular since over 3000 BC. - in ancient times they were made of wood, gold, silver or bronze, ivory and stone, decorated with carved ornaments and inscriptions.
Modern technologies have made great strides forward, so you can find boxes made from any available materials on sale. Each variety has its own advantages and disadvantages, which you should know about before purchasing.
Wooden crafts
Jewelry boxes made of wood are the most popular option. They are affordable and durable, made from environmentally friendly material and come in a wide variety of variations. There are options on sale from beech, cedar, mahogany and any other species - this factor often becomes decisive in determining the cost of the product.
Wooden boxes for storing jewelry have a number of advantages:
- low price;
- a huge assortment, including handmade carved boxes;
- the ability to complement and decorate the product yourself.
A wooden box-chest for storing jewelry with carved paintings is a piece of art. Such products can be passed on from generation to generation; they do not lose their value over time. One of the valuable options remains music boxes, which are also most often made of wood.
Leather boxes
Such things look stylish, but their cost is much higher. The frame can be made of a thick layer of cardboard or wood, and the top is covered with tanned leather. Such boxes can have any color and shape; multi-level designs with several compartments can also be found on sale.
No less popular are jewelry boxes made of eco-leather or leatherette. These materials are difficult to distinguish from genuine leather, so they are increasingly replacing it. They are chosen for several reasons, including price differences and personal beliefs. Storing jewelry in such boxes is no less fashionable, so the eco-leather option can be considered both for personal use and as a gift.
Stone or acrylic products
A box made of stone (malachite, marble) is considered a precious product in itself. It is difficult to process natural material, and the process takes a lot of time, so the price of the finished box can be exorbitant. Such things serve, first of all, as interior items, so their functionality may be low. There is only one compartment, so chains, earrings, beads, rings and other jewelry will be stored mixed up.
A good alternative to natural stone is acrylic. It is more affordable, but less durable, so such a box cannot be passed on by inheritance. There are beautiful options of different shapes on sale, since the material is plastic and very durable when hardened. It can be complemented with inserts of precious or semi-precious stones, carvings and any other decorative elements.
Textile options
Fabric boxes are the most budget option. They are convenient to take with you on vacation or use for gift wrapping jewelry. They are light and soft and can have any number of compartments. More often, such boxes are made of cardboard, onto which fabric upholstery is secured with glue. They have several advantages:
- cost - this category remains the most budget-friendly;
- simplicity of execution - the box you like is easy to repeat yourself;
- lightness, presence of a comfortable soft lining;
- a huge number of shapes and colors in stock.
Textile boxes are especially popular among handmade lovers. To make them, brightly colored fabrics are used, and the body and lid are decorated with rhinestones and beads, flowers and any other decorative elements. Also on the inner surface of the lid you can find a mirror for more convenient trying on of jewelry.
Cardboard box
Using cardboard to create a box allows you to make a product of any shape and size. The source material is available and easy to work with. Therefore, it is worth considering when thinking about what you can use to make a jewelry box.
To work you need to prepare:
- cardboard,
- glue,
- regular and double-sided tape,
- decorative elements.
The first step is to decide on the appearance and size of the product.
Operating procedure.
- Cut out a couple of elements of the same shape and size from corrugated cardboard for the bottom and lid of the box.
- Cut out the back wall piece and glue all the pieces with tape on both sides.
- Coat the inner surfaces with glue and cover with paper for decoration.
- Cut out the side parts and cover them with decorative paper.
- Glue the sides to the rest of the part using glue.
You can make such a box in an hour or an hour and a half. External design can be very different in method and style.
You can come up with the most original decor options by looking at photos of jewelry boxes on the Internet.
For decoration, you can take any materials: fabric, beads, colored paper applications, sand and shells, decorative pebbles and much more.
DIY heart-shaped cardboard box
Many girls will like the original shape of the box; besides, you can make such a craft yourself. All you need is thick cardboard, glue and decoration material.
Cut out 2 cardboard bases into a heart shape. Also prepare the sides of the box, the height of which you will determine yourself, based on the purpose of the craft. Cut the bottom edge of the sides as shown in the photo and glue them to the base using Moment glue.
You can connect the lid and the box using pieces of thick fabric, which are fixed with glue.
Cover the inside of the box with decorative paper, and decorate the top with lace, decoupage designs, ready-made flowers made of fabric or paper, and beads.
Creating crafts with your own hands and contemplating the results of the work brings great joy to needlewomen. Caskets created independently are unique objects that have absorbed the hard work and creative abilities of their creator. These items will be a wonderful decoration for your home or can serve as a great gift idea.
Source
Box made from adhesive tape
A durable roll of masking tape can serve as the basis for an original small box for jewelry or various small items.
To work you need to prepare:
- tape sleeve,
- cardboard,
- corrugated cardboard or decorative paper,
- cover with screw thread of suitable diameter,
- acrylic paint,
- universal glue,
- PVA glue,
- decorative elements,
- colorless varnish.
Operating procedure.
- Paint the edges of the bushing with white paint.
- Cover the inner surface of the workpiece with corrugated cardboard.
- Decorate the inside of the bottom and glue it to the sleeve.
- Cover the sleeve and lid with white decorative paper.
- Decorate the lid and walls of the product from the outside.
- Cover the box with clear varnish.
Box out of the box
A small box for storing small items can be easily made from a box of a suitable size and shape.
Before starting work, the box must be inspected and any stickers removed from the surface.
To decorate such a box, you can use fabric or beautiful paper. Boxes in folk style, covered with burlap, look original. You can get an unusual box if you cover the blank with jeans or guipure.
There are a lot of options for decorating ready-made boxes to turn them into a beautiful box.
Eggshell box
Anyone can make an unusual box with eggshell decor. It looks quite interesting, so it will definitely attract attention.
We will prepare the following materials:
- cardboard box;
- eggshell;
- paints;
- napkins;
- PVA glue;
- manicure sticks;
- brush.
Clean and smooth the box using sandpaper.
We coat a small area of the box with PVA glue and apply the shell to the surface.
Use a stick to poke it a little so that the shell cracks. Then we move the fragments apart to the required distance to form a mosaic.
When all the shells are laid out, treat the surface with PVA glue.
We cover the box with acrylic paint in several layers.
Let's start decorating. To do this, separate two layers from the napkin, leaving the one with the design on it. We coat the surface with a layer of PVA and immediately apply a napkin, after which we apply another layer of glue.
Let the box dry for several hours.
Design options for a box made from scrap materials
To decorate a box made with your own hands from scrap materials, you can use a variety of design methods.
Ribbons, lace, beads and stones can be used as decorative details.
It’s easy to make artificial flowers or an applique from ribbons or fabric to decorate a box.
The product can be decorated with artistic painting in folk style or in the form of original patterns.
The decor options for homemade boxes made from various available materials are limited only by the imagination of the master.
Box options
It’s easy to make a box with your own hands from any materials. A simple method of making crafts is creativity using ready-made bases and their design. The frame of homemade storage chests can be boxes, packaging, or baskets. Assembling a craft from parts will be more difficult.
General algorithm of the creative process:
- thinking about an idea;
- drawing a sketch and components;
- preparation of material and tools;
- making patterns;
- cutting out parts;
- assembly of the workpiece;
- decor.
Homemade homemade boxes can be of different configurations and shapes. You can make a product with one or several sections, decorate the lid with a mirror, equip the drawer with legs and a lock.
From a candy box
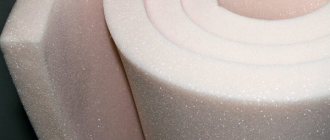
A memorable and interesting gift is a DIY paper box. You can put inspiration into a craft, express your creativity, and capture unique features. You can easily make a beautiful container for small items made from a candy box. Lace, beads, ribbons, silk fabric, threads, and foam are suitable for decoration.
Important!
For crafts made from candy boxes, choose bulk packaging. They will act as a frame. The capacity of the box depends on the volume of the selected base.
Make your own jewelry box based on a candy box in the following sequence:
- cut out a rectangle from a cardboard sheet 0.5-1 cm larger than the dimensions of the bottom of the candy package;
- prepare a foam backing of the same dimensions;
- connect the parts and glue them to each other;
- wrap the workpiece with fabric or paper with a pattern and glue it. This part will be the lid of the box;
- Glue ribbons to the candy box and lid. They will connect the parts;
- drape the product with lace fabric, secure with threads or glue with PVA glue;
- Sew beads tied with a ribbon bow to the lid and sides.
The skeleton of a homemade box can be candy boxes made of cardboard, metal, or plastic. Use your imagination when decorating the base to get a cute and elegant craft.
From ordinary matchboxes
An interesting option for a container for DIY jewelry is a master class on working with matchboxes. Small cardboard cases will serve as a solid base for light, original crafts. For creativity you will need 16 match boxes, sheet cardboard, color drawings, beads, PVA glue and standard tools.
Work in the following sequence:
- Glue 4 boxes together. They will serve as mini chests of drawers, in each drawer of which you can store beads, jewelry, and small items;
- form a blank from glued boxes so that the compartments can be opened on both sides. Glue the parts together;
- cover the craft with cardboard;
- apply cut-out colored designs to the surface and coat with PVA;
- Glue or sew a bead in the form of a handle for opening to each drawer.
The final layer for the box can be a varnish coating or adhesive tape. The craft is convenient for storing hobby accessories. You can regulate the number of boxes yourself and make blanks from 5 or more boxes, form 3 or more compartments.
Corrugated cardboard
An unusual and simple solution would be to make a box from corrugated cardboard. A container with a lid is easy to make by removing the top of a corrugated cardboard box to reveal the wavy paper. In addition to packaging, you will need PVA glue and colored paper.
Process algorithm:
- cut strips of corrugated paper 1 cm wide;
- from the edge, twist the wavy blanks with a snake so that a circle is formed;
- gradually anoint the part so that its parts stick together;
- assemble the round bottom by twisting it to the desired diameter;
- Make the lid in the same way. Its radius will exceed the size of the base by 0.5 cm;
- cut a long rectangle and wrap it around the base with the corrugated side out;
- glue its edges together and glue it to the bottom;
- cut a strip 1.5-2 cm wide and wrap it around the lid and glue it.
For decoration, you can use decoupage - glue napkins with drawings or paint surfaces with bright gouache. Using a similar technique, you can create boxes with lids of different sizes. They will fit harmoniously into any interior.
Jewelry box made from a shoe box
Durable and original boxes for jewelry, storage of sewing supplies, accessories for hobbies, collectibles and photos can be made on the basis of a shoe box. The packaging will serve as the frame.
The decor can be decorated:
- paint the outer walls of the product with gouache, decorate with cut-out pictures, stick on lace ribbons, and varnish;
- Make tubes from magazine paper. Glue them to the bottom so that they diverge in different directions. These elements will serve as the basis for weaving. Bend the posts along the walls. Make a weave out of a glossy magazine, colored paper, thread, and braid. Bend the guides inside the box and cover with colored cardboard. Design the lid in a similar way;
- prepare lace fabric or satin. Glue the material to the surface of the box using PVA glue. Sew ribbon bows, appliques, and beads onto the lids and walls.
The cover of the product can be made separate or connected. You can attach the top to the container using ribbons or laces.
Made from cardboard with several compartments
A home chest for storing jewelry, sewing accessories, beading accessories, and organizing hair accessories can be made in the form of a large box, divided into several compartments. For the base, use shoe packaging; for the compartments, use thick cardboard.
Instructions:
- cut strips from cardboard paper to form the interior space;
- bend one blank from the edges, place it longitudinally in the middle and glue it to the sides;
- make cuts on the partition 2-3 cm deep in the places where you plan to install transverse walls;
- prepare cardboard partitions to place perpendicular to the glued longitudinal wall. Don't forget to leave a 1 cm margin on each edge;
- cut the segments so that they coincide with the cuts on the long strip inside and connect the elements;
- fold the edges and glue them to the sides of the shoe box.
Decorate the product with fabric, appliqués, dyeing, pasting with pictures, sew buttons, bows, textile flowers.
From a milk or juice box
A functional and original cardboard box is a great way to organize space and organize small items, jewelry, and details. Dairy product packages wrapped in cardboard will serve as a strong frame. The lid can also be made from cardboard paper. For decoration you can use fabric, beads, bows, colorful pictures.
Do the craft in the following sequence:
- cut washed packages to the same height;
- glue the boxes together;
- wrap the workpiece with a long rectangle of cardboard and seal it;
- Glue a cardboard base to the bottom;
- use tape to secure the lid.
Interesting!
The first evidence of the appearance of caskets in Russia dates back to 1610 in a description of the life and peculiarities of the queens’ residence.
Decorate the craft with fabric covering, appliqués, decoupage, decorate with beads, ribbons, postcards, and interesting buttons.
Wooden crafts
Wooden boxes are of particular value and originality. They are durable, environmentally friendly and presentable. A gift in the form of a wooden container for jewelry, sewing supplies, money or awards will be greatly appreciated. For creativity, you need an edged board 0.5-1 cm thick, sandpaper, a jigsaw, a saw, fittings, a hammer, nails or glue.
You can make a wooden box with your own hands in the following sequence:
- cut off the elements from the board that will serve as the bottom, walls, and lid;
- polish every detail;
- connect the segments at the ends, secure with nails and glue the surfaces;
- secure the lid to the hinges.
You can glue velvet fabric inside. Decorate the outer surface with painting, cover it with stain, and glue the design. The finishing layer is wood varnish.
From postcards
Gift cards are a keepsake that reminds you of the people who gave them. An original solution to give them a second life would be to make a box. For creativity you will also need scissors, a needle, and thread.
Do the craft as follows:
- make patterns from cardboard according to ready-made patterns or make sketches with your own hands;
- Using the templates, cut out paired elements so that the inner surface of the product has straight walls and the outer one is curved;
- sew the folded pieces together using an overlock stitch using single or double thread;
- Secure the workpieces together by stitching the seams.
Choose bright cards for crafts, combine different elements. The casket can be a great gift for the person who sent messages for you.
Soft box
A container for systematically storing jewelry, threads, bows, hairpins, and stationery can be made from multi-colored fabric. For the creative process you also need padding polyester, cotton wool, thick cardboard, and scissors.
Do the craft step by step:
- cut out the base for the product from thick cardboard in the form of a circle or oval;
- wrap the workpiece with padding polyester, secure the edges;
- Drape the part with fabric on top;
- make a sidewall from cardboard paper in the form of a long rectangle, the length of which is equal to the size of the bottom circumference;
- lay cotton wool or padding polyester on the outside of the part, glue it;
- sew a fabric cover so that the wall part fits inside;
- fold the workpiece and secure the edges with a seam;
- sew the base to the prepared cylinder;
- Make a lid by analogy with making the bottom.
Make a soft box so that the inner walls are smooth and the outer surfaces are soft. Additionally, textile elements can be decorated with buttons, beads, beads, and bows.
Boxes made of threads
An original and colorful craft that will organize small details at home, or will be an excellent gift for a friend or relative, is a box made of threads. To make it you will need thick thick cardboard, toothpicks, thread, scissors.
Follow the step-by-step creativity algorithm:
- cut a blank for the bottom from cardboard of any shape;
- insert toothpicks into the base so that they are perpendicular to the bottom, at a distance of 1-1.5 cm between the elements;
- make weaving with threads, threading alternately through perpendiculars;
- Cut out the lid from cardboard and attach it to the wall.
An interesting option would be to use bright floss threads, combine different colors, and use fluffy knitting threads. Decorate the lid with fabric drapery, cover it with paper, glue cut-out pictures, sew textile flowers and bows.
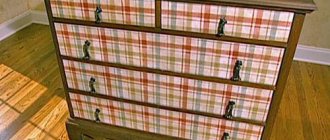
From vinyl wallpaper
A simple but original way to decorate a box is wallpaper. For decoration, it is better to use vinyl type wallpaper. They are durable, have high-quality design, elegant embossing and relief. For this craft you will need a box, glue, and scissors.
Follow the creative process like this:
- measure the dimensions of the base box;
- cut out segments from the wallpaper according to the dimensions of the walls, bottom, and lid;
- glue paper cutouts to the inner surface;
- iron and dry the workpiece thoroughly;
- Cover the outer walls with wallpaper paper.
To decorate the lid and interior design, you can use wallpaper with a different pattern and color. If desired, stick fabric flowers, decorative elements, and beads onto the closing part.
Made from bamboo napkin
An original idea for creativity is to make a box from a bamboo napkin. The dense material will serve as a strong base that will withstand even heavy jewelry or other items. Bamboo looks stylish and modern. The product will fit perfectly into any interior. For the craft you also need glue, corrugated cardboard, a needle, thread, and a glue gun.
Execution algorithm:
- cut a long strip 1 cm wide of corrugated cardboard;
- twist and glue the workpiece so that an oval or circle is formed;
- make 2 of these parts. They will serve as the sides of the box;
- attach the side parts to the bamboo napkin with glue. Glue 2/3. Leave the top part open; it will serve as a lid.
Interesting!
In Russia there are 2 monuments to the box. Monuments were erected in the cities of Penza and Novosibirsk.
Decorate the product - sew buttons, fabric bows, beads, glue coins. You can attach accessories in the form of a lock or a strap with a loop to the edge of the upper and lower parts as a fastener.
Eggshell box
The original design of a homemade casket can be made by finishing with eggshells. The crushed egg shell resembles a mosaic. For decoration on a dark surface, choose white elements. To decorate walls in light colors, select yellow particles. You can mix different types of colors.
Do the craft as follows:
- clean the cardboard or wood box;
- degrease surfaces;
- Apply PVA glue to the walls and lid;
- place the broken shells so that there is a small gap between them;
- dry the workpiece;
- Apply another adhesive layer on top;
- After drying, coat the product with varnish.
For decoration, you can decorate the surfaces by gluing cut-out images of flowers, gluing fabric bows or roses, appliqués, and beads.
From book
The box made from a book has an original design. For crafts, you can use any hardcover edition. The more pages there are in printed materials, the higher the chest for jewelry, sewing accessories, money, and collectibles will be. For this craft you need PVA glue, a stationery knife, cardboard, and elements for decorative brushes.
Follow the instructions for making an original chest:
- Using a sharp knife, cut a hole in the pages from the first sheet after the cover to the last crust;
- make the slot in the form of a rectangle, oval or several compartments;
- generously coat the pages with adhesive on the outside so that they stick together;
- apply glue from the inside;
- after drying, cut a rectangular strip of cardboard with a width equal to the height of the workpiece;
- glue the coating to the inner walls;
- decorate the lid in decoupage style, glue drawings, fabric flowers, bows;
- coat the craft with varnish.
A homemade box made from a book can become an original hiding place for storing precious things or money.
From scrap materials and accessories, you can quickly make a box with your own hands using original ideas and photos. For home creativity, you can use boxes, packaging, books, cardboard, and wooden boards. The design of the craft involves different options. You can decorate the chest using the decoupage technique, decorate it with applique, beads, and textile flowers.
Baguette box
The boxes, for the manufacture of which a baguette was used, look dignified and noble. You can simplify the task by taking the plastic version.
To work you need to prepare:
- baguette,
- hardboard blanks for the lid and bottom,
- universal glue,
- clasp and loops,
- decorative elements.
Step-by-step instruction.
- Cut 4 pieces for the lid from the baguette. The cut is made at an angle of 45 degrees.
- Glue the parts of the lid using universal glue.
- Cut out 4 elements for the side parts and glue them around the perimeter to the bottom part.
- Cover the inner walls with fabric.
- Glue the hinges and lock.
Instead of hardboard, you can make the bottom and lid from thick cardboard.
To decorate the appearance of such a box, you can effectively shade the convex parts of the baguette pattern with a shade of paint.
Painted baguette boxes also look stylish. Additional decor options must match the style of the item.
If desired, you can make a box with your own hands from materials available at home. You can think of decor options yourself or take jewelry box decor ideas from the Internet as a basis.
You can make the task easier by looking at the instructions for making boxes on thematic websites. In general, creating a box with your own hands does not require much experience or special skills.
Milk packaging box
A small box is an excellent solution for various small items. That's why girls like her so much.
To work you will need the following:
- packaging for dairy products;
- textile;
- double-sided tape;
- scissors;
- ruler;
- ribbon;
- knife.
We cut out two identical containers from the packaging to create compartments for the box.
We connect them together with double-sided tape and cover the box with fabric. Don't forget to treat the bottom.
Cut out a rectangle from the packaging that will serve as the lid. We cover it with fabric using tape. Glue a ribbon so that you can tie the box.
We connect the base and lid with double-sided tape. A cute box for small items is ready!
Photos of boxes
Did you like the article?
0