69069
To creatively decorate your apartment, as well as add personality to it, you can make furniture from cardboard with your own hands; the patterns and diagrams are so simple that even a beginner can make the products. A variety of options will allow you to choose the right piece of furniture and make it, involving all family members in the process.
Cardboard - properties and features of the material
Cardboard is produced from waste paper and various wood pulps. The material consists of several layers - the internal space is filled with cheap mechanical shavings, waste, and the outside is covered with durable, more expensive cellulose with or without whitening.
Cardboard, like paper, consists primarily of plant fibers. Its minimum thickness is 0.2 mm. The manufacturing technology is almost identical to paper production. First, the crushed raw materials are cast, then ground, pressed and dried. At the output, you can get two types of products - grades A and B. The following parameters characterize the products:
- Weight.
- Thickness.
- Humidity indicators.
- Electrical insulating properties.
- The ability to absorb moisture (water, gasoline, oil).
- The degree of deformation when wet and dry.
Types of cardboard
Cardboard varies in density and characteristics. Each type of material has its own purpose. It is mainly used for packaging to preserve the integrity of the contents. It is also used to make packaging containers, decorative boxes, gift boxes, and individual sheets. Based on composition and purpose, cardboard is divided into the following types:
- Packaging. They are used in production for packaging products of any group and size. Corrugated cardboard is divided into classes depending on the number of layers and their density. It has high levels of strength and shock absorption.
- Printing. Folders, booklets, bindings, and various layouts are made from it. The surface of the cardboard is perfectly smooth and whitened. The products have increased resistance to mechanical damage, do not press when pressed without force, and do not delaminate.
- Chromersatz. This type of cardboard for boxes is made from purified wood and plain or bleached pulp. Mainly used for packaging retail goods (jewelry, perfumes, detergents, confectionery, etc.). It is inferior in popularity to corrugated cardboard due to its high cost. It has good density, despite the small number of layers (maximum 4).
- Decorative design. Produced from high-quality expensive raw materials. The material can be of different shapes, sizes, colors. It gained the greatest popularity in advertising. It is used to make business cards, flyers, booklets, and personalized invitations. Also used for packaging luxury coffee, alcoholic beverages, and sweets.
- Shoe. Used in shoe factories and repair shops. Insoles, backdrops, and half-insoles are made from it. It is made from synthetic materials and tanning waste.
Advantages and disadvantages of cardboard furniture
Making your own furniture from simple and more than affordable material is a great way to diversify your interior and make temporary changes to the design of the room. You can make functional items such as a table, chairs, sofa, shelves or decorative origami-style toy crafts, doll houses, children's airplanes and cars. Cardboard products have the following advantages:
- Economic benefit. You don’t have to buy raw materials for making furniture, or spend money on delivery or installation. You can use packaging from household appliances lying around on the balcony or in the garage, or simply ask at the warehouse of any store.
- Original design. You can create unique things using unusual patterns. Sofas with small honeycombs, doll houses in the full height of a child, and tables on figured cardboard legs look beautiful.
- Lightness and mobility. Even a child can move cardboard furniture. You can easily change the location of a massive sofa made according to the template of a large living room item.
- Safety for people and animals. Cardboard does not contain harmful chemicals. Broken parts can be disposed of profitably and without harm to the environment (used to light a stove or fire).
A significant drawback of furniture made from cardboard is the rapid loss of shape in a humid environment. Even a drop of water falling on a paper table, shelf or cabinet can ruin the appearance of the product.
Tools and materials for manufacturing
What is needed to make cardboard furniture with your own hands? The constant materials will be:
- Packaging cardboard/cardboard boxes – you can ask for boxes in the store or look for purchased equipment at home;
- Regular and colored tape, paper tape, double-sided tape;
- A stationery knife for cutting cardboard (watch the sharpness of the blades and change them as they become dull);
- Sharp scissors;
- Dull knife;
- Roulette/iron ruler;
- Pencil and eraser;
- Glue (PVA, hot melt glue, wallpaper glue, liquid “moment” - depending on the situation, but sometimes you can only get by with tape);
- Sandpaper (you will use it to sand the cardboard sections);
- Kraft paper (white and dark) and tracing paper.
Types of cardboard
To make cardboard furniture with your own hands, you will need different cardboard, depending on the situation.
Cardboard can be one-, two-, or three-layer, depending on the number of layers, which, in turn, consist of small waves that can be seen on the cut of the cardboard. The more layers of cardboard with waves, the thicker the cardboard. Also, do not forget to determine the sides of the cardboard before starting work:
- smooth (sometimes with drawings) side - front,
- rough - purl.
To strengthen the edges of cardboard furniture, use dark-colored kraft paper, gluing all the seams with it, using wallpaper glue. Stick white paper (or tracing paper) on all furniture - it makes decorating the furniture easier.
Remember: craft paper and tracing paper must be torn by hand before gluing, not cut!
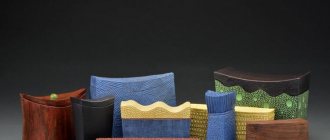
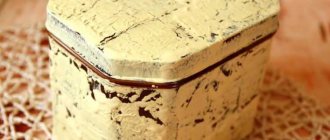
How to beautifully design and decorate storage boxes
How to make cardboard furniture more durable
Depending on the purpose of the item (whether it be a chest for children's toys or a TV stand), cardboard is strengthened in different ways. For a more reliable and durable fastening, you must remember the following:
- To strengthen the cardboard and protect it from moisture, use parquet varnish, applying it to finished and decorated parts of the furniture;
- Try to make furniture symmetrical - it is more stable than irregularly shaped furniture;
- If you make asymmetrical furniture, then add more supports to it for strength;
- The more cross sections your furniture has, the more stable it is;
- To give more strength to your structure, use a trick - make two layers of cardboard on all furniture elements. But, pay attention, the layers must be different: one layer must have horizontal waves, the other must have vertical ones;
- Light cardboard is less durable than dark cardboard;
- The thicker the cardboard, the stronger it is.
Where can you use cardboard furniture?
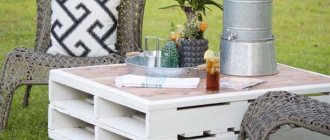
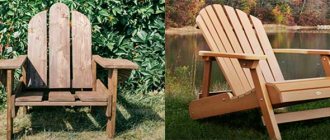
Cardboard items will fit perfectly into a rustic, Scandinavian, eco-friendly interior. There is always a place for furniture for relaxation in the spacious living room, on the loggia, or on the closed terrace of a country house. Hanging hammocks made of paper tubes and mobile chairs can be taken with you on a picnic or fishing.
Designer tables and chairs made of cardboard are increasingly found in cafes and restaurants. Cheap, beautiful items can last for several months without losing their original appearance. They can be quickly and easily replaced with similar ones without disturbing the overall style of the establishment.
Cardboard interior items cannot be placed in open areas, near roadways, fountains, ponds, lakes. The material quickly deteriorates in a humid environment and is difficult to clean.
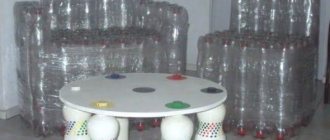
Table made of cardboard and plastic
If you are planning to make a paper theater, first of all take care not of its actors, but of the environment. For everyday scenes, you need to know how to make a chair. Let's get to work. Draw a layout on paper, carefully draw all the elements. Draw in life-size, focusing on the parameters of the characters who will inhabit your theater. We cut out the finished “patterns” and glue them onto cardboard.
Please note that the cardboard should be thin but strong enough.
If you want to add density to the product, you need to stock up on plastic that hardens in air. We glue all the elements of the future chair together. We knead the plastic in our hands and make several small pieces out of it. Place them in water and leave for a couple of hours. Mix the soaked plastic and pass it through a sieve. Please note that the finished mixture should have a consistency similar to sour cream. Cover the chair with plastic and leave to dry. If necessary, the entire theater can be coated with it to make it denser and more resistant to wind if performances take place outdoors. To make the products dry faster, you can use a hairdryer.
As you can see, you can make not only a theater with your own hands, but also interior items. The finished craft will delight your kids.
Ideas and options for what can be constructed from cardboard
The strength of properly designed and processed finished cardboard products is not much inferior to furniture made of chipboard and plywood. Every room in an apartment or house can be successfully transformed with the help of original items. You can build a light house for Barbie on the window sill in the nursery, and place a table and chairs made of cardboard on the floor. Floor shelves made of cardboard glued together in several layers in the shape of animals and people will look great.
In the kitchen you can make an original dining area. Basic and additional material in the form of fasteners, connecting brackets, in this case you will have to spend much more. Designer stylish shelves will highlight the personal qualities and professionalism of creative workers in the office.
LiveInternetLiveInternet
Recently we were lucky enough to work on one very interesting order - interesting, because in addition to the internal and external lighting of the house, they ordered us a small room into which you could look through the window :))) usually all these things created by hand acquire their own history over the years , but this lamp had it already when the foundation began to be laid. The characters in the story were united by their love for children and charity work, but I will tell it when I ask permission to publish a shortened version, but for now I would like to show how we made the room for this house. It’s not difficult at all, and is quite suitable for warming up.
1. We take thick cardboard, a ruler, a pencil, and draw our room - three walls, a floor and a ceiling.
2. glue them together with paper tape.
3. We glue paper on the ceiling, wallpaper on the walls, and cover the floor with bamboo parquet. on the ceiling I like to use watercolor paper - it is thick and it has a very interesting relief surface - in the case of the ceiling it perfectly imitates plaster :) instead of wallpaper, you can use any other paper, cotton (we glue it on PVA), and in general, anything that whatever.
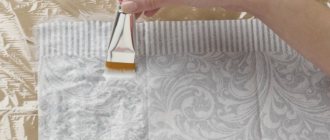
4. We can stop here, but we’ll complicate the process a little - we smear our floor with PVA, cover it with a napkin and again go over it with a brush with glue. dry.
5. make a door. in this case, the door is two-layer, we cut out two identical rectangles from thick paper, cut out any simple design on one of them and glue it to the second sheet, cover the top with pva and a napkin - the same as in the case of the floor.
6. I made a half-centimeter door handle from plastic; it can be made simpler by gluing together several different-sized paper circles and adding a bead. We need 3 bamboo sticks for door jambs.
7. Now let’s start with the furniture - yes, just like that, leaving our room with the doors to dry. We cut out a sofa from thick cardboard - whatever you want, just to get a book like this. choosing fabric for upholstery, fabric for pillows...
8. glue the upholstery to the sofa, bend the edges and glue them behind the back. My room will be static and will be strictly behind glass, so I won’t hide anything; if you plan to rearrange the furniture, I strongly recommend carefully gluing fabric or thick paper to the back. We roll up the armrests from strips of fabric, where the width of the strip is equal to the width of the sofa, and glue the round pieces to the ends of our bolsters. The legs, again, can be made from anything, but I made them from my favorite modena clay that came to hand - it is smooth and dries quickly. for the sofa I use fleece here - it allows me not to use padding, but to immediately glue the fabric to the base. You can not just glue the pillows together from a piece of fabric like I did, but decorate them with hand embroidery - it will be simply gorgeous!
9. I make a corner table from thick cardboard and four toothpick legs. We cover the table with a napkin with PVA to create the texture of wood, we glue the legs with instant glue, I personally stuck a piece of plastic on the bottom of the table and stuck the legs into it.
10. after which we sculpt the rest of the little things... or we don’t sculpt, but cut them out of paper - for example, books. we put them on the shelf, draw a picture, make a vase with flowers, throw a blanket on the sofa - we have as much fun as we can, but first, of course, we paint everything we’ve done.
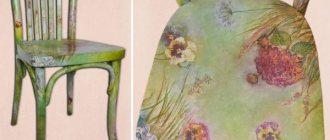
11. First we paint everything in primary colors, and treat the corners and protruding surfaces with a dry brush and white paint - many articles have already been written about this “antique effect” on the Internet.
12. glue the walls to the ceiling and floor. We throw a carpet on the floor, which we lovingly decorate with miniature embroidery, or knit it, or, like me, brazenly glue it together from two round pieces of fleece.
13. Next, I thread a wire with a diode through the ceiling and sculpt a chandelier, but this is me - after all, I need this room for our lamp house. And as an independent object, it can be supplemented with a cardboard roof, the door can be made to open initially, or a decoy can be glued not only inside, but also outside. Cover the walls with bricks made of paper or plastic, or maybe with boards made of the same bamboo. You can make 4 walls instead of three and cut out a large window, hang curtains on a toothpick cornice. Recreate your own room in miniature, or create your dream home, or give it to a friend instead of a postcard...
Well, this is what the room looks like through the window of the house.
and, of course, the house itself. height 40cm.
Master class: creating furniture with your own hands
The fashionable hobby of usefully recycling waste material at home has become very popular. You can create with your own hands not only furniture for your home or garden, but also large-scale playrooms, attributes for recreation areas, cozy armchairs, and functional shelving. You can use the most unimaginable idea. Furniture made from cardboard is not a simple quick-fix craft, but a long-requested trend in modern design. Before starting work, you must carefully study the master class you like and perform all the described steps step by step.
Necessary materials and tool kit
Cardboard furniture will be functional and attractive if you use high-quality materials for its manufacture. Beginning craftsmen will have to work with devices for cutting thick paper and teaching aids with patterns and detailed diagrams. You can create full-fledged items from boxes using the following raw materials and tools:
- Cardboard. This could be old packaging, custom-purchased sheets, or shipping boxes;
- Scotch tape of different widths (transparent, colored, double-sided);
- Stationery knife, scissors;
- Large ruler (minimum 50 cm), tape measure;
- A simple pencil, a grater;
- Glue (PVA, superglue, glue gun);
- Kraft paper, tracing paper;
- Emery for sanding cuts.
Product diagrams and drawings
The process of preparing for work includes not only the selection of material, its cleaning and disassembly, but also the creation of drawings. First of all, you need to decide on the type of furniture and model. Then choose the most successful scheme. You can find a detailed description in any master class.
The next step is to measure the area of the room in which the piece of furniture will stand. Based on such data, you should adjust the drawing so that the table or sofa looks harmonious in the room. Now you can make a three-dimensional layout with transfer of patterns and detailed drawing of all elements.
Forming parts and assembling products
Regardless of the complexity of the drawing and dimensions, features of the future design, cardboard furniture is made according to a single algorithm. Paper patterns are applied to the main raw material, traced with a pencil and cut out. The resulting parts must be prepared for assembly - the cut areas must be cleaned with sandpaper. The peeking texture of corrugated cardboard can be covered with tape or decorative paper.
After careful processing, they begin to assemble and fasten all the elements together. You can connect cardboards using special grooves, tape and glue. In order for the product to have a neat appearance, uneven areas in the places of cuts and joints are sealed with putty.
All elements, glued in layers, are placed under a press for the drying period. It is necessary to apply pressure on all areas with equal force. To do this, you can use large books and other weighty objects with a flat surface. Irregularities formed after gluing are masked with kraft paper. After the furniture has completely dried, you can begin to strengthen and decorate it.
Strengthening structures
Each piece of furniture needs varying degrees of strengthening. Children's houses for dolls, chests, and crafts for games can do without such a procedure. Shelves for TV, tables, sofas, shoe racks must be durable.
Additional fixation is given to all parts of any design by stiffening ribs. You can’t do without them when making a cabinet, rack and other large items. The joint grooves of such items must be coated with glue during assembly. This will extend the service life of the products and protect the items stored in them. The following techniques will also help increase the strength of structures:
- Parquet varnish will protect cardboard furniture well from moisture. They cover the already assembled, decorated structure with it.
- Symmetrical furniture is more stable than irregularly shaped objects and does not require additional fixation of supports;
- The strength of structures is affected by the number of transverse parts. The more there are, the more stable the cabinets, tables or sofas;
- Two-layer parts will be much more reliable, especially if you connect two parts with different directions of cardboard waves.
Decoration
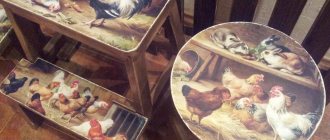
At the final stage, the finished items are decorated. You can use a variety of methods - purchase special finishing materials or use improvised means. The right decor and methods of applying it will also help strengthen the furniture. The following techniques are used to decorate cardboard structures:
- Fabric upholstery. The material can be glued, stapled or placed on special pins;
- Finishing with paints. Using acrylic compositions, you can paint pieces of furniture in one or more colors, apply any pattern using a stencil, or create a custom painting;
- Decoupage. The method will not only give the furniture an original look, but also strengthen the paper material with an additional layer of glue and varnish;
- Pasting with film, decorative paper, wallpaper. You can use the same color or pattern that is present on the walls, ceiling, other surfaces, or print any pictures;
- Applying varnish and glitter. Shining houses for dolls, miniature towers in the nursery will look fabulous if their roofs are decorated with beads, beads, and natural materials;
- Glaze. With the help of various compositions, a deep transfusion of several shades is achieved.
DIY making
In order to cut parts and gluing and assembling elements, you will need a fairly large free area.
The approximate dimensions of the cabinet (they depend on the size of the cardboard boxes) are 900 mm * 450 mm * 1500 mm (width, depth, height).
It is better to use a solid base for the cabinet . If you have a large refrigerator box at hand, you can use it as a frame into which individual elements will be inserted. Otherwise, each part of the cabinet will be connected to the other using glue.
To ensure the stability of the structure, as well as to make the cabinet walls more dense and reminiscent of standard furniture, it is better to glue two sheets of cardboard together.
Cutting parts from cardboard boxes
Use a utility knife to cut parts for the rack. The cabinet is roughly divided into three compartments: upper open shelves, a middle part with drawers and lower open shelves. The product has a symmetrical structure, so the upper and lower parts are allocated an equal number of centimeters in height - 650 mm, and 200 mm are allocated to the middle part.
Important . The thickness of the walls and partitions should also be taken into account when marking the rack. In these instructions, the dimensions are given taking into account these values, but the net size of the shelf depends on the thickness of the cardboard, which ranges from 5 to 10 mm!
To assemble the cabinet you will need the following parts:
- double body of the product;
- four horizontal internal shelves;
- three vertical internal partitions (one of them serves as a divider for drawers);
- two fronts (internal!) for drawers with rounded slots instead of handles;
- four barrels of drawers;
- two rear walls for sliding parts.
For better fastening, drawers must be made internal , as if recessed into the walls of the rack. This part must be made with the tightest possible fit so that they do not fall out of the cabinet.
Gluing
Each part must be cut out in two copies, which are then glued together.
The trick that will allow you to quickly assemble the structure is to ensure that the internal parts of each element are 5-10 mm (i.e. the thickness of the cardboard) smaller than the external part .
For example, parts are attached to the cabinet body from the inside, the distance between them in height is 10 mm. They also glue the parts symmetrically onto the transverse wall of the rack, which divides it into two equal parts. This creates grooves into which shelves can be easily inserted directly. This option does not require special furniture corners or other fastening methods.
Advice . The glued elements must be allowed to dry. It is better to dry some parts under a press and in a ventilated dry room.
After all the parts are securely glued, the edges must be sanded so that small nicks do not interfere with the subsequent connection.
Assembly
After gluing the main parts, you should get the elements of an almost finished cabinet. On the inside of the body, five parts should be glued vertically, between which horizontal shelves are inserted.
On the upper and lower inner parts there are two elements each where vertical shelves will be placed.
In its principle, a cardboard cabinet is reminiscent of a construction set that many probably had in childhood, where each part serves as a support for the other.
Before driving each individual part of the rack into the groove, the edges must be coated with an even layer of glue . The same applies to the assembly of boxes - the edges of the side elements are glued together, and the bottom, attached after, reliably fastens the parts together.
Advice . To make the edges and corners of the structure look neater, they can be covered with thin paper. It is also better to glue the joints between the longitudinal and transverse shelves with paper for better stability of all elements.
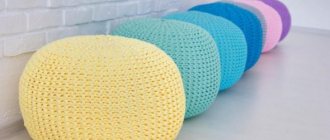
Furniture made from cardboard triangles and sleeves
You can make original interior items not only from solid large sheets of cardboard. You can use small boxes and toilet paper rolls. To make functional chairs and tables of unusual shapes, you will need to prepare many triangles. The technique is similar to modular modeling, but on a larger scale. The cardboard is cut into strips, the width depends on the desired size of the triangle. Then they are folded several times using the origami technique. The basis for work should not be rigid and multi-layered.
Ordinary bushings can be used as a reliable material for creating original furniture. To make large functional objects, you will have to accumulate a large number of building elements.
These straws create a wonderful impression of cave design. By gluing them together in height, you can make original chairs and a table. Install a designer organizer made of bushings on the surface of the table. You can also make an excellent hanging chandelier, a screen partition, or assemble a picture in the form of the faces of cats, dogs, and other animals.
For a large craft, collecting the required number of bushings is problematic. They can be replaced with any cardboard tubes of different sizes, for example, from stretch film, baking sleeves, or made yourself from a sheet of cardboard.
Rules of care
The service life of cardboard furniture is unlikely to be extended with proper and timely care. It will last as long as possible without losing its original appearance if you adhere to the following recommendations:
- You cannot leave cardboard items in a damp room or on outdoor areas without a canopy;
- Cardboard catches fire quickly, so tables, chairs and sofas should be at a safe distance from gas stoves in the kitchen, fireplaces, fires;
- The fragile material is susceptible to even the slightest mechanical damage. Such furniture must be handled with care and precision.
Disadvantages of cardboard furniture
Cardboard is a fairly universal material that has found application in many areas of human activity. This raw material has not bypassed household goods, and cardboard furniture is becoming increasingly popular.
Having many advantages, such designs also have some disadvantages. And although their list is inferior in number to the undoubted advantages, before installing such furniture you need to know about the disadvantages of its operation:
Cardboard furniture requires special care for its long life.
- incompatibility with moisture and dampness;
- Incorrect assembly will lead to breakdown and fragility of the product;
- not all types of cardboard are designed for heavy weight;
- fragile material requires adherence to certain rules for care and operation;
- increased risk of damage during transportation.
In order for cardboard furniture to last as long as possible, you will need to follow simple rules for its operation:
Coating cardboard furniture with varnish will extend its service life
- do not leave in a damp room and ensure that the cardboard is not exposed to moisture;
- do not leave it outside;
- varnish for better preservation;
- wipe with a dry cloth or damp cloth;
- do not load with a large mass;
- do not jump on furniture surfaces.
Furniture made from cardboard will become not only an original, but also a useful element in the arrangement of a residential or office space. This solution will not only save your budget, but also make your most vivid and daring fantasies come true.