The kitchen plinth is a special fence that helps keep the kitchen floor clean even in places where a mop or vacuum cleaner cannot reach. Dust, dirt and food often accumulate under furniture. To prevent this from happening, a base is used, which is attached to the headset, or rather, to its legs.
A special clip is installed on the furniture legs, thanks to which the kitchen plinth is attached. Materials for the production of the base
The most popular types of plinths are plastic (PVC), MDF and chipboard plinths, and aluminum. Each of them has a number of features that need to be taken into account when choosing.
What is it and why is it needed?
When ordering a kitchen set, the question invariably arises: should the lower tier have legs or not? All manufacturers insist on using furniture legs. After all, with their help, two problems are solved at once:
- during installation, it is convenient to level the lower cabinets by adjusting the height of the legs;
- they protect furniture in the event of a “flood” (the lower shelves and fronts remain above the water level).
But it would seem that not everyone likes such a practical accessory.
Most often, the legs are made of plastic or metal, and this design does not suit every style of kitchen. In addition, round products (potatoes, onions, etc.) are constantly rolled into the gap between the kitchen unit and the floor and excess dust and dirt gets clogged. Few people want to spend extra effort and time on cleaning.
The lower plinth for the kitchen set solves these problems. It reliably hides misplaced legs, and the presence of a special silicone seal protects the space under the lower cabinets from moisture and dirt.
Chipboard bases - what is it?
Kitchen plinths made of chipboard have a water-repellent profile, but they have their own characteristics. It is rarely possible to achieve a perfect fit to the floor: dust and dirt will still get under the kitchen furniture, forming dark spots and plaque. Accordingly, this negatively affects the appearance of the kitchen. Note that chipboard bases quickly become unusable, as they swell greatly from moisture. It is simply necessary to carry out additional work on the chipboard plinth to avoid further deformation. It should be noted that a product made of plastic is much lighter than a product made from materials such as MDF and chipboard.
For or against?
There are no significant pros and cons to the kitchen plinth. Personal taste preferences rather play a role here. Some prefer the shiny chrome of metal legs, while others prefer the monolithic plane of the facade.
Most often, the advantages of the base include its aesthetic appearance. The decorative “skirt” makes it convenient to hide hoses and wires leading to the sink and kitchen appliances.
But you should realize that by hiding communications in this way, you can create a lot of problems for yourself. So, the breakthrough of a hidden hose will become known only when the size of the puddle is quite large (and, perhaps, the neighbors below will report the “flood”). After all, the sealing rubber will hold water under the kitchen unit for some time.
What materials are they made from?
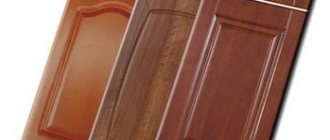
Decorative overlays that hide the legs are made from different materials. Each of them has its own set of advantages and disadvantages. The most popular materials include:
- plastic (PVC). The most budget option. Despite the relatively low cost, a plastic strip is one of the best options. The material is resistant to moisture, quite flexible (easy to install and replace), and there is a fairly large selection of colors. A significant drawback is that the plastic does not always match the texture of the headset. For example, when combined with a natural array, it will look ridiculous;
- aluminum. The solution is very expensive, but these costs are justified. Aluminum is inert to moisture, environmentally friendly, durable and reliable. At the same time, such a “frame” looks stylish and expensive;
- Chipboard and MDF . These materials are selected only “as a set” for the headset. That is, when the set itself is made of MDF or chipboard. The protective functions of such a decorative strip are not very high; with prolonged contact with water, the material quickly swells and loses its original appearance. In some cases, the MDF panel is additionally protected with a special profile (a kind of plastic cover that fits onto the bottom of the plank);
- array. Due to the high cost, this base option is used extremely rarely. In most cases, decorative strips made of solid wood are made only to order for a specific set.
The beauty of the security strip is that it is fairly easy to install and remove. If the chosen option does not live up to expectations during operation, you can replace the base with your own hands with another one (by color or material).
Features of installing a plinth made of chipboard
Once the legs are installed, you can begin installing the kitchen plinth. One more feature should be noted here: you should not attach the base to all the legs, two or three are quite enough. The plinth must be fixed on the outer legs and, optionally, on one intermediate one, in the case of a kitchen unit length of more than 1.5 - 2 m.
This is due to the fact that installing all the legs exactly in one straight line is very problematic. And if you fasten the base to all the legs at once, provided that the legs are slightly out of alignment, then a wave will go along the surface of the base, which will spoil the appearance of the base itself.
In order to install the plinth, the location of the legs is marked and fasteners are installed to the plinth using self-tapping screws.
Fig.7.
The plinth strip is secured to the legs with clips that come with the legs. The clips are mounted on the base plate and snapped onto the legs. To attach the plinth strip, it is enough to secure them on 2 legs. If the base is long, it can be mounted on 3 legs.
Here it is advisable to use self-tapping screws with a small head. The fact is that the base mount, by its design, has the ability to be adjusted, which simplifies its installation. And if the screw heads are large, the fasteners may jam, which will make adjustment much more difficult.
The article fully covered the methods of attaching plinths, as well as the position of the plinth relative to the kitchen facade, which is very important for the ease of use of the kitchen. We noted the peculiarities of installing the plinth to the legs of the kitchen unit. This feature is important for the appearance of kitchen furniture.
If you are leaning towards a plastic base, do not forget to immediately purchase the necessary accessories for the base (corners, connectors, etc.). It is important to note that all elements should be purchased from the same manufacturer, for example, FIRMAX, so there will be no problems with different shades of elements.
Fig.8.
The plastic plinth is equipped with various connecting elements, such as corners, plugs, etc. This greatly simplifies the joining of the plinth parts and improves the appearance of the plinth.
If you choose a plinth made of laminated chipboard, then do not forget to make an edge to protect the plinth from moisture. In addition, chipboard plinth seals have worked well for this purpose.
Fig.9.
The kitchen plinth can be used for roll-out baskets. This very good solution will increase the capacity of the kitchen unit. For such baskets, legs from 120 mm are used.
Fig. 10.
The baskets are made on the basis of special roll-out elements. The floor and side walls of the basket are made of laminated chipboard. You can make such roll-out elements with your own hands.
Fig. 11.
Roll-out plinth baskets can be made significantly larger than 120 mm; this will give the kitchen an interesting design.
Fig. 12.
The base can be used for decorative lighting of kitchen units. The backlight is based on LED strip.
Fig. 13.
Spotlights can be used for illumination.
Fig. 14.
Fig. 15.
An interesting effect in kitchen design can be achieved using RGB LED strip. This LED strip allows you to set different lighting colors.
Types and forms
Plinth strips cannot boast of a wide variety of designs. The entire range can be divided into straight and radius (for sets with curved facades).
It should be noted that kitchens with complex shapes may require custom-made plinths. In this case, there are many more possible design options.
Corrugated profiles (most often aluminum) are produced in limited quantities.
It looks original, but requires increased attention, since more dirt and dust gets clogged into the relief of the design. Typically, this type is chosen only when it fits perfectly with other interior elements, for example, chrome legs of a table or chairs.
Colors
The color palette of the plinths differs depending on the material from which it is made.
Aluminum decorative strips most often remain in a natural metallic color, and are divided only into mirror and matte. It is possible to apply an individual pattern on them in the form of engraving, but this type of finishing is not particularly widespread.
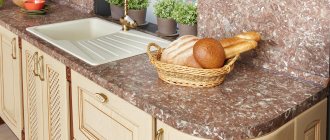
Plinths made of MDF and laminated chipboard are usually colored “wood-like”, “stone-like”, or in plain matte or glossy colors. The palette of this type of plugs is quite wide. It allows you to choose the right option for almost any kitchen design.
Protective strips made of natural solid wood are also left in their natural color, or they are opened with tinting varnish to match the headset.
Plastic bases have the widest range of possible shades. You can choose either monochromatic solutions or an option with a pattern (most often imitating the pattern of natural wood or stone). Delicate pastel colors or bright and aggressive - the choice is huge.
It is not always possible to select a decorative plug to match the kitchen set. A solution with a contrasting base is common. In this case, the protective profile matches the color of kitchen appliances or other interior elements. This solution looks stylish and emphasizes the originality of the design.
You should not choose a “custom-made” base from a catalog or based on the palette of samples provided. Colors in the photo and in reality may vary greatly. Moreover, the shade may vary from batch to batch (especially if we are talking about a natural array).
When arranging “to order” delivery, you may find yourself in a situation where the decorative strip is significantly different in tone from the facades. The best option: take the protective profile complete with the headset. If this is not possible, you should select a base only from stock.
When choosing a color scheme, you need to take into account the features of care. So the mirror base will have to be regularly rubbed with glass detergents. Doing this while lying on the floor is not very comfortable.
Glossy bases in bright colors will also require more careful care than matte ones. They show all the stains that most often remain after contact with a mop when wet cleaning the floor.
Dimensions: height, length, depth
To order, you can make a plinth of almost any length and height. But they do this extremely rarely. Most manufacturers of protective strips produce their products in three heights: 100, 120 and 150 mm.
These sizes were chosen for a reason. This height is ideal for the length of standard legs for kitchen furniture. Therefore, individual production of a base may only be required when working with an exclusive set of non-standard sizes.
Some manufacturers produce only the maximum width option, but with the ability to trim to 120 and 100 mm.
As for the length of the strip, it is also tied to certain standards. Depending on the manufacturer’s brand, it can be 3 or 4 m. Subsequently, such a blank is cut to the specific size of the headset.
The thickness of the base depends on two factors: the material and the manufacturer.
MDF and chipboard planks are usually produced from a standard 16 mm thick sheet. All accessories for them are produced in accordance with this standard.
The base is made of plastic and aluminum and is slightly narrower. Its thickness varies in the range of 10–14 mm. To reduce weight, planks made of these materials are produced hollow. There are special stiffening ribs inside, which make the structure quite strong and reliable.
Kitchen plinths: how to close the space under the box in kitchen furniture
The basis of the kitchen set is the lower tier boxes. Sometimes they are mounted on decorative supports, but more often inexpensive plastic legs are used for this. At the same time, there is always a space between the floor and the kitchen box, into which dirt and dust get over time. And simple black legs do not look aesthetically pleasing. A kitchen plinth helps protect this hard-to-reach space under furniture from dirt.
The plinth is a panel, usually plastic (although there are other options, such as an aluminum plinth or a chipboard plinth). The height of the plinth is usually 100, 120 or 150 mm, which corresponds to the most common options for the gap between the floor and the bottom box. The plinth is mounted on the legs using special clips. This approach makes it easy to remove and reattach the base to the legs. Not only the special shape allows you to secure the base tightly, but also the presence of a sealant, which is applied using the co-extrusion method, i.e. without glue. The color range of plinths is very diverse - these are various tree-like colors: oak, walnut, beech, ash, birch. For plain kitchens and kitchens in high-tech style, plinths are produced in the colors white, gray, bronze, vanilla and others. Metallized colors have also become widespread - matte aluminum and glossy aluminum.
#TOVAR_105085#
In addition to the base itself, hardware manufacturers produce a wide range of components. First of all, these are a variety of connecting corners, which are used in cases where the kitchen deviates from a simple linear shape. There are external and internal corners, with an angle of 90 and 135 degrees, as well as straight connectors of 180 degrees. Such connectors are used on long straight sections, when it is necessary to join several sections of the base. The multi-angle is very interesting - there is a flexible element in its center, which allows you to obtain angles of 90-135-180 degrees for the internal and external corners. All these components are available in heights of 100-120-150 mm and colors corresponding to the base. For boxes of round shapes, you can use radius elements: external, internal or universal. If it is necessary to ensure air flow into the space between the floor and the box, special ventilation grilles are cut into the base.
The process of installing the base looks like this: the clips are inserted into special grooves on the back wall of the base. Moreover, the clips in the groove can be moved freely, adjusting them to the location of the leg. Further, if necessary, individual sections of the base are connected through corner or straight connectors. The entire structure is then snapped onto the legs and finished off with end caps.
If the kitchen set uses a base made of chipboard, then you should choose a special plastic seal. This seal is resistant to moisture and reliably protects the space behind the plinth from dust and dirt. The seal is transparent, which allows it to be used with any chipboard color. It is important to keep in mind that the seal is mounted on a base made of 16 mm thick chipboard.
Don’t forget about the drawers under the plinth, which can be installed in the free space under the bottom box. At the same time, we get additional storage space. You can use a plastic plinth as a drawer front.
See also: Plinth for the kitchen 100 mm Plinth for the kitchen plastic Plinth for the kitchen 150 mm Plinth for the kitchen 120 mm Aluminum plinth for the kitchen
Accessories
When installing a plinth made of MDF or chipboard, additional installation of PVC protection may be required. There are usually no problems with this.
The plinth protection is produced in standard sizes (for MDF sheet thickness 16 mm), and the strip is simply inserted into a plastic case (like a mobile phone) without additional fastening. The connection is tight and reliable, with virtually no gaps.
The thickness of the silicone protection is small, so its installation has virtually no effect on the overall height of the base. But the plastic “skirt” reliably protects the chipboard base from moisture and swelling.
In addition, there are models with a seal; they make the fit of the plank to the floor tighter, completely eliminating the possibility of moisture getting under the kitchen set.
The plastic cover does not spoil the appearance of the decorative strip, since it is completely transparent and makes itself felt only by the slight shine of the lower part of the base.
There are also a number of plugs and connecting strips. With their help, you can refine the ends of the plinth, or connect several parts of the decorative strip into a single structure. Depending on the configuration of the kitchen modules, the individual parts of the plinth can be connected at different angles, exactly repeating the shape of the set.
The following connectors are available as standard:
- 90 o - for assembling L-shaped and U-shaped kitchens;
- 135o - designed to form trapezoidal corners (near the sink);
- 180° - used when installing long straight headsets.
It is best to purchase such accessories immediately, complete with a plinth. At the same time, you need to make sure that it is from the same manufacturer and does not differ in texture and shade,
Also, when installing the base, you cannot do without special plastic clips. With their help, the strip is fixed on the legs of the kitchen set. Fasteners can be included with furniture legs, but are often purchased separately. The number, shape and size of clips are selected based on the material and dimensions of the base.
Types of kitchen unit plinth
It should be noted that both types of base have advantages and disadvantages. Naturally, the plastic base is more practical. It is not afraid of moisture both from washing pilaf and from possible leaks, which is quite likely in the kitchen. The disadvantage is the rather modest range of colors. In addition, if the desired color is still available, the shade of the color is unlikely to match.
Fig.1.
Plastic plinths are available in heights of 100, 120 and 150 mm. The height of the plinth must correspond to the height of the legs of the kitchen unit. The disadvantage of the plastic base is the small range of colors.
Problems with moisture in the case of a plinth made of chipboard can be quite successfully solved by gluing the edges and creating a small gap between the floor and the chipboard. This gap not only provides ventilation for the end of the chipboard, but also prevents contact of the base with the floor, which also protects the base from moisture.
Fig.2.
The plinth made of laminated chipboard can be made of any height, the color of the plinth can be precisely matched to the color of the kitchen. The disadvantage is the fear of moisture. This drawback is eliminated with the help of a special moisture-proof edge.
How to choose?
Each type of decorative strip has its own list of advantages and disadvantages. The best option should be selected taking into account the individual characteristics of the kitchen.
When choosing, you need to consider the following points:
- ceiling height. In a low Khrushchev building, a wide base will look disproportionate, disrupting the harmony of the interior. At the same time, a narrow base in a large kitchen will get lost and disrupt the holistic perception of the tall set;
- presence of built-in equipment. A plastic plinth is sold immediately with built-in ventilation, while a grille will have to be built into a plank made of MDF or chipboard. For an aluminum base, the ventilation grille will also have to be purchased and mounted separately;
- the material from which the kitchen set is made. A plastic plinth will visually reduce the cost of expensive exclusive furniture made from natural solid wood, etc.;
- kitchen style. Incorrectly selected details can turn the kitchen interior into a parody of a specific style. So, plastic will be inappropriate when embodying a retro style. Classic or loft also involve the use of only natural materials, but for high-tech, the dull chrome of aluminum or the glossy shine of bright plastic are perfect;
- required functionality. If the base is installed only for decoration, then the material will not have much significance (the main thing is that the chosen option is visually pleasing). When installing additional ventilation, lighting or drawers into the strip, you need to take into account the required level of strength (fire resistance, etc.) of the material;
- possibility of a flood. If the likelihood of flooding is high (there is a regularly leaking roof above or unfavorable neighbors live), it is better to choose materials inert to moisture (plastic, aluminum) for the base.
It is also worth considering personal preferences. If your “soul doesn’t fall in love” with a certain material or color, it’s better to choose another option rather than rely on “if you endure it, you’ll fall in love with it.”
How to install?
Installation of the plinth begins with the correct installation of the headset legs. There are three main installation requirements :
- All legs of the headset must be installed on the same straight line (horizontal plane). This point is especially important when the wall near which the modules are mounted has an irregular shape (protrusions or niches). A difference in distance of 1–2 cm will cause the base to “wave” after installation, which will ruin the appearance of the kitchen set. When installing a rigid trim strip, the kitchen support clip may not snap into the correct position at all;
- During installation, the legs need to be pushed slightly under the headset. The level to which they should be “recessed” is selected individually. After installing the decorative strip, it should not protrude, interfering with the approach to the kitchen set. In addition, if the legs are not “recessed” enough, the base will interfere with opening the dishwasher door. In some cases, if the front of the dishwasher rests on the base, the strip is cut. But not everyone likes the gap that forms in this case;
- It is advisable to choose standard plastic supports for the headset. They are sold immediately complete with a clip-holder for the base, which simplifies the installation process. You can also install the base on decorative metal legs, but this will be much more difficult to do. Since they often have an original shape and size, complicating the process of selecting a mounting clip.
After installing the legs, the process of installing the plinth begins. To do this, the second part of the clip is fixed to it. You can screw it on with ordinary self-tapping screws, the main thing is to choose the correct length (so as not to damage the front part of the bar) and monitor the size and shape of the cap (it should not interfere with the clip). When installing it yourself, you need to make sure that both parts of the clip are at the same level.
There is no need to attach the base to all the legs of the headset. Usually only the edges are fixed. For decorative strips longer than 1.5 m, an additional attachment point is added in the center.
Furniture assembly. . Mounting the base. Furniture for kitchen.
When installing a plinth in a kitchen with curved facades, it is not always possible to select the desired radius of curvature of the decorative strip. There are two solutions to this problem:
- make small cuts along the stiffeners. The method is effective, but its implementation can damage the base. Also, the disadvantages of the method include the fragility of the final structure. Due to the cuts, such a structure turns out to be quite fragile and can burst during subsequent dismantling;
- heat the profile using a hairdryer or heater. This option is only suitable for working with a plastic base. When heated, the workpiece becomes soft and easily takes the desired shape. The main thing in the process is to ensure that the heating is uniform and at the same time not to allow overheating, otherwise the plastic may “float”. The process technology is shown in the video:
Bend a plastic plinth for the kitchen
If it is not possible to do without a slot for the dishwasher, then a cut is made in the right place. If done correctly, you can only notice it by dropping to the floor and looking under the façade.
Drinking under the dishwasher should not spoil the appearance of the base. If the cut is noticeable from any position, the base is installed incorrectly (it is not recessed enough under the lower modules). The gap should not be visible from human height.
It is quite possible to install or remove the base without the help of professionals. Usually it is dismantled for general cleaning or routine repairs. Products made from chipboard or MDF may need to be dried.
Difficulties can arise only with a swollen profile made of wood materials. In this case, the bar must be replaced (in most cases).
Installing a kitchen plinth
The kitchen plinth is mounted on legs that have a set of special fasteners.
Fig.3.
The plinth strip is secured to the legs with special fasteners that come complete with the legs. The installation of the plinth strip is highly dependent on the installation of the legs. If installed incorrectly, the plinth strip may protrude beyond the façade of the kitchen, which will ruin its appearance.
Therefore, you should begin installing the plinth with the correct positioning of the legs when assembling the kitchen. Here you should pay attention to two points: the installation of the front row of legs and side legs, of course, if the base will be attached to them.
Fig.4.
The fastening of plastic and laminated chipboard plinths is different. Various connecting elements are used to install the base. So the laminated chipboard plinth is fastened with self-tapping screws, and for the plastic plinth, fastening in a special groove is used.
The front row of legs should be installed in such a way that there is a distance of about 7 cm from the plane of the installed base and the end of the cabinets of the bottom row. In other words, the surface of the base should be recessed under the cabinets. This is necessary to create room for your feet when you stand close to the countertop, for example, when washing dishes. If you do not make the indicated displacement of the base, then it will be almost impossible to get close to the tabletop.
Fig.5.
The front row of legs should be offset relative to the facade by 7-10 cm. If the plinth is to be installed from the side of the kitchen, then the legs should be offset by at least 20 mm. This way the base will not protrude beyond the surface of the cabinet walls.
This circumstance does not apply to the base located on the side of the cabinets, but here another problem arises - an aesthetic one. It is almost impossible to make a plinth flush with the cabinet, without differences and gaps. Therefore, here too it is advisable to make a small indentation from the edge of the cabinet. It is necessary to preserve the aesthetics of the kitchen set.
Fig.6.
In this example, the front legs are offset by 10 cm, and the side legs by 3 cm.
Ventilation grill
The ventilation grille in the base is not a mandatory element; it is installed as needed. Most often, the grille is installed in kitchens with high humidity (first floors, private houses), or complete with built-in appliances.
An oven or refrigerator built into a kitchen unit needs good cooling. Ventilation grilles in the base provide the equipment with the necessary air flow, protecting it from overheating.
The grille can be not only a functional element, but also a decorative one. With the right selection of design, this part of the fittings can become a decoration of the kitchen set.
Some plinths are sold with a ventilation grill already installed (most often plastic), for the rest you have to purchase it separately.
It should be noted that the market for finishing materials does not have a wide range of ventilation grilles. Most hardware stores can only offer white and chrome models.
If you try, you can find grilles that are black, gray or beige. If you need a different tone, then the workpiece will have to be painted in the required tone yourself. As for the shape of the product, in nine cases out of ten it will be rectangular.
Usually the grille is cut into the base before it is installed. The place for it is selected individually (away from joints and fasteners, but, at the same time, closer to the built-in equipment).
Is there a need for a drink in the base under the dishwasher?
There is no clear answer to this question. It all depends on the model and installation location of the dishwasher, as well as on the configuration of the kitchen unit.
In most cases, drinking is not technologically necessary. When installing, it is enough to push the legs and plinth a little deeper under the kitchen cabinet. But, again, a matter of taste plays a role here. Some people like “floating” furniture, while others find it easier to put up with drinking.
If the kitchen furniture was bought ready-made and not made to order, then there is a possibility that the legs cannot be moved to another place. In this case, the base is installed as the design allows. There is a possibility that in such a situation it will not be possible to install a dishwasher without a cut in the base.
Why do you need the height of lower kitchen cabinets?
Good question. Indeed, why know the height of kitchen furniture? Obviously, the width of the cabinets is important, as it forms the length of the kitchen unit. It is by length that they buy a kitchen in order to fit it into the dimensions of the kitchen. But why do you need the height of kitchen cabinets?
The furniture that you plan to place in the kitchen is the starting point for decorating the room. Artificial lighting is planned for furniture locations, sockets are planned, and doors are placed.
In the kitchen, the height of the lower kitchen cabinets is the starting point for marking and laying the kitchen tile backsplash. It is the height of the lower tier of the kitchen, together with the thickness of the countertop, that should, ideally, become the lower level of laying the kitchen tile apron.
It is worth noting that in our country, unlike, say, America, it is not customary to first install kitchen furniture and then protect the space above the work surface with tiles or mosaics. Therefore, the first thing a tiler asks before laying tiles on a kitchen wall is what the height of the kitchen cabinets will be from the floor, better than the final one.
The second point is the installation height of the sockets above the work surface. It also depends on the height of the kitchen cabinets, taking into account the countertop and baseboard.
Let's assume that I answered the question: Why do we need the height of kitchen cabinets?
Related article: Enamels in kitchen painting
Do you need drawers in the plinth?
The answer to this question depends on the overall size of the kitchen and the organization of free space. If the area of the room allows you to sacrifice this space, it is better to do so.
Boxes in the base are not a very good solution. The main disadvantages of this solution include:
- inconvenience of use. Young and healthy people can easily bend down to the floor. For older people or those with health problems (back problems, blood pressure, excess weight), this configuration can cause a lot of inconvenience;
- storage features. The height of such a box usually does not exceed 5–8 cm, and the likelihood of a flood should be taken into account. That is, all contents can be damaged at any time. As a result, only something flat, inert to moisture and not very in demand can be stored there;
- rise in price. Installation of boxes assumes that the base will be securely fixed and made of durable materials. A decorative strip made of plastic will not work in this case. Taking into account the cost of hidden fittings, materials, work, etc., the cost of such a plinth will be two to three times more expensive than a similar one, but without drawers.
The drawers in the lower bar are favored by their original appearance. It is also worth noting that such a place is well suited for organizing a hiding place. True, it will be convenient to store only jewelry in it. Money or documents may be damaged in the event of a flood.
If you need to get a full-fledged, functional storage space, the base for the drawers is made wide enough (20–40 cm). It is made individually, taking into account a small indentation from the floor. This option is quite practical, but expensive, and looks harmonious only in kitchens with high ceilings.
What is a kitchen plinth and why is it needed?
The plinth in a kitchen set is a fairly important component. This element is a strip attached to the support legs or bottoms of kitchen cabinets , which performs several functions in the interior:
- Aesthetic. A correctly selected kitchen plinth can significantly improve the appearance of your kitchen unit. In addition, this element allows you to hide kitchen communications, such as electrical wiring or water pipes. If necessary, you can quickly unfasten such a strip, thanks to special latches that ensure reliable fastening of the structure to the furniture.
Advice! If kitchen furniture consists of modules, then a properly selected kitchen plinth will allow you to achieve harmony and integrity of this design.
- Protective. Here, the functions of the plinth are both to protect the space located under the furniture from the entry of pets or children’s toys, and to prevent the accumulation of dust, household waste, etc. here.
- Convenience. Since the seal for the kitchen plinth does not allow dirt and dust to penetrate under the furniture, such strips make cleaning the kitchen much easier.
Structurally, a PVC plinth for a kitchen consists of the strip itself, a seal, fasteners, which are most often presented in the form of clips, and end caps. Modern plinth systems can have various design parameters that allow them to perfectly follow all furniture contours.
For example, in addition to standard strips, installing a plinth on a kitchen set may involve fastening the following elements:
- Standard corner connectors that are designed for 90 and 135 degree angles.
- Adapters that allow installation in areas of different heights.
Equipped with various adapters, kitchen plinths can be used for facades of absolutely any shape.
- Fragments of the radius type, thanks to which it is possible to outline bends while making smooth turns.
- Ventilation grilles for the kitchen basement. Thanks to such elements, natural circulation is ensured under the kitchen furniture and the appliances built into it. The grille of the kitchen plinth ensures the natural movement of air masses under the refrigerator, oven, dishwasher and washing machine.
Advice! The attachment of the plinth to the legs of the kitchen should be so tight as to ensure that there are no large gaps, so it is very important to choose the right height and shape of the slats. In this case, the design features of the headset and the evenness of the floors should be taken into account.
When properly selected and installed, plinth strips effectively prevent not only dirt, but also liquids from penetrating under kitchen furniture
Backlight
It is impossible to organize full kitchen lighting using plinth lighting; this element can only perform a decorative function.
There are two ways to organize lighting:
- lighting fixtures cut into the decorative strip. They can be installed along the entire length of the base, or highlight a certain part of the headset;
- The LED strip is attached along the upper edge of the base, or along it along the bottom of the modules. This option is used to create the effect of “floating” furniture. For proper installation, the bar must be pushed well under the lower modules (only the light from the tape should be visible, and not the tape itself).
The second installation option is preferable, as it is more secure. Do not forget about the possibility of a flood and the risk of a short circuit.
conclusions
- The distance from the floor to the top of the countertop must be selected taking into account the physiological characteristics of the person who will most often work in the kitchen. It is necessary to take into account the location of communications, sockets and spot lighting.
- Kitchens with a multi-level layout are more versatile; it is easier to install built-in household appliances in them and organize a comfortable workplace for various food preparation operations.
- Cabinets with adjustable legs are easier to install and protect furniture from moisture, but the space under them will have to be cleaned more often. The accumulation of dust under the cabinets will be significantly reduced if you install a base (for models with legs there are removable solutions). It is possible to increase the usable space in the kitchen by placing drawers in the base area.
- When ordering a set, you need to clarify what height of the cabinets is indicated - with or without taking into account the thickness of the tabletop.
Naturally, it is difficult to take into account all the points, especially if the manufacturer himself does not have all the information about the product being sold. However, knowing what is important to pay attention to, you are more likely to end up with a headset that will best meet your expectations.
Is it necessary for a kitchen to have legs or a plinth, maybe you can do without them?
The difference between the base and the legs is clear. The advantages of decorative strips include:
- additional protection from moisture and dust;
- tidier appearance;
- original design;
- ability to hide wires and pipes.
Open legs also have a number of advantages:
- additional free space;
- a more “airy” type of headset;
- additional ventilation;
- free access to communications.
The number of fans for the first and second solutions is approximately the same. But there is a certain percentage of people who are categorically against legs on a kitchen set. Regardless of whether they are hidden behind a decorative strip or on display.
In this case there are three solutions:
- make the lower cabinets hanging , attaching them only to the wall, without lower support. The idea is modern, original and convenient (it’s easy to clean under the cabinets, it’s convenient to store large items under them, for example, skis). But this option is only suitable if you have a good-quality monolithic wall. It is also worth considering the strength of the material from which the cabinets are made and the weight of the contents of hanging shelves and drawers;
- make drawers from the floor itself . This option is not distributed. Such a design will have to be made to order (and you will still have to look for a craftsman). There are four reasons for the unpopularity of this solution: the lower drawers and their contents are constantly under threat of flooding;
- it is difficult to level the tabletop during installation;
- the set will highlight the slightest unevenness of the floor. Moreover, if the difference in the floor covering is 1–2 cm or more, the lower drawers may have problems opening;
- there is a more budget-friendly and practical analogue (boxes in the plinth);
- make the base a stationary part of the structure. In this case, the lower cabinets are mounted not on legs, but on a permanent box made of chipboard or MDF. In order for this design to last longer, it is installed in a special plastic base. This solution cannot be called a complete rejection of legs, but this option can safely be considered the most practical and convenient of those proposed.
Refusal of legs entails many problems during the operation of the headset. When choosing this option, you need to carefully consider it first, studying all the pros and cons.
Attaching the plinth to the kitchen legs
When designing a set, an important consideration is the height of the kitchen plinth. Due to the height of the plinth, the position of the tabletop relative to the floor is adjusted, which allows you to adjust the kitchen to your height. On the other hand, if the kitchen plinth will be used to store utensils, then it should be made at least 120 mm high; standard retractable storage systems cannot be installed in a plinth of lesser height. Therefore, kitchen plinths with a height of 120 and 150 mm are most widespread.
Fig. 16.
Connecting dimensions.
Fig. 17.
High legs for mounting plinth boxes.
When assembling a kitchen set, special adjustable furniture legs are used, the design of which includes a clip for the kitchen plinth. The plinth strip is attached to the kitchen legs using this clip. The clips are attached first to the base plate, and with the help of a special clamp to the kitchen leg. For a base made of chipboard, the clip is attached using self-tapping screws; for a plastic base, a special groove is provided where the clip is inserted.
Fig. 18.
Attaching the plinth to the legs of the kitchen set using a clip.
Fig. 19.
Ventilation gap between the plinth and kitchen cabinets.
A kitchen plinth fastener is included with each leg, but this does not mean that you need to use all the fasteners. The plinth fastenings should be placed at a distance of 1 m from each other and along the edges of the strip. This way the plinth will stand level and possible mutual displacement of the legs will not affect the appearance of the plinth, at the same time it will be securely fastened.
Fig.20.
Location of clips on the bar.
Installing a plinth in the kitchen involves another important issue: the depth of the plinth. The plinth should be recessed relative to the kitchen facade by 7-10 cm. This is necessary so that when you stand close to the countertop, your feet do not rest against the plinth. The required displacement of the base can be ensured by correctly installing the legs. When assembling the kitchen, the legs of the front row should be shifted 7-10 cm relative to the facade. This is enough to ensure correct installation of the base in the future.
Fig.21.
The displacement of the legs relative to the facade of the kitchen unit is necessary to recess the base by 7 - 10 cm.
Fig.22.
Minimum dimensions for installing legs.
Fig.23.
Even in an island kitchen it is necessary to indent the plinth.