Features of wooden countertops, pros and cons
The use of natural materials in the interior emphasizes its fashionability and exclusivity.
Even an inexpensive kitchen set from IKEA, complemented by a custom-made wooden countertop, will sparkle with new colors and last much longer.
When giving preference to a wooden tabletop, you need to take into account all the advantages and disadvantages of this material.
The advantages include:
- naturalness;
- environmental friendliness;
- aesthetics;
- durability.
Although the second point can be disputed. Taking into account the fact that all kinds of chemical impregnations (moisture-repellent, antifungal, etc.) and coatings (varnishes, stains, paints, etc.) are used in production, environmental friendliness becomes very conditional.
There are also a lot of disadvantages:
- high cost;
- moodiness;
- low moisture and heat resistance.
All three points can be challenged here. Performance can be improved with the help of proper processing and special impregnations, but cost is a relative concept.
With proper care, a solid wood tabletop can serve for decades, remaining in its original form. Therefore, if you divide the price by the service life, the final cost will be much cheaper than analogues made from cheaper materials.
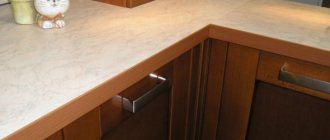
Wooden countertop for kitchen
Making a kitchen worktop from wood is a rather labor-intensive process and requires certain skills in working with wood. For such work, as a rule, a laminated board is used; it is more stable to temperature changes and aggressive environments. A high-quality wooden shield is not subject to deformation and will last for quite a long time.
Since this element of kitchen furniture is most often subjected to mechanical stress, only hard wood is used as the starting material. It is allowed to use pine board that does not have traces of resin on the surface, subject to additional treatment with special compounds.
Work with a wooden tabletop takes place in several stages. The manufacturing process can be divided into:
- Determining the dimensions and measuring the future working surface.
- Making a shield from solid wood.
- Surface treatment with protective compounds.
If you follow the step-by-step instructions, it is quite possible to make such a product with your own hands, avoiding critical mistakes.
Determining the dimensions and measuring the future tabletop
In cases where a kitchen work surface is made to replace one that has become unusable, the dimensions are simply transferred to the new product. In case of deviation from the previous dimensions, the base will require serious modification.
Making a shield from solid wood
There are two ways to get a quality product: purchase a ready-made shield at a hardware store, or make it yourself. The second option requires certain woodworking skills.
First grade wood is used as the raw material. It contains the least amount of flaws on its surface. The board used must be of the same thickness, the ends of which must be perfectly even to avoid gaps at the gluing points.
To glue the shield, carpentry glue is used, which has a certain degree of moisture resistance. The resulting glued product is clamped with special clamps until completely dry.
The final stage of obtaining a finished shield is grinding the surface. For these purposes, a grinding machine is used using wheels of different grain sizes.
Surface treatment with protective compounds
Today, hardware stores offer a huge selection of protective compounds for wooden surfaces. These include both well-known water-based stains and more expensive compounds, for example oils, distinguished by their high environmental properties. The latter does not require any additional tools and is easily applied with a regular sponge.
Below we have provided many photos of tabletops made with our own hands. Having set a goal, you can always find a product for yourself in shape, color, suitable for a particular interior. With some effort, it is quite possible to make a high-quality countertop that will delight you for many years.
Practicality
The beauty of a wooden tabletop is that it is easy to restore. Therefore, despite the rather long list of disadvantages: a tendency to scratches, susceptibility to warping, low impact resistance - solid wood can be considered a fairly practical material. After all, after sanding and re-opening with varnish, the surface acquires its original appearance.
Photo of a DIY kitchen countertop
Read here - DIY wooden furniture: the best photos of solid wood furniture! The process of making wooden furniture: drawings, diagrams, furniture assembly
Which material to choose?
When making countertops yourself, the following materials are most often used:
- whole board . The option is the most durable and reliable, but at the same time the most expensive. When choosing a solid board, you need to pay special attention to the degree of drying. Under-dried material may lead to deterioration over time;
- prefabricated array. In this case, a stacked tabletop made of timber, boards, or ready-made furniture panels is used. With this approach, the cost of the product will be slightly lower, there is less chance that it will fail, but there is a chance that over time, cracks will form at the joints due to shrinkage;
- wood products . This option is one of the most affordable, but the least practical and durable. Although, with proper processing and careful handling, even such a tabletop can last ten years without any problems. This includes all types of wood materials:
- plywood;
- MDF;
- HDF;
- Chipboard and laminated chipboard;
- OSB (oriented strand board);
- CSP (cement particle board);
- GSP (gypsum particle board).
When choosing a material, it is also worth considering the type of wood. When choosing which wood to make a countertop from, you need to rely on the individual characteristics of the kitchen and its owners.
- If the room is damp, or the family is large and they cook a lot and often, then it is better to choose dense types of wood. In such conditions, countertops made of oak or walnut have proven themselves well.
The products are not only practical, but also very beautiful. The shades and textures of these materials will decorate any kitchen. The only drawback of these varieties is the price, but it is fully compensated by the quality of the material.
- It is better not to make a tabletop from pine. This type of wood is too soft and will not last long. In this case, it is better to choose an array of larch. Yes, it is more expensive, but this material is more waterproof and practical, so it will last much longer.
If wood products are chosen for the countertop, then special attention should be paid to moisture resistance. It will not be possible to properly process a finished chipboard or MDF board, so you should initially buy only moisture-resistant varieties of plywood and other wooden products.
Do-it-yourself tabletop made of cast acrylic
Many people think that a solid tabletop without seams is the best possible option. Easier to maintain, no leaks. This is true, but the material itself (acrylic) is not easy to use everywhere. Acrylic itself is an excellent material. For a bathroom, an artificial stone countertop is a good choice. There are very few opportunities to scratch the surface and there are no high temperatures. And moisture, steam, soap and other detergents are not afraid of plastic. If you decide to master the technology of casting an acrylic countertop, you can try making it for the bathroom.
A non-specialist cannot distinguish one type of artificial stone from another by appearance
Preparation
To pour acrylic, make a mold. For its manufacture, laminated chipboard or MDF is used. If the surface of the countertop must be smooth, the formwork material must also be smooth. If texture is needed, it should be on the form. After removal from the mold, the acrylic stone will repeat all the grooves and tubercles. Therefore, we are meticulous in selecting material for the mold.
We frame the cut-out workpiece with sides, close the holes for the hob and sink with technological plugs
The sides are made from the same material. The edges of the planks are sanded first with a coarser cloth, then with an increasingly finer sanding disc. Increasingly decreasing grain sizes are used. Remember that all defects will then be cast in acrylic. And they are very noticeable if the stone chosen is plain, without inclusions. The seams are sealed and leveled. The structure is thoroughly cleaned, dried, and then covered with wax from the inside.
Making a countertop
Fillers are added to acrylic - stone or marble chips, pigment, decorative components. Everything gets mixed up. Lastly, the hardener is poured. Acrylic is poured in several layers, so the hardener is added only to part of the composition.
The composition is distributed over the plane
An acrylic composition is poured into the finished formwork. Distribute it evenly over all areas. It should spread over all elements of the form. In this case, bubbles must not be allowed to appear - the air must be removed. After the composition has been distributed, a sheet of chipboard is placed on top, which is also lubricated with wax. A load is placed on the chipboard. It must be selected carefully so that the composition does not squeeze out on the sides. The load is left for half an hour. Then they remove it and lift up the chipboard. A second portion of plastic is poured into the mold and left for a day. During this time, the acrylic will harden. You can remove the formwork.
Installation on frame and polishing
After the plastic slab has been removed from the formwork, it is attached to the frame. Acrylic is an elastic material. Even with a thickness of 20-30 mm, it bends. To ensure stability of shape, the frame is assembled. It is made of wood (timber 50 mm thick or more) or moisture-resistant plywood (thickness 27 mm). The frame consists of slats along the front and rear posts, transverse jumpers installed in increments of 40-50 cm. The slats are also placed in places where they rest on the furniture frame. More reinforcements are needed in areas of greatest load. This is where the hob or sink will be installed.
A solid worktop for a kitchen or bathroom is also fixed to the frame
The frame is made with an acrylic thickness of more than 10 mm. A thinner layer requires a solid base. That is, you need to cut out a repeat of your tabletop from the same plywood and glue these two sheets together. The thickness of the plywood is 27 mm or so. You can glue two thinner sheets. It turns out cheaper. For normal gluing, the sheets are fixed with clamps.
The final finishing is sanding. First, with discs with fine grains - from 320 and above, and finally - with a polishing attachment. This stage is important for appearance. Most of the flaws can be removed. But it can also cause harm.
Deciding on design and construction
When choosing a design, you must first focus on your own skills and capabilities. It is better to make a high-quality tabletop of a simple configuration than to take on a complex project for which you do not have enough time and skills.
In addition, there are several other factors to consider:
- kitchen style;
- size and weight of the finished product;
- material chosen for the base;
- availability of necessary tools for processing;
- complexity of the configuration (whether it will have mortise elements, curvilinearities, etc.).
It is better for novice carpenters to choose simple models with a minimum of mortise parts.
It is very convenient to make a tabletop from parquet or floorboards; they already have the necessary groove for reliable adhesion of the individual dies.
Table top made of oak parquet. Table top oak parquet.
Despite the presence of the necessary grooves, it is not worth making a shield out of laminate. Its surface is covered with a number of harmful substances that are incompatible with food and the cooking process.
Also, you should not make a shield from old boards - such a product will not last long. In addition, if stored improperly, mold may form on the surface of the wood, or bark beetles may develop inside.
If a homemade countertop should have an antique look, then let it be an imitation. The desired design is achieved using brushing and staining of the appropriate shade. This product will last much longer.
Materials and tools
Before you start making a table from plywood, you need to prepare high-quality material. When choosing, you should pay attention to the type and grade of plywood, thickness, and type of wood. In addition, you need to prepare special tools.
Different tools are suitable for cutting plywood of different thicknesses. For a sheet of 3 mm, a regular stationery knife is quite suitable; up to 10 mm, a hacksaw or jigsaw is used, and if the plywood has a thickness of more than 10 mm, then you cannot do without a circular saw or an electric jigsaw.
In addition, the following items are used for the work process:
- pencil;
- compass;
- metal ruler;
- roulette;
- clamps;
- sandpaper or sander;
- screwdriver;
- roller and brushes;
- stapler for furniture;
- paint, varnish, stain.
You definitely need to prepare the legs for the table. They are made from the following materials:
- Metal pipes. The material is durable, but if not treated, it will corrode.
- Wooden bars. It is also a durable material, but in conditions of high humidity the wood may begin to rot, so treatment with special coatings is necessary.
- Plywood base. Made from thick plywood in various configurations.
It is important that the legs are strong and reliable, then the plywood table will stand on them steadily.
Manufacturing instructions
The order of work will depend on the chosen design and the quality of the base material. The list of required tools may also vary depending on the selected configuration and processing method.
It's easiest to work with a single piece of wood. In this case, it will only need to be carefully leveled and sanded.
Then the workpiece is given the desired shape and size, treated with moisture-repellent and antifungal compounds, and at the final stage, it is opened with varnish.
This method is also used to make simple rectangular covers for a dining table or bar counters.
Finding a solid board to make a work surface is much more difficult. This is due to the fact that the width of the tabletop is usually made at least 60 cm (the depth of large kitchen appliances). It is difficult to find a solid workpiece of this size, so the working surface is often made from bars or boards.
Design project
Before starting work, you need to draw up a design project. To do this, measure the required part of the kitchen. The following points must be indicated on the drawing:
- length (taking into account distances to walls or equipment);
- width (the distance from the wall should be 5 mm so that the apron tiles do not put pressure on the countertop);
- height (selected based on the height of the kitchen owners);
- tabletop thickness (when choosing this parameter, the base material and the expected load on it are taken into account);
- sockets and wire routes are indicated;
- the outlet points for communications are marked (water pipes for connecting a sink and gas pipes for connecting a hob);
- all places where technological holes will be made (for sinks, communications, hidden sockets, etc.) are indicated.
The nuances of choosing a place to place a summer kitchen and its size
It is the size of the area that is planned to be allocated for the arrangement of a summer kitchen that determines its design and content. It can be in a very compact, linear configuration. Or quite voluminous, with a corner and U-shaped layout.
Most often, a summer kitchen is located on a veranda - an extension to a residential building, open or closed. It is important that the dimensions of such a veranda allow the kitchen modules to be placed in such a way that it is convenient for the hostess. Here, planning the interior space is subject to general ergonomics for kitchens.
In short, when planning a summer kitchen, adhere to the following considerations:
- The width of the passage between the summer kitchen cabinets and the external cladding should be at least 1-1.2 m. Otherwise, it will be inconvenient for the housewife to bend down and use the lower shelves.
- The most convenient width for a summer kitchen countertop is about 50-60cm. When working while standing, it is best to place it at a height of 85-100 cm, depending on the height of the owner.
- The most comfortable working surface size is 800x600. Usually it increases in length due to the placement of tabletop tiles and a sink (in dacha conditions it is replaced by basins of water and washstands if there is no water supply connection). And ultimately it is 1.5 m or more.
- Thus, the total width of the summer kitchen should be at least 1.8 m. With a corner layout, the minimum dimensions of the veranda (the space under the canopy) should be about 2x2m.
In the simplest version of a summer kitchen, the modules themselves can be under a canopy. The canopy will provide protection from precipitation and wind.
Ideally, it is better to make a summer kitchen with your own hands in the depths of the site, away from the fence bordering the road, toilets and cesspools. Sometimes a good solution is to place a row summer kitchen along the fence with neighboring areas.
It is not recommended to place a summer kitchen in an open area directly on the ground, without an equipped, raised platform. Perhaps as a temporary option, which is then planned to be moved to a new location under a canopy.
Installation
The countertop installation process is relatively simple:
- Kitchen cabinets (base) are leveled in height. It's best if they have adjustable legs to make the process easier.
- The finished product is placed on the base and fixed using special fasteners. When installing, you need to leave technological gaps. There must be at least 5 mm between the wall and the tabletop. The distance to kitchen appliances depends on its type and the requirements specified in the instructions.
- A sink is installed in the prepared hole. The edges are carefully sealed.
- A siphon and mixer are connected to the sink.
In addition to the sink, a hob can be attached to the countertop if this is included in the kitchen design.
Useful materials on the topic:
How to install a siphon on a sink with your own hands?
How to assemble a siphon for a kitchen sink?