Materials for making a shoe rack
To make shoe racks, you can use various materials from metal to plastic bottles. Each material is characterized by its pros and cons.
The most reliable and convenient type of material is wood. A cabinet or shoe rack made of wood will last a long time without requiring replacement. You can build a shelf, cabinet, or cabinet for storing shoes from wood.
If you decorate it beautifully by cutting, burning, and varnishing, you will get a nice addition to the interior of the hallway.
It is important to ensure that there is no high humidity. In dampness, wood deteriorates over time and becomes unusable. Therefore, a prerequisite for the manufacture of wooden objects is coating with water-repellent agents (special impregnation, paint, varnish.)
Wood derivatives include chipboard and plywood. This material is cheaper, but if you use your imagination you can make good options for shelves for shoes. When making a cabinet or cabinet for storing shoes, the walls of old cabinets or cabinets are used.
Metal shelves are strong, stable and durable. To make a metal shelf you need some experience and certain skills with metal structures.
Not everyone can make such a shelf. But experts are able to build quite attractive shelving with figured ornaments.
A cheap way to make shoe shelves is plastic. Plastic, easy to care for, but too fragile and short-lived. This category includes PVC pipes used for sewage, plastic bottles, but such shoe racks are simple, but do not have an aesthetic appearance.
Cardboard boxes, adapted for constructing shelves for shoes, are a simple, cheap option, but do not last long, are not practical, are afraid of moisture, excess weight, are used for the temporary use of indoor shoes.
Material from which you can make a shelf with your own hands
The material is usually selected based on your experience in work, and it should also be in harmony with the interior of the hallway or the place where the homemade shelf is planned to be placed. The financial side plays a special role:
- wood in all its forms is perfect: bars, plywood, slats, chipboard);
- metal;
- possible use of plastic;
- PVC pipes;
- carton boxes;
- thick fabric;
- other materials that you can find around your home.
Important! Budget materials include: fabric, cardboard boxes, improvised items. They are easy to use and do not require any special skills.
Shoe shelves for the hallway
Casual shoes are usually left in the hallway. The choice of making a shoe rack in the hallway depends on the area of the interior space and the number of shoes.
Open shelves are an advantage. Such products do not interfere with the free access of air, which helps the shoes dry out and get rid of unpleasant odors. This design is suitable for a small hallway.
A shelf hung on the wall, which does not require much space, will save space. It does not interfere with cleaning and is ideal for a narrow room.
Note!
Do-it-yourself screen: a step-by-step master class for creating it yourself. Types of screens, manufacturing materials + design ideasDo-it-yourself installation of interior doors - preparation of the structure, selection of doors, installation step by step + instructions from professionals
Do-it-yourself sliding wardrobe - manufacturing manual with a full description of the stages, types of structures, choice of manufacturing materials (photo + video)
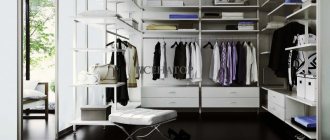
In a spacious room, a closed floor structure is installed in the form of a cabinet or cabinet with doors. This structure is most suitable for out-of-season shoes and their long-term storage. This shoe rack can serve as part of the furniture in any room.
What is it like, a shoe rack in the hallway?
The hallway is rarely spacious. Everything is always close together here, so every piece of furniture that appears in it should be compact and practical, and ideally multifunctional.
The shoe rack should be compact and practical
Before you start assembling a shoe rack with your own hands, it’s a good idea to get acquainted with the design varieties of the accessory. This will help you choose the best option that suits your needs.
Among homemade shelves for the hallway, the most popular are:
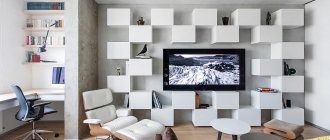
1. Wall models.
2. Shelving.
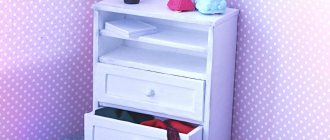
3. Slim cabinets.
4. Stands.
Wall-mounted views are ideal for small spaces. This design is easy to assemble from wood or even scrap materials.
Wall mounted shoe rack
Shelving models can serve not only as a storage system. If you make the shelves in the form of a bench, then you can sit on them for ease of putting on shoes. This will eliminate the need to add poufs and chairs to the interior of the hallway. You can make a shoe rack out of wood even higher, then its upper part will become a storage place for all sorts of little things.
Functional shoe rack in the form of a bench
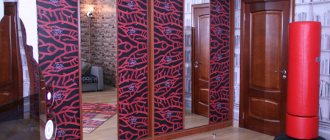
The closed design of the cabinet-slim is very practical. It opens by turning the body 450. It is most important to make corner shelves in this form.
Stands are the simplest type of shelves for shoes in the hallway. Can be in floor or wall mounted versions. They are assembled from everything that comes to hand, even from cardboard.
Slim cabinet for shoes
We’ve sorted out a little bit about the structural varieties. Now is the time to talk about consumables.
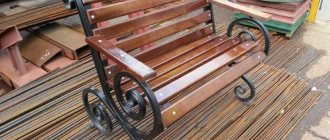
Metal shelf
Metal is a durable material and such a shelf can last a very long time. For the base, pipes with a diameter of no more than 30 mm will serve; if you take more, it will look too massive and ugly; rods or thick wire will serve as a stand for shoes.
Other types of metal (corner, metal plates) are also suitable as a base.
Shoe racks made of PVC pipes
If necessary, a shoe rack can be made from scrap materials, using imagination. One of these will be PVC pipes. A minimum number of tools and costs will allow the shoes to find their place.
When making a shoe rack with your own hands, you will need a PVC pipe with a diameter of 25 cm and a hacksaw. Cut the pipe into pieces 25-30 cm long, sharpen the edges, decorate the pipe sections with paint or wallpaper, or with adhesive film.
Secure the finished cells to each other, and you can use lace, tape or glue them together. The honeycomb-like structure can be mounted on the wall or placed on the floor. Each cell will serve for one pair of shoes.
Round shoe rack
The original shoe rack model is assembled from any material, including glass. You will need to make a cross, cut a central post from a wooden block or pipe, and prepare the shelves themselves.
The decoration method is selected in accordance with the type of consumable material. Plywood shelves can be covered with wallpaper, film or simply painted. Stained glass will look wonderful on glass. It would not be a shame to place such a shelf for shoes, created with your own hands, in the most modernly decorated hallway.
A round shoe rack can be assembled from any material
If you have certain skills and desire, the tiers of a round shoe rack can be made rotating. This will make its use as comfortable as possible.
Cardboard wall structure
The next available material is cardboard. An affordable material, cardboard boxes are found in every home and can be obtained for free from any store. Using scissors, a ruler, a pencil, glue and paint, you can easily build pockets for shoes.
From the cardboard boxes, make a cutout in the form of a rectangle 60X65 cm, divide the side lengthwise into 3 parts and mark 20 cm, 25 cm and 20 cm using a pencil along a ruler, draw lines, measure 25 cm on the other side and also draw a line.
In the center you will get a square and a rectangle. On the sides of the rectangle, make cuts along the lines for the T-shaped blank. Measure 11 cm from the square and draw a line diagonally from the top line to the points of the T corners.
Bend the cardboard along the marked lines. The back wall of the pocket will be a rectangle, and the side walls will be triangular. Make a certain number of pockets as needed.
Decorate the pockets with paint, film or wallpaper, glue them together and hang them on the wall. When suspended on the wall, water will not get in, and the structure can last for some time.
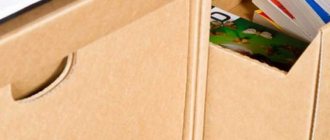
Shoe rack made of cardboard boxes
It’s easy to make a rack out of cardboard boxes. Cut a box of a suitable size into two parts, the height equal to the depth of the shelf shelf. Tape the bottom so that the short parts are inside. Do the same with the second box.
Cut the shelves together with the ribs so that their width is equal to the distance between the shelves. Secure the shelves into boxes, glue the boxes together or secure them with a stapler.
Decorate the structure with wood-look wallpaper or film and the shoe rack is ready for use. But this type is short-lived; if water gets in, it immediately becomes unusable.
Operation of cardboard furniture
Although cardboard boxes seem quite dense, products made from them are highly flammable, as are the materials used in assembling such furniture (paper, glue, etc.). In addition, exposure to high humidity and constant temperature fluctuations will contribute to the deformation of the product.
The kitchen, balcony and bathroom are absolutely not suitable for cardboard racks and shelves. The best place for such furniture will be a dry and well-ventilated room, so most often this place is the hallway.
In addition, the availability of the materials used makes it easy to repair the structure. If one of the shelves begins to sag over time, you can make a box based on its internal size, decorate it and insert it inside the structure.
After considering how to make racks from shoe boxes and cardboard with your own hands, and familiarizing yourself with the step-by-step assembly instructions, you will be able to assemble various options for such furniture. Thus, it becomes possible to transform your home at minimal cost, embodying various ideas, which cannot be done with any other material.
Related publications
- Read
DIY concrete flowerpots
- Read
DIY piñata - the best ways to make toys
- Read
Making a nest from branches with your own hands
- Read
DIY soft bath mat made from wine corks
- Read
DIY winter house for stray cats
- Read
Rack of glass bottles
Human inventions have no boundaries. So, glass bottles that no one needs can serve as supports for a shoe rack. Eight glass bottles, two boards - all the material for the rack. Make holes in the boards the size of the neck of the bottle, place one board on the bottles, and the second one on top. You will get a two-story stable rack.
You can make a shoe rack with your own hands not only rectangular, but also round or angular. A corner shelf will save space and put away shoes.
You can build a circular shoe rack from chipboard sheets. Prepare four rectangular and three round shapes. Connect the rectangles crosswise using grooves cut in the center. Attach round blanks to the crosspiece with self-tapping screws. Make a design, if desired, sand the ends.