Manufacturing technology
Cardboard is suitable for design and decoration, providing a wide variety of original forms.
For the details of the bottom, top cover and side walls you will need twelve pieces of cardboard measuring thirty-five by nineteen centimeters. The thicker the better.
For the partitions on which the drawers will stand, sheets measuring thirty-four by seventeen centimeters are needed. There are also twelve of them.
A hand-made cardboard chest of drawers can withstand decent loads.
For the front and back walls of the drawers, you will need thirty pieces, the size of which is thirty-one by five and a half centimeters.
Below is a master class on assembling a chest of drawers using these parts.
You can do without any investment at all if you have a supply of cardboard in the house or you know where to get extra.
Schemes and drawings
Scheme for determining cardboard thickness
| Length | Width | Quantity | |
| Bottom, lid, walls (sides) | Thirty five centimeters | Nineteen centimeters | Twelve pieces |
| Partitions | Thirty four centimeters | Seventeen centimeters | Twelve pieces |
| Walls (front and back) | thirty one centimeter | Five and a half centimeters | Thirty pieces |
With careful use and high-quality assembly, cardboard will last 5 to 10 years.
- Bottom, lid, side walls. 1 cell = 1 cm.
- Partitions. 1 cell = 1 cm.
- Front and rear walls. 1 cell = 1 cm.
Master class on making a chest of drawers from boxes
We take the side parts of the chest of drawers (thirty-five by nineteen centimeters). We mark first five, then seven centimeters from the edge. From the top edge, mark six centimeters along the height of the drawer, add the thickness of the partition, and so on until the very bottom. We cut out the small rectangles that we got with a stationery knife and take out two of the three layers of cardboard.
For those who will be making a chest of drawers out of cardboard with their own hands for the first time, choose a lighter model.
We do this specifically in order to fix the partitions in the future. Otherwise, due to heavy things, the partitions will begin to sag and peel off.
We measure 5 and 7 centimeters from the edges of the partition and cut off the excess. Now the side wall and the partition fit perfectly together.
Connect the surfaces with instant glue, a glue gun, then place under a load for an hour for adhesion.
We repeat everything that we did with the first side wall with the second.
We check that the upper partition falls into place without problems and, if everything fits together, you can cut out the remaining rectangles in the side wall and install the partitions.
All that remains is to glue the partitions into the side walls. To do this, fill all the holes with glue. You can also use hot glue for strength. It will securely fix the partition, and after drying everything will hold tight. We repeat this whole process with all four partitions.
Glue the parts on the inside of the sides so that there are gaps in the places where the shelves will be inserted. The dimensions of the groove must correspond to the height of the shelves.
After the glue has dried, we will do the same with the second side wall.
We glue the top cover and the bottom (two parts measuring 35 by 19 centimeters) and, if you decide to use colored paper, cover the entire front part of the chest with it. Next, measure the size of the back wall and glue it (may vary depending on the thickness of the cardboard)
For neatness, the edges are covered with paper tape or paper.
Let's take care of the drawers. The front and back walls (31x5.5 cm) need to be glued to pieces of cardboard measuring 31 by 16.5 centimeters. After this, we measure the size of the side walls and glue them between the front and back. It turned out 16.5 by 5 centimeters, but this figure may vary depending on the thickness of the cardboard used.
Then, if you wish, you can cover the entire structure with colored paper and/or paint it in any color of your choice. You can also screw the handles for convenience.
To summarize, I would like to say that you can assemble many different designs from cardboard, and this is just one of the options. After spending a couple of hours on assembly, you will have a beautiful and comfortable chest of drawers at your disposal, which will cost you mere pennies.
Dresser for dolls made of paper and cardboard - step by step
Our next master class is another version of a small cardboard chest of drawers. This cardboard chest of drawers has four shelves. For work, it is advisable to take thick corrugated cardboard. We will also need an Erich krause or Kores glue stick. Prepare a couple of sheets of office paper, a stationery knife, Moment glue, 2 beads - drawer handles, a ruler, a pencil, and scissors.
When working with paper, it is important to take your time and glue all the parts carefully and evenly. Instead of white office paper, you can take thin colored paper.
Parts Dimensions:
So, let's start with the details of the chest of drawers. Draw the details on a sheet of cardboard using a ruler and pencil:
- 2 parts of the back wall 12*15 cm.
- 4 side parts 15*6 cm.
- 2 children top 13.5*6 cm.
- 2 children bottom 12*6 cm.
- 6 shelf parts 12*5.2 cm.
We glue the parts together in pairs for thickness. We will get:
- 1 back wall.
- 2 side.
- 1 top piece.
- 1 lower part.
- 3 shelves.
Next, all these blanks need to be covered with plain white paper using a glue stick.
Then take Moment glue, bottom part. and the back wall and glue them together, while maintaining an angle of 90´. Keep the back wall in this position until the glue dries. Next, glue the side walls in the same way.
We arrange the shelves so that the distance between the lower ones is 4.5 cm (there will be drawers here), leave the upper shelves open. Glue the shelves with Moment glue.
We will make boxes. For the drawers, we cut out 4 parts for the back wall 10.7*4 cm, 8 side parts 4*5 cm, 4 front parts. 4*12 cm. We will cut out the bottom later.
On the two front children. draw frames, retreating 0.7 cm from the edge. We cut out the frames with a stationery knife. Then, we must cover these frames with white paper. To do this, smear the frame with glue, take a sheet of paper and place the frame on it.
We make a cut with a knife, stepping back 1 cm from the frame. Make a triangle at the end of the cut line.
Apply glue to the paper inside the frame and carefully bend the paper onto the frame. Cut out a 4*12 cm piece from white paper and glue it onto the front cardboard piece on one side. Next, we place the second front piece on top of the frame with the paper facing down and paste it over the front of the drawer with paper.
We should get 2 white parts like this with a frame inside. We glue together the parts of the back part in pairs and glue these 2 resulting parts. paper. We do this to strengthen the box. Cover 2 lower and 2 upper parts with paper.
We assemble (glue) the boxes with Moment glue.
In the center of the front det. Sew on beads with white thread. Glue the front part to the finished drawers.
So the doll chest of drawers made of cardboard is ready.
On the video - how to make a chest of drawers for dolls with your own hands:
HOW TO MAKE A DRESSER FOR DOLLS ♡ HOW TO MAKE FURNITURE FOR DOLLS ♡ #DOLL WORLD ♡ FOR DOLLS
Making a chest of drawers from cardboard
First of all, prepare the main box. In the selected box, cut off the detachable side parts, which are usually located at the top and bottom. Only one side needs to be cut (Drawing 1).
drawing 1
Place the box so that the sides are narrower than the width. Measure and trim the excess depth of the future chest of drawers (drawing 1). You don't have to reduce the depth of the drawer if it suits you.
After the first two steps, you should already clearly understand what kind of chest of drawers you will end up with, which means you can start with the technical aspects. The main frame needs to be compacted. As I wrote above, I have a box made of thick double-layer cardboard; in addition, I glued another sheet of cardboard to each wall of the chest of drawers.
The back wall with detachable sides also needs to be sealed, but after that, secure the moving parts with paper. To ensure that all the parts are well connected, place the press and do not remove it until the parts are completely glued.
When the frame is ready, you need to make crossbars on which the drawers will lie. Cut out pieces of cardboard corresponding to the depth of the box, and make an allowance of 1 centimeter on each edge in width. The allowances along the edges need to be folded down and glued to the sides. Also coat the back of the shelf with glue.
In order for the shelves to stick together well, the box must be sandwiched between heavy objects. As an option, place the box on the floor with the back wall, and press the sides with two chairs.
Before you start gluing the crossbars, seal them in the same way as the main walls of the chest of drawers, i.e. glue 2 two-layer sheets together.
To ensure that the shelves are even, measure the same distance from the top on both sides and make marks along which you can then glue the crossbar.
Drawing 2
When the shelves are firmly glued together, measure the distance between each crossbar. The void from crossbar to crossbar will be the size of the drawer. Make the boxes a little shorter than the opening, i.e. if the height from crossbar to crossbar is 25 centimeters, then the height of the box will be 15-20 centimeters. This will allow you to conveniently pull out the drawers. The boxes are made like regular boxes. For convenience, I add 2 drawings of the box, and insert your own dimensions (drawing 2).
When the box is formed, the joints need to be secured with paper. It is for such processes that unnecessary paper will be needed; I used old calendars and unnecessary printouts. In addition to additional fastening, paper is a fastening element. It is on the paper that you apply PVA and connect the sides of the cardboard.
By the way, boxes can be made without additional reinforcement with cardboard.
Now you need to make a beautiful front side of the drawer, which will affect the appearance of the entire chest of drawers. Now you need to measure the height of all the niches (it may differ, all my drawers are different) and make its own front side for each.
When measuring, keep in mind that both the front side and the crossbars will be covered with paper, which will add 0.5 centimeters on each side. Details of the measurement are shown in the drawing (drawing 3).
Drawing 3
When we have measured and cut out the required rectangle, we glue it to the box. Here again you need to take care of the weighting agent for gluing the parts
If the boxes are of different heights, it is important not to mix up the rectangles
After gluing the parts together, assemble the chest of drawers and make sure all the measurements have been made correctly. If curvature appears somewhere, think about how to correct it or how to disguise it.
Take photocopier paper that matches the color of the wallpaper and cut it into strips. Cut the A4 sheet in half lengthwise. These strips should be used to cover all sections of the frame and drawers. Cover the boxes inside and outside with solid sheets. It is advisable to glue the strips on the top side on which the box will lie. Pasting with paper is not only an aesthetic issue, it is also an additional strength of the structure.
Only when all the unflattering details are hidden can you start wallpapering. I think there is no need to explain anything here, except that you need to try to carefully and correctly join the sections so that the drawing looks neat. I also glued the bottom and back wall.
When the glue and all the parts are completely dry, make holes in the boxes, where there are two layers of cardboard, and insert handles. By the way, on my second chest of drawers, instead of handles, there is a string with a bead stretched horizontally. So, if you don’t have any pens, improvise.
Stages of creating a chest of drawers
- The dimensions of future furniture and the place where it will stand are measured (for beginners it is better to take on small and simple models).
- Sketches of the chest of drawers and all the drawers separately are drawn on paper, taking into account the places of fastenings and bends.
- Blanks of the rear and side walls are cut out with double dimensions - for gluing together and for additional strength. The parts are connected with glue and placed under a press for 60 minutes.
- Parts with empty spaces for future inserted shelves are glued inside the sidewalls. Their height coincides with the dimensions of the grooves.
- The outer frame is assembled and the shelves are inserted.
- The edges are sealed with paper and tape.
- The boxes are made in the likeness of the frame. If you have shoe or household appliance boxes that are the right size, you can use them.
- After all the parts have dried, they begin to decorate the furniture. Finishing using crumpled paper is popular. Decoration depends on the imagination and desire of the creator. Paint, colored paper, stickers, etc. are used.
DIY cardboard chest of drawers with drawings
Assembling a chest of drawers from cardboard with your own hands using drawings is very simple, especially if you have free time for this and a desire to create. Cardboard furniture has both pros and cons, which, in general, applies to any thing.
The disadvantages of things made from cardboard are their fragility and the inability to use them in rooms with high humidity levels.
However, cardboard furniture, despite its external fragility, is capable of withstanding fairly decent loads, it is environmentally friendly and is made from cheap material that is accessible to absolutely everyone.
The main advantage of a cardboard chest of drawers is that how it will look in the end depends only on you, your imagination and artistic abilities. By creating a chest of drawers from cardboard, you can show all your creativity, and maybe even discover your potential as a designer.
A chest of drawers made of cardboard can be used to store absolutely any things; it is very convenient to put handicraft supplies in such a small homemade chest of drawers.
If you love everything original and know how to work with your hands, then this master class on how to create a cardboard chest of drawers with your own hands is perfect for you.
Drawings and diagrams
Before you start directly assembling our chest of drawers, you need, of course, to prepare drawings.
If you are not particularly talented in drawing, then don’t be upset, because DIY diagrams of a chest of drawers made from boxes can be found in great abundance on the Internet.
Several simple and clear diagrams are included in our article, so you can safely choose one of them, change the sizes to the ones you need and assemble your own chest of drawers from cardboard boxes.
Necessary materials
You can create a chest of drawers from cardboard boxes in completely different ways, but in this article we will look at only one. For it we will need:
- Corrugated cardboard (you can cut packaging boxes from TVs, refrigerators and other equipment)
- Scotch tape or glue “Moment”
- Breadboard knife
- Metal ruler (can be replaced with some metal tray)
- Acrylic primer
- Latex putty and spatula
- Acrylic paint
- Gouache
- Brushes
- Sponge
- Simple pencil
- Napkins
- PVA glue
- Water
- Acrylic lacquer
- Furniture handles
Assembling the chest of drawers
So, we moved on to the main part of the article. Below is a step-by-step master class on how to make a chest of drawers from cardboard with your own hands with detailed descriptions and high-quality illustrations.
Using a utility knife, cut out the walls for the shelves, as well as the side and back walls of the chest of drawers according to your own measurements. Carefully glue the structure together using tape or glue. Keep in mind that there should be a small space between the main side wall and the walls of the drawers so that the drawers can slide out and slide into place freely.
Cover the joints with newspaper or plain paper and prime the chest of drawers with acrylic primer. If you suddenly don’t have a primer, you can use plain white acrylic paint instead. After applying the primer, you can start painting, but we decided to include one more intermediate point in the mk, which you can skip if you wish.
Since corrugated cardboard has a ribbed surface, which may not look very aesthetically pleasing, we decided to smooth it out using quick-drying latex putty. Apply three coats of putty to the chest of drawers, allowing each coat about two hours to dry.
The last layer can be applied using a sponge to create a slight roughness on the surface. After filling, sand the chest of drawers with sandpaper. Paint the drawers inside and out. If you want, the inside of the boxes can be covered with paper with a beautiful pattern, as in the second photo.
Prime the front of the drawers and, sliding them inside the chest of drawers, paint the entire product. Apply several layers of paint.
Now you can show your imagination to the fullest and decorate the chest of drawers the way you want. This chest of drawers is decorated using the decoupage technique: roses from napkins are carefully glued to a mixture of water and PVA glue, and the edges of the finished applique are hidden using paint applied to a sponge.
Cover the chest of drawers with varnish and screw on the furniture handles.
Ready! You have assembled a wonderful cardboard chest of drawers with your own hands.
on this topic
Our master class on how to make a beautiful chest of drawers out of cardboard yourself has come to an end. At the end of the article we attach several simple and understandable video lessons on this topic.
Features of working with cardboard
Multi-layer cardboard is most suitable for creating furniture, but single-layer cardboard can also be used. It is glued in several layers to increase strength. The layers are laid perpendicularly, so there will be good rigidity.
Glue is used for connection. The best option is Moment glue. Experienced people recommend working with a glue gun, but precision and caution are required.
Note! The glue must be such that the materials do not become wet upon contact with it. The connection is instant.
Kraft paper is useful for gluing the edges and joints of the chest of drawers. It is not a required material, but is recommended for accurate work.
To create a chest of drawers with your own hands, you need a minimum of materials and tools. Most of them can be found at home. The main advantages of this work are the unique design of the furniture and the reliability of the structure.
DIY cardboard chest of drawers with drawings
Assembling a chest of drawers from cardboard with your own hands using drawings is very simple, especially if you have free time for this and a desire to create. Cardboard furniture has both pros and cons, which, in general, applies to any thing.
The disadvantages of things made from cardboard are their fragility and the inability to use them in rooms with high humidity levels.
However, cardboard furniture, despite its external fragility, is capable of withstanding fairly decent loads, it is environmentally friendly and is made from cheap material that is accessible to absolutely everyone.
The main advantage of a cardboard chest of drawers is that how it will look in the end depends only on you, your imagination and artistic abilities. By creating a chest of drawers from cardboard, you can show all your creativity, and maybe even discover your potential as a designer.
A chest of drawers made of cardboard can be used to store absolutely any things; it is very convenient to put handicraft supplies in such a small homemade chest of drawers.
If you love everything original and know how to work with your hands, then this master class on how to create a cardboard chest of drawers with your own hands is perfect for you.
Drawings and diagrams
Before you start directly assembling our chest of drawers, you need, of course, to prepare drawings.
If you are not particularly talented in drawing, then don’t be upset, because DIY diagrams of a chest of drawers made from boxes can be found in great abundance on the Internet.
Several simple and clear diagrams are included in our article, so you can safely choose one of them, change the sizes to the ones you need and assemble your own chest of drawers from cardboard boxes.
Necessary materials
You can create a chest of drawers from cardboard boxes in completely different ways, but in this article we will look at only one. For it we will need:
- Corrugated cardboard (you can cut packaging boxes from TVs, refrigerators and other equipment)
- Scotch tape or glue “Moment”
- Breadboard knife
- Metal ruler (can be replaced with some metal tray)
- Acrylic primer
- Latex putty and spatula
- Acrylic paint
- Gouache
- Brushes
- Sponge
- Simple pencil
- Napkins
- PVA glue
- Water
- Acrylic lacquer
- Furniture handles
Assembling the chest of drawers
So, we moved on to the main part of the article. Below is a step-by-step master class on how to make a chest of drawers from cardboard with your own hands with detailed descriptions and high-quality illustrations.
Using a utility knife, cut out the walls for the shelves, as well as the side and back walls of the chest of drawers according to your own measurements. Carefully glue the structure together using tape or glue. Keep in mind that there should be a small space between the main side wall and the walls of the drawers so that the drawers can slide out and slide into place freely.
Cover the joints with newspaper or plain paper and prime the chest of drawers with acrylic primer. If you suddenly don’t have a primer, you can use plain white acrylic paint instead. After applying the primer, you can start painting, but we decided to include one more intermediate point in the mk, which you can skip if you wish.
Since corrugated cardboard has a ribbed surface, which may not look very aesthetically pleasing, we decided to smooth it out using quick-drying latex putty. Apply three coats of putty to the chest of drawers, allowing each coat about two hours to dry.
The last layer can be applied using a sponge to create a slight roughness on the surface. After filling, sand the chest of drawers with sandpaper. Paint the drawers inside and out. If you want, the inside of the boxes can be covered with paper with a beautiful pattern, as in the second photo.
Prime the front of the drawers and, sliding them inside the chest of drawers, paint the entire product. Apply several layers of paint.
Now you can show your imagination to the fullest and decorate the chest of drawers the way you want. This chest of drawers is decorated using the decoupage technique: roses from napkins are carefully glued to a mixture of water and PVA glue, and the edges of the finished applique are hidden using paint applied to a sponge.
Cover the chest of drawers with varnish and screw on the furniture handles.
Ready! You have assembled a wonderful cardboard chest of drawers with your own hands.
on this topic
Our master class on how to make a beautiful chest of drawers out of cardboard yourself has come to an end. At the end of the article we attach several simple and understandable video lessons on this topic.
Chest of drawers for cosmetics with mirror
Boxes with a mirror will look very beautiful in the interior.
For work we will need:
- fiberboard sheet (fibreboard);
- glue “Moment” or similar;
- acrylic paint and varnish;
- half a meter of satin ribbon;
- stationery knife, ruler, pencil;
- office paper, scrapbooking paper;
- mirror;
- masking tape;
- varied decor.
Stages of work:
- On a sheet of plywood we mark 1 cm margins and indicate the dimensions of the box.
- Cut out 2 side panels and dividers.
- We collect all the elements: glue the outer walls. Apply glue to the cut sides and attach them to the base.
- Glue the sides and partitions.
- We glue the internal and external corners with masking tape, this will strengthen the structure.
- We cut the satin ribbon into 3 pieces of 12 cm each and glue it to the body blank. When the glue dries, glue the other ends of the tapes to the lid.
- We paint the visible parts of the parts where there will be no decor with acrylic paint.
- After the paint has dried, coat the surface with varnish.
- Glue a mirror to the inside of the lid.
- When everything has dried well, we begin to cover the box with paper. First, we glue white office paper, stepping back 0.5 cm from the edges, and then carefully glue the scrap paper.
- We glue all the inner sides of the product.
And the last stage of work - decorate your mini-chest of drawers according to your taste: beads, contours, decoupage, vintage.
Such tabletop chests of drawers will become a real decoration of your home, they will allow you to put all sorts of small items in the cells, help to structure cosmetic accessories and protect them from the sun, thereby increasing their shelf life.
Dressers and boxes will look good on a bedside table in the bedroom or on a nightstand in the living room. If you have wide window sills, then it would be quite appropriate to place the chest of drawers by the window. You can use small tables, large chests of drawers, bookcases, shelves and wall cabinets for this purpose. Or you can come up with a hanging structure. The main thing is that the mini chest of drawers for cosmetics fits into the interior of your apartment and is in harmony with the things around it in color, size and style.
Assembly and strengthening of structures
Cardboard furniture is made according to different drawings and from different materials, but there is a general algorithm for collecting cardboard products:
- according to the existing diagram, cut out all the parts along the marked contours, you can attach paper patterns to the base, trace and cut out the parts, or continue drawing directly on the cardboard;
- the next step is to process the raw materials: you need to clean the parts using sandpaper; the cut areas where the texture of the corrugated cardboard shows can be sealed with paper or tape.
Assembly and strengthening of cardboard structures
Fastening parts
Fastening the parts
After processing the parts, you should begin fastening them, which can be done using glue or tape. A good result is achieved using a glue gun. The parts can also be assembled using grooves, which are also glued to increase strength. But before gluing, it is recommended to seal all the unevenness on the cardboard cuts with putty. This way, sloppy marks will be hidden under a finish that won’t leave dirty marks.
Elements that are glued together in layers are placed under a press. These can be books and other heavy objects. Depending on the thickness of the cardboard, the layers are left to glue and dry for several hours or a day. The irregularities formed after gluing are sealed with kraft paper. If there are sharp corners, they need to be rounded with paper. When these processes are completed, cardboard furniture is decorated. Several techniques are used for these purposes:
DIY cardboard box decoration
- painting with paints;
- fabric upholstery;
- decoupage;
- pasting with decorative paper, film or wallpaper;
- applying varnish, glitter;
- glazing with various mixtures.
The base of the structure can be strengthened and further secured using stiffening ribs, which play an important role in the manufacture of a table, shoe rack, or bookshelf. The grooves and stiffening ribs are coated with glue, which will allow you not to worry about the durability and strength of furniture made from boxes in the future.
We make a chest of drawers from cardboard with our own hands with drawings and diagrams
Before you start directly assembling our chest of drawers, you need, of course, to prepare drawings. If you are not particularly talented in drawing, then don’t be upset, because DIY diagrams of a chest of drawers made from boxes can be found in great abundance on the Internet. Several simple and clear diagrams are included in our article, so you can safely choose one of them, change the sizes to the ones you need and assemble your own chest of drawers from cardboard boxes.
You can create a chest of drawers from cardboard boxes in completely different ways, but in this article we will look at only one. For it we will need:
- Corrugated cardboard (you can cut packaging boxes from TVs, refrigerators and other equipment)
- Scotch tape or glue “Moment”
- Breadboard knife
- Metal ruler (can be replaced with some metal tray)
- Acrylic primer
- Latex putty and spatula
- Acrylic paint
- Gouache
- Brushes
- Sponge
- Simple pencil
- Napkins
- PVA glue
- Water
- Acrylic lacquer
- Furniture handles
Assembling the chest of drawers
So, we moved on to the main part of the article. Below is a step-by-step master class on how to make a chest of drawers from cardboard with your own hands with detailed descriptions and high-quality illustrations.
Using a utility knife, cut out the walls for the shelves, as well as the side and back walls of the chest of drawers according to your own measurements. Carefully glue the structure together using tape or glue. Keep in mind that there should be a small space between the main side wall and the walls of the drawers so that the drawers can slide out and slide into place freely.
Cover the joints with newspaper or plain paper and prime the chest of drawers with acrylic primer. If you suddenly don’t have primer, you can use plain white acrylic paint instead.
After applying the primer, you can start painting, but we decided to include one more intermediate point in the mk, which you can skip if you wish. Since corrugated cardboard has a ribbed surface, which may not look very aesthetically pleasing, we decided to smooth it out using quick-drying latex putty. Apply three coats of putty to the chest of drawers, allowing each coat about two hours to dry. The last layer can be applied using a sponge to create a slight roughness on the surface. After filling, sand the chest of drawers with sandpaper. Paint the drawers inside and out. If you want, the inside of the drawers can be covered with paper with a beautiful pattern, as in the second photo. Make limit panels from corrugated cardboard and stick them on the front walls of the drawers so that all the drawers go inside the chest at the same level, and the product itself takes on a neater appearance .
Prime the front of the drawers and, sliding them inside the chest of drawers, paint the entire product. Apply several layers of paint.
Now you can show your imagination to the fullest and decorate the chest of drawers the way you want. This chest of drawers is decorated using the decoupage technique: roses from napkins are carefully glued to a mixture of water and PVA glue, and the edges of the finished applique are hidden using paint applied to a sponge.
Cover the chest of drawers with varnish and screw on the furniture handles.
Ready! You have assembled a wonderful cardboard chest of drawers with your own hands.
Let's start the lesson
The master class “How to make a chest of drawers” will help you cope with this task without any problems.
To create a chest of drawers from cardboard you will need the following materials:
- Stapler;
- Cardboard boxes or sheets of cardboard;
- PVA glue;
- Stationery tape;
- Acrylic paints (shades depend on your own imagination and desire);
- Brushes;
- Scissors;
- Awl;
- Various decorative elements for your choice.
First of all, on a piece of paper we draw the so-called desired result.
If you are going to make a chest of drawers for the first time, we strongly recommend that you create a “mini version” using plain paper. This way you can save yourself from damage to the prepared materials. Based on the sketch you have drawn up, you can begin further steps to create a chest of drawers.
We create the basis of the future chest of drawers. Based on its size, we will select drawers. For boxes you will need six boxes of the same size (for example, cereal or baby cereal). You can also assemble and glue boxes from a single sheet of cardboard. In our case, we will use ready-made oatmeal boxes.
Article on the topic: Baubles with inscriptions - weaving patterns and how to weave
Using scissors or a utility knife, cut the box crosswise, as shown in the photographs. The cut parts of the box must be bent inward to strengthen the walls of future boxes. You can secure the bent parts of the cardboard using PVA glue or a stapler. Similar actions must be done with the remaining five boxes. Thus, all six drawers are ready for the future chest of drawers.
Using your imagination, you can cover the boxes with self-adhesive film, decorative or wrapping paper, craft paper, and even fabric. Or you can simply paint it with paints, for example, acrylic. In this case, the method of gluing the boxes with decorative paper is used. After which, the parts must be left to dry.
In order to make shelves for drawers, you will need thick corrugated cardboard. It is necessary to cut strips from it so that it is possible to wrap two adjacent boxes, namely:
- the width of the strip should match the length of the drawers;
- strip length = two heights and four widths.
In order for the fold to be as accurate and even as possible, you first need to mark the strip by gently pressing the scissors. Because the cardboard is quite dense and thick, it would be advisable to draw parallel strips with a distance of 2 millimeters from each other.
After the work has been done, you can begin gluing the internal parts of the resulting shelf using the same decorative film that was used to design the drawers. To ensure that the edges of the shelf and the cut are hidden, be sure to fold the edges. By gluing the edges and thereby forming a complete shelf, you can first check the operation of the future chest of drawers. To do this, two drawers need to be inserted into the shelf. They should slide out without problems, after which it is necessary to make two more such shelves. In total, you should get three shelves with six drawers.
- The next step will be to connect the three prepared shelves together. To do this, you need to put them on top of each other and coat them well with PVA glue. Then, using some kind of weight, you need to press it down and leave it to dry thoroughly.
Related article: Crochet booties-ballet shoes for beginners with description and video
After the glue has completely dried and the shelves are firmly attached, you need to cover the back of the chest of drawers with a solid sheet of cardboard using glue. Apply glue to the bottom of the chest of drawers, its lid, and also to the sides. Next, from corrugated cardboard you need to carefully cut out the back, top of the chest of drawers, its bottom, as well as the side parts, fix them with glue on the resulting chest of drawers. After that, we cover everything with paper.
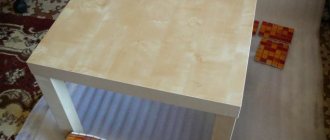
How to make a cardboard table with your own hands?
As you understand, it is also easy to make from this material.
- corrugated cardboard;
- stationery knife;
- acrylic paint;
- acrylic varnish;
- adhesive tape;
- hot gun;
- PVA glue;
- cardboard tubes from rolled material.
For the legs you will need cardboard tubes. You can ask for this scrap material at a hardware store. Oilcloth or film is wrapped around it.
If you also want to make furniture out of cardboard, be sure to try making it. The promised plot will help you with this, because such a shelf is very easy to make, the result is simply wonderful.
If you want to see what other furniture made of cardboard can be, including beds, stools, chairs, then check out the presented photo selection.
To creatively decorate your apartment, as well as add personality to it, you can make furniture from cardboard with your own hands; the patterns and diagrams are so simple that even a beginner can make the products. A variety of options will allow you to choose the right piece of furniture and make it, involving all family members in the process.
At first glance, you might think that cardboard is a fragile material that requires special handling. On the one hand, this is correct, on the other hand, having chosen the desired type of cardboard, you don’t have to worry about its further use. Cardboard furniture will be durable and practical if you follow the sequence of work and recommendations for using tools.
To choose an option for making a furniture product yourself, you need to consider several proposals:
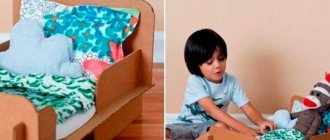
- Toy furniture made of cardboard - it is profitable and creative to make your own furniture for dolls. If children require the purchase of a new house for Barbie with all the accompanying accessories, the solution would be to produce this option with your own hands;
- Book shelves are considered one of the simplest cardboard products. They don’t take much time to make, and the books don’t put much stress on the cardboard;
- The original table will not be a dining table on which dishes are constantly located, but a small coffee or coffee table. A child can perform developmental tasks on such a piece of furniture, because it is designed for a light load;
- Chest of drawers - this kind of furniture is convenient for storing documents or papers; children’s accessories will also fit here. It is easier to make a chest of drawers from cardboard boxes from large appliances, such as a refrigerator;
- Shoe rack - an original shoe stand in the form of triangular cells will fit comfortably into any hallway. Entering the room, all guests will be surprised at how convenient and practical the rack turned out to be;
- A small chair for children - since cardboard is not intended for heavy loads, furniture for children is what you need. A small chair for your baby will become his favorite object, where he can draw or play.
As you can see, furniture made of cardboard is easy to make. To make it you need the simplest material and a minimum of tools.
Shoe rack
Toy
DIY cardboard shelf
Materials
To make a cardboard shelf you will need:
- Cardboard
.
The most important role in making furniture from cardboard yourself is played by the thickness
of the material.
The larger it is, the stronger the furniture will be. It is believed
that the density depends on the color of the cardboard.
The darker the material, the denser it is. But don’t rush
to throw away thin material!
It is often used for gluing joints. In addition, such material can be glued together to form durable, thick cardboard. If you do this, keep in mind that the waves of each new layer should lie perpendicular to
the previous one; - Glue
.
Necessary material for gluing cardboard furniture. You can use any
type of glue, but the most preferable is
“Moment”
. When using it, the cardboard does not get wet; - Tool
.
To cut parts, you need a stationery knife or jigsaw. The sharper
the tool, the more accurate the cutting will be, so blades and files need to be changed as often as possible.
Using a jigsaw will make it possible to cut several layers of cardboard. To dry the glue faster, you can use a regular or hair dryer
.
For finishing
Everything here is to your taste, you can
use:
- Dye;
- Kraft paper;
- Self-adhesive;
- Remains of wallpaper;
- Other materials.
At this stage there are no strict
rules - how you see furniture is how you decorate it. Kraft paper and wallpaper are usually used to cover the joints and edges, and sometimes the entire surface of the shelves.
Advice!
Using kraft paper for finishing will not only decorate the furniture, but also make it smooth and pleasant to the touch.
Description of work stages
As an example
we will look at
a cardboard shelving unit
.
It will fit perfectly into your interior, and you can use it to store
books, photo frames and similar things.
- Choose cardboard
. Five-layer is ideal, it is durable and easy to handle; - Then you need to cut the parts. With 3
sections there should be
4
, with two -
8
, with one -
2
.
The height of the part with 3 sections
corresponds to the height of the shelf. The height of the remaining parts is determined as follows: the convex part is the width of the shelf, the cut is the thickness. Draw the layout of the parts with a pencil or pen; - Using a utility knife, cut out the pieces
; - Now you need to cut strips
of cardboard that will add volume to the shelf.
They must be more than 4 cm
wide; - We glue
them as follows (this is convenient to do with a glue gun); - Then you need to glue both parts
of the part. It is best to do this with Moment glue; - Place
a press
on the parts (you can use books); - Then assemble the rack
; - After this, cover the uneven areas
with putty and leave to dry
for 24 hours
; - Now you can start gluing
with wallpaper or other materials. In this example, self-adhesive was used; - All that remains is to assemble the parts
and glue them together.