When it comes to wooden furniture for a child, many parents ask themselves: is it possible and how to make a high chair for children with their own hands according to the drawings? There is only one answer - of course, you can, if you know how to hold a plane, saw and hammer in your hand. The main thing is to decide what kind of wooden chair you need to make - folding (regular), transformable, growing, or simply sew a mobile one from fabric. In this article we will focus on a regular folding chair, and use its example to look in detail at how to make a children's high chair with your own hands, and also show improvised diagrams with dimensions.
Material selection
Coniferous wood - spruce or pine - is suitable for the production of children's furniture; it is soft, durable, comfortable, pleasant to look at and inexpensive.
But professional carpenters recommend using lime; it is also convenient to use, but much more durable.
To protect the child from injury and splinters, all parts must be sanded with sandpaper before assembly.
You will also need carpentry tools, nails, hinges, varnishes or paints to finish the finished product.
It is better to use acrylic paints and varnishes, as they are extremely non-toxic, as the child will breathe them and possibly even try them on his teeth.
Additional items
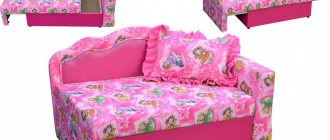
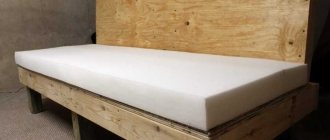
A children's table, made by yourself, will become not only a place where the child is fed, but also for exciting games, pleasant communication with the baby and further learning. When making a high chair, it is important to make the seating area as comfortable as possible so that the baby can stay in it longer. Often, adults themselves choose kitchen chairs with soft seats, so you should take care to create a comfortable seating area for your child as well. For this purpose, you can sew a soft seat, or upholster it with foam rubber and fabric, which was taken into account when preparing materials and tools.
You should cut a square to the size of the seat of the foam rubber chair, which is then covered with soft fabric. Experts recommend using artificial leather for simple furniture care. You can also use padding polyester folded in several layers and wrap it in fabric. The edges on the inside of the seat can be secured with a stapler. Upholstery will be the final stage of work in creating a children's furniture set. When the structure is assembled, you can immediately seat the fidget and feed it delicious food for quick adaptation to its own place.
Types of chairs
The child begins to eat at the same table from about 6 months, but, of course, cannot sit at the same table with others.
For the convenience of the child, various design solutions have been developed to accommodate him without fear that he may fall:
- A child's chair that sits next to the adult table, but is uncomfortable due to the difference in height - the child's head is at the level of the adult's knee. The design of such a chair can be beaten with the help of small wheels for ease of transportation;
- The soft cover, which is attached to the back of the chair for adults, is made in the form of a sling;
- A feeding chair with a small table on long legs;
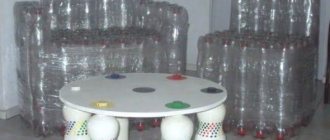
- Combination High Chair - A small high chair can be placed on a special table stand and used as a high chair for feeding or as a play table.
What should a chair and table be like for feeding a baby?
The main requirement that applies to all children's furniture is safety. Materials must be environmentally friendly. Chairs and tables are made without sharp edges or dangerous joints. In addition, small children are very active, so stability and reliability of the structure are of particular importance.
When making a high chair that will help you comfortably feed your baby, consider the following wishes:
- the product must have a comfortable, preferably soft seat;
- a comfortable chair back cannot be higher than the child’s shoulders, it should be soft and comfortable;
- It is advisable to equip a children's chair with comfortable leg support;
- Caring for the high chair will be easier if its surfaces can be washed, and the upholstery material dries quickly or has water-repellent properties.
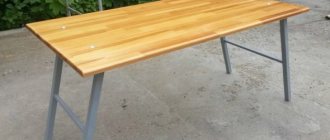
The simplest and most economical option for creating a high chair with a table is to retrofit a regular children's high chair with a shelf-footrest and attach a small table to the armrests, on which you can place a plate of food, a cup of juice or tea. Increasing safety, such products are often equipped with harnesses (with carabiner clasps) that securely secure the child.
Multifunctional models are popular among parents. For example, a transformable children's chair helps to comfortably place the child during feeding. It consists of two parts: a small children's high chair itself with a small table-overlay and a structure that is at the same time a high-slung base and a separate children's table.
The first use option is more suitable for a child from 6 months to 2 years. On such a chair you can simply feed your baby by placing his plate on a small table mounted on the railing of the chair, or you can move the entire structure to a large adult table. The second method is recommended to be used from 2 to 5 years. It is a separate arrangement of children's chairs with a table. At this age, girls and boys can already do a lot on their own. Sitting at such furniture, you can eat, draw, play, even learn to write.
Making a high chair with your own hands
Preparation of parts
For the combined design of a children's chair we need a high chair:
- Crossbar with a cross section of 200×400 mm on legs and crossbars;
- A small board 200-250 mm thick for rounding the armrests. To cut the parts on the chair, you can use a wooden board - a board. This durable material is an excellent imitation of the carrier and can be used not only for cladding facades, but also for construction. For example, a wooden staircase covering children's sandboxes, a playhouse in the village;
- fiberboard sheet 2×2.1 m (fibreboard) for making a seat;
- Plywood on the countertop.
- legs, length 390 mm, 4 pcs.
- Cross strip, length 300 mm, 3-part;
- Rounded elements, 4 pcs;
- Tabletop 200×340, size can be changed upon request;
- Top rod 220 mm, 2 sections;
- Bottom rod 340 mm, 2 pcs.
Beware! In order for the child seat to be beautiful and uniform, the dimensions of the parts must correspond to the child's design drawing.
To make a table stand, the following parts are needed:
- foot length 500 mm, 4 pcs;
- Crossbar 340 mm long, 4 pcs.
- Rod length 410 mm, 4 pcs.
- Plywood for countertops measuring 380x450 mm.
There is no need to buy all the material, you can use existing wooden boards and finishing materials partially in the household and adjust them to the desired size.
The plank is sawn to the specified size. Some parts of it are sanded (sanded) to remove any unevenness or scratches on the surface of the wood to prevent your child from getting splinters in the future.
You can then go onto the board and cut out the fillets from the design using a joiner.
It is better to connect connecting rods using wooden cabinets (connecting elements); you can make them yourself by cutting off a rod measuring 10x20x50, or you can buy ready-made tenons in a furniture fittings store.
Tip: If you don't have the time or desire to work with a scale, you can simply connect the parts with screws.
Cut or drill holes in the blocks and plates themselves corresponding to the size of the scales (depth about 30-40 mm) at the fastening points, avoiding drilling through the wood.
If you are interested in how to make a cover for a chair, we recommend reading the article: //6.///
/ /kak-sshit/kak-sshit.
Second stage: assembling the sidewalls
The future chair will have two side walls with 2 curves, 2 upper and lower slats and two legs. Each side wall will be installed separately, the legs and bottom beam will be connected first, then the curves will be attached separately to the top beam, then both elements will be glued together.
Before connecting the two connecting rods, the joint and the scales are well coated with glue, you can even use ordinary PVA. The second side wall is installed in the same way, then these parts are dried for a day and then sanded again.
Watch out guys! When assembling, make sure that the right angles between the rods and the sides are exactly the same.
Third stage: seat connection
Chipboard cut into 6 rectangles measuring 300x250 mm, each with two adjacent corners on the long side. To protect the baby, all edges must be carefully sanded, and then the three-component panels are glued together and placed under a press for one day. The result is a strong, stable back and seat.
The finished parts are joined together at an angle or bent along a metal strip and screwed together with screws.
Stage four: chair assembly
The sides are connected by crossbars using scales secured with glue. The back and support strips of the plywood table top are also attached to the structure.
Advice! First, it is more convenient to fold the structure, mark places for the scales, drill holes and make rods without glue - so that you can replace and correct defects in time.
Find out how to make a chair with your own hands: //6.polki///stulya/stulya/kak-sdelat-.html
Fifth stage: creating a table
The table mounting method is similar to the chair mounting method. First, the upper and lower strips are attached to the legs, then the side walls are connected by crossbars 340 mm long.
It is advisable to sand the edges with fine sandpaper to ensure a smooth, smooth and durable surface.
The next step is to secure the tabletop. Tighten the screws from the end of the structure - and a reliable children's desk and chair will be ready.
Stage six: making a soft seat
In principle, this is not necessary, but for the comfort of the child it is better to make the seats and the back soft, if desired.
That's why you're standing on the sheet. Chipboard Glue foam rubber 1-2 cm thick and cover it with an unmarked cloth or light-colored child.
The fabric is simply stapled to the back of the seat.
Advice! To save money, the foam can be replaced with several layers of synthetic resin.
. It only takes a few days to make a chair for catering at home, and only a few days to work in the evening. Thus, you can quickly, efficiently and inexpensively build a beautiful chair for your baby.
In this video you will learn how to make your own high chair:
Page 2
Would you like to update your interior with a new piece of furniture? You can make a chair made of natural wood with your own hands, which not only looks great, but is also useful in everyday life.
In this article you will find valuable tips and tricks on what materials to choose, where to start making wooden chairs and what tools to use.
Pre-assembled plans with dimensions make carpentry easier for beginners.
Do-it-yourself baby high chair, drawings, dimensions, diagrams - getting started
To begin with, we invite you to watch the video, which may encourage you to make a folding wooden baby high chair for feeding with your own hands. Of course, the video has flaws. There are no drawings, no step-by-step demonstration of how and what is being done. The author of the video himself said that he took the dimensions from his head. He shows what he did. However, if without exact dimensions and having only a rough plan, you can do THIS, then it’s simple. He made a great chair, and it can’t help but inspire you to create your own masterpiece.
Usually, before you start making anything yourself, you need to clearly decide on the type of chair and its size. To do this, sketch out at least a rough plan on paper. For more experienced craftsmen, it may not be needed, but the dimensions are still needed.
So, what is a classic folding wooden high chair? A seat with a small table, located on high legs that fold down. The table and seat can also be folded. Only the back and front legs remain stationary.
In order not to reinvent the wheel, you can search for the diagram on the Internet. There are several of these DIY high chairs with drawings and dimensions. The most successful options are shown in the picture.
When deciding on the size, first of all, you need to know the height at which the chair itself is located. The optimal leg height for a folding wooden chair is about 80 cm (800 mm). At this height it is convenient to feed the child - there is a table and armrests on it. The seat itself is located at a height of 60 cm (600mm) from the floor. But the legs will have to be made exactly according to the height of the table.
In general, when choosing the height of the legs of a baby high chair made by yourself, you should adhere to two rules:
- Parents should be comfortable feeding their child, and not bend over backwards next to him. At the same time, the height of the chair should be such that a grown-up baby, if desired, can fit into it himself.
- It is very convenient for the chair, in its unfolded state, to fit under a regular large table with its small table, or to be flush with it. This way you can not only feed your child while sitting at a large table, but also let him play at this large table, or just let him be next to you at the table. Choose your option.
Do-it-yourself baby high chair - looking for suitable material
In general, wooden furniture is best made from softwood. The bars made from them are cheaper and are the easiest to work with. However, both spruce and pine can release resin, which is very toxic and may not have a very good effect on the health of babies. Therefore, it is better to make a do-it-yourself highchair (and indeed all products for small children) from linden. Linden bars are also easy to process, but the linden tree does not emit toxic resin.
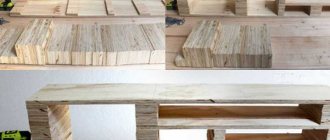
After you have decided on the type of wood, you need to prepare (buy, find in bins) the required number of bars and boards from which parts for the future chair will be cut. And to do this, you need to choose a suitable diagram or drawing of a children's high chair with dimensions in order to have a clear idea of what parts you will use to make it with your own hands.
So, we liked the following diagram, then the spare parts for the high chair will be like this:
- 4 long bars for legs (80 cm each)
- 2 cross bars located between the legs at the bottom - the main support for the high chair (450x60 mm)
- Side “walls of the chair” - 2 pieces. (200X200 mm). The legs are screwed to them.
- Armrests – 2 (400Х30 mm)
- 2 slats between which the back of the chair is attached (170x20 mm)
- 2 rear crossbars - located between the two rear legs, the seat rests on the upper one (310x30 mm).
- Table – 1 (500Х200mm)
- Seat and back (300X300mm), (400X300mm)
- Two crossbars located between the front legs. They act as steps so that the baby can climb onto the chair. They are also needed so that the chair legs do not move apart spontaneously in case of poor fastening. Although... they play a secondary role, so making steps is optional. (310X60mm).
The thickness of all bars is 25 mm. This is quite enough for a toddler up to 20 kg - the structure will hold up. Of course, if he doesn’t jump on the chair like on a trampoline g)
Do-it-yourself folding wooden children's high chair for feeding - preparing the details
As an example of a do-it-yourself folding wooden baby high chair, you can use the following videos. It first shows the step-by-step production, and then the final result of production. The author tells what and how he did. A glimpse of the dimensions and approximate plan. However, even such a short review is quite understandable in order to learn from his experience and make your own chair.
Once you have decided on the number of parts and their sizes, and found the right material, you should proceed directly to cutting and sawing them. The most convenient way to do this is to use an electric jigsaw. Anyone who deals with carpentry will understand me, because not everyone has a machine at home. After all the parts are cut out, you need to CAREFULLY clean them of burrs, then sand them (process them) with sandpaper. Little children not only feel everything with their hands, but also taste it. Therefore, once again ATTENTION!!!! no burrs, the baby’s safety directly depends on this. No one needs unnecessary injuries and splinters, so we do it thoughtfully and with passion.
When all the parts are cut out and sanded, you can proceed directly to assembling the chair.
How to make a baby high chair with your own hands - assembly
Now, having ready-made spare parts and a plan in my head, to the question of how to make a highchair for children with your own hands, there is only one answer - to assemble it. For assembly you will need screws, hinges, wooden or metal dowels. So, let's go.
- First, the sidewalls are screwed to the front legs (processed bars).
- At the back, two strips are screwed to the sides, between which the back will be located.
- Screw the backrest to the slats.
- Install the hind legs. They are attached either in the center of the sidewall or in the middle to its upper part. It is the hind legs that are made mobile.
- Screw the crossbar onto which the seat rests. After this, you can screw in the remaining transverse bars, including the bottom ones, on which the chair will directly stand.
- Attach a seat. It is attached either to small hinges or to couplings that hold the pipes together.
- Screw the armrests to the table
- Attach the armrests to the chair. They are attached to the rear slats, to which the backrest is screwed.
High chair assembly completed
Which tree to choose
A natural wood chair can be made from the following types of wood:
- Governing body;
- bar;
- array
- Protocols.
In most cases, a combination of several types of materials is used, each of which has its own function when designing a chair.
You can buy ready-made materials or, if you have the necessary equipment, make them yourself. This requires quality protocols. When choosing logs, pay attention to their appearance: the presence of branches, cracks, fungal diseases. Inspect the top layer of wood - sometimes logs are painted to improve their performance.
If you decide to purchase lumber for a chair, you should take into account the following recommendations:
- Tires and slabs must be dry, with smooth edges and no cracks. Pay attention to deformations - only minor deviations are allowed, as well as the presence of holes (diameter from 2 to 4 mm), symptoms of rotting, and mold.
- The thickness of the panels reaches 100 mm, and the thickness or thickness of the panels is 100 mm.
- Solid wood is a material containing only natural wood without impurities. When choosing a lattice, we pay attention to the type of wood that best suits the design of the chair.
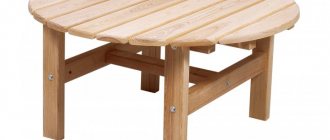
- Chairs are preferably made of oak or mahogany - these varieties are known for their excellent decorative and practical properties (strength, durability, ease of use).
- Other suitable materials are pine and beech.
Important: Store wood, rods and plates in a slightly larger volume than designed for production, as there is a possibility of damage or breakage of one of the parts.
Manufacturing process
Furniture production can be divided into 3 stages: preparation of material, cutting and assembly of the product. A fourth option is also possible – finishing. The sequence is the same when making any model, but the work itself will depend on the complexity of the design and the selected material.
The following video will help you make a beautiful and bright highchair:
Preparation and production of parts
Often these stages are carried out in parallel to each other. The material in the store does not always have a sufficiently low degree of humidity - 12–16%. Therefore, it is advisable to dry the wood additionally. Also, any of the wood materials must be acclimatized. Therefore, before starting work, it is recommended to leave wood, plywood or chipboard in the room for at least a day.
Cutting bars, boards and sheet material can be done independently, or to order in a workshop at the store. A standard drawing of a high chair includes the following elements:
- legs for table and chair - 4 pcs. for each part of the product. The bars are cut to size using a jigsaw and must be treated with sandpaper;
- upper and lower crossbars – 2 pcs. also made from bars;
- crossbars – 3 pcs. for a chair and 4 for a table. The bars are sawed on a workbench or on a table, held in a vice. A miter box is used to cut 90 degree corners;
- roundings - 4 pcs., cut from the board. In this case, the wood fibers must be perpendicular to the bending angle. Otherwise, the part breaks easily due to internal stress;
- The tabletop and seat are cut from a sheet of plywood, wood or chipboard to size.
If the chair is made entirely of plywood or chipboard, then all the parts - the sides, the partition connecting them, the seat and back - are first drawn on a sheet and then cut out with a jigsaw.
The following video will tell you how to make a children's chair from chipboard:
Product assembly
The best option is to connect with dowels. The latter are easy to make yourself from a board. The bushings are rectangular in shape, their edges are sanded.
- Holes are made in the parts of the product for dowels: first, with a drill of a smaller diameter - up to 6 mm, then widened with a chisel to 8 mm.
- The parts are attached with glue - carpenter's glue, PVA, etc. Before the final connection, it is advisable to carry out the installation without glue to ensure that the dowels and holes are at the desired level and the angles are respected.
- For the most durable fastening, proceed as follows: place the parts on a dowel, tap with a hammer to fit the elements as tightly as possible, and then secure them in a clamp for a day. Making the chair will take longer, but its reliability will be much higher.
All parts according to the drawing are connected to dowels using the described method. If we are talking about a plywood chair, then its elements are cut out with tongues and grooves, and connected in the same way - with glue.
Bright children's homemade chair
Chair finishing
- The easiest way is to open it with water-based acrylic varnish. The color and gloss level of the varnish are determined at will.
- You can paint the product with water-based acrylic paint. Although it is not as stable as the oil composition, it is completely safe.
On the seat, and sometimes on the back, a soft insert is made of foam rubber and a fabric cover. It is better to choose a fabric that can be easily washed, as it will get dirty quickly.
Drawings with dimensions
The process of making a chair begins with a drawing. If this is your first product, then it is best to avoid complex designs and try to make the chair a simple design with fabric seat cushions. You can use the following drawing (all dimensions are in millimeters):
If you are interested in how to make a cover for a chair, we recommend reading the article: //6./// / /kak-sshit/kak-sshit.
Materials and tools
When making a chair, the following materials are required:
- Sheets (thickness - 10-15 mm);
- Rod (parameters - 40 x 60 mm and 40 x 40 mm);
- Sanding paper;
- Foam and durable fabric;
- self-tapping screws;
- Furniture glue.
If you are going to produce tires yourself, you will need special equipment. Woodworking tools:
- Construction stapler;
- saw;
- Furniture security guard;
- sycamore;
- Chisel;
- ...this is the guy who is a duck;
- Puzzle;
- screwdriver;
- Roulette.
To make a fishing chair, read the following article: //612.//mebel//kak-sdelat—rybalki.html
Description of work stages
Step 1: Prepare a bar: one for the back of the chair (80 cm long), another for the front legs (44 cm). Make holes in the blocks at the same height - they are necessary for the base. The finished parts should be placed on top of each other, and the leg cuts should be aligned. Mark the position of the holes.
You should make two holes in the adjacent chair legs to create a sort of rectangle that sits on your legs.
Step 2: Using a chisel, drill holes into the markings. Get rid of sawdust, clean your feet.
Step 3: Create 2 longitudinal stripes and 2 steps (horizontal pieces connecting the bottom of the chair legs). To do this, take 4 beams with markings of future peaks. Their dimensions should be about 10-12 mm. Mark and cut the tenons as carefully as possible so that they fit snugly into the holes. Make sure there are no gaps.
Step 4: The next step is to install the seat back. It is better to take a cutting board as its basis. To adjust the height and thickness of the backrest, make holes on the inner supports of the seatback - there are slots for attaching the seatback. The seat is secured with screws. To ensure the chair is sufficiently rigid, attach small brackets.
Step 5: Sand the outside of the chair back and legs so they are round and then sanded.
Step 6: The base of the future chair should be painted and polished. It is best to buy a water-based, odorless varnish. Wait for the components to dry completely.
Step 7: If you want to make a chair with an upholstered seat, take the foam of your desired size and wrap it in a thick, fairly thick fabric. Attach the foam to the seat using a staple gun.
Step 8: The process of assembling the wooden stool begins immediately after processing all the components. The pegs should be well lubricated with glue and punched into the grooves with a hammer. In order not to damage the varnish of the chair, it is necessary to use strokes as carefully as possible.
Step 9: The last step is to attach the seat and backrest to the base of the chair. Use suitable drill bits to attach self-tapping screws to furniture. Screw caps may be coated with adhesive. PVA and sawdust. Mix these two ingredients and apply them to the flat cast iron. After painting the chair, the screws become almost invisible.
Having mastered the manufacturing principle, you will be able to adopt more complex designs in the future - chairs with figured legs and backs, with armrests, carved chairs and self-repair of wooden chairs. You may want to make an original high chair to feed your child or surprise famous authors with an unusual design.
Watch a video master class on making a chair from solid wood:
Page 3
Fishing enthusiasts must adopt a static position that waits a long time for a bite, so the most important condition is the right choice of chair.
Sitting on the grass or sandy beach is not the most convenient or healthy solution - just laying down a piece of tarp. Your legs and back are leaky, and the soil moisture in the coastal area can lead to colds, so you'll need a chair.
The models presented in tourist or fishing equipment stores do not differ in variety, special comfort or cost.
A cleaner whose hands are well acquainted with the tools of a carpenter is quite capable of making a fishing chair on his own. If there are scrap wooden rods or aluminum pipes in the house, then useful homemade goods will cost the family budget practically free.
Let's move on to assembling the table
Many parents, having made a purchase for their child, cannot figure out how to assemble a high chair. This is understandable, because all models, as a rule, are sold disassembled.
Before the assembly procedure you will need the following materials:
- Wooden crossbars.
- Soft seat for baby.
- Small and large tabletops.
- Euroscrews and a key for them.
“Agu”
In order to assemble such a mini-installation, you must first remove all the parts from the packaging. As a rule, the chair itself is assembled first - the rest of the work will not be so difficult.
This model of chairs has two armrests, which in turn have triple vertical wooden rods. The edge located closest to these rods is called the anterior edge.
- Connect the armrests using a wooden crossbar. You need to turn it with two bolts from the front side of the armrests from below.
- Attach a wooden crossbar to the bottom of the seat.
- Place the soft pad in the base so that the seat belt is on both the front and bottom.
- Secure the seat with four bolts, the back and armrests with two.
- Now all that remains is to assemble the feeding table. For this purpose, the tabletop must be placed on top and snapped into place with grooves in its bottom directly on the armrests.
Important! On the left armrest there is a plastic regulator, which determines the distance of the baby’s desk.
- Now you need to make a stand for the table. For this purpose, you need to connect together two identical parts in the set (you will notice them immediately) perpendicular to each other.
Important! The connection points are marked with strokes that you will immediately notice.
- Place the almost finished structure on its legs, screw the very last part with the wall - the structure must remain stable.
- Connect the legs of the structure using the remaining jumpers and secure everything with bolts.
Assembly is complete.
“Baby”
Before assembling the “Baby” high chair, you need, as in the first example, to lay out all the parts in front of you. There will be much more of them here than described above, but the advantage of these details is that they are all already numbered (2-9 - parts of the tabletop; 11 and more - parts of the chair).
The collection process is as follows:
- Arrange all the parts by numbering separately from each other.
- Align and twist parts with holes that have the same serial numbers, starting with the number 12.
- Connect the parts numbered 13.
- Fasten the holes of parts 11 and 14 respectively. The end result will be a 4-piece part.
Important! The second part is assembled in the same way - the configuration of the same numbers is connected one by one, then these parts are connected together using a crossbar.
- Now it is possible to assemble a high chair by attaching a soft seat for your child to a wooden base - the crossbar should be between his legs, and the safety strap should hang down. The seat must be secured with six bolts.
- The last stage of the initial assembly of the structure is attaching the table to the armrests using two bolts.
- Next, the stand for the table is assembled. To do this, select 4 elements with cell numbers 3, screw them together with bolts. As a result, you will get a part that resembles the letter H in appearance.
- The second part is twisted in the same way according to the numbering of the same cells.
- Ultimately, all that remains is to assemble the feeding table by connecting the main assembly parts.
Important! Do not tighten the bolts too tightly - this can cause rapid wear of the entire structure.
Quality and structure of the fishing chair
In order for your home fishing chair to be truly comfortable, you need to consider what characteristics and design the product has:
- Durability. A chair must support the (sometimes significant) weight of its owner in order to last long enough and not become a disposable item;
- Stability. The design of the product should provide comfort to the fisherman in all aspects of the coastal topography (uneven and loose bottom, dirty shore, sandy beach);
- small size. Even if you go fishing in your own car seat, it should be compact because the trunk is not a dimensionless space;
- light weight. When a person goes to a fisherman, he tries to reduce the load so that the high chair is light enough;
- simple production technology. Manufacturing fishing chairs using clean and simple technology only if the product is of high quality and does not take much time to manufacture.
Home walking chairs come in a variety of designs, but require a strong connection of parts and a simple folding mechanism.
The following types of mobile chairs are distinguished by product type:
- Chairs with chairs. Folding chairs are the most comfortable to carry due to their lightness and compactness;
- Chairs with backs. Folding versions of models with a backrest significantly reduce the load on the back and make fishing very comfortable;
- Camping chairs. If you can get to the fishing area, it is better to use armrests with comfortable armrests and an adjustable backrest. This will allow the fisherman to avoid back pain and excessive muscle tension.
Folding Fishing Chair Drawing
Construction procedure and diagram
On the video: another option for designing a high chair. Be sure to check it out