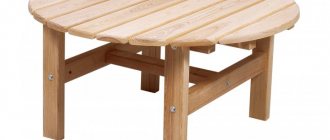
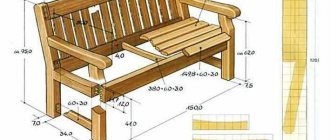
For outdoor recreation, you need lightweight things that can be compactly folded for transportation and instantly returned to their original position. And the first piece of such furniture is a table where you can place prepared food and drinks. The compact product can be easily placed in the trunk to be taken with you to the country house, outdoors, etc.
A table where you can place prepared food and drinks.
The folding design has its own characteristics. Making a convenient picnic option is quite easy if you have the skills to work wood and assemble the parts at home.
The compact product can be easily placed in the trunk to take with you to the country house, nature, etc.
The benefits of making it yourself
To be able to set up a picnic area, you don’t have to resort to buying special furniture. It is much cheaper to make a folding structure with your own hands. In addition, a table assembled independently is usually thought out to the smallest detail and has the design that you like best.
The folding design has its own characteristics.
During manufacturing, you can give the product any tabletop shape, but it is more convenient to use a traditional rectangular one.
Wooden blocks and plywood can be purchased in the specialized department of any hardware store.
If you make a small folding table with your own hands, you can give it an original look - paint it in any color or varnish it. The legs are attached to the main fabric using elements that are found in any home.
Making a convenient picnic option is quite easy if you have the skills to work wood and assemble the parts at home.
When making it yourself, you can choose your own tabletop size, designed for 2, 4 or 6 people.
To be able to set up a picnic area, you don’t have to resort to buying special furniture.
Deciding on design and construction
Folding picnic tables come in a variety of styles and materials. Hence there are many design and construction options. You can make furniture entirely from wood (solid, chipboard or slats), light aluminum, plastic, combine plywood (tabletop) and metal (legs), etc.
It is much cheaper to make a folding structure with your own hands.
The shape of the tabletop can be round, square or rectangular. The picnic table is made on frames that can be easily folded or brought into the desired position during use.
In order to make a folding table for equipping a picnic area, you need to adjust all the parts to size.
The legs play a major role in this design. Correct calculation of the length and installation of fasteners will ensure the convenience of folding the table into a compact position and stability when unfolding.
In addition, a table that you assemble yourself is usually thought out to the smallest detail and has the design that you like best.
Basic requirements for headsets for outdoor recreation
The hardships that befall furniture for outdoor recreation are much more serious than the share of living room or hallway sets “spoiled” by home comfort. This is why it is so important to decide what and how exactly to make a picnic table with your own hands: the drawings should take into account not only the desired dimensions and method of transformation, but also the ability to use this furniture in light rain and next to an open flame. Soot from the barbecue and drops of dew, scorching rays of the sun and slight frosts should not cause significant harm to the material.
The basic requirements for camping furniture are understandable:
- water resistance;
- ability to withstand fairly aggressive sanitization;
- light weight;
- compactness.
But when it comes to the prospect of making a picnic table with your own hands, another aspect comes into play: the availability of the material.
and ease of processing. The leader in demand is wood. The craftsmen use both slats and small planks, as well as plywood panels.
If there are scraps of boards and beams left from assembling cabinet furniture, we can assume that the basic materials to assemble a folding picnic table with your own hands are already available. Instability to moisture, which can gradually dissolve the formaldehyde resins used when pressing chipboard, can be corrected with a generous layer of varnish.
Slats and planks made of solid wood can be used even unpainted, although additional gloss and varnish will make the furniture not only more practical, but also elegant.
Necessary materials
To make the simplest version of the table, you will need:
- thick plywood board 550 x 300 mm (1 pc.);
- bars for legs 700 mm long (4 pcs.);
- bars for crossbars 450 mm long (2 pcs.);
- cross bars for securing legs 500 mm long (4 pcs.);
- sandpaper;
- bolts;
- nuts;
- washers;
- nails.
During manufacturing, you can give the product any tabletop shape, but it is more convenient to use a traditional rectangular one.
It is not recommended to take blanks that are too thick, otherwise the bulkiness of the structure will negate the ease of the layout. For bars, the optimal cross-section is 20x40 mm, and the thickness of the plywood should not exceed 10-15 mm.
With the help of a drawing it will be easier to follow the planned project.
To make a structure from other materials, self-tapping screws may be needed.
If you make a small folding table with your own hands, you can give it an original look - paint it in any color or varnish it.
Tools, materials and cutting blanks for the future folding chair
First you need to saw off a strip of plywood, which should have a width equal to the length of an A4 sheet. This work can be done either with a regular hacksaw or with a hand-held electric circular saw - everything will depend on the equipment of your workshop or garage. The length needs to be calculated so that the workpiece is enough for two parts, the size of two A4 sheet widths. These are all the blanks that will be used in our work today.
Cut a strip of plywood for two blanks
The main things you will need for the job are plywood (not necessarily thick), a jigsaw, a screwdriver and a template on a sheet of A3 paper. You can also use two A4 sheets glued together. The template itself is drawn on paper by hand using a ruler or printed on a printer. You can see what it looks like in the photo example below. After the two templates are ready, they need to be glued onto pieces of plywood and then carefully cut out. One part, selected from the middle of the workpiece, can be discarded or removed for other purposes, and the second will be used for a folding chair. The result should be three parts.
Glue the prepared template onto the plywood and cut along the marked lines
Related article:
Do-it-yourself furniture made of wood : photo examples, drawings, diagrams, materials; features of making furniture for the garden, children's room, bathhouse, gazebo, tips and recommendations from craftsmen - read in the publication.
Required Tools
Assembling the future table is easy if you have all the necessary tools at hand:
- hacksaw;
- jigsaw;
- screwdriver or screwdriver.
The legs are attached to the main fabric using elements that are found in any home.
Using a screwdriver you can make a model much faster and without much effort.
When making it yourself, you can choose your own tabletop size, designed for 2, 4 or 6 people.
How to make: step-by-step instructions
Before starting work, make a detailed drawing of the whole table and its parts, indicating the length, height, width. Try to make the parameters of the product proportionate. With the help of a drawing it will be easier to follow the planned project.
It is not recommended to take blanks that are too thick, otherwise the bulkiness of the structure will negate the ease of the layout.
In order to make a folding table for equipping a picnic area, you need to adjust all the parts to size. Wooden blocks and plywood can be purchased in the specialized department of any hardware store.
The legs play a major role in this design.
At home, check the length and proportionality of the elements again. Let the workpieces be a little larger; the difference can be eliminated at home using a hacksaw and a jigsaw. After trimming, sand all parts with sandpaper. It is advisable to slightly round the corners of the tabletop using a jigsaw.
- Connect the legs with crossbars at a distance of approximately 25-30 cm from each other using bolts or ordinary nails.
- Screw the crossbars to the back of the tabletop.
- Secure the finished frame legs crosswise using bolts and connect one at the top to the crossbars, leaving the other free.
Try to make the parameters of the product proportionate.
To make the table more stable, make the supports slightly beveled at the bottom and top.
The picnic table is made on frames that can be easily folded or brought into the desired position during use.
The height of the table can be made smaller or larger, depending on your preferences. To do this, measure the length of the bars for the support frames of the appropriate length. Try to make sure that the aspect ratio of the tabletop and
To make a structure from other materials, self-tapping screws may be needed.
The finished structure can be painted or coated with a double layer of varnish, transparent or with a wood tint to choose from.
The shape of the tabletop can be round, square or rectangular.
To prevent dishes and other accessories from rolling off the table when tilted, you can add edges to the surface. To do this, take thin, low bars and secure them to the tabletop with nails.
Using a screwdriver you can make a model much faster and without much effort
The edges of the upper part can be decorated in relief. Using a jigsaw will help you with this, then clean the edges with sandpaper.
Hence there are many design and construction options.
Like a wooden one, you can make a plastic structure or a combined one, where the supports are made of light metal.
Before starting work, make a detailed drawing of the whole table and its parts, indicating the length, height, width.
To create a picnic set in the same style, it is recommended to assemble several folding chairs to the table. These compact products will greatly reduce space and will be convenient for transportation if you are going with your family or a group of friends to spend a day off in nature. During the off-season, they can be put away in the pantry until next spring or summer.
Folding picnic tables come in a variety of styles and materials.
Furniture and interior items
A folding table is very convenient and indispensable in many cases. Most apartments in our country have a small area, and many do not even dream of placing a large dining table in the kitchen. To solve this problem, there is a wide selection of folding table designs. And when organizing a picnic in nature, it is optimal to take with you a small aluminum folding table, which is lightweight and folds compactly.
Content:
Variety of folding table designs
The sizes vary depending on their functionality, but in any case the folding part must be shorter than the height, otherwise it will not be able to fold. A table made by yourself can be decorated with decoupage or simply painted, not forgetting to apply several layers of varnish at the final stage.
Folding tables are used in trade, at picnics, at dachas and in apartments. They are indispensable when you need functional, but compact and lightweight tables. Depending on the place of their use, a suitable material is selected. So, for the street it is best to take an aluminum structure with a plastic tabletop. This table is moisture resistant and lightweight. Natural wood, plywood or laminated fiberboard on a wooden frame are suitable for the house. But all folding tables have one drawback: you cannot stand on them. This load is too large for a folding structure.
First of all, they differ in the shape of the countertops - rectangular, round, oval or square. The most versatile tables are those with a rectangular top.
The legs are made of wood, aluminum and steel. Parallel legs make the structure less rigid, but it is comfortable to sit at such a table. And those arranged in a cross, although less convenient, provide maximum stability. In addition, there are removable and length-adjustable legs; they are especially convenient for uneven surfaces. Therefore, when choosing a table, you need to focus not only on its appearance and the size of the tabletop, but also on the design features of the frame.
Tables made of wood or laminated fiberboard with parallel legs look beautiful. But they can only be used indoors and provided that you do not have to unfold them often.
An inexpensive table made of varnished plywood is perfect for outdoor trips. It is moisture resistant and will last for many years. To quickly and easily fold the legs should be arranged crosswise.
How to make a folding table for different occasions will be discussed in this article.
DIY folding picnic table
Outdoor recreation is becoming increasingly popular. It helps you relax and unwind from the bustle of the city. But even far from civilization, you want to make your time as comfortable as possible. An important attribute is a folding camp table, which has a number of advantages. Firstly, it has small dimensions and light weight, which greatly simplifies its transportation. The finished tables have a special tabletop coating that does not absorb food odors and is easy to clean. Secondly, it is made of reliable material, most often aluminum, and can be used in the harshest conditions for many years. It is convenient if there is a hole in its center for an awning, then relaxing under the hot sun will be as comfortable as possible. Today there is a large selection of folding tables for camping: children's tables, sets with benches or simple tables. They combine time-tested materials and modern ones, such as plastic.
Let's look at how to make a folding table with your own hands using the example of a simple and very reliable design.
It will be compact and lightweight, which will allow you to use it for different purposes: on a hike, in the garden or fishing. Below is a drawing of a folding table. If necessary, the dimensions can be changed proportionally.
First, the required number of bars is cut out with a small margin in size. The easiest way to do this is on a circular saw.
The tabletop can be made of any material, but it is better to make it from varnished plywood or wood (in the future it must be carefully coated with several layers of varnish).
All cuts of the workpieces are covered with edge tape. The bars for the legs and footrests are rounded using a jigsaw or a right angle is cut and smoothed with a grinder.
They are fastened to each other using a bolt, the length of which should not exceed 35 mm.
Having prepared all the parts, you can begin pre-assembly. First of all, the legs and supports are fastened together. After that, markings for fastenings are applied to the tabletop (it will be mounted on wood screws). Having numbered all the parts, the table is disassembled, all irregularities are sanded, and several layers of a protective compound are applied. That's it, it's ready for final assembly.

