The circle is a perfect figure. If you look at this from a certain point of view, you will notice that almost all things around us, one way or another, have a round shape.
Psychologists say that on a psychological level, rounded shapes have a positive effect on a person. For example, if you negotiate at a round table, then with a high probability they will be successful. Your interlocutor will feel as relaxed and at ease as possible.
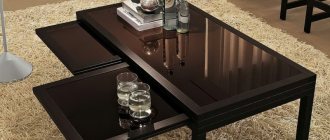
Dear reader, it’s not just that we made several analogies with rounded shapes. Today we want to talk about making and assembling a round table with our own hands. Make yourself comfortable, it will be interesting.
Round table options
We will not list all the variations of the round table, because there are countless of them. However, there are several classic variations that are always relevant:
- A small round table with one massive leg in the middle.
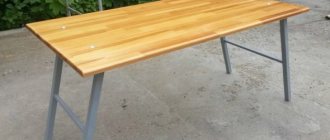
- Classic table with 4 legs.
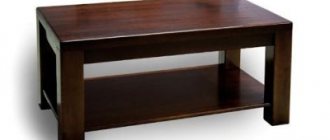
- A table with 4 legs that has several “floors” for storing books and magazines.
Tools
Before assembling a piece of furniture, you need to prepare tools and other equipment :
- materials for making a table;
- electric drill;
- drills for woodworking;
- electric jigsaw;
- grinding machine;
- screwdrivers;
- set of hex keys;
- sandpaper of various grain sizes;
- foam roller;
- oil brushes;
- fastening elements (screws, confirmations).
To fasten the mounting units you will need PVA glue.
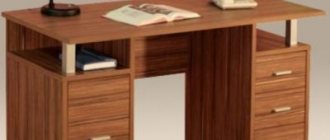
What can a table be made from?
There are many materials for making a round table, ranging from a variety of wooden coverings to durable metal fittings.
Craftsmen most often use the following materials in their work:
- Chipboard.
- MDF and plywood sheets.
- Stones.
- Glass.
- Metal elements.
- Durable plastic.
With these materials, desire and a little imagination, even a beginner can create a truly beautiful and practical table.
We would like to note that handmade furniture is most valued, because it is one of a kind and made with love.
Original ideas
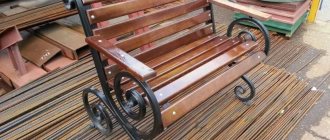
A round wooden table is a rather trivial interior detail, but it can be made much more interesting by applying original ideas. So, a table can be made from:
- The bottoms of large barrels are boards obtained from barrel lids, strong and durable. If they have inscriptions or images, this will only emphasize the unusual design. To complement the picture, you can equip the edges of the wood with iron strips or staples.
- Wide cuts of trunks - you can leave the bark, rounding the edges of the oval elements. Such a table will add naturalness to the interior and will be completely safe for health.
- The reels left over from the power cables are almost ready-made tables that only need to be finished. They are stable and large, but it should be borne in mind that such products are non-separable.
- Solid wood with carvings - you can make carved elements yourself if you have basic skills. Epoxy glue is poured into the grooves, which looks quite unusual and turns the table into a work of art.
Making a table for a laptop with a cooling system with your own hands
High-quality furniture made by yourself will help create coziness and comfort in your home. If you want to make a reliable and beautiful round table using your own hands, you need to prepare a number of tools, materials and drawings. Good work will give an excellent result, ensuring the uniqueness of the interior and harmony in design.
Making a wooden table
Next, precise instructions will be given on how to properly make a round table. First of all, prepare the wooden flooring for work. Grind it on all sides so that the wood becomes smooth without splinters.
Then apply the drawings and dimensions of the future round table to the wooden surface. The next stage of work will be to carefully cut out your drawings with a jigsaw.
If everything is done correctly, you will get an even circle, which will be the basis of the table. Next, you can start working on the table legs. To do this, prepare 4 beams and make them the same in size and height.
Yes, the work is not easy, but every craftsman can do it. Then use metal corners to attach the legs to the table.
The final touch of the whole work will be to apply water-repellent impregnation to the table. This product will not only help cope with moisture, but also protect the tree from small insects.
Making a table with a round top and one leg on four legs
Realizing that it is problematic to describe in detail the process of making such a table here, I will try to do so. I am ready to answer any questions that arise. It is recommended to make a table from ash, because some elements are bent; ash is most suitable for this.
So:
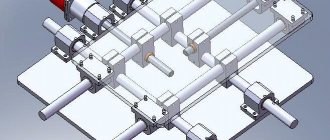
Let's start with the leg. The leg is made of three main parts:
1) Upper part of the leg. It is made from glued blanks shown in the drawing below:
The length of the workpiece is 400-450 mm, depending on the shape of the paws, which can be changed. When gluing the workpiece, it is necessary to take into account that it will rotate in a lathe. Therefore, it is necessary to glue the layers by matching the edges in density, i.e. balancing is necessary for safety. I will return to this issue below. As can be seen in the drawing, the workpiece is hollow, therefore, to clamp it in the center of the lathe, it is necessary to plan the insert along the entire length of the workpiece. The insert must fit tightly into the hole of the workpiece. After this, we clamp the workpiece in the centers as shown in photo below
Now I would like to dwell separately on the safety of manufacturing. As you can see in the photo above, the workpiece is quite massive. When rotating such a part, the imbalance leads to vibration. Therefore, when gluing the workpiece, you need to take into account the density of the layers, try to glue the same density of layers opposite. It will not be possible to completely get rid of vibration , that’s why I have a lathe attached to the wall with studs, I drilled through the wall. And of course, adjusting the speed is important. The pictures show that I can change the rotation speed using pulleys. The operation is quite dangerous, so I don’t advise beginners to do this. So, gradually increasing the rotation speed, we process the workpiece. The shape can be to your taste. I would like to draw your attention to the fact that in the lower part of the workpiece it is necessary to machine a side with a given diameter in order to then join it with the second part of the leg, this will be shown below. After processing the workpiece, something turns out like this:
Now let's start making the lower part of the leg:
2) The lower part of the leg. The workpiece is made according to the drawing below. The external dimensions of the workpiece are 200x200x200 mm:
As you can see in the drawing, the workpiece is hollow, so it is necessary to turn two mandrels that will fit tightly inside. Before turning on a lathe, we mill out the seats for the paws. Using mandrels, we clamp the workpiece into the lathe and process it as shown in the photo below. Please note that with On one side, a recess is made with a given diameter for the edge, which we sharpened on the first workpiece:
Since the photos were taken later, the workpiece was simply inserted into the center; when processing in a clamped state, the supports are tightly pressed to the workpiece. The photo also shows holes for screws for attaching the paws.
Now let's start making the third part of the leg: four legs.
3) The feet are made using a template. First, the shape is cut out roughly to a tolerance using a jigsaw. Then it is processed with a straight cutter with a diagonal angle of attack, or as it is also called “corn”. Please note that the use of simple cutters will lead to chips and blanks knocked out of the template. The template is guided along the support bearing standing under the cutter:
Now you need to mill out a seat for the cross to which the tabletop will be attached. I will not dwell on this in detail; each master does this in his own way. I do it as shown in the photo below:
We fasten the crosspiece into the seat. Please note that there is a hole in the center of the crosspiece, it is necessary for the pin, which is necessary for merging the two parts of the leg.
Now we carefully polish everything and glue the paws to the bottom of the leg, pressing them with sealants from the inside through the drilled holes:
After processing, we glue the lower and upper parts of the leg using a pin passing inside the leg. The gluing location is the above-described side and the recess in the parts of the leg:
As you can see from the photo below, the lid is sharpened from one mandrel, the pin is left inside:
When the leg is ready, you can start making the table top. I think there is no point in describing the making of a round table top, it’s elementary. But I want to dwell in more detail on the production of decor along the edge of the table top. The decor is made on a lathe. Blanks 500 mm long are sharpened. in which the machined part is 400 mm, the tips are necessary to cut the workpiece into four parts. The workpiece is visible in the photo below. It is advisable to make the workpieces from split wood. To bend the workpieces, we mill a groove with a diameter of 1200 mm and a depth of 12 mm in the MDF sheet. The minimum diameter of the decor should be about 8 mm. Before bending, wet the thin parts of the workpiece with water using a syringe. After this, carefully insert the decor into the groove:
To glue the decor into a quarter, you will need to make the fixtures shown in the photo below, the fixtures are attached to the tabletop with clamps, the decor is pressed with screws standing at an angle of 45 degrees to the tabletop, through soft spacers:
This is what the final decor looks like:
That's almost all. I apologize for the grammatical errors, I just don't have time to edit. I will answer any questions you may have in a private message. I hope my notes will be useful to someone. Create, improve, compete. The higher the competitors, the greater the desire to create better. God help you.
Interesting ideas
Now we will give you some interesting ideas on how to make a round table with your own hands.
Despite the rapid development of modern technologies, elements of antiquity are still in demand. For example, if you are the owner of a dacha or a nice country house, then why don’t you make a knight’s table from the times of Medieval Europe? Let’s say right away that it will take a lot of solid wood to make it, but the result will be worth it.
To make a knight's table, take a look at several thematic sites where craftsmen share their knowledge and give useful advice. Don't worry, because 50% of the work is identical to making a regular round table.
Another interesting solution will undoubtedly be a loft-style table. Its lid will be made of stone, and the legs and other structures can be made of wooden and metal elements.
Materials used
You can use different materials to make your own round table. This should include:
Chipboard and fibreboard are well suited to make a budget option. Despite the cheapness of this design, with proper care it will last a long time.
Using a tablecloth, you can hide the material used, and it will look no worse than a product made from natural wood.
Coniferous wood provides the opportunity to make a high-quality product at minimal cost. Such wood is easy to process and can last for a long time.
Read here - How to make a bedside table with your own hands - easy and simple, choose your option and follow the instructions in the photo!
It is important to strictly adhere to the technological process and at the initial stage, treat the structure well with paint and varnish material.
Check it out here too!
Instructions on how to make a table with your own hands: step-by-step photo instructions, drawings, assembly diagrams for tables of different types for the garden and at homeHow to make a hanging chair with your own hands - 100 photo ideas for chair design, instructions for their implementation. Creating the perfect vacation spot
- DIY furniture made of wood: the best photos of solid wood furniture! The process of making wooden furniture: drawings, diagrams, furniture assembly
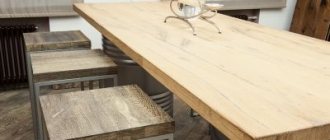
Solid wood in the form of oak or beech will allow you to make a truly high-quality product that will become the real pride of any room.
Such a table will have a decent appearance; it amazes with its massiveness and grandeur. You will have to try a little when processing this solid wood, but the result will not be long in coming.
This design emphasizes the status of the owner and his family members.
There really are a lot of options. There are also modern solutions to the issue using plastic.
DIY photo of round tables
Please repost
0
§ 42. Design solutions for dining tables
Dining tables are designed to be non-transformable and transformable.
Non-transformable dining tables are used in kitchens, while transformable ones are used in kitchens and living rooms. In all cases, dining tables are made collapsible (with removable legs). Dining tables must be durable and rigid enough. In addition, tables after transformation must be resistant to tipping over.
The strength of dining tables is characterized by their durability during use. The strength of dining tables mainly depends on the correct design of the table as a whole.
The rigidity of dining tables is characterized by the ability of the table structure to resist the formation of deformations under the influence of external forces. It depends on the strength of the connection between the legs and the drawers and the correct choice by the designer of the sections of the legs and drawers of the table. The rigidity of dining table structures can be determined experimentally by testing the tables on a special stand (GOST 16144-70).
When testing, a force P (Fig. 164), also equal to the weight of the table, is applied to a table with a load Q installed on it, equal to the weight of the table, as a result of which the table is deformed by an amount E1. The rigidity of the structure is determined by the ratio of the force P to the magnitude of the deformation E1 during the second loading cycle at a speed of 2-3 cycles per minute. According to GOST 16371-70, the rigidity of tables is considered sufficient if the following condition is met:
where P is the horizontal loading force, kg;
E1—table deformation, mm.
Rice. 164. Scheme for testing dining tables for rigidity
The stability of the table against overturning can be determined with sufficient accuracy by calculation. The table design will be resistant to tipping if the table parameters (Fig. 165) are selected based on the following ratio:
where P is the vertical overturning force (assumed equal to 18 kg)
с—overhang of the table cover, mm;
B - width of the table base, mm;
Q - table weight, kg.
Rice. 165. Scheme for determining the stability of tables from tipping over
Based on the condition of the table not tipping over, the maximum permissible overhang of the lid can be determined:
The dining table consists of a base and a lid, and the transformable table also has running elements. The upper part of the underframe, where the tsars are located, is called the tsar belt. The drawer belt can be carpentry, bent-glued or bent-propyl; it contains drawers and running elements.
The tsar joiner's belt consists of four tsars, connected or not interconnected by bosses (see Fig. 107, 1-4). The bosses, connected to the drawers by group straight tenons, have at each end at least four tenons 8-10 mm thick and at least 12 mm long. When connecting with a dovetail tenon, the length of the shield must be at least 10 mm. Metal bosses are attached to each drawer with three screws.
The legs are connected to the drawers using the methods shown in Fig. 107, 1-3, with screw fastening. The tensile strength (according to VPKTIM) of screws with a diameter of 8 mm with a special (screw) thread is 1000 kg, with a metric thread - 720 kg. The crushing strength when fastened with a caged flat nut measuring 40x25 mm is 700 kg.
What does an extendable table look like?
Dining tables have fairly simple designs. Folding models are equipped with a special mechanism and additional tabletops. In general, everything is quite simple, the main thing is to draw up the drawings correctly at the very initial stage of work.
1
2
3
4
5
The main requirements for carpentry work are the quality of the material and the strength of its fastening. We all know what loads a table must withstand and must comply with this standard. In addition, this furniture is often transported, and this is another signal that you need to take care of the strength of the structure.
The dimensions are determined by who will use the sliding table. There are practically no restrictions here, except that the tabletops must be firmly held at the base.
The sliding parts are attached only at the very edge, so by making them very long, you will not benefit. Under any load greater than their own weight, they will sag and eventually break completely. It is worth approaching this issue wisely and considering some diagrams that will tell you the optimal length for your kitchen table.