12326
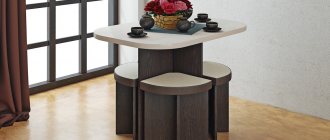
Bookcases are usually installed in the living room, but if there is space, they can be located in the bedroom or hallway. This piece of furniture can have different sizes and characteristics, and also has different capacity. Many people love to read books, so to optimally store their library, they need a cabinet that has the right dimensions and other features. If you can’t find the optimal model, then you have the opportunity to make a bookcase yourself from different materials.
Finishing touches
Draw lines limiting the length of the bevels at a distance of 10 mm from the ends of the decorative overlays and sand the bevels by hand.
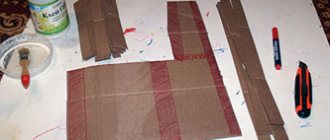
1. Cut out a blank measuring 19x102x203mm for decorative overlays NN . On one of the edges of the workpiece, saw off two longitudinal intersecting bevels at an angle of 40°, and then saw off a 10 mm thick strip with beveled edges. Make decorative overlays from this strip, filing them to the specified length. By sanding, form bevels at the ends of the overlays (photo P). Glue the decorative trims to the faceplates F (Fig. 1).
2. Remove the back wall K , doors and drawer. Separate the Y/Z/AA false panel the EE-GG . Remove the metal fittings and rubber shock absorbers of the door stops DD . Use a brush to apply walnut stain to the top/bottom panels of the G to match the color of the rest of the cabinet. When the stain is dry, apply a thin coat of linseed oil to all unfinished parts. After thorough drying, apply polyurethane varnish. Once the varnish is dry, sand all parts with 320-grit sandpaper and apply a second coat of varnish.
3. Prepare glass cut to fit the folds in the doors. BB beads and saw off the bevels at their ends, adjusting the length to the folds in the doors (Fig. 4). Drill pilot holes with a diameter of 1.6 mm for the mounting pins, insert the glass into the folds and secure the glazing beads with the pins. Reinstall the doors and rear wall K .
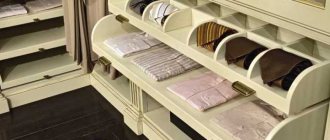
4. To install hanging folder holders from an aluminum strip with a cross-section of 3×25 mm, saw off two pieces with a length equal to the distance between the side walls of the FF , drill holes in them with a diameter of 3.2 mm and countersink them (Fig. 5). Attach the strips to the front/back walls of the EE so that they protrude 10mm above the top edge of the walls.
5. Reattach the Y/Z/AA and insert the drawer into the frame.
6. If nothing interferes, you can fill the closet with books and put your work on display for everyone to see.
Cabinet assembly
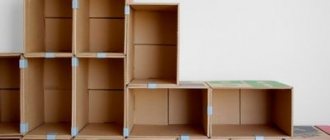
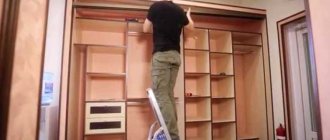
Work on assembling the bookcase is carried out on a flat surface to prevent distortion. Installation begins with the upper block of furniture. The side walls are connected to the top. Holes for fasteners are made using a drill. The diameter of the openings must correspond to the fastening elements. The parts are fastened using confirmations. The furniture is reinforced with additional steel corners.
After securing the bottom part, begin placing the shelves. The elements are pressed tightly against the frame and fixed using confirmatories. Removable shelves for bookcases are not recommended. At the final stage, the back wall is installed and fastened to the frame. Nails, self-tapping screws, or a construction stapler are used as fasteners.
What will you need?
List of required materials:
- old wooden staircase;
- wooden elements to strengthen the shelves;
- metal supports in the shape of “L”;
- sandpaper;
- paint/wood oil.
Tools:
- wood saw;
- drill;
- grinding machine (optional);
- screwdriver;
- ruler.
Depending on the type of staircase, they show ingenuity. The main tool for such projects is “improvisation”. When making such a bookcase with your own hands, the drawings are made after measuring the existing staircase in the house.
Depending on which base is chosen, there will be an opportunity for additional use of the bookcase. A smaller type of ladder will help create a sort of cabinet shelf. The tall model will serve as a full-size piece of furniture, for example, in the living room.
If the staircase is old and dilapidated, it should be cleaned using sandpaper or a sanding device, removing all stains, discoloring and smoothing out uneven areas until the wood has a satisfactory uniform appearance.
The staircase is then shaped into a bookcase, creating space to display books. For this purpose, find out at what level the shelves will be located. Mounting brackets are used to secure them.
Types of bookcases in the interior - their advantages
Models of book shelving are divided into 2 types: closed and open.
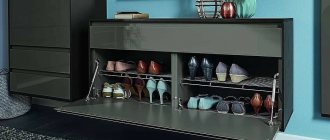
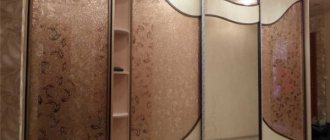
The closed version of the furniture is the most gentle for paper products, since it does not allow dust, moisture, or direct rays of the sun to enter. The disadvantage of closed furniture systems is their massiveness. The designs are not suitable for compact spaces. In models with closed facades, 2 types of doors are used: compartment and hinged.
The open-type furniture façade provides direct access to publications. The models are aesthetic and spacious. Decorative items are also displayed on open surfaces. Racks are suitable for both spacious and small spaces. The disadvantages of the design are the lack of protection from the rays of the sun, moisture, and dust.
Printed materials in open-type structures will require regular maintenance. It is also necessary to pay attention to the humidity level in the room. Designers complement open bookshelves with blocks with doors - hinged or sliding. Additional elements for storage are located in the lower, upper or side parts of the structure.
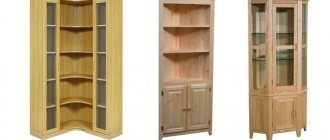
Bookshelves are divided into horizontal and vertical. The execution option is determined in accordance with the dimensions and style of the room. Based on their shape, there are corner bookcases, rectangular-shaped products and round structures, as well as shelving-type models.
Bookcases are available as cabinet, modular or built-in.
Cabinet structures for storing books and magazines are the most common in interior design. The filling and finishing of the furniture is selected in accordance with the design concept. The product can be with open shelves or with doors: sliding (compartment type), hinged, glazed, etc.
Modular furniture for books allows you to combine elements of different heights, widths, and configurations. The design is universal because it can be located in rooms of different sizes. Modular furniture blocks are easy to disassemble and move.
The built-in design for books is represented by a system with sliding or hinged doors. The furniture is large in size and has deep shelves. The peculiarity of the model is the fastening of parts to the ceiling, wall panels and floor.
Doors can be frame or glass. The frame parts of the doors are made of MDF boards lined with veneer or polyvinyl chloride film. Frames are made of aluminum with imitation metal or the frame is covered with decorative film to resemble valuable wood species.
Bookcases with glass doors are aesthetically pleasing and make it easy to find the volumes you need without opening the doors. Solid wood furniture in combination with glass is used in high-tech, modern, and English classic styles.
Glass doors can be in the form of swinging doors, sliding panels, or bar glass. A slight tinting of the glass is allowed, which will partially protect paper products from direct sunlight.
Milling the ends and back wall for the cabinet
Milling the ends is not a complicated or time-consuming job, but it still requires accuracy and thoroughness. You should choose the right cutters for the relief and clearly set the desired offset; When feeding the workpiece into the router, you must maintain smooth movements and avoid deviation to the sides.
Before starting work, check the functionality of the cutter on the excess trim. Once the desired size is set, begin processing the slats.
When milling is completed, check the contact of the workpiece with the working part. If there are gaps or crotches between them, remove them using 150-grit sandpaper. Such differences will be noticeable after you open the finished cabinet with varnish, so they need to be eliminated immediately.
The back wall of the cabinet is an inconspicuous side, so it does not require special processing and finishing. But how well you install it determines the overall reliability of the entire structure. The back wall is the connector of the entire cabinet, onto which all other parts are attached.
Most often, sheets or pieces of plywood are used for the back wall of furniture. This material is very easy to process, and its installation will not take much time. Using a sawing machine or jigsaw, cut the pieces to the desired size, and remove the chamfer from the cut areas with sandpaper.
If you need a more reliable, strong back wall with high wear resistance, make it from chipboard, which is much heavier in weight. But remember that such material is much more difficult to process and requires both special fasteners and certain fastening methods.