Interior design made in eco- and ethnic styles is becoming increasingly popular. Currently, designers are focusing on the naturalness and originality of the materials used. Thus, the decor from wood cuts in the interior looks stylish and organic.
Adds extraordinary comfort and warmth to the atmosphere of the room. In addition, such material is an environmentally friendly product, resistant to many types of influence and does not require large material costs. You just need to show your imagination - and ordinary cuts of wooden blocks will become a beautiful decoration for your home. Today we’ll talk about how cutting wood in the interior with your own hands can advantageously emphasize the individuality of your home.
Wood cuts as finishing material for house walls
Wooden
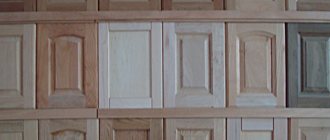
cut Wall surfaces are the most convenient and extensive area for decorating a room. Here you can realize the most daring and creative ideas in room decoration. This time we will use wooden slices as a decorative element. They are smooth transverse layers of a tree trunk. Each layer has its own original and unique pattern, which is obtained from the growth rings of wood. Well, are you ready to get to work? First, let's find out how to make wood cuts for the interior. The process is extremely simple and even a beginner can handle it. Often, a transverse cut (also called an end cut) of a log takes part in the design.
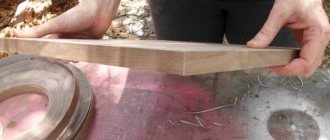
- We cut tree trunks into plates of the thickness we need. Their diameter can be different - this way the decorated surface will look even more beautiful.
- We clean the cut from sawdust and shavings, you can also remove the bark.
- We treat the layers with stain or special paint.
- We apply an adhesive solution to each cut and place it on the wall.
- You can lay out the wall plane partially or completely with cuts.
- We wait for the glue to set and finally cover the surface of the glued sections with varnish.
Wall made of wood cuts
This part of the room is the most popular in terms of decoration, so it is the wall that is decorated with wallpaper, whitewash or wooden material.
The cut itself is an even transverse layer of wood, which is often used in design solutions. Each of the elements is distinguished by its uniqueness, because it is simply impossible to cut exactly one into one perfectly. On each of the plates there are tree rings, not a single contour of which can be repeated in the others.
In order to decorate the wall, we will need the saw cuts themselves, glue, varnish, paint or stain. To bring the cut to normal condition, you need to remove the upper part (bark), and the thickness of the layer will not have a strong significance. Alternatively, the bark can be left, which will provide an excellent effect for interiors in a rural or ethnic style.
Recommendations for decorating with wooden cuts
- The first and most important point is the perfectly smooth walls on which we will glue the saw cuts. They must be pre-prepared and cleaned.
- Consider options for laying wood, because you can lay the entire wall, or make a small fragment or accent.
- By the way, partial laying is sometimes used to design the head of the bed, or the area above it.
- The saw cuts are best suited for connoisseurs of rustic or hunting style, who will be able to appreciate every element and accessory of the design.
Types of wood used for cuts in decoration
In principle, different types of trees are used for log houses, but the most popular are still: pine, spruce, ash, fir, oak and birch. After finishing the work with wood and gluing, everything will need to be covered with varnish and a fixative.
Related article: How can you get rid of small ants in the kitchen?
Types of wood used for cuts in decoration
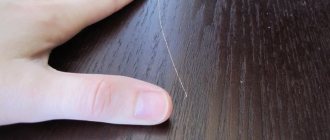
Important! The interior combines wooden elements, decorative stones or plaster well. When using wood material for decoration, it should be taken into account that when cutting a log, cracks and cracks open. Consequently, layers of wood must undergo carpentry processing.
And provided that the wood material is planned to be used in a functional role, then I advise you to restore the cracked sections of the cut. To do this, fill the damaged area with a special resin solution. After the resin has dried, we mill and sand the layer.
The following types of wood are used for decoration:
- spruce;
- pine;
- fir;
- ash;
- birch;
- oak.
When completing the finishing work, the cut of any type of wood must be coated with a paint and varnish composition. We discussed above how to process tree cuts for the interior (stain, paint, varnish).
Recommendations for decorating with wood cuts
- The main condition for quality work is a well-prepared and cleaned surface. The wall plane must be leveled and treated with a primer.
- Decide in advance exactly how you will decorate the surface. A wall with a partially covered saw cut will look good. It is not recommended to lay all the walls of the room with wooden plates, since the room will seem too small and overly cluttered.
- Partial installation looks natural in bedrooms at the head of the bed, in living rooms near fireplaces or modern electric fireplaces, as well as in the kitchen or hallway.
- Decorating surfaces with wood cuts is excellent for country and country houses.
Wood cut frame
Do-it-yourself panel from wooden saw cuts
The next popular way to use wood slices is in wall compositions. Their execution requires different types of wood and fragments of different sizes. In fact, this is an independent abstract painting made from wooden pieces. Wood plates are suitable either peeled from bark or covered with it. The compositions are also composed with the addition of stumps and branches. They are painted with different colors or left in natural colors. Such a panel made from wood cuts in the interior looks original and elegant.
DIY solid walnut furniture
The world has always valued objects made from natural noble materials.
I want to share with you how you can make beautiful, high-quality furniture with your own hands from a seemingly inconspicuous board, which will only become more valuable over time, passing on through inheritance.
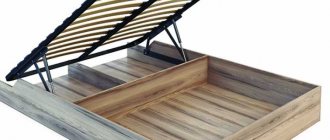
In this master class I will tell you and show you how to make a bed, a rocking chair, a mirror with closing shutters and a shelf.
For this work I used solid natural walnut; for many centuries it has been considered a tree with very durable and beautiful wood. Before starting production, you need to decide on the style, design, size and record this in the drawings, in this case I preferred a hand drawing on graph paper to a computer one, I also made drawings with precise dimensional detailing: Afterwards you need to prepare the wood: saw and glue the parts required size. You can already cut parts of the required size from the blanks.
Next, we completely cover the product with white stain: I use white water-based stain from a well-known Italian company.
As soon as it sets a little, remove the tape. We age the products using a coarse textile mesh. We give the rattan an aged look by applying a thin layer of the same enamel that was used to make decorative stripes on it. Having achieved the desired aged texture, we coat it with varnish with a silky matte sheen. We upholster the seat of the chair with fabric and... the bed, rocking chair, mirror with shutters and hanging shelf are ready!
Source
Flooring made from wood slices
Wooden materials are often used to cover floors. Round log plates are also widely used for this work. As a result, the surface is durable, environmentally friendly, aesthetically attractive and unusual.
So, let's see what technology is used to lay tree cuts on the floors in the interior. Floor tiling is reminiscent of working with ceramic tiles. Installation is carried out using a special solution. After installing the elements, they are sanded and covered with several layers of varnish. The surface should be decorated using the following wooden plates:
| Parameter | Function |
| Plate thickness | Under constant load on the coating (furniture) and other mechanical influences, the surface made of a thin layer of wood may become deformed |
| Wood type | Softwood is not recommended for use, since such material is not resistant to stress. Oak and ash are suitable here. This coating will serve for many years without losing its attractiveness. |
How to make a chair from a tree stump
Furniture made from natural wood has a special charm. It's always nice to buy a couple of these things for your own home. But what can truly please you is the prospect of making something with your own hands. And it’s always doubly pleasant when recyclable materials are used, because partly it significantly reduces purchase prices for materials, and partly it saves the environment for us and our descendants.
The author of this master class will tell you how to turn firewood into an original chair, and this is no joke. He himself made a chair from a tree stump. This time it is not too large, so the new interior element will not only decorate the space of the house, but will also be great for a nursery.
Make the top of the mono chair soft by thoughtfully choosing the color scheme of the fabric used, but this way, without frills, it looks as natural as possible.
A white oak stump cost our craftsman $2, which is very, very economical for a US resident. The remaining costs were spent on finishing oil, but overall it turned out inexpensively. In a store, despite the amazing simplicity of the design, such a chair would have commanded an exorbitant price.
In order to make this wonderful chair from a stump you will need:
1. Materials:
— the highlight of the program itself is a stump of the required diameter, well dried; - wood putty; — BIOSHIELD protective oil based on natural oils and wax; - polyurethane varnish if desired, preferably matte or semi-matte.
2. Tools:
- chainsaw; - sander; - axe; - sandpaper with coarse and fine grains; - spatula for applying putty; - a soft, lint-free cloth for soaking wood with oil.
Step one: choosing material
In fact, you can use any type of wood. The firewood seller, according to the author, sold him a cut of white oak. Oak will undoubtedly last a long time and it will be possible to avoid the appearance of dents during operation.
However, dry oak is quite difficult to process properly. If your choice also fell on oak or any other hard wood, be prepared for the fact that you will need strong and reliable tools.
It is better not to use soft woods like linden, as they are highly susceptible to damage.
Wood must be well dried for work. If you receive a raw stump, it will take a long time before it is ready to use. The tree must be dried in the bark. This will avoid express drying and characteristic deep cracks.
Saw off the workpieces with a considerable margin in length, so that before use you have the opportunity to saw off the grayed, cracked ends. Step two: pre-processing
Once the piece is properly dried, remove the bark. An ax will do an excellent job with this task. To avoid damaging the wood again, remove the bark in layers. The author is sure that this is one of the simplest tasks today.
Using a chainsaw, trim the ends of the stump to get as flat a surface as possible on both sides.
A chainsaw, of course, is not the most precise tool, but later in the processing process you can correct all the flaws thanks to a grinder.
Trim the base. If you have already decided where the top and where the bottom of your future chair is, proceed to the base. Everything is simple here: for a chair to be stable, its base must be flat. A chainsaw will help you cut the bend. Don't remove too much, because the end result is that the chair's profile should resemble a rounded section of wood.
Step three: making the seat
The width of the seat directly depends on the length of the bar of your chainsaw. The author stopped at 22 cm.
You will need to cut a slightly rounded recess for the seat. To make work convenient, temporarily fix the stump with screws on a wooden work surface. This way the workpiece will remain in place, and you can work as accurately as possible.
The author did not immediately figure out how to cope with the task and came to the conclusion that it would not be possible to cut out the seat in one step. Then he decided to use the wedge method.
He sawed two wedges down the sides until he achieved the desired shape. Then he cut out the remains of the tree with wedges. Thus, he received a conditionally rounded seat, ready for further processing.
Remove the screws and proceed to the next step.
Step Four: Shape the Chair
In order to shape the chair, the author used a sander with a coarse-grained attachment. Your task at this stage is to smooth the sides and round off the sharp edges.
Once the shape seems satisfactory to you, change the wheel to a fine one and sand the chair until a perfectly smooth, pleasant-to-touch surface is formed. Clean the workpiece from dust.
Step five: eliminating defects
Carefully inspect the workpiece. If you find cracks, and this is most likely, they need to be eliminated. For this we need wood putty.
Before filling the gap, clean it of sawdust, dust and sand it as shown in the photo.
Fill the gaps with putty using a putty knife. Make sure that the putty fills the entire volume. Smooth the surface and leave the chair to dry completely. If the quality of the putty leaves much to be desired, you can replace it with epoxy sealant. It is more resistant to various types of influences.
The author completely missed this step. He just wanted to make sure that the cracks wouldn't cause any harm during use. He used a knife and sandpaper to smooth out the cracks.
Step six: finishing
Since the chair was originally intended as a children's chair, the author decided to use an exclusively safe composition for its processing. He chose BIOSHIELD protective oil based on linseed oil and wax. Apply a layer of oil using a soft, lint-free cloth, rubbing it thoroughly into the surface of the wood. Wait until the oil is absorbed and repeat the whole process again. This is quite sufficient for indoor use. Your chair will be protected from ultraviolet rays, moisture and dust.
However, the author believes that if you are not a stranger to more synthetic materials, you can use polyurethane varnish as a final treatment. It is better to apply it in a couple or more layers, waiting until each of them is completely dry. It would be a good idea to sand the first layer of varnish and all subsequent ones, except the finishing one, with fine sandpaper. This promotes good adhesion of the layers to each other.
If you want to tint wood, use stain, or even better, protective and decorative toner oils, which perfectly protect wood from harmful influences. Many of these compositions do not require a finishing coat of varnish, but work well on their own.
And finally, the chair can simply be varnished, but also in several layers. It all depends on your personal preferences.
The original stump chair is ready for use!
Source
Become the author of the site, publish your own articles, descriptions of homemade products and pay for the text. Read more here.