Arrangement of the room
If a person wants to live with comfort, he will certainly turn his bedroom into a sanctuary of comfort, peace and convenience. Of course, this requires a lot of effort. Requires time, financial costs and effort. But slowly, gradually, you can turn your home into a corner of bliss. What else is needed for this? Here's a short list:
- a rough outline of what is planned;
- wish;
- action.
There is a good proverb about this: “water does not flow under a lying stone.” If you do nothing, dreams will remain dreams. If it is possible to arrange shelving in the bedroom, it should be done. Creating, inventing yourself is useful. Don't be lazy.
Convenience of life
When arranging your bedroom, you need to do everything possible so that you don’t have to dig around for a long time when looking for the right thing. For example, you need a book. Then make it convenient.
So that you can reach out and take this book off the shelf. Or take just two steps to the book. Then the bedroom will be comfortable for living. You can buy shelves for books. Or you can do it yourself. Not difficult as it seems at first.
Varieties of forms
Before purchasing or making your own shelves for the bedroom, you should decide on the choice of design. Let's look at the main ones:
- Classic shelves. This type is very common; it is valued for its ease of manufacture, laconic appearance and ease of installation. Well, if desired, even a classic shelf can be made stylish and effective.
- Angular. Very often it is the corner space that remains unused in the room, and this applies not only to bedrooms. And in this situation, an angular design is a way out. Corner shelves not only look very impressive, but also make an obvious design approach to the design of your bedroom.
- Hanging. The name speaks for itself; such structures can be ceiling or wall mounted. The shape and size may also vary.
- Floor-standing. This model can be installed anywhere in your bedroom, and if desired, you can easily change its location. As a rule, such designs are very functional.
Initial stages
To get a good photo of the shelves in the bedroom, you need to put skill and effort into the work. A drawing is made on which the main features of the future rack are worked out: shape, size, appearance. When the drawing is ready, they begin to implement the plan. The frame of the rack is sewn together from slats.
For example, a rack should consist of 4 shelves. All joints of the future product are being worked out. Pre-cut plywood is laid on the cross members inside the frame. It is connected to the frame with recessed screws.
Completion of creation
The recess for the screw heads is made in a similar way. Pick up a 10 ml drill. and manually rotate the recess. If you do it with force, in half a minute the funnel under the screw head will be ready. All 4 shelves are made without protrusions.
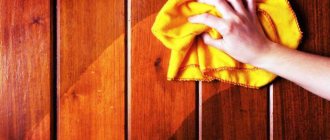
During the work process, do not forget to go over all rough places with sandpaper to avoid splinters and hangnails. The rack is ready. Clean thoroughly. Wipe.
Select the desired decorative film with a specific color. And carefully glue the entire rack with it. Iron with a cloth. Give time to dry.
If the film is chosen correctly, its color will harmoniously fit into the bedroom interior. This method of creating a rack is good because the rack turns out to be light, beautiful, and for the price of the materials spent it will be cheap. Such a bedroom with shelves is pleasant for a person.
After all, a furnished home is always nicer and closer. The design of the bedroom depends on the location of the bed, window, and other items. A certain design is also created based on a person’s preferences. If a person wants, he can buy and make a rack or any thing with his own hands.
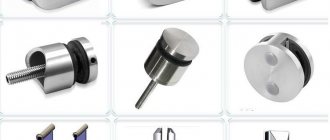
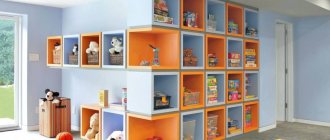
Products on the walls
But how much space is often empty in the room on the walls. If the room is small, but you want to live comfortably, the easiest way is to hang shelves on the wall. Store-bought or homemade – it doesn’t matter. Although homemade ones are preferable. They were made by the owner of the room himself.
An important incentive for life. Making shelves on the walls is much easier than making a rack. All you need is: a board for the back; thick plywood - for the bottom; board sides.
The product is so easy to make that when a person has made about a dozen products, he will begin to be surprised. How he was once afraid to make shelves! It will be funny for him to remember himself, who did not know how to make such crafts. Do-it-yourself shelves are a thrill and a pleasure.
Do-it-yourself upholstery of upholstered furniture: step-by-step master class, advantages and disadvantages of updating furniture (130 photos)Wardrobe for the bedroom: the best models of 2021 and modern solutions from leading manufacturers (120 photos and videos)
Cabinet fittings - the best modern components and accessories for cabinets of various designs (120 photos)
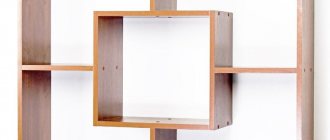
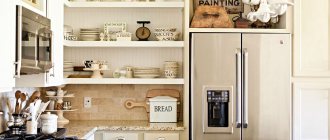
Module – universal solution
The easiest way to assemble wall shelves consists of side, top and bottom walls, fastened together with self-tapping screws or furniture fittings. Make the required number of such “modules” of different lengths and heights and fix them on the wall in the desired order. This option is well suited for making bookshelves.
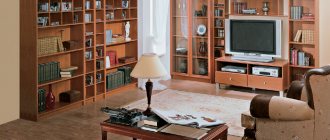
In living rooms, it is not so important what material the shelf is made of. It is important that its design is in the same style as the interior.
You will need the following materials and tools:
- board 16-20 mm thick and 150-180 mm wide - it can be pine, MDF, plywood or chipboard.
- self-tapping screws;
- screwdriver;
- building level;
- furniture hacksaw for wood.
Even functionality is not always important: some play a purely decorative role. If they have anything on them, it’s only one or two items.
Other homemade products
If desired, and as needed, you can place all kinds of homemade products for different purposes along the walls in a small room. Of course, there is no need to overdo it. Everything is good in moderation.
And the measure is good when necessary. Otherwise it will be ridiculous. You need to stop yourself in time from trying to cover the walls with your own handicrafts. But where it’s convenient, beautiful and very necessary - shelves will be in place. They are welcome there.
DIY carved cornice shelf
Hello, dear readers and DIYers! Each of you in your house or apartment has curtains and curtains that are hung at the top of the windows using cornices. Often the choice of curtain rods themselves in stores is quite wide, but you can expand the functionality of the curtain rods by making them yourself. In this article, the author of the YouTube channel “Do-it-yourself carpentry” will tell you how he made a carved cornice, while combining it with a small shelf.
This homemade product is quite simple to make, but at the same time very labor-intensive.
Materials. — Pine boards, round timber, scraps of sheet plywood — Masking tape, PVA glue — Furniture canopies — Wood screws — Sandpaper — Wood impregnation.
Tools used by the author. — Hand router — Clamps — Screwdriver — Electric jigsaw — Drilling machine — Forstner drills — Japanese saw — Carpenter’s knives, vice, workbench, mallet, brush — Pencil, compass, square, ruler, chisels, awl. Manufacturing process. The author just finished installing the window, and now he needs a cornice.
He first made the project on the computer. This model provides two crossbars for curtains, curtains, and the shelf itself. From pine boards he glued together blanks for the side panels and the shelf itself.
To make the side panels, the author prepared a template drawing, which he kindly shared online. This drawing can be downloaded from the following link.
Having printed the template on paper, the master fixes it on the workpiece using masking tape. After this, the main lines are carefully drawn and the marks of the centers of the holes are transferred.
He marks straight lines and radii using a ruler, square and compass.
The centers of the holes are pinned on the surface of the workpiece with an awl, and the required drilling diameter is marked.
First, the author drilled through pilot holes.
Next, using Forstner drills, he drilled holes near the curves of the design. This is done first on one side, half the depth of the material. Then the workpiece is turned over and the holes are drilled. The need for such an operation arises for the reason that when through drilling, chips occur on the other side.
Using a regular wood drill, holes are drilled for the jigsaw blade to enter.
The next step is to mill the grooves for the shelf.
To make this work easier, the author made such a guide for a hand router. The shelf blank is fixed between its halves, then the clamping screws are clamped.
Next comes checking the accuracy of the cut groove. Everything is fine.
Now the master begins to cut out the figured elements. This can be done using either an electric or manual jigsaw.
In both blanks you need to drill a hole for the crossbar on which the curtains will hang.
The front side of the panel is processed quite well, but on the back side the blade of an electric jigsaw left many irregularities and chips.
First, the master removes excess material using a chisel.
Then he sands all surfaces of the panel with sandpaper by hand.
The sidebars look great now. The master slightly rounds the corners of the panels.
Also, recesses are milled into the blanks into which furniture hangers will be installed.
First, a blind hole is drilled according to the markings, and then the excess material is removed with a chisel.
The dowels are glued into place and hammered in with a mallet.
Now, on the leading edge of the future shelf, the author applies markings for carving.
Next, the author tried to cut out the shaped elements with a regular carpenter's knife, but it has too large a sharpening angle and requires a lot of force.
So he took another knife, the so-called “hatchet”. It made cutting out elements much faster.
This is what a “snake” looks like.
Now all surfaces of the parts are covered with dark oil-wax. One of the previous articles already described a simple method for making such impregnations at home.
After the impregnation has dried, the furniture hangers are screwed into place.
Next comes the assembly of the entire structure. The guide is put on the dowels, and a shelf is installed between the side panels. The author fixes the shelf using self-tapping screws, having previously drilled pilot holes for them. It will be possible to hide the heads of the screws using overlays or decorative plugs.
This is such a beautiful and unusual solution that the master came up with.
Good mood, good luck, and interesting ideas to everyone!
The author's video can be found here.
Source
Become the author of the site, publish your own articles, descriptions of homemade products and pay for the text. Read more here.
Cozy and good
And place the unit itself with musical electronics on a craft next to it on the wall. It is located in the corner, next to the computer desk, so there will be no clutter from the equipment. Doesn't interfere at all. At least dance in the room to the music.
The design of the room will also not be disturbed by such an arrangement in the corner on the shelf of the speakers. The speakers are top notch. It's not an eyesore. There's more you can do with the shelves in the corner. There would be desire, will and hard work.
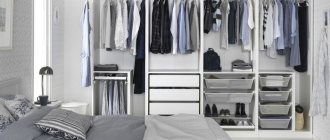
Design Features
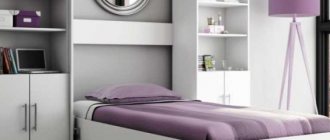
As a rule, a minimum of furnishings is chosen for bedrooms. The main piece of furniture is the bed.
The choice of a shelf in the bedroom next to the bed must be approached with particular pedantry.
Shelves are used for two purposes:
- To diversify the interior, make it unusual, unique in its kind. Using hanging structures you can decorate walls. Not only necessary things are often placed on the shelves, but also decorative elements and souvenirs, thanks to which a cozy and comfortable atmosphere is created.
- To ensure maximum comfort. So, if this is a bedside shelf, then you can put a lamp on it, put a mobile phone, a book or a tablet. Particularly popular are hanging shelves that replace bedside tables. This allows you to save space and get rid of bulky furniture.
The indisputable advantage of shelves is their more than affordable cost compared to bedside tables or tables. A rich assortment ensures that you can choose a model that suits you perfectly in style, size and color.