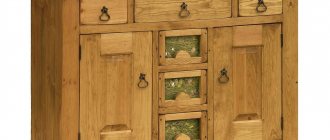
How to calculate the details of a corner cabinet with your own hands
Once you have decided on the dimensions of the corner cabinet with your own hands and the internal contents, you can begin to calculate the details. The simplest option is in the form of a table in the Excel office program.
- We write down all the details in strict accordance with the texture of the drawing, first the length, then the width. If you enter the formula into a tabular form for calculating the square footage of each part, you can sum it up and roughly estimate how much volume the cabinet will “flow into.”
- At the same time, we designate the visible sides that will need to be rolled up with an edge in units. Formulas will also help you pre-calculate the footage of the end tape.
- I recommend highlighting irregularly shaped parts so as not to lose sight of them (for example, as in the table below, in yellow). And also clearly show along which side they will be rolled with an edge.
- How to calculate the size of the fronts for a corner cabinet can be found here. Strictly speaking, the facade part can be made of another material - for example, MDF or solid wood.
- A similar method is considered to be detailing fiberboard.
How much will it cost to make a corner cabinet with your own hands?
By correctly drawing up the drawings of a corner cabinet with your own hands, all the design stages, the risks of errors that lead to inevitable additional expenses are reduced to zero. If you make any furniture with your own hands, it always costs less. Actually, nothing prevents you from predicting costs before starting all work. Find out all the prices for materials, fittings and hardware in your city that will be required when making a cabinet with your own hands, and enter it into a simple excel sheet.
The most significant costs will be for the purchase of chipboard and cutting. We took a standard model - changes up or down by 100-200mm will not change the material consumption significantly. It will also take approximately 2-3 sheets depending on the number of shelves and fronts (whether they will be ordered separately or not).
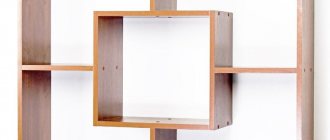
Making a corner shelf out of wood
This is my first master class at the Masters Fair, so please do not judge too harshly.
At first glance, it is a simple product. Just a corner shelf made of solid beech, which will then be attached to corner metal brackets. Let's try to figure out how this is done...
What is required from the tool for this:
- planing machine;
- thicknesser;
- a circular saw;
- milling cutter;
- orbital sander.
Where it all begins.
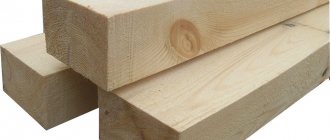
Of course, from the material. The next two photos show a very ordinary beech board. After cutting and drying, the board is, of course, crooked; of course, it needs to be straightened. We need to give it a plane.
This is the result obtained after planing and thicknessing.
The specified shelf dimensions are 350x350 mm. Finding a board of this width is not an easy task, and it doesn’t make much sense. If you make a shelf from a solid board, then over time it will definitely move. Therefore, after leveling, we cut our board into lamellas on a circular saw. After sawing, we plan and re-glue again.
The photo below shows the result of glued lamellas made of pine, beech and oak. Do not forget that after processing the shield on a surface planer at the beginning and at the end, you will definitely end up with a step of 0.5-1 mm and a length of approximately 50 mm; it is marked in the photo with a pencil. It is necessary to determine the length of this step in advance so that it can be sawed off later.
Gluing the shield is a very important point. What you need to pay attention to here: firstly, two adjacent lamellas must fit perfectly against each other. There shouldn't be any gaps, not even for light. Secondly, when the future shield is folded, be sure to look at the location of the wood fibers at the ends, they should go like the letter “S”, this will compensate for possible bends. Thirdly, we use good glue. What is produced under the brand name of some “IP” and sold for pennies can only glue paper.
Of the more or less decent adhesives with a moderate price tag, we can recommend “Moment”. The one in the gray container is marked “D3”, which means waterproof. A higher class are “Kleyberit” and “Tightbond”; these adhesives are used in professional carpentry. Depending on the operating conditions, you can use polyurethane glue, the so-called PURglue (in the photo is a sample of such glue from Kleiberit). PURglue is not only waterproof, it is also frost-resistant.
And of course, to glue the shield together you will need clamps or good strong clamps. The choice of clamps on the market is quite large. I only showed a couple in the photo.
After gluing, we remove the exposed glue and set the required thickness of the shield on the surface planer. And let's start defining the form. We saw off the step after the planer and use a jigsaw to cut out the radius, but with a small margin of about 10 mm.
Why is it needed, this reserve? A jigsaw, of course, is a good tool, but no one has ever been able to cut it straight. This is clearly visible in the photo below. You can, of course, achieve the desired radius by subsequent grinding, but this is very tedious work.
So let's go the other way. We make a small device - a compass for the router. And with its help we make a template from a piece of plywood.
Next, using a template on the milling table, using a cutter with a bearing, we give our part the ideal shape to the given size.
Using a cone or other cutter, it’s a matter of taste, we remove the chamfer.
And the last preparatory moment is sanding. The more carefully the part is polished, the better the result will be in the end.
The final stage is finishing the shelf. Here, of course, there are a large number of options: stains, paints, varnishes, impregnations, oils, waxes... And all this is sold in a variety of colors and shades.
In the photo, the shelves are treated with colorless wax glaze.
A simple shelf, but how much effort needs to be put in to get a decent result...
Of course, it is unrealistic to present all the intricacies of working with wood in one master book, but if someone likes it, there will definitely be a continuation...
Material for making corner shelves
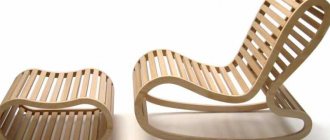
Any material can be used for manufacturing - wood, iron, chipboard, glass or any artificial materials. Recently, shelves made of plastic have become popular. The advantages of this material are lightness and plasticity; they can be made of any shape and any color. Wavy or broken lines, uneven edges on shelves are a stylish work of design art. They also look good surrounded by, for example, mirrors or special stickers.
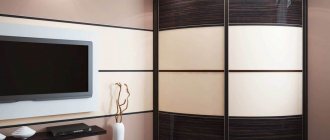
If you choose the right material and style of shelves for the wall, this will be the key to the harmony and integrity of the interior. For a classic type room, shelves made of natural wood with clear rectangular shapes are suitable. For high-tech or minimalist style, metal and glass, in any combination, are suitable. Made of plastic, they are suitable for a room in the Art Nouveau style, and with elaborate decor - for an interior in the retro or French Provence style.
When choosing the design and texture of the shelves, do not forget about the purpose of the room. If bright colors and any material are suitable for a nursery or living room, then for the bathroom and kitchen you need to select reliable and moisture-resistant shelves on the wall that can withstand temperature changes and will not be subject to deformation when water gets on them.
What types of corner shelves are there for the wall?
They are:
- fixed,
- removable.
Fixed shelves are attached with several brackets to the wall, which is very strong; in this case, no partition will work. If you need to install fixed shelves, it is better to immediately determine the distance between them. It is necessary to at least approximately know the height and weight of the object that will stand on it. In order to make it convenient to use this shelf, you can add another 2-3 centimeters in width and height. The most important thing is to firmly attach the brackets to the wall, and then attach the shelves themselves to them.
Removable shelves are installed on brackets that are inserted into the grooves of the vertical posts. When the rack is completely secured, then the brackets are attached, and then the shelves themselves.
Corner shelves are hung in the living room only after the decoration of the rooms is completed, and the brackets, racks and shelves themselves are painted in the desired color.
Using a wall-mounted corner shelf in different rooms
Shelves will find their rightful place in absolutely every room. After all, these products are very functional, but do not take up much space. Therefore, we recommend that you definitely include them in your design project.
There are different ideas for making corner shelves. Many note the attractiveness of unusual options, such as creating corner structures in the form of a vertical diamond base, and horizontal shelves attached to it.
Each room has its own requirements for choosing shelves. And when choosing the product you like, you must take them into account. Therefore, we invite you to take a closer look at them.
Choosing shelves for different rooms:
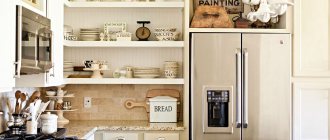
- When choosing shelves for the kitchen, you need to take into account the fact that there is always high humidity in this room, as well as grease and soot splashing around. Therefore, for such rooms you need to choose high-quality products that are resistant to moisture and easy to clean. In this case, glass and metal are perfect. You can also use wood with moisture-proof impregnation and chipboard covered with a special film.
- You can install any shelves in the living room. In this case, you only need to take into account the style of the interior and how many items you want to fit on it. The same goes for your bedroom. The only thing is that you should not choose plastic shelves for the living room and bedroom, as they will not look aesthetically pleasing.
- You need to choose products made from safe materials for your children's room. Therefore, you will have to immediately exclude glass from the list of possible materials, as it can break. You should also not use plastic, as it can release harmful substances. Metal products will not look aesthetically pleasing in a child’s room, and forged products can cause injuries. Therefore, wood would be an ideal option for this room. As a last resort, you can pay attention to chipboard.
- There are also extreme conditions in the bathroom. Therefore, the materials here must be resistant to large amounts of water. Therefore, shelves made of plastic and glass are ideal for this room.
- For the corridor, you can use all the options described. Corner shelves look best in this room.
As you can see, each room has its own characteristics. And if you want your shelves to last a long time and look appropriate, be sure to take them into account when choosing furniture.
How to make a corner shelf with your own hands
You can make corner shelves with your own hands. There are many drawings and options for such work, but we will describe the simplest of them.
How to make a shelf with your own hands:
- First of all, you need to make a blank. To do this, you can simply cut out several squares of the same size.
- It is necessary to prepare the preparations correctly. Sand the workpieces with sandpaper. Next, you can paint or stain them.
- Now you can attach the shelves to the wall. The simplest mounting is a corner bracket.
This is how easy it is to make shelves. You simply place the workpieces in a corner at some distance from each other, and you have an excellent storage system.
Corner shelves are a great option for your home. Use our advice and your imagination, and you will create a stylish and practical interior.
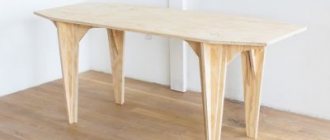
Do-it-yourself corner cabinet: deciding on the dimensions
Before wondering how to make a corner cabinet with your own hands, you need to decide on the overall dimensions. Ergonomic shapes attract many, but it is not always possible to achieve what you want if the allotted space for placement is too small.
The smallest dimensions of a corner cabinet with your own hands can be compared to the typical dimensions of a kitchen wall unit. It occupies 600x600mm from the corner. In order for the facade to be of sufficient width (400 mm minimum), the depth of the pillars (sidewalls) is set to no more than 300 mm. Naturally, with such dimensions there is no question of placing the barbell under the hangers. Only shelves or hooks for clothes.
For a corner wardrobe with a compartment for hanging clothes, the distance from the corner, at least on one side, must be at least 800 mm. Then the depth of the stand can be set at 450mm, which is quite enough for hangers with light clothes (for “men’s” and outerwear, 500mm is required). Do-it-yourself corner cabinet diagrams are approximately the same, in the ratio of the depth of the stand and the remaining space for the facade.
With asymmetrical options, it is quite possible to implement your plan with dimensions ranging from an angle of 850x650mm, 800x700mm, etc.