The most common problems with furniture hinges
Adjusting hinges involves properly tightening or loosening hinge components. It is worth remembering that each furniture hinge consists of several elements. These elements:
- The hinge tab is the unadjusted part of the hinge that is permanently screwed to moving doors or furniture fronts with two machine screws.
- The hinge fastening is the second part of the hinge (also screwed with two screws, but adjustable - fixing the height of the door), which is attached to the cabinet itself.
- Two adjusting screws – screws located on the mounting hinge; the first (located deeper in the closet) regulates the deviation of the door from the furniture, the second (located closer) is used to raise them.
The furniture hinge consists of three elements.
The most common problems with furniture hinges: the door falls off completely, the hinges are torn out by the roots, the fasteners have been deformed, manufacturing defects, frequent disassembly, loosening, improper fit. These problems can occur due to various reasons. From factory defects to poor-quality installation or wear. In this case, it is necessary to restore, strengthen, or simply replace the hinge with a new, durable and reliable option.
In case of problems, the mechanism is repaired or replaced.
How to order a door repair
To get inexpensive repairs to cabinet door hinges and other torn elements, fill out a simple request to call a technician through the YouDo service. Indicate the type of furniture, your address and a convenient time for repair. Craftsmen who are ready to repair a piece of furniture at an affordable price will leave their suggestions. You can choose a suitable candidate.
Using the profiles of furniture specialists, you will find out how much it costs to repair furniture and compare the experience of the craftsmen. Feedback from previous clients and our rating system will make it easier for you to find a proven and reliable specialist. Order cabinet door repairs at a competitive price through the Yudu website.
Source: remont.youdo.com
Possible causes of malfunctions
The reason for each malfunction has its own, let’s consider each one separately:
- If the door falls off, the load is too great for the hinge. The reason in this case may be weak screws or screws.
- If the hinges are completely torn out, then the depth for the screws was incorrectly calculated or the door is very heavy.
- When fasteners are deformed, peeling of the wood coating is most often observed. This occurs due to improper wood processing technology or wear of moving parts.
- Due to manufacturing defects, defective fasteners may result.
- If furniture is often disassembled and reassembled, then the holes in the seats may no longer hold the fasteners.
- If the doors are opened carelessly, loosening occurs. It can cause shifts and, as a result, deformation.
- The problem can also be caused by improper fit.
There may be several reasons for a malfunction.
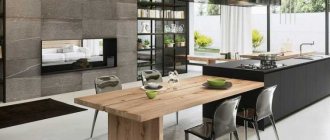
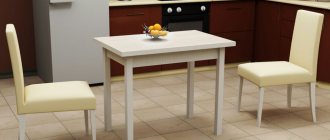
Kitchen door repair
The most common is cabinet door repair, which is caused by defects such as misalignment of the doors, changes in the geometry of the doors, spontaneous opening, difficulty closing, and loss of stability. The main reasons leading to such phenomena are deformation of the cabinet body, loss of vertical installation, mechanical damage, delamination or swelling of the material, failure of hinges or magnetic latch.
The most common reason is a broken hinge, which requires replacement. Typically, kitchen furniture contains standard disc-type hinges with two adjusting screws. First of all, if you have a problem with the door, you should try to adjust its position by turning these screws. If damage to the mechanism is noticeable, it is necessary to replace the hinge with a new one. This operation is carried out in the following order:
- The old loop is removed.
- One of the plates of the new hinge is tightly installed in the round socket of the door (diameter - 35 mm) so that the hinge mechanism is strictly perpendicular to the side cut of the door. The plate is secured with two screws screwed through the holes in the ears.
- The second hinge plate is installed in a similar slot in the side of the cabinet and secured with two screws through the holes in the bosses.
- Screw two screws into the corresponding holes. With their help, the position of the door relative to the cabinet body and the second leaf (if provided) is adjusted.
A common cause of the door opening spontaneously is damage to the magnetic latch. The fact of damage is determined visually, and if it is detected, a new magnet should be installed. At the same time, we should not forget about the presence of a return element, a metal plate on the sash, which must exactly coincide with the magnets.
The cause of door skew may be loss of vertical position of the cabinet. Cabinets are characterized by sagging legs under the influence of their own weight. In this case, you should place a strong support under the leg and adjust the installation of the cabinet. Wall cabinets are characterized by loose hinges. To eliminate the defect, the cabinet will have to be removed from the wall and the hinge strengthened, for which more powerful screws are screwed in.
How to repair hinges on a cabinet door with your own hands
In order to repair hinges or install them, you will need special tools. Your arsenal should include:
- drill;
- screwdriver;
- metal drills;
- pliers;
- hammer;
- hacksaw;
- structure level, vertical;
- tape measure or ruler;
- pencil;
- hexagon.
For repairs you need to have certain tools.
You can eliminate the problem using glue, sawdust, epoxy resin, wood or metal dies, or purchase a new hinge.
Types and causes of damage to chipboard furniture
The most basic defects that appear during the operation of laminated chipboard furniture are scratches, chips, loosening, deformation, peeling edges, torn hinges and fallen off facades. The reasons for their occurrence can be very different:
- chips, scratches, peeling edges - caused by careless transportation, improper operation, manufacturing defects;
- loosening - frequent disassembly, improper operation, manufacturing defects;
- fallen-off facades, torn or creaking hinges - weak fixation of fasteners, improper installation, heavy door weight, frequent opening (closing).
Furniture made from chipboard can be restored in several ways, namely:
- Restoring the color of a worn laminated surface.
- Masking scratches and chips.
- Label the new edge.
- Restoration of fastener and hinge locations.
Repair instructions for cabinet doors made of chipboard
Long-term use or production of furniture from budget materials, including chipboard, can lead to loosening of loop fittings and even to their breakage. How to repair a chipboard cabinet door? Fortunately, there are simple ways to fix them, thanks to which we can restore the ability to open and close the door without problems.
Chipboard cabinets often have problems with hinges.
Loop position offset
This is the easiest way to fix a torn hinge - move it 1-2 cm up or down. However, we must remember that changing the position is necessary both on the door and on the cabinet itself. To make screwing in a new location easier, it is recommended to make small holes first, which will make it easier to secure the screws.
One way to repair doors is to move the mechanism to another location.
This method will cause a little more problems in the case of cup hinges, for which we will additionally have to cut holes to insert the hinge into them. The easiest way to do this is to use a carpenter's chisel. Changing the position of the hinge is associated with leaving unsightly holes after the previous fixation of the entire mechanism. Fortunately, the holes are located inside the furniture and will remain invisible to outsiders.
The holes will not be visible to the naked eye.
Using glue and sawdust
A less reliable, but very quick method is to fill the hole from which the screws were removed. To do this, we fill it with wood glue with the addition of sawdust or paper. We then leave the holes for about an hour to let them dry a little, then we need to screw the hinge (without the door) and leave it overnight to allow the filled hole to harden completely.
You can repair the door using glue and sawdust.
Epoxy resin
Another option is to fix the door. To do this you need:
- mix resin with sawdust;
- seal the hole with the resulting solution;
- leave the work for 24 hours so that everything dries;
- drill new holes for self-tapping screws;
- install the mount;
- secure the door.
Alternatively, you can mix sawdust with epoxy resin.
Special repair product
There are also special tools for repairing hinges. They allow restoration to be carried out. If you purchased such a product, you must:
- knead the composition;
- moisten the area to be restored;
- cover the hole and let it dry;
- install the loop.
There are also special tools for repairing hinges.
Wooden or metal die
A more labor-intensive method is to use a wooden or metal dowel, which we insert into the screw hole. However, the dowel needs to be a little wider, so we need to drill a hole the size of the dowel we want to put there. During this operation, you must be very careful not to drill into the other side of the furniture and cause further damage.
You can use a dowel for repairs.
Then fill the hole with wood glue and insert the dowel into it. Then we leave everything for several hours. Once the glue has dried, cut the protruding part of the dowel down to the level of the plate. In addition, you can additionally sand this area with fine-grained sandpaper. The last step is to screw the hinges back on. Using the above method ensures reliable fastening of the hinges for a long time.
After the procedure, the hinges are screwed on with a screwdriver.
Purchasing a new loop
Purchasing a new hinge is advisable if you do not want to waste your time and energy on repairs. In this case, loops of a different type and size are purchased, then they are installed in another location. The unnecessary hole is covered up, and the new mount is installed lower or higher than the old one.
In some cases, purchasing a new loop will help.
How to install correctly
In order to correctly install the loop, you must follow the following procedure:
- Choose the correct distance to place the fittings. If there are defects at the selected distance, the marking is shifted.
- Attach loops at the selected distance to outline the outline.
- Using a chisel, cut out a recess similar to the thickness of the metal fittings.
- Cut the wood for the holes. If you accidentally cut out an unnecessary part, use special pads.
- Install the hardware and fix the hinges in the proper position.
If you want to install hinges yourself for the first time, then it is best to choose lightweight design options with a simple installation method.
How to seal a hole in a fiberboard door: materials
After some time after use, any wooden covering may lose its proper appearance. For example, you may need to repair a hole in an interior door, which is quite possible to do on your own and even without the help of a professional. For this process you will need to prepare a number of items.
In order to repair a hole in a fiberboard door, you should first prepare all the necessary materials for repair
Namely, it is important to have:
- Paper, both regular and sandpaper, the grain size of which should be more than 150;
- Polyurethane foam;
- Epoxy or polyester resin, it can be purchased at any automotive store;
- Putty specially designed for wood flooring;
- Wood primers;
- Special two-component paint and varnish composition and brush.
First you need to remove the hole. In other words, a hole is initially prepared, which is cut using a special construction knife. Preparing such a hole allows you to simplify the process of sealing the opening during subsequent work. Next, inside the door leaf you need to make padding from paper or newspapers. Absolutely any literature will do, but only with durable leaves.
This stage allows you to reduce the consumption of polyurethane foam, which will fill the hole. After the foam has dried, you need to cut off its excess to level it with the surface of the door leaf. Due to the fact that the foam has a very porous structure, it cannot be called a durable fabric, and therefore requires coating the foam layer with resin. As soon as it saturates the foam on the cut and hardens, the hole space can be considered sealed. Restoration and, in particular, the application of resin should be carried out using special rubber gloves to avoid getting the composition on your hands.
If the resin gets on the skin, you need to remove it as quickly as possible using a solvent.
After making sure that the resin has really hardened, you can apply a putty designed specifically for wood. As soon as it dries, the surface is sanded using sandpaper. There must be priming. Each subsequent stage is done only after the previous applied layer has completely dried, which will allow the door to be reconstructed quickly, simply and without consequences. Finally, the door is coated with a pre-selected composition of paint and varnish material.
What to do if the door has completely fallen off
If the cabinet door has completely fallen off, it means that the hinge has been torn out. It is possible to find a loop of the same dimensions so that the mounting dimensions are the same, and fasten them on the wall at a different distance.
If the hinge is pulled out, the door completely falls off.
Another option is to leave the same loop, but fasten it through. However, this will affect the appearance of the structure. Or fill the holes with any of the above options and proceed with installation.
Wooden "chopik" glue
The solution is as old as time, and it should be noted that it works well. Perfect if you have a piece of chipboard torn out.
We suggest you familiarize yourself with How to clean the outside of a pan from carbon deposits
The idea is simple - we take sawdust (you can take it from a chipboard, a piece of which has been torn out), or find it near furniture factories, next to large construction supermarkets (usually there are pieces lying around that no one needs), crush them, mix them with glue (previously we used PVA) this Apply the mixture to the broken areas and let dry. And that’s it, tighten the “screws”. It's holding up well.
However, now there are a large number of adhesives; on the Internet I even saw a guy pouring a lot of glue from a glue gun into broken places. And everything seems to be holding up
I used to repair hinges in the kitchen a long time ago. BUT due to the fact that the sash was used often, it broke quite quickly.
So this is again an option for a while, for constant use (10 - 15 openings per day), this is not the best way.
I think this method is the best. After such a repair, the door in my kitchen worked for several years, and nothing was torn out again.
The principle is this: Remove the sash - door, then you need to take a drill and drill out the torn holes.
We take a drill with a diameter slightly smaller than a wooden “chopik”, for example, my chopstick is 9 mm in diameter, and the drill is 8 mm.
We do not drill to the full depth of the door, usually 80% is enough, the main thing is not to drill further, because the drill will come out on the other side of the door, which is not always necessary. To do this, there is a special limiter on the drill, or at the required depth, you need to screw electrical tape onto the drill and not go beyond its limits.
Next we pour glue into the hole, I take “MOMENT” which glues the wood (you can take any other one; there are now dozens of different ones). Well, we hammer in the “chopik”, do it carefully so as not to break the back wall!
Let it set for about 15 minutes. Then in our wooden inserts, I drill another hole in the center, also not to the full depth. This is done in order to tighten the “screw” freely, but do not overdo it. For example, I have a “screw” with a diameter of 4 mm, and I take a drill with a diameter of 2 mm.
I tighten it on the removed door, try it - it holds perfectly! Now you can hang it on the closet.
This third method, I think, is the best for repairing chipboard doors. Moreover, it is suitable for frequent openings.
Now we are watching the video version
This is where I end, I think my materials were useful to you. Read our construction blog, there will be a lot more useful.
How to repair a kitchen cabinet door if it is quite heavy? Even very strong glue is not a particularly reliable assistant in this situation. You will need:
- a piece of hard wood (oak is best, but you can also take birch);
- knife;
- PVA glue;
- rags or napkins;
- hammer.
In this case, cone-shaped plugs are driven into the holes:
- Cut out 2 wooden plugs - their diameter should be larger than the size of the hole.
- Coat the holes with PVA glue so that the tiles are well saturated.
- Lubricate the cork with the same glue.
- Hammer the plug into the hole.
- Remove excess glue with a damp cloth or rag.
- Wait until the glue is completely dry.
- Screw the loop into place with self-tapping screws
The holes formed by fallen screws do not need to be filled, but closed. For this you need a wooden or metal die.
Important! Wooden is easier to make and drill, but metal is more reliable.
How to repair a cabinet door:
- Remove the door and unscrew the hinges.
- Cut the die long enough to cover both holes.
- Attach it with long screws to the inside of the cabinet.
- Mark the locations for the screws.
- Screw the door.
Ways to strengthen furniture hinges
If a furniture hinge has become loose, it must be strengthened so that it continues to serve. How to strengthen hinges on a cabinet door:
- Insert a drill into the holes for furniture screws and drill them out. Be careful not to make a through hole. Drills of sizes 5 and 10 mm are suitable.
- We take a stick and make several chopsticks of the same size with drilled holes out of it.
- Fill the holes and holes with glue. Then we kill them and leave them for 24 hours.
- We insert the loop and make marks where it will now be located.
- After which the loop is put in place and re-screwed.
A loose loop can be strengthened.
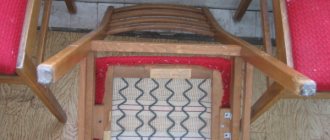
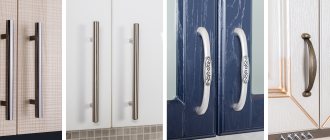
Hinges for mortise doors: almost invisible
Often used in furniture, semi-concealed overhead hinges for mortise doors are distinguished by their laconic and neat appearance. They are great for cabinets, but they don't have the convenience of self-closing, so you need to add a latch to keep the doors closed. When purchasing hinges, choose ones whose mounting holes are oblong rather than round (photo D), which allows you to adjust the position of the door.
To determine the size of the door, measure the thickness of the hinge when closed, multiply this measurement by 2 and subtract the result from the width and height of the opening in the body. Make sure the opening is rectangular. If this is not the case, make the door 3mm higher and wider to allow room for adjustment.
To attach these hinges to the door, determine their position as in the previous options, press the fold of the card against the edge and back of the door and drill pilot holes for the screws in the middle of the oblong holes of the hinge. Screw in both screws (photo E). When installing the door, attach a backing board underneath to line up the top and bottom gaps, and attach each hinge to the façade frame with only one screw. After making sure that the door opens and closes freely and has equal gaps on all sides, screw in the remaining screws.
Useful tips and tricks
When purchasing furniture, you should pay attention to specific sets of hinges in terms of their durability. Properly selected hinges help to open or close the door efficiently, and drawers will not get stuck on the guides. Hinges for kitchen furniture are used quite intensively, so it is necessary to choose reliable and durable options and not skimp on hinges.
Door hinges must be of high quality.
The exceptions are those found in rarely used furniture, such as a pantry. The most common problems with hinges are loosening or pulling. A broken hinge cannot hang in the same place where it was before. It should be moved 1-2 cm up or down. Changes should concern not only the door, but also the cabinet itself. Driving the screws should be preceded by creating delicate holes.
When the mechanism becomes loose, it needs to be moved to another location.
Installing hinges on the cabinet is necessary for self-assembly of furniture or in case of breakage of parts. This process does not take much time and is quite accessible even for inexperienced craftsmen. The only thing worth paying attention to is correct and clear labeling. The success of all subsequent actions and positive work results depend on this stage.
Repairing the hinge mechanism does not require much skill or experience.
When installing hinges, follow the instructions; when disassembling and restoring, take your time, let the materials dry well. Restored doors and high-quality installation of hinges can last a long time. If you choose complex fittings and have no idea how to install hinges, then it is best to contact a professional.
Please follow the instructions during installation.
When working, take your time, carefully measure each part of the fastener so that the markings coincide with an accuracy of 1 mm. If this is your first time doing installation or restoration, then watch the training lessons; they clearly show all the stages of these processes.
It is necessary to carefully mark the installation location.
Chipboard is characterized by problems with hinges, but they are easily solved. In order to solve the problem quickly, use the instructions and carefully follow each step you perform.
Installing hinges of a simple design does not require any special skills. They are easy to install if you follow each step step by step.
Materials and tools needed for work
At the initial stage, furniture and necessary materials and tools should be prepared. The quality of the repair depends on this. After all, incorrect installation is fraught with loss of time and repeated work.
Preparation of products consists of wet cleaning and cleaning the surface of dirt. This procedure is carried out especially carefully if do-it-yourself cabinet repair involves the use of varnish.
The door needs to be removed. Check the quality of fittings and fasteners: hinges, handles, locks, bolts. Metal products are cleaned of rust and coated with an anti-corrosion agent. The wooden surface is sanded.
Depending on the material used to make the canvas, the following materials and tools will be needed to repair furniture at home:
- varnish;
- polyethylene film;
- machine oil;
- glue;
- putty;
- decorative material;
- accessories and fasteners;
- sandpaper;
- paint brush;
- syringe with needle;
- screwdriver;
- jigsaw;
- hex wrench;
- putty knife;
- Screwdriver Set;
- awl;
- pencil;
- roulette;
- square;
- level;
- hammer;
- pliers;
- chisel;
- plane;
- stationery knife.
Frequent problems and solutions
The loop is torn out of its seat
This can happen due to loose fastening holes, when the screw of the wrong size is selected, or the hole itself has become loose due to frequent opening and closing of the door. In this case, the treatment is quite simple - choose a self-tapping screw with a slightly larger diameter, or, if the hole is completely broken, insert a small round wooden pin coated with glue into it. After the glue has dried, the protruding part is cut off and the loop is installed in its original place.
The hinge is torn out with part of the side wall, the seat is destroyed
The first thing you can do is raise or lower the hinge, making a new seat in the undamaged part of the rack. To do this you will need a Forstner drill Ø 35 mm. If it is not possible to rearrange the loop, you should use epoxy glue. Replace all damaged parts, cover them with epoxy, apply a little glue to the hinge itself. Wait a day and install the facade in place. Practice shows that a product repaired in this way lasts quite a long time.
The seat cannot be restored
It’s more difficult to get by with improvised means. In this case, the seat is partially removed, then a small pad is inserted into the resulting recess, having previously treated it with glue. Next, the loop is screwed into place.
For the tightest fit of the lining to the frame, it is advisable to use a clamp.
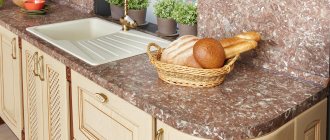
Restoration of chips and scratches
At the ends and surfaces of countertops, especially at corners and radii, chips are not uncommon. They can be easily removed, especially if a melamine edge was used when processing the ends. For restoration, you will need to purchase new material for processing edges, preferably PVC, of the required length and color, from a specialized store that sells chipboard and furniture fittings. Using an iron or an industrial hair dryer, remove the old edge, clean the chipboard from chips with sandpaper and, while also warming it up, stick on a new one. Cut off excess edges with a utility knife and sand with fine-grained abrasive paper. Often, after installing the edge, traces of glue remain. They can be disguised with tinting.
Restoration of a dent on the end of the facade
If the chips, scratches and dents on the furniture are quite deep, they can be disguised as follows:
- Treat the defect, clean it from dirt and, using a chisel, give the recess a more or less rectangular shape.
- Choose furniture wax to match the chipboard. Sometimes you need to mix several different crayons to find the right shade, since you are unlikely to find the desired color in a pure color.
- Using a rubber spatula and softened wax, fill the recess and compact well.
- After the wax has hardened, you need to carefully cut off the excess using a utility knife or rubber spatula. The wax should be flush with the surface of the chipboard.
- Sand and polish the wax with a rag. If necessary, use retouching agents to restore the texture of the material. The final step will be to fix the result with a fixing varnish.
Related article:
How to remove scratches from furniture using: furniture pencil and stroke, wood wax and mastic, oil polish, using walnut kernels, nut oil, mayonnaise, tea leaves, machine oil, iodine, vinegar with vegetable oil, stain - in our publications.
Updating facades using self-adhesive film
Often, a good-quality and reliable wardrobe is sent into exile to the country only because its design is hopelessly outdated. But any furniture can be given a second chance, just modernize its appearance, and external restoration will help with this.
Hard wax is used to repair chips on chipboard.
In order to breathe new life into an old closet, you will need (Fig. 1):
- self-adhesive film;
- furniture layout - decorative tape on a self-adhesive basis;
- scissors, knife;
- iron.
Even a beginner can restore furniture with his own hands using self-adhesive film. The main thing is to purchase high-quality materials, carefully study the step-by-step work plan and follow all recommendations. And the master class will help you navigate the renovation of furniture with your own hands - a clear step-by-step diagram.
- First of all, it is necessary to disassemble the furniture that will be restored. Remove all fittings, and after finishing the work, replace them with new modern ones.
- Thoroughly clean all surfaces. To do this, you can use dishwashing detergent dissolved in water.
- After drying, all facades should be wiped with a weak solution of vinegar. This treatment will remove a thin film of grease that will interfere with the adhesion of the slab and the self-adhesive film.
- Next you need to cut the film. Be sure to leave a margin of 5-7 mm on each side. These surpluses will allow you to avoid rework. And after finishing the work, they can be easily cut with a sharp knife.
- And only now does the actual restoration of furniture with your own hands begin. Before gluing, the surface of the chipboard must be sprayed with water; this will help lay the film more evenly, and if folds and creases form, it is easy to correct the defect.
- At the next stage, the film must be smoothed using a dry soft cloth. You need to move from the center to the edges, carefully removing air bubbles or drops of water. If the bubble cannot be corrected, it must be pierced with a thin needle and smoothed out. This technique ensures perfect adhesion of the film to chipboard furniture.
- The DIY furniture restoration is almost complete, all that remains is to bring the new coating to perfection. To do this, the facades need to be ironed through the fabric. The iron should be preheated to a moderately hot temperature.
- All that remains is to stick on the layout and replace the handles with new ones. The restoration is complete, and the cabinet or table can be used.
Frequent problems and solutions
The loop is torn out of its seat
This can happen due to loose fastening holes, when the screw of the wrong size is selected, or the hole itself has become loose due to frequent opening and closing of the door. In this case, the treatment is quite simple - choose a self-tapping screw with a slightly larger diameter, or, if the hole is completely broken, insert a small round wooden pin coated with glue into it. After the glue has dried, the protruding part is cut off and the loop is installed in its original place.
The hinge is torn out with part of the side wall, the seat is destroyed
The first thing you can do is raise or lower the hinge, making a new seat in the undamaged part of the rack. To do this you will need a Forstner drill Ø 35 mm. If it is not possible to rearrange the loop, you should use epoxy glue. Replace all damaged parts, cover them with epoxy, apply a little glue to the hinge itself. Wait a day and install the facade in place. Practice shows that a product repaired in this way lasts quite a long time.
The seat cannot be restored
It’s more difficult to get by with improvised means. In this case, the seat is partially removed, then a small pad is inserted into the resulting recess, having previously treated it with glue. Next, the loop is screwed into place.
For the tightest fit of the lining to the frame, it is advisable to use a clamp.