Advantages and disadvantages
Chipboard or chipboard
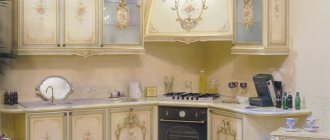
occupies about 50% of all offers on the market. The basis of a kitchen countertop made of chipboard is wood particles pressed at high temperature, lined with plastic of different colors. Fast production and low cost determine the demand for products, but they have many disadvantages. They cannot withstand temperatures above 180 degrees, are susceptible to moisture and do not withstand impact well. The service life of such countertops is approximately 5-6 years.
MDF or fiberboard
It is also produced by pressing wood particles, but then the board is coated (laminate) on all sides. Laminated paper increases the strength of the tabletop and gives it an aesthetic appearance. The products are not afraid of moisture, withstand severe mechanical damage and are resistant to chemicals. The disadvantages include deformation under the influence of high temperatures.
Artificial or natural stone
– these are elite materials for countertops. The first consists of stone chips held together with acrylic resin. The composition has increased strength, is impervious to water, and can easily withstand minor mechanical damage. The ideally smooth surface of artificial stone is devoid of pores, unlike natural materials, some types of which have a porous structure.
Stone countertops for the kitchen are made of marble or quartz. They have practically no disadvantages, except that they weigh a lot. The porosity of some types of stone leads to the retention of tiny particles of dirt and microbes on the surface of the countertop. However, the service life of natural stone is decades, which certainly attracts consumers.
Original countertops made of wood or glass for the kitchen are not uncommon, but there is not much demand for them. Some people doubt the practicality of glass in a production area such as a kitchen. Some people don’t like the need to periodically sand and polish wood to restore it to its original beauty. However, with careful use, wooden and glass countertops last much longer than MDF or chipboard.
Coloring
The method is quite simple, but requires careful surface preparation. The main advantage of this method is the ability to paint the facade in any color. If you want to make your kitchen bolder, you can choose a bright shade, such as blue, green or orange. A win-win color is white, as well as many light shades, incl. beige, gray, cream, etc. Imagine in advance what the kitchen will look like and get creative.
At the same time as painting the facades, they can be slightly transformed using moldings, special strips that are glued to the surface and give it an interesting relief.
The sequence of actions is as follows:
- remove the facades from the furniture, dismantle the fittings and glass. Those elements that are difficult to remove can be sealed with masking tape;
- It is most convenient to remove old varnish or paint using a sanding machine. If PVC film was used as decoration, it is better to use a hair dryer. The temperature will melt the film and make it easier to remove. It is better to work in a respirator so that small particles of the facade and the pungent odor of PVC do not enter the respiratory tract;
- if there is serious damage, they must be filled with putty and then sanded;
- the surface is rubbed with sandpaper, then the dust is removed and degreasing is carried out;
- if you plan to use moldings, they are attached at this stage. You can choose smooth or textured planks; there are products that imitate stucco. It is better to sand the planks in advance, then they are cut into pieces of the required sizes. Often moldings are attached along the contour of the doors, or they are formed into a pattern closer to the center. Usually a connection at an angle of 45 degrees is used. After you are sure that the figure is laid out evenly, the elements are glued, you can use glue for wooden products. It is allowed to use nails without heads;
- MDF, chipboard and wood absorb moisture well, so it is better to pre-coat them with a primer. The one designed for woodwork will do. It is better to apply two layers;
- Now you can start painting. It is better to use acrylic paint or auto enamel. The first is cheaper, the second is better in terms of moisture resistance and resistance to mechanical damage. You can use a brush, roller or spray gun. The paint is applied in 2-3 layers depending on the required color saturation. To guarantee, some craftsmen cover the facades with a layer of transparent varnish;
- when the paint has dried, the masking tape is removed, the fittings are returned to their place, and the facades themselves are hung on hinges.
If painting seems too banal to you, then use glisal, a translucent glossy paint. It is applied in exactly the same way as acrylic paint, but while the coating dries, you can create an interesting texture on the surface. Using a sponge, bag or other available items, you can make a geometric design or an ornate pattern. If anything happens, part of the drawing can be removed with a roller. The result is an unusual result that will appeal to lovers of ethno-style.
Details change everything: 5 ways to quickly and easily update the look of your kitchen
Every heart sooner or later begins to demand change, especially the heart of the owner of the apartment, who spends a lot of time in the kitchen. The kitchen is the heart of the apartment, because all roads do not lead to Rome - but to the kitchen, to the stove and refrigerator.
But what to do if it’s scary to start renovations, and you’ve already gotten a little tired of the kitchen? Then it’s time to update it with minimal labor and financial costs. This is much easier to do than it seems at first glance. We'll look at 5 simple ways to update the look of your kitchen. Go!
1. Changing the handles on the kitchen set
If the kitchen set is in good condition, you don’t want to change it, but your soul asks for new accents - you can simply change the handles.
New handles can give your kitchen cabinets a different style and give you a more comfortable experience.
Our store offers handles in modern and classic styles, chrome-plated, smooth or antique-carved, wooden, black, gold, colored - whatever your heart desires.
In your daily kitchen bustle, you will definitely notice the convenience of handles from our range:
- they are safe due to their round shape;
- easy to grip with wet hands thanks to the high “legs”;
- and sometimes, like, for example, the profile handle “Veresk”, they are completely invisible, but functional.
How to change handles:
Use a ruler to measure the distance between the bolts of your old handle.
Select and purchase the desired cabinet handle model using the “distance between holes” filter.
Using a screwdriver or screwdriver, install the new handles in place of the old ones.
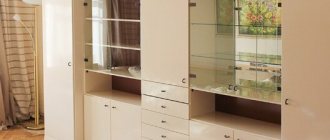
2. Changing the shelves to glass
You can quickly update your kitchen interior design using glass shelves. If you have kitchen cabinets with glass doors, this is the solution for you!
Advantages of glass shelves
- Compared to wood, glass shelves create a stylish, modern and airy interior better.
- The use of glass shelves in cabinets helps to avoid the external “heaviness” of the kitchen set.
- Buffets are back in trend, and of course, it’s hard to imagine such a “zest” in the kitchen without glass shelves.
- In terms of functionality, glass shelves are in no way inferior to wooden ones. They can also be used to place beautiful dishes, sweet souvenirs, festive table decor, a family bar - they can withstand a load of up to 10 kg.
- Glass shelves are not afraid of water; moreover, it is easier to remove various types of stains from a glass surface than from a wooden one.
You can replace shelves even without tools and skills. Simply remove the wooden shelf and place the glass shelf in its place on the previously installed shelf holders.
3. We update furniture at a minimum cost
It is not always necessary to buy new furniture for a new kitchen; it is enough to simply repair or update the facades of the kitchen cabinets. Sagging doors can be straightened, cracks and chips can be filled, old fittings can be replaced. For this purpose, Leroy Merlin has all types of paints, including decorative ones, putties, sandpaper and kitchen fittings.
If you don’t need to repair anything, then aged wooden facades can be varnished or stained, or repainted in a different color. As an option, play on the contrast of two colors, for example, white and turquoise.
A more radical option is to completely replace the fronts of the kitchen cabinets. In addition, you can update the kitchen apron - the part of the wall between the upper and lower cabinets of the kitchen set. Leroy Merlin has a wide selection of wall panels that are created specifically for the kitchen apron area.
How to paint old facades in the kitchen
There are two ways to paint your kitchen facades.
1. The easiest option is to use special paints to renovate old furniture. The advantage of such paints is that they can be applied directly to an unprepared surface; it is enough to clean it of dust and dirt.
Also, with the help of such paints you can give facades a special appearance. These can be super matte surfaces with a blackboard effect (you can’t write with chalk, but it looks great), surfaces with glitter, mother-of-pearl, interspersed with sand particles, or just standard plain ones.
2. A more complicated option. Since the facades have a non-absorbent surface (lamination) or are already covered with some type of paint and varnish material, it is better to apply paint after first preparing the surface.
The surface must be cleaned of dust, dirt and any other contaminants. It is also recommended to lightly sand the surface with 1000 grit sandpaper to enhance adhesion before applying the future material.
The next step is to apply a special primer for non-absorbent surfaces. It will create the necessary adhesion for the finishing layer.
After applying the primer, the surface can be painted with any paint; you just need to take into account its strength characteristics, washability and moisture resistance. Acrylic enamels from our own brand Luxens are ideal for these purposes.
4. Add light
More light - more life. Try changing the lighting in your kitchen. It is not necessary to buy new lamps; you can easily get by by changing the temperature of the light or playing with the power of the lamps. Warm orange light will make the lighting cozy, warm yellowish light will relax you, neutral white will set you in a working mood if you use the kitchen as a place for intellectual work with a cup of tea or coffee.
Work area lighting
Be sure to take care of lighting the work area in the kitchen. This is important not only for your comfort, but also for your safety. Most often, the work area refers to the kitchen countertop, stove and sink. This is the area that is most involved in cooking.
Work area lighting is most often installed under wall cabinets. These can be linear lamps, special panels or even LED strip. The main thing is that you feel comfortable cooking in this light.
Interior lighting for cabinets
For wall cabinets with display cases (glazed facades) and glass shelves, internal lighting would be a good solution. In addition to aesthetic functions, it can also perform practical ones: all objects will be clearly visible.
Such lighting can turn on automatically when the door is opened or have a separate switch. Lamps with automatic switching are equipped with a special built-in sensor that is activated when the door is opened. In addition, you can leave the backlight on so that the display cases glow from the inside and create a cozy atmosphere.
Illumination of kitchen units from the outside is also popular. It can be implemented, for example, using an LED strip running along the upper edge of the base of the cabinets - this technique creates the illusion of a kitchen floating in the air. If the set is equipped with a mensola (canopy over wall cabinets), it can be decorated with mortise or surface-mounted spotlights.
How to connect lamps
To connect the lamps, nothing special is required: as a rule, they have a wire with a plug or USB connector. You just need to take the wire out the back wall of the cabinet and plug it into the nearest outlet. It is possible to connect to a 220V network directly if you already have wires laid out.
Lamps with autonomous energy sources are battery-powered - there is always information on the packaging which batteries you will need and in what quantity. When connecting an LED strip, you need to take into account the voltage from which it operates. The tapes from our range operate on 12V voltage; to connect them to a 220V network you will need a special transformer, or you can buy a kit ready to operate on a 220V network.
5. Add kitchen accessories, flowers and greenery
The final touch to updating your kitchen will be new accessories. A tired cup can always be replaced with a new one, and fresh textiles - tablecloth, tulle and curtains, as well as towels - will breathe new life into the kitchen. Bright colors will enliven the room and make it festive, while snow-white colors will refresh the kitchen and visually enlarge it. For variety, sets of kitchen textiles can be changed periodically.
Try experimenting with style: choose new accessories depending on the material and color of the kitchen surfaces.
Treat yourself to table napkins, grocery baskets, mug coasters, salt and pepper shakers, kitchen accessory organizers, food containers, or a new tea and coffee infuser. In addition, you can always hang a beautiful picture on a free wall.
Indoor flowers will add beauty and life to the kitchen. If you love caring for plants, choose begonias, kalanchoes, delicate violets or azaleas - these flowers feel good even in the kitchen and will delight you for a long time.
Another option is a bowl of fruit. Green apples and other bright fruits in a vase will lift your spirits - you will catch your eye on them in anticipation of the warm season.
We wish you easy and enjoyable kitchen updates! Come to our hypermarkets, and consultants will help you choose the right products, or choose everything you need yourself in our online store.
Caring for plastic-coated chipboard countertops
Postforming plastic kitchen worktops are widely used to equip inexpensive kitchen sets. Thanks to the plastic lining, which is resistant to moisture, abrasion and temperature changes, the working surface made of chipboard is quite practical, durable and undemanding in maintenance.
In order for a chipboard countertop to serve for a long time and retain its original appearance, you must adhere to several rules:
- Do not place hot dishes on it, as this may cause the top layer to crack, swell or change color. Be sure to use hot mats.
- Do not allow liquid to accumulate on the surface of the plastic tabletop. Having penetrated beyond the edge, it can lead to swelling of the base material - chipboard. Coloring substances can also negatively affect the appearance of the work surface.
- Clean the item only with safe products without the use of acid, chlorine and other aggressive and toxic materials, as they can damage the surface.
- Means and available items for cleaning should not be abrasive, without particles that scratch the surface. Because there is a risk of damaging the decorative layer of plastic during diligent cleaning.
- Do not use the surface of a plastic countertop as a platform for cutting food; use only special cutting boards.
Decoupage technique
To remake a table, you can use such a popular method as decoupage. Decoupage is the decoration of an object by attaching a design to it. Often, napkins and any drawings, pictures, fabrics, or decoupage cards are used for such applique. Decoupage card is a specially designed decoupage paper that can be purchased at any specialty craft store. With its help, you can easily and quickly give an old table a very beautiful look.
- decoupage card;
- decoupage glue or PVA;
- aqualak;
- clear acrylic varnish;
- basic acrylic paint;
- primer.
The following tools will be useful when working:
- sandpaper of 2 types - coarse and fine-grained;
- fan brush;
- roller
First, the table is prepared for future work - it is sanded and primed. Next, you need to successively apply 2 layers of base paint, after which the table is left to dry completely.
It is very important that the paint is completely dry before further work, since the areas left undried will most likely change color under the varnish layer - the appearance of the furniture will be ruined
If you plan to make a table in a vintage style, you should sand it again: first with coarse-grained sandpaper, then with fine-grained sandpaper. In some places you can even intentionally rub off some of the paint. But if this style does not fit into the interior, you just need to carefully walk over the tabletop with fine-grained paper 2 times so that further layers lay down and stick better. Next, you need to apply aqualak to the surface of the table and gently sand it when it dries.
Now you should cut out pictures from decoupage paper and carefully arrange them in the desired order. You can completely cover the tabletop or simply make a pattern, for example, along the edge. When the location of the pictures is determined, you need to mark it with a simple pencil so as not to get lost during the work and not spoil the layout.
Then the pictures need to be soaked in a container with water for 5 minutes and then glued with PVA glue, slightly diluted with water, or with specialized glue for decoupage. In this case, each picture must be smoothed with a fan brush, otherwise unsightly wrinkles and folds may form, which will then be very difficult to remove.
When the glue and pictures have dried, the tabletop is again treated with fine-grained sandpaper. Then you should remove dust particles with a cloth and cover the table with varnish. The varnish is applied in 2 layers, with the last painting done no earlier than the 1st layer has dried.
To paint a wooden table, you can use such an interesting method as decoupage.
Remaking a table using decoupage technique will require the following materials and tools:
- PVA glue or special decoupage glue.
- Decoupage card or napkins.
- Transparent acrylic varnish.
- Aqualak.
- Primer.
- Basic acrylic paint.
- Fan brush.
- There are two types of sandpaper: fine and coarse.
- Roller.
The sequence of decorating a wooden table using decoupage technique:
- Prepare the table for future work - sand it and prime it.
- Apply 2 layers of base paint in succession and leave to dry.
If you are making a table in a vintage style, you will need to sand it first (first with coarse-grain paper and then with fine-grain paper). Apply Aqualak to the surface of the table and carefully sand it after it has completely dried. Cut out the pictures you like from decoupage paper and carefully arrange them in the desired order. The tabletop can be completely closed, or you can lay out a beautiful pattern with pictures, for example, along the edge. Mark the location of the pictures with a simple pencil so as not to get confused or confuse the layout during work. Soak the pictures in a container of water for 5 minutes, then glue them with glue that was previously slightly diluted with water.
- When the glue and pictures have completely dried, sand the tabletop again with fine-grained sandpaper.
- Remove dust particles with a cloth and cover the table with varnish. The varnish must be applied in two layers, with the second painting of varnish carried out no earlier than the first layer has completely dried.
Countertop – replace kitchen unit or update it?
In the kitchen, countertops and tables lose their appearance the fastest. Therefore, every second person sooner or later asks the question: can you update or do you need to replace the old countertop?
Stone countertop finishing
A complete replacement should occur in cases where it is no longer possible to restore the element. The kitchen countertop needs to be removed before updating. Unscrew the fasteners and dismantle. Most likely, some effort will be required, since silicone is always used to better secure it - and, as you know, it does not lose its qualities after a long period of use. The choice of new material depends only on you, so you can safely experiment with shades and new sizes. If you decide to update your countertop, you can use materials such as paint or varnish. It’s very easy to design a kitchen set in this way, and for quality, follow this sequence:
- First you need to prepare the surface of the headset that will be painted. Use a sander or sandpaper
- Fill all chips and cracks with putty mixture. Once dry, use fine-grained sandpaper. To make the surface smooth and even. Only after this can you paint the countertop
- Alkyd paint is suitable for this process. Its first layer will be the primer of the material. Next, subsequent layers should be applied after the previous ones have dried. And for overall individuality, you can use various coloring techniques.
At the moment, you can buy or make your own various stencils, with which you can apply a drawing or pattern to the surface of the headset to be finished.
However, remembering the use of self-adhesive film for kitchen drawers, you can safely use it for the countertop. This method seemed to me the most acceptable, since with the help of paint we cannot imitate wood or stone, but self-adhesive has different textures. The film is applied very quickly, so it will not take a long time to update the kitchen set. As in the case of kitchen drawers, you will need to take measurements and then cut out the necessary pieces on the canvas. When cutting, leave a small margin, which will then be very easy to remove using a stationery knife. It will be much worse if you are missing a millimeter or two and this will be the most noticeable place.
Do-it-yourself countertop finishing
On my own behalf, I would like to add that self-adhesive film can be used to correct various defects not only on kitchen furniture. From my own experience, long before the kitchen and its furniture, I experienced the quality of self-adhesive material. When the washing machine lost its appearance, and the paint peeled off in some places, after which the machine began to electrocute, there was no paint at hand. I felt sorry for the money to buy a new device, since the functionality of the machine was not inferior to the new models. Then the idea of using self-adhesive film arose in my head. Carefully removing the lid from the washing machine, it was vertical and not frontal, I washed the surface of the pasting. After taking measurements, I cut out the required piece and very quickly glued it to the lid. This may not seem like the best option to some, but I have been using this washing machine for 2 years now, and the film on it has not changed at all. And I, in turn, saved money and am very happy about it.
How to update your kitchen countertops
To ensure that the surface takes on its original appearance, it can be painted with safe acrylic paint, tiled, or the top layer can be sanded and varnished. As a last resort, replace the countertop and splashback in the kitchen and install it in its original place.
Film - quick design of the facade of a kitchen unit
This option for updating the headset turned out to be the cheapest and most accessible, because each of us can use self-adhesive film. Modern film can imitate natural materials such as leather, wood or stone. The only thing when choosing a material is not to give preference to the most inexpensive options, because the film must be of high quality and practical. For myself, I selected vinyl film, which is resistant to moisture, sudden changes in temperature, and also retains its color and appearance for a long time.
Renewing the tabletop with film
Before updating your old kitchen set, stock up on the following tools:
- Film
- Knife
- Ruler and pencil
- Centimeter
- Scraper
First you need to take measurements of all kitchen surfaces that are to be updated. Usually, for such processes, all cabinets are disassembled, since it is very difficult to carry out any repair work with an assembled and installed set. High-quality preparation requires not only cleaning the headset from dirt and dust, but also sealing cracks and chips. This will require putty, which we are all so used to.
Important! Self-adhesive film has one property that should not be forgotten - it highlights all surface imperfections. Therefore, the preparation process must be serious, and the foundation after it must be smooth.. https://www.youtube.com/embed/KXqQR1WCoTE
After the dimensions are made, we will make marks on the reverse side of the film. The fabric is cut along them into the required pieces. When using a film with a pattern, make sure it matches. Use a utility knife and a ruler to cut the pieces as evenly as possible. When gluing, a rubber scraper allows you to smooth out places where bubbles form. You may not be able to paste the parts the first time, but after completing the renovation process, your kitchen will sparkle with new colors. Do not forget that fittings also play an important role and therefore it is worth purchasing them too. Unlike purchasing the entire kitchen set, purchasing individual parts will be very beneficial in terms of inexpensive repairs.
Photo wallpaper is a new product for decorating not only children's rooms, but also kitchen utensils
A more interesting option than the previous one seemed to me to be a way to not only update the kitchen, but also radically change its appearance. Photo wallpapers today are in great demand for decoration in children's rooms and bedrooms. However, not only these rooms can be decorated in this way. The only caveat is the gluing of photo wallpaper onto the paint, which indicates the requirement to paint the kitchen unit. Among the tools you will need are: wallpaper glue, roller and paint, brush, scissors. To do the work yourself, you also need to take measurements, but for the renovation itself, you can use self-adhesive laminated options. They are more resistant to mechanical damage and are easy to wash.
Finishing the countertop in the kitchen
If your choice is traditional wallpaper, then do not forget that after gluing is completed, the entire set should be covered with several layers of varnish. It is somewhat more difficult to update a kitchen set with photo wallpaper than with vinyl film, but its appearance is more attractive. By the way, photo wallpaper can be made to suit your preferences, which means that you can even update your kitchen furniture with your own portraits or photographs.
Decoupage
A huge advantage of decoupage is that it does not limit your imagination and allows you to change the tabletop beyond recognition, with little effort.
For the work you will need:
- PVA glue;
- Pictures;
- furniture varnish.
To decorate your table, you can purchase ready-made pictures for decoupage, sold in any craft store. But motifs cut out from paper napkins or pictures from magazines and books are quite suitable.
You can design a drawing on a computer and print it out - this way you can see the whole picture in advance and decide on the drawing before starting work. Stages of work:
- Before work, thoroughly wash the old countertop and treat it with any degreasing agent - a swab moistened with alcohol will do;
- Dilute the glue in a ratio of 1:1;
- Moisten the selected motifs with it and glue them to the tabletop. The composition is created based on your taste, the main thing is not to overdo it with the number of motifs, otherwise the tabletop will look tacky.
- Carefully straighten the glued pictures - there should be no bubbles under them;
- Wait until the tabletop is completely dry;
- Cover the dried surface with varnish;
- Wait for the varnish layer to dry and apply a second coat;
- To prevent new decorations from being erased from the tabletop during wet cleaning, repeat the varnishing operation 3-4 times. For ease of use, the varnish can be purchased in aerosol packaging.
This hand-made table design will be in a single copy. This will make the interior design unique and memorable.
We also recommend watching the video instructions:
Stencil painting
A simple and fast method that requires minimal costs. To decorate a kitchen countertop with your own hands, you need to find a suitable picture, for example, a floral motif or ornament, print it, transfer it to thick cardboard and cut out a stencil. The cuts should be as even as possible so that the lines of the drawing do not turn out blurry.
To work you need:
- acrylic paint;
- paint brush;
- foam sponge;
- sandpaper.
| Step 1. | The countertop should be sanded, washed, dried and treated with a degreaser. |
| Step 2. | For the background, the surface is covered with 1-2 layers of paint and dried. |
| Step 3. | Place the stencil on the table, press it tightly, paint over the desired area, applying the paint with a sponge. To prevent drips from forming, do not dip the sponge into the paint too much. |
Renewal by varnishing
The stronger the smell of varnish, the more resistant it is to mechanical stress. Alas, a durable varnish without a pungent odor has not yet been created.
The best varnishes are at the beginning of the list:
- nitrocellulose,
- alkyd,
- polyurethane,
- epoxy,
- acrylic.
There are a lot of “combi” varnishes with partial addition of certain substances: shellac, resin, drying oil, acrylic suspension. The wide variety is associated both with the purpose of improving the compositions and with different purposes. It is often necessary to re-varnish surfaces containing lecithin (converted fats). Nitro varnish will no longer stick to this. In any case, varnishing is the most reliable way to protect solid wood and paint on furniture. If you don’t like shiny shine, choose a matte composition. You can add particles for sparkle, tint to taste (tinting reduces transparency). By selecting the composition and mode of the nozzle of the spraying device, the varnish creates the effect of raindrops, bubble skin, silk, and mica plates.
Some varnishing tips:
- the first layer must be extremely thin, dry, and carefully sanded - a high degree of gloss depends primarily on this process;
- the varnishing roller must be made of fur that is resistant to caustic thinners; even before use, the roller is washed, even a new one, and the strength of the bristles is checked;
- the same requirement for brushes;
- Any brush lint or bristles that accidentally get caught are quickly picked out with an awl;
- varnishing is carried out only in a clean room;
- to avoid splashes, the spray nozzle is first tested on cardboard and only then the torch is transferred to the surface to be painted;
- using tinted polyurethane varnish to transform ordinary glass into tinted glass;
- varnish with a small “chameleon” additive becomes pearlescent.
Create decor using tiles
When making a concrete countertop on your own, it is best to choose decor in the form of applying tiles to the surface. This way you can restore the product or update it. Suitable for the task: ceramic, composite and mosaic tiles. Mosaic gives the decoration originality and a special style thanks to a wide range of colors.
You can improve your kitchen interior design by integrating tiles into the decor, which decorate the apron area of the work area. A very interesting effect will be created by a combination of tiles and mosaics. Mosaics can be made like large tiles, so such combinations are not difficult to create.
To make a tile countertop with your own hands, you need to prepare the tiles, glue and grout in advance.
The work is performed in the following sequence:
- Cleaning and drying the table;
- Application of adhesive and tiles;
- Applying grout.
This is how a table is transformed from a tabletop. The tiles are not afraid of increased loads. Wet cleaning and aggressive detergents will not harm it. Above is a diagram of how to make a table from tiles. Using the same method, it is recommended to make window sills that serve as table tops. Dining tables should not be made of tiles.
Replacing the countertop
The trend of 2015 is naturalness. Therefore, if you want to follow it, we recommend taking a closer look at a wooden tabletop. Today their choice is quite wide, so choosing one will not be difficult.
A radical way to update a countertop is replacement. The new countertop can be made from:
- Fiberboard;
- chipboard;
- MDF;
- Solid wood;
- composite material.
A backlit glass tabletop is something incredible. Plus, the backlight can be made with different modes and colors
Countertops with a non-standard sink shape will confuse some people, while others will absolutely love them
You can purchase a ready-made countertop. Or purchase material from which to cut out a part of the desired shape and size using a circular saw and jigsaw. An old tabletop can serve as a template.
After this, you need to install a new part in place of the old one. It can be secured with self-tapping screws or special wood glue. The gaps between the wall and the countertop, if we are talking about the work area or the sink area, are masked using sealant. You can additionally glue a molding - ceramic or plastic. This will make the decor of your work area more stylish. The ends of the tabletop are glued with furniture edges. The easiest way is to use a hot-melt edge that is glued on with an iron.
If everything is done carefully, the interior design will not suffer at all and will not look handicraft.
So, you can update your countertop with your own hands in different ways. But in any case, with due care in the work, the kitchen design will not suffer, but, on the contrary, will acquire a touch of exclusivity and originality.
Tabletop care
Proper care will help increase the service life of your countertop. There are five golden rules, the observance of which will allow you to update your work surface much less frequently:
- Use a cutting board to cut food, even if it's just one piece of bread.
- Do not place hot dishes on the countertop, even if the work surface is made of stone.
- Do not use abrasive cleaners to clean the surface. It is better to replace the latter with more gentle ones.
- Try to avoid hitting the surface, so it’s better to beat the meat in a different place.
- Do not leave the tabletop wet; it must be wiped dry with a cloth after each wash.
Despite the apparent simplicity of all update methods, in some cases it is better to trust the professionals. This is due to the need to have certain skills, tools and experience.
How to update kitchen furniture
Restoring the facade of a kitchen unit is an interesting idea and only part of the work to revive its beautiful appearance. But it is quite possible to restore other elements of the set with your own hands: tables and chairs, tabletops.
Do-it-yourself chair repairs
Types of work that can be done at home include:
- renewal of varnish;
- seat reupholstery.
How to apply paint is described above - the mechanism for varnishing chair parts is no different from working with facade elements. Let's look at how to replace seat upholstery:
The seat is dismantled, the old fabric and upholstery are removed. Try not to damage the wooden base - it will still serve. A pattern for the future seat is made from thick cardboard. Place the plywood base on the cardboard and trace it with a pencil, allowing for 3 cm allowances. Using a template, cut out a blank for a new seat from foam rubber or batting. Next, using the same pattern, we cut out the fabric base of the new seat. On each side you need to leave at least 12 cm for hem
If the fabric is not plain, it is important to monitor the location of the pattern or ornament on it. The image must be located strictly in the center of the fabric base. Glue the foam blank to the plywood base using regular superglue. The fabric is attached using a staple gun or a construction gun
First, a fabric blank is laid out on a flat surface, face down, then plywood is applied to it, the side to which the foam rubber was attached should be at the bottom. Stretch the fabric around the entire perimeter or circumference of the chair and secure with staples. Try not to have large folds between the staples.
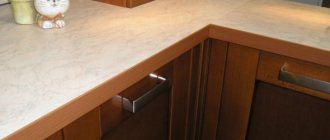
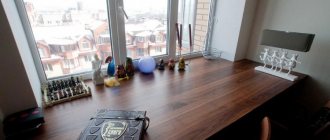
Kitchen countertop
The countertop is one of the most vulnerable places in a kitchen set, because it is located in the work area. This is why a tabletop made of chipboard or other materials loses its presentable appearance before other furniture elements. There are several ways to simple and not particularly expensive tabletop restoration:
- coloring;
- opening with varnish;
- decoupage;
- finishing with ceramic tiles.
The first three methods have already been described above. Finishing with tiles involves gluing the tile to the surface (it is better if it matches the color and texture of the kitchen backsplash) using tile adhesive. The final stage of installation is grouting the joints. You can read about wall decoration in the kitchen by following this link.
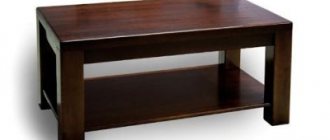
Kitchen table
The table top, just like the kitchen worktop of the work area, loses its presentable appearance before the other elements of the set. Various restoration methods are suitable for updating it, the schemes of which were described above:
- for tables made of natural wood – painting and varnishing;
- for fiberboard tables - painting, varnishing, vinyl wrapping, decoupage, tile gluing.
And finally, one more master class on how to restore kitchen furniture:
DIY repair
Product restoration
Restoring a tabletop involves returning it to its original appearance without visible changes in design. Many private craftsmen and companies offer their restoration services, but due to the high cost, this option is not available to everyone. The restoration process is long and painstaking, however, if you want to update the kitchen table with your own hands, you can do it at home. Before repairing the countertop, you need to prepare the following materials:
- glasses, respirator, gloves;
- sanding machine or coarse and fine grain sandpaper;
- art or paint brush, roller;
- impregnation and putty for wood;
- wood glue, liquid nails;
- acrylic or alkyd paint, stain, countertop varnish or wax;
- antiseptic and primer.
When the necessary tools are at hand, you can get to work.
Preliminary repair
Before covering a wooden tabletop, you should pay attention to the underframe and the general condition of the table: whether the legs are loose or whether some parts are missing. The new life of an old table begins first of all with the elimination of these defects, since the functional component is important for any furniture. It must be disassembled, the old coating removed from each part, sanded and put back together, secured with glue or liquid nails. Many restorers insist that the integrity of the table should not be damaged, as it will quickly become unusable.
The tabletop that has come unglued will have to be sorted out and re-glued
Here, each case is individual. For flimsy structures, assembly can really be disastrous. A hammer drill may destroy the surface or cause chips. If the furniture is good quality and massive, then you should not be afraid of this. If assembled correctly, the product will become more durable and stable. After work, it is important to ventilate the room, since accumulated dust can subsequently settle on the kitchen table top. Dust stuck to the surface after painting will spoil the appearance, so general cleaning will not hurt.
Old paintwork is removed mechanically or using a special remover
Primary processing
A wooden table, like chipboard countertops, requires mandatory impregnation with an antiseptic, which will protect against pests and fungi. This substance will not allow woodworms to attack the product in the future. After treatment, it is recommended to leave the table to dry for at least a day. Next, you need to remove the old coating using a sanding machine. You can also use coarse-grit sandpaper at the beginning and fine-grit sandpaper at the end of sanding.
Kitchen countertop restoration
Before covering a wooden tabletop, you should carefully inspect the surface for damage and chips. Small cracks up to 3 mm are sealed with putty and then sanded again so that there are no tubercles. Large chips can be repaired using veneer. You must first make a stencil of the desired size. In order to make it correctly, you should cover the surface of the chipped part of the table with paint, then press it with paper. A clean place, untouched by paint, is the necessary stencil. Next, you need to cut the veneer along the contour and glue it to the surface with wood glue. Press the part tightly and leave to dry for 10–12 hours. How to cover the countertop after cosmetic repairs? Alkyd or shellac primer for wood. This will ensure even paint coverage. The primer should be applied in 2 layers and wait until completely dry after each treatment. After this, the surface can be sanded again.
Painting tables
Now you can start painting directly. Since restoration requires restoration of the original appearance, the correct shade should be chosen. Modern manufacturers offer a wide range of color palettes, but it is not always possible to find an absolutely identical option that was used before restoration. You can purchase several types of paints, mix them and arrive at the desired color. How to cover a wooden tabletop so that it lasts for many more years? There are a lot of options here, but the most common is water-dispersed acrylic paint. It is non-toxic, dries quickly and is quite moisture resistant.
Using a brush, apply a thin layer, leave to dry, then apply a second coat and also let dry. For dark shades, it is recommended to repeat the procedure three times. If the table will be placed outside, care must be taken to protect the surface from moisture and precipitation. Alkyd paint is suitable here. Despite the pungent toxic odor, it is successfully used for exterior decoration. It is moisture resistant and is not afraid of direct sunlight. The most budget option is oil paint based on drying oil. This material is suitable for restoring the tops of coffee tables that are not actively exposed to mechanical stress. Please note that after dyeing, the product will be ready for further processing after 3-4 days.
Applying spray paint to a countertop surface