17439
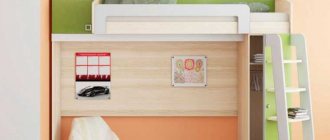
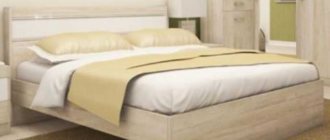
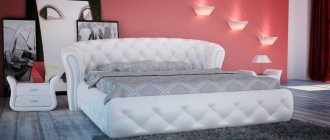
The bed is the main piece of the bedroom set. Today there are many different models of beds, one of the first places is occupied by options with soft headboards. The cost of such products is quite high, but making a headboard with your own hands is not difficult. This will not only save on work, but will also give you the opportunity to experiment with finishing.
Preparing the headboard frame
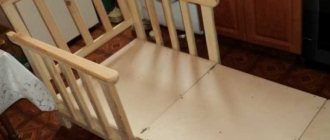
Do you have a headboard that has lost its original appearance? Great! Of course, you can buy lumber and make a new frame, but why not use what you already have.
The headboard of my bed, which I inherited from my grandparents, was uncomfortable and looked unpresentable. And when one night my neighbors living on the floor above were flooded, causing all the furniture to be badly damaged, I finally decided to part with it. I removed the ugly plastic panels from the front of the headboard to get to the frame.
After that, I started looking for any scrap wood that was the right size. For example, I had two MDF doors from an old broken wardrobe, which I cut to length and nailed to the frame. You shouldn’t strive for any special beauty at this stage, just nail or screw the boards to the frame.
The headboard frame was a little lower than I wanted, so I built it up using 5x5cm blocks. Special strength is not required here; it is not even necessary to attach these bars to the existing frame. Simply nail or glue them to the front panels. The bars extending the frame serve only to hold the staples securing the fabric.
From the back, the design looks like junk that belongs in a landfill. Haha. What can I say? I like to use whatever I can get my hands on in my work. For example, I used door hinges taken from the same cabinet as the doors to fasten the panels. Perfection is not required when it comes to framing.
The nuances of making a headboard, how you can do it yourself
The bed is the main piece of the bedroom set. Today there are many different models of beds, one of the first places is occupied by options with soft headboards. The cost of such products is quite high, but making a headboard with your own hands is not difficult. This will not only save on work, but will also give you the opportunity to experiment with finishing.
Holes for fabric covering
It's time to apply markings along which you will drill holes for subsequent fastening of the fabric. I hate taking measurements, so I did a quick search on Pinterest for “DIY tufted headboards” and discovered that some DIYers are using Pegboard as a base for their headboard, often used to organize tools and other items.
Good idea! True, a perforated plate of this size will cost a lot, and it does not have sufficient strength. With that in mind, I decided to use the Pegboard just as a template to mark where to drill the holes on the headboard of my bed.
What should be done:
1. Measure your headboard and mark its center.
2. Center the piece of pegboard you have in the center of the headboard.
3. Start at the marked center, but three holes down.
4. Use a marker to trace the hole locations onto the wood base. You can trace the holes that have already been moved on the perforated plate so as not to forget what has already been done.
5. Mark a point (remembering to circle the hole), then skip seven holes, and mark the eighth again. Continue with this pattern.
6. The second row should be shifted relative to the first by three positions, i.e. the new point will be opposite the fourth hole. The result will be a diamond shape (see photo below).
7. When you reach the edges of your pegboard, simply move it, aligning the already marked points with the corresponding holes. Continue until the entire top half of the headboard is covered with dots arranged in a geometric pattern. There is no need to mark the entire headboard of the bed - only up to the level of the mattress.
Once you have finished marking the surface of the headboard, make sure that you do not miss any desired points. If you traced the holes on the panel, this will be much easier! There is nothing worse than removing the pegboard and then discovering that all the dots have not been ticked.
TIP: There is no need to apply dots to the very edges of the headboard; leave a few centimeters untouched.
Now it's time to drill holes at all marked points! The holes should not be very large, just enough for the needle to pass through them freely. Shake off the sawdust.
If on the back side of the structure access to any holes is blocked by frame elements, drill the bars through so that nothing prevents you from sheathing the back.
DIY bed headboard
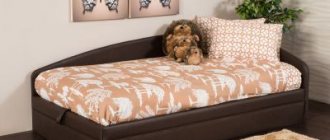
The headboard of the bed is a decorative element; it makes the sleeping area look complete. But besides the aesthetic appearance, the headboard performs a number of functions. This is convenient if you decide to read a book or watch TV before bed. In addition, a person's sleep is much stronger and more peaceful if he feels safe, and this is the feeling that the head of the bed gives. You will have to spend a lot on purchasing this interior detail; let’s look at how to make a headboard with your own hands.
Fastening foam and fabric
Take two pieces of packing foam of the appropriate size (this will be much cheaper than buying furniture upholstery foam) and place it on the front surface of the headboard, mesh side down. Line up the top and sides of the foam with the edges of the wood back, trimming away any excess. Secure the bottom and sides (no need for the top) using a furniture stapler.
Drape the structure with a piece of fabric. When measuring the material, make a margin of 25-30 cm on all sides.
Raise the fabric-covered headboard to a vertical position and lean it against the wall. Keep in mind that when it comes time to cover the back, you will need to have free access to the front and back sides. It’s good if you have an assistant who will hold the backrest.
Preparation of material and tools
The original headboard serves as the final stage of any sleeping place. With it the bed looks impressive and beautiful, it gives the bedroom a unique style and originality. How to make a headboard with your own hands is a question for those who want to create new or update old furniture themselves. This work requires a certain time, a special set of devices, materials and diagrams, drawings for making a bed with your own hands.
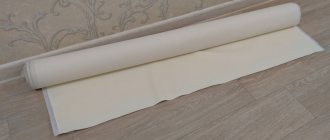
For this you will need materials:
- sheets of plywood of medium thickness - it is advisable to take the furniture version;
- foam rubber, batting necessary for a soft headboard for a bed with your own hands;
- nails – preferably 1.5 inches thick;
- decorative fabric - you need to buy it in furniture stores. The cut size is selected based on the area of the product, but do not forget about the margin for the hem;
- a set of bolts and hinges with which the headboard is attached to the wall or bed frame;
- required number of buttons, snaps. It is better to go with metal ones, since plastic buttons have impractical legs. You will need regular buttons with holes to secure them on the wrong side;
- needles are thick and durable;
- threads - nylon threads are suitable, they are quite durable.
Tools you will need:
- a jigsaw is a necessary tool when you need to make a figured headboard with your own hands;
- furniture stapler - it’s safer to take a metal one, with a device for staples of different sizes;
- drill and drills - without them it is impossible to make the necessary holes;
- construction sawhorses - useful for dismantling large sheets of plywood;
- knife with a wide blade and scissors;
- an ordinary hammer and screwdriver;
- a set of sewing accessories - necessary when decorating.
Materials
Tools
Button wrap
It's time to cover the buttons with fabric. This is the most difficult part of the project. I hate this job! Maybe it's because I bought the cheapest set, I don't know, but my fingers really hurt when I only made 7 buttons.
You should follow the instructions on the pre-packaged packaging, but once you've read them, come back here. I'll give you some good tips that will make the process much easier. Oh, and don't forget to use a good glue if you don't want the button covers to fall off over time.
Tips for covering buttons:
- Not all kits are created equal. I bought two sets of the same brand, but it turned out that the rubber mold fit the buttons from one set well and much less well from the other. One set won't be enough for you anyway, just try all the rubber molds until you find the one you like best.
- Cut the fabric with a small margin, i.e. slightly larger than the template that comes with the kit. It's better to trim off the excess material after you've pressed the button cover inside the rubber mold rather than painfully trying to center a small piece of material.
- Insert the fabric and button cover into the rubber mold from one side, then slowly insert them all the way. Otherwise, you won't succeed.
- If you don't want to do this all over again someday, before inserting the button shank, apply a little glue to the edges of the button. Remember that if you add too much glue, the excess will end up on the outside (if this happens, blot the glue with a napkin). Let the glue dry overnight before using the finished buttons.
- It is very difficult to hammer the “pusher” into place! It slips out, you have to keep adjusting it with your finger... ugh! My super smart advice to you (this knowledge only came to me through experience): use a wooden striker so as not to pinch your fingers while trying to hammer the “pusher” into place! My poor blue thumb...
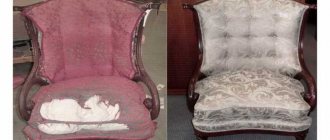
Methods for restoring an old wooden stock
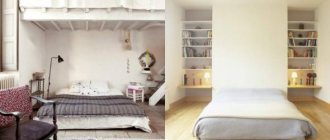
Sometimes it's hard to part with an old wooden bed, whether because of its convenience or its value as a memento. You can use several methods to restore, decorate furniture and give it new life.
Updating the backrest (headboard)
You can update the backrest in the following ways:
- Restore a damaged area of varnish: If there are no bubbles or deep cracks, wipe the surface with a rag soaked in gasoline to remove grease stains.
- Wait until the product dries, treat it with conditioner, and then wipe it with a wooden furniture polish.
- From the dried back, wipe off the top thin varnish layer with a steel wool. You can't cut through it all the way through!
- Remove dust with a dry cloth and apply a varnish similar to the previous one in several thin layers.
- Allow the product to dry.
- In the first case, the wooden back is sanded and craquelure varnish is applied. After it has dried, the surface is coated with basic varnish. When the varnish layer cracks, cracks form, giving the furniture an antique look.
The aging effect is achieved by washing off the stain with a sponge dipped in water. Most often, the middle parts are lightened, while the edges and recesses remain darkened.
The dried surface is sanded, and a new layer of stain is applied to the parts that are planned to be left darker, having a different base than the composition when first used. After the product dries, the wood pores are filled with shellac primer. When the back is dry, wipe it with antique wax along the fibers. After it dries, sand with a soft cloth.
The owner of an old bed can update the headboard by covering it with different types of materials. We wrote about the most popular methods of reupholstery in this article, and you will find detailed master classes here.
Mattress restoration
To reupholster a spring mattress you will need the following tools and consumables:
- new fabric for upholstery;
- hammer, construction stapler;
- nails or staples for fastening.
Depending on the structure of the mattress and any damage inside it, the following may be required:
- cord for tying;
- wooden slats;
- foam;
- items without defects.
- The mattress is placed on a flat plane in a horizontal position, and the old textile covering is removed. Using any tool, remove the parts that attach the worn fabric to the base. If the mattress is covered with stitched fabric, it is cut at the seams and carefully removed.
- The mattress structure is inspected for damage, cleaned of dust, small debris shaken out, and the frame is wiped.
- After making sure that the internal parts are in good condition, they begin the sheathing: laying a fresh gasket layer and top covering material, securing with nails or staples. To avoid wrinkles in the fabric, stretch it slightly with your free hand.
How to restore a mattress in the video:
Headboard trim
You will need a long needle with a large eye, regular buttons and upholstery twine. The knots on this smooth twine are easy to untie, but it passes freely through foam and fabric. Just make sure you tie the knot well (more than once) so it doesn't loosen over time.
Insert a long piece of twine into the needle and then thread the button onto it. Do you want to prevent the button from slipping off? Then pass the twine through all 4 holes (as if you were sewing on a button) and tie a few knots.
Pass the needle through the drilled hole, moving from the back to the front. Start with the top center hole. Be sure to keep the needle straight.
When inserting the needle, gently press on the foam from the front surface until the tip of the needle protrudes out. Pull it out a little. You can now move to the front of the headboard and pull out the needle.
Attach a decorative button to the front of the headboard.
How to attach a button to the front of the headboard:
1. Pass the needle through the eye of the covered button.
2. Make one turn of the thread around the button and thread it through the eye again.
3. Sink the button into the foam rubber while simultaneously pulling the thread tight. The loop should hold the button in this position, unless, of course, force is applied to tighten it.
4. Cut the twine, leaving small tails.
5. Tie the ends of the twine at the bottom of the button (as if you were tying shoelaces).
6. Tie another knot on the other side of the button. Repeat the operation several times.
7. Cut off the excess length of twine and place the short tails under the button.
8. Protect the fabric by forming folds on it.
To illustrate how this happens -
(the animation size is about 8 MB, so you need to wait a little before it appears).
Before you move on to the second row, read the next section, which has some information you should know about the first row. The only thing I messed up was the first row, so unfortunately my headboard isn't perfect, but you have a chance!
Stages of manufacturing different types of headboards
Before you make a soft or hard headboard with your own hands, you need to calculate the dimensions of the element and prepare drawings based on them. Calculations must be carried out carefully, accurate to the millimeter, so that the finished product fits the bed perfectly in shape and size. If necessary, simple drawings and interesting headboard decor ideas can be found on special thematic resources.
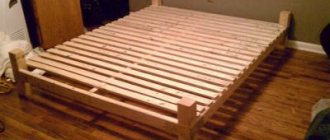
Hard wooden
For work you will need the simplest materials. The headboard can be made in the desired size - for a 1-, 1.5- or 2-bed bed. Before you start manufacturing, you need to prepare:
- chipboard;
- bars;
- jigsaw;
- wood glue;
- matte white paint;
- corners and screws for fastening;
- screwdriver
Step by step guide:
- Cut a piece of plywood to the desired size. The headboard can protrude slightly beyond the edges of the bed or be level with the sides.
- Cut the bars into the required quantity. If desired, paint or varnish them.
- Place long bars horizontally along the edges, and place short ones between them.
- Secure the elements with glue.
- Using angles and screws, screw the headboard to the bed frame.
The bars can be arranged in any order, creating a specific pattern or ornament, fastening them both horizontally and vertically.
A wooden headboard can be made according to the following plan:
- Polish the boards with sandpaper, removing all roughness, burrs and other defects.
- Coat the finished elements with varnish or paint.
- Using screws, build a kind of shield from the boards.
- If desired, reinforce the back with a sheet of plywood.
- Attach the finished headboard to the bed or hang it on the wall in a convenient way.
It is not necessary to make the back in the form of an even rectangle. If the interior style allows, you can imitate a hedge or choose another unusual configuration. The advantages of a board headboard are ease of manufacture and minimal financial costs.
A simple bed with a lifting mechanism, DIY assembly step by step
Upholstery
The soft version of the headboard can be made in a variety of designs and shapes. It will take a little time to make - about 2 hours. There is no need to wait for the glue or paint to dry.
Necessary materials:
- plywood;
- jigsaw;
- foam;
- stapler;
- decorative fabric;
- loops for mounting the backrest.
Stages of work:
- Cut a piece of plywood to the desired size and shape.
- Place a layer of filler on it.
- Stretch the fabric over the foam rubber so that the edges extend beyond the plywood edging.
- Use a stapler to secure the textiles, making neat folds on the back side of the headboard.
- Using loops, attach the finished product to the bed.
The soft back can be made using another technique:
- Build a frame in the shape of a rectangle from thin beams. The width of the base is selected individually.
- Place several sheets of foam rubber on top of the frame and secure it along the edges with a stapler.
- Cover the workpiece with leather or its equivalent. Make neat turns and trim corners if necessary. Secure the material with a stapler - the soft, practical upholstery is ready.
- Attach the headboard to the bed with loops.
A soft headboard for a bed, made by yourself, can be both part of the overall interior and its accent. The product does not have to be made rectangular - the choice of shape depends on the skills and wishes of the craftsman.
Carriage tie
The carriage screed is a way of decorating the head of a bed, which dates back to the distant past. Previously, royal carriages were decorated this way, but today the method is successfully used by modern designers and furniture manufacturers. A characteristic feature of the carriage tie is a pattern in the form of squares or diamonds, made using large buttons on thick fabric.
To make a headboard with a similar decor option you will need:
- chipboard;
- foam rubber or any other sealant;
- fabric (it’s better to take eco-leather);
- buttons;
- drill;
- knife;
- self-tapping screws;
- stapler;
- threads;
- Crochet hook;
- glue;
- scissors.
Step-by-step production of a headboard with a carriage screed:
- Cut a piece of plywood and a piece of foam rubber; their sizes and shapes should be identical.
- Make markings on the seal in a checkerboard pattern. These will be the places where the buttons are attached.
- Cut holes on the foam rubber, and mark the places for drilling on the plywood.
- Using a drill, drill holes with a diameter of no more than 5–8 mm.
- Glue the foam rubber to the plywood, first making sure that all the notches made coincide with each other.
- Place another sheet of foam rubber on top. Its size on all sides should be 5–7 cm larger than the main frame.
- Spread the fabric on the foam rubber. The margin at the edges should be at least 10 cm.
- Carefully turn the workpiece over and secure all materials protruding beyond the edges on the reverse side using a stapler.
- Secure the buttons on the leg into the prepared holes using a lace and a hook.
- Hang the headboard on the wall in a convenient way or mount it directly to the bed.
Buttons should be covered with fabric. The headboard can be additionally decorated with beads, edging cords and ribbons.
An important point regarding the first row
At some point in my work, I began to realize that I had not taken one important small step at the beginning. A disappointing justification for this can be the fact that I did not have the opportunity to learn from the mistakes of others. Make sure you remember to do this step so that every diamond on your back will be perfect.
Immediately after you have secured the first button, stop and make an upward fold. Now fasten the next button and make the fold again...
Once you have sewn on the first 3 or 4 buttons, pull the fabric taut at the back and secure the folds with furniture staples. Make sure all folds are facing the same direction. Fasten the remaining buttons (and form pleats) of the first row in the same way.
Once you have completed the first row, you can move on, stitching the entire remaining surface of the headboard. Now you have to make micro folds with your fingers after adding each new button to get perfect diamond shapes.
Tools for work
Initially prepare the tools for disassembling the bed:
For finishing you will need:
- fabric or leather for covering - 3.5 m;
- 2 meters of foam rubber 2 cm thick;
- furniture stapler;
- scissors;
- ruler;
- roulette;
- marker;
- furniture staples;
- thread and needle.
Securing the fabric
Once you've completely stitched your headboard, it's time to secure the fabric around the edges. Place the headboard on the floor, face down. You've already secured the fabric to the top of the headboard, but it doesn't hurt to add a few extra staples. To get neat corners, create folds by pulling the top side down and then covering it with the stretched side panel, then staple the fold in place. Continue attaching the sides, remembering to stretch the fabric. The front side should look ideal, and the back view is not so important.
Before securing the bottom edge of the fabric, place the headboard upright again and trim off any excess fabric around the legs. There is no need to fasten the fabric from the front of the leg; it is pulled tightly at the back.
How to make a headboard with your own hands?
A full bed is not cheap. Even if you choose from mass market models or the popular IKEA, it’s difficult to find a suitable model along with a mattress for less than 20 thousand rubles. Save money - for example, make some of the furniture yourself, and buy the frame and mattress in the store. We tell you how to create a soft headboard for a bed with your own hands, as well as what you will need to implement it. And we’ll give you some cool ideas on how to decorate some of the furniture yourself on a budget.
The article will appeal to those who furnish an apartment on their own or live in rented housing - when you want to add comfort, but there is no opportunity or desire to invest money. Let's begin!