Types and causes of damage to chipboard furniture
The main damages that occur during the use of chipboard furniture include the following:
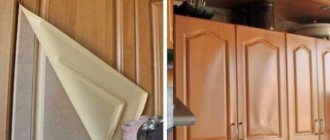
- scratches, chips, peeling edges - can be caused by manufacturing defects, careless transportation or careless operation;
- loosening - appears due to manufacturing defects, careless operation or frequent disassembly;
- creaking or torn hinges, falling off facades - occur due to improper installation, frequent opening and closing of the door, too much weight, or insufficiently strong fixation of fasteners.
Chipboard furniture is damaged quite often.
Features of choosing a composition for upholstered furniture
When making upholstered furniture, the adhesive composition must be able to glue wooden planes with other materials (plastic, fabric, foam elements, leather).
Adhesive for upholstered furniture should provide durable, flexible, strong bonding. At the same time, have increased adhesion.
Furniture is often installed near the heating system, so the seams should not react to rising temperatures.
It is preferable that gluing is done with an environmentally friendly composition. Today it is a water-based representation.
What you need to restore furniture
The following materials may be useful for the restoration process:
- Wax putty, or soft furniture wax. Used to hide scratches, chips and cracks on the surfaces of interior doors, cabinet furniture, parquet and laminate. Makes the treated surface moisture resistant.
- Hot melt putty, or hard furniture wax. Before use, it must be melted, for which you can use a soldering iron, lighter or gas burner. It is used similarly to soft wax, but is used primarily for the restoration of surfaces whose use is particularly intense (for example, shelves, countertops or floor coverings).
- Retouching products. This includes markers or felt-tip pens that are alcohol-based, fibrous, and valve-based. They are used to highlight the texture of the material in restoration areas, making the wax treatment less noticeable.
- Fixing varnishes and polishes in the form of aerosols and sprays. They are used to process the surface after the restoration is completed. The products allow you to hide minor scratches and abrasions, as well as add shine to the furniture.
- Melamine adhesive edge. Useful for replacing ends.
- PVA, epoxy, wooden plugs and dowels. With their help, you can fill the holes formed in the place of torn loops.
Various professional products can be used to restore chipboard furniture.
You can use regular markers, paints, iodine or shoe polish. The main thing is that they match the shade of the furniture.
For minor damage, folk remedies can be used for restoration. You will also need the following tools:
- plastic spatula;
- sandpaper;
- iron or hair dryer (preferably industrial);
- stationery knife;
- chisel;
- fine sanding sponge;
- non-woven napkins;
- rags (felt fabric).
For DIY restoration you will need certain tools.
Restoration of chips and scratches
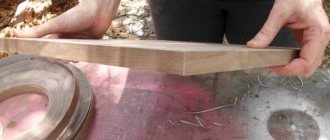
At the ends and surfaces of countertops, especially at corners and radii, chips are not uncommon. They can be easily removed, especially if a melamine edge was used when processing the ends. For restoration, you will need to purchase new material for processing edges, preferably PVC, of the required length and color, from a specialized store that sells chipboard and furniture fittings. Using an iron or an industrial hair dryer, remove the old edge, clean the chipboard from chips with sandpaper and, while also warming it up, stick on a new one. Cut off excess edges with a utility knife and sand with fine-grained abrasive paper. Often, after installing the edge, traces of glue remain. They can be disguised with tinting.
Restoration of a dent on the end of the facade
If the chips, scratches and dents on the furniture are quite deep, they can be disguised as follows:
- Treat the defect, clean it from dirt and, using a chisel, give the recess a more or less rectangular shape.
- Choose furniture wax to match the chipboard. Sometimes you need to mix several different crayons to find the right shade, since you are unlikely to find the desired color in a pure color.
- Using a rubber spatula and softened wax, fill the recess and compact well.
- After the wax has hardened, you need to carefully cut off the excess using a utility knife or rubber spatula. The wax should be flush with the surface of the chipboard.
- Sand and polish the wax with a rag. If necessary, use retouching agents to restore the texture of the material. The final step will be to fix the result with a fixing varnish.
Filled scratches mask and highlight texture
Related article:
How to remove scratches from furniture using: furniture pencil and stroke, wood wax and mastic, oil polish, using walnut kernels, nut oil, mayonnaise, tea leaves, machine oil, iodine, vinegar with vegetable oil, stain - in our publications.
Furniture decoration
After restoration of furniture, it can be decorated. The following options are usually used:
- Drawings. Can be done manually or using a stencil. Acrylic paints are usually used. It is better to place the ornament around the perimeter, and large drawings - in the lower or central part.
- Decoupage. The most popular are plant or thematic designs.
- Applications made of fabric, wallpaper or self-adhesive film. They can be applied evenly over the entire surface or form a specific composition. For this method, it is necessary to choose a waterproof fabric so that it does not lose its aesthetics.
- Thread. This is done using a sharp chisel and sandpaper. It must be done with caution, since the slab is fragile if its integrity is damaged.
Restored chipboard furniture can be decorated according to your taste and desire.
Varieties
Several types of adhesives have been identified, differing in purpose. Each has a high drying strength. Varieties:
- Water-based - PVA, animal. Designed for fixing fabric bases of furniture, foam elements, non-woven fibers. When attaching such bases, other types are not suitable, as they can damage the surface (superglue can corrode the fabric.
- Carpentry (resorcinol). Made from aliphatic resins. Used for gluing wooden elements. Subsequently, the glued product can be used outdoors.
- Contact – rubber-based, thermal, PVA of special strength. Purpose: repair, restoration of furniture that is used indoors and outdoors. It sets quickly, but it dries completely within a day.
Several types are distinguished according to the principle of solidification:
- Quick drying. These include PVA; it is enough to leave the glued element in a ventilated area for rapid gluing to occur.
- Hot melt adhesives. They are produced in the form of granules, cartridges, etc. To activate the functions, it is enough to bring them into a liquid state by heating.
- Thermosetting. Bonding occurs under the influence of increased temperatures. This type is divided into single-component (ready to use immediately) and multi-component (requires preparation before application).
Depending on the form of production, adhesive masses are liquid, solid, or dry.
Furniture adhesive containing a solvent quickly fixes and dries due to the evaporation of the volatile substance. Water-based bases are glued over a longer period.
Interesting video on the topic:
Cleaning and repair of mechanisms
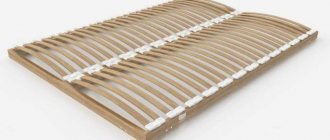
Moving parts are the most susceptible to breakdown; parts of these parts become unusable over time and require replacement. You can independently repair or replace elements such as rollers, springs, meshes, rivets and slats.
Mechanisms on chipboard furniture also need to be cleaned periodically. Each of their mechanisms requires an individual approach to diagnosis and repair, but the general operating procedure is as follows:
- Dismantle the mechanism.
- Take it apart into its component parts.
- Install the damaged element.
- Make the necessary replacement.
- Reassemble the mechanism and place it in place.
Regular lubrication of moving parts will help prevent or delay minor breakdowns. Lubrication reduces friction of metal elements and also protects against rust.
Important nuances and tips
It is important not only to buy a good adhesive, but also to use it correctly and know the rules of use:
- You always first read the instructions and determine which surfaces you can work on.
- The composition should not contain toxins; if they are present, appropriate actions should be taken (protection, ventilation).
- Surface preparation, thorough cleaning.
- A large mass of products are produced in white or yellow, but if the design is colored, then you need to choose a colorless material.
- A thick layer does not provide better adhesion, the main thing is that it is uniform.
- It is necessary to fix the connection until it dries completely.
When to contact a specialist
You should contact a specialist in case of serious damage, for example, broken furniture, and lack of special skills and knowledge. Also, you should not attempt to repair expensive or memorable furniture yourself, as there is a risk of causing irreparable damage to it.
If furniture made from chipboard is severely damaged, you should contact a specialist. If you need not just minor repairs or minor elimination of defects, but a serious comprehensive restoration, then it should definitely be entrusted to the appropriate specialist or cabinetmaker.
Before you repair chipboard furniture with your own hands, you need to evaluate your strengths and select suitable materials. If you work carefully, you can achieve a high-quality update in the appearance of products.
How to choose the best glue for furniture: rating
To choose the right glue for furniture, you first need to know the specifics of the work and the characteristics of the adhesive mass:
- Surface type. The instructions contain information about materials that are suitable for this gluing. In the absence of information, information on the name of the raw material is studied on the Internet.
- Base type. Some brands bond firmly, but at the same time damage the surface. To prevent this from happening, a synthetic elastomer is purchased. They do not cause deviations.
- Shelf life. An expired product loses its original properties and can damage the surface.
- Harmful components. When working with chipboard, it is advisable to avoid purchasing materials containing toxic compounds and solvents. These substances lead to damage to elements and can be harmful to health.
- Consistency. It is optimal to work with products of medium consistency. Liquid masses are quickly absorbed and do not give the elements a chance to set. But thick ones need to be spread quickly and then they take a long time to dry.
- Color. To ensure that the seam is not noticeable, you need to buy furniture glue of a certain shade. If this is difficult to do, then it is better to buy a transparent base.
On the topic of making furniture with your own hands
Since this is a topic, I’ll show you my creations:
First. Let's start with the kitchen. Sample project on the knee. (unfortunately, the main drawings remained on the old computer)
Ordering and waiting for parts to be cut.
Well, the final look. The biggest problem was the built-in equipment, and especially compliance with all technical requirements for its installation.
As a result, lighting and a glass apron were added to protect the tiles from greasy splashes.
160 thousand were spent on the entire kitchen (not including appliances and plumbing). Frame – 40, fittings (Blum) – 60, fronts – 40, tabletop – 20.
In addition to the kitchen there was also a bedroom
And a bathroom cabinet
Everything was designed and assembled with our own hands in our free time.
What to do with the fittings
If the handle and lock are not of particular value, then they can be replaced. The rollers, with the help of which the canvas moves along the guides, are subject to both replacement and adjustment.
During long-term use of furniture, threads or dust collect in the grooves of aluminum profiles. This leads to poor web movement. In this case, repairing an old cabinet is simply removing the accumulated small debris or dirt.
The guides may not have a rigid fixation with the structure. To eliminate the defect, they are removed. The mounting location is determined, holes are drilled, and the profiles are attached to the furniture. Old holes are sealed with putty.
The reason for the door not closing tightly may be the deviation of the lower roller stopper. This problem can be solved by tapping the stopper with a light object. The stopper is moved into place. The door is closed for inspection. If it stays still and does not roll in the opposite direction, then the stopper is moved correctly.
The rollers may squeak. To eliminate unpleasant sound, they are lubricated with machine oil. You can also adjust the location of the rollers. When the bolt is screwed in, the blade rises slightly, and when unscrewed, it lowers.
Sometimes the rollers fail. Then they are changed:
- the lower and upper strips are unscrewed;
- the door is removed from the guides;
- the broken roller is unscrewed;
- the purchased roller is attached to the canvas.
Materials and tools needed for work
At the initial stage, furniture and necessary materials and tools should be prepared. The quality of the repair depends on this. After all, incorrect installation is fraught with loss of time and repeated work.
Preparation of products consists of wet cleaning and cleaning the surface of dirt. This procedure is carried out especially carefully if do-it-yourself cabinet repair involves the use of varnish.
The door needs to be removed. Check the quality of fittings and fasteners: hinges, handles, locks, bolts. Metal products are cleaned of rust and coated with an anti-corrosion agent. The wooden surface is sanded.
Depending on the material used to make the canvas, the following materials and tools will be needed to repair furniture at home:
- varnish;
- polyethylene film;
- machine oil;
- glue;
- putty;
- decorative material;
- accessories and fasteners;
- sandpaper;
- paint brush;
- syringe with needle;
- screwdriver;
- jigsaw;
- hex wrench;
- putty knife;
- Screwdriver Set;
- awl;
- pencil;
- roulette;
- square;
- level;
- hammer;
- pliers;
- chisel;
- plane;
- stationery knife.
