Why paint the kitchen furniture
Painting your kitchen cabinets yourself is an interesting option for updating furniture. This method has advantages:
- the kitchen will be transformed, while the costs will be minimal;
- painting can be done without any help;
- the prospect will open up for original design solutions and the manifestation of your own imagination.
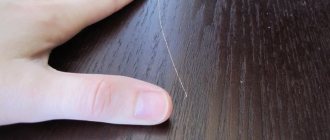
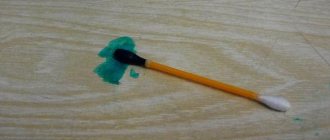
If we are talking about restoring kitchen facades made of MDF (in a situation where the PVC film has peeled off), then this can be easily done with paint. You just need to choose the type of coating and skillfully find the color.
Over time, the PVC film begins to peel off
Care and operating features of painted MDF kitchen facades
In order for painted kitchen facades to last a long time, they must be properly cared for, observing the following rules:
- First of all, you need to choose the right accessories. It is important that it ensures minimal contact between hands and fronts. These can be wide mortise and railing handles;
- Careless operation of the cabinets should be avoided - strong slamming of doors and hitting their surface is unacceptable;
- In order for the facades to retain their original brightness and color saturation, it is recommended not to expose them to direct sunlight.
The panels should be cleaned using soft flannel cloths soaked in soapy water. It must be washed off immediately so that there are no streaks left. It is acceptable to use microfiber cloths.
The use of foam sponges and harder materials, as well as products with abrasive particles, is not allowed - they can scratch the coating.
General requirements
Currently, the assortment of hardware stores is replete with a huge variety of paints that can be used to paint kitchen facades. But not all of them can boast of excellent results. Experts recommend avoiding the use of acrylic varnishes and paints in the kitchen , since the aggressive kitchen environment and humidity very quickly render these materials unusable. Even ordinary vinegar accidentally falling on the surface of such a facade can significantly damage the coating.
Therefore, you should choose a paint that is as resistant to any damage as possible. It must withstand sudden temperature changes, frequent heat, steam from boiling food, and high humidity. In addition, such paint should have a long service life, since frequent painting of panels is harmful and impractical.
It is important to remember that the kitchen is the place that most often needs wet cleaning, and therefore the paint must withstand constant exposure to moisture.
The paint color is selected taking into account the interior of the kitchen. For a harmonious combination, it is allowed to use several shades of the same primary color. It is important to choose the color according to the style of the kitchen. For example, if it is a classic, then brown and warm pastel colors are suitable; for neoclassicism, it is recommended to choose cold pastel shades; for eco-style, it is customary to use a green range of colors.
There are several ways to restore a kitchen unit, over which repainting has several advantages. First of all, this is an unlimited choice of shades, the ability to independently create an interior style, and realize your wildest fantasies in the design of a kitchen space.
In addition, painting involves textured options: you can leave the panels smooth, or you can give them a relief shape, although this is a rather bold and not very convenient option. Finally, painting is the easiest way to update and does not require special skills.
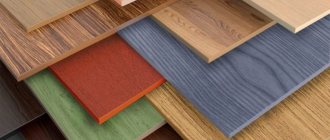
Features and advantages of painted kitchen facades
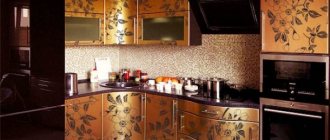
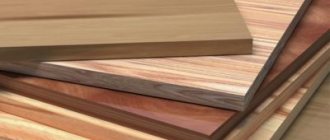
Painted kitchen facades are MDF sheets onto which special enamel (paint) is applied. It gives the product color and performs a protective function, eliminating the effects of moisture, high temperatures and dirt on the material.
Compared to other options, painted facades have the following advantages:
- thanks to a large selection of colors and effects, enamel allows you to make your set truly unique;
- durability - painted panels are heat-resistant, do not melt, do not chip or delaminate;
- high-quality coating is resistant to mechanical damage.
Please note that a headset with painted front panels will cost much more than the option with a film coating. High-quality enamel-coated facades are comparable in cost to furniture made from natural wood.
Paint selection
Today in stores you can see a huge assortment of paints. But not every one is suitable for kitchen facades. You should not use water-based emulsion or oil-based paint - they will lie unevenly and leak. Acrylic paint is also not recommended - it will not tolerate moisture and various cleaning agents.
After all the work has been done, we attach the fittings, insert glass, and hang cabinets.
The best option is aerosol alkyd paint in cans or auto enamel. This material is applied smoothly, without smudges, its properties are reliable, resistant, easily tolerates humidity and temperature changes, and is available in a variety of colors.
Acrylic paint
One of the most popular types is acrylic paint mixtures. They can be used for all types of surfaces, but reviews note that this paint works best on wood and concrete.
Variety of colors and high quality
Due to its structure, the paint does not require a perfect rough finish - it is able to mask small cracks and irregularities. The material is quite elastic, so it can be applied without much difficulty. The smell is practically absent, disappearing within half an hour after application.
The smell from the renovation is not noticeable after half an hour
You can wash walls and ceilings painted in this way either with a damp cloth or with non-abrasive detergents. If you properly care for the surface, the paint layer will remain in its original form for 15-20 years.
Acrylic paint goes on very smoothly
The list of advantages of acrylic paints is quite wide:
- The color of the paint in the can fully matches the result after application: the color retains its intensity, so you can always predict the final design of the walls and ceiling.
- It tolerates temperature fluctuations well, which are essential in the kitchen.
- It dries in a maximum of half an hour - much faster than other types.
- After application, no cracks or wrinkles form, the paint goes on very smoothly.
- Over time, the color does not change, the paint does not fade from direct sunlight.
The result is worth the money
The only downside is the relatively high price. However, we believe that taking into account all the characteristics, the cost of this paint is quite justified.
PVA paint
So-called PVA (polyvinyl acetate) paints have many advantages, however, they have low resistance to moisture, so they are not suitable for painting kitchen walls.
In the modern market, paints are presented in large quantities.
Silicate paint
One of the most advanced paints currently available is silicate paint for walls and ceilings. Long-lasting, easy to apply and durable, it is also the most expensive of the presented series.
Easy to apply
Let's see why they love her so much:
- First of all, it is necessary to note vapor permeability. This means that hot, humid steam will pass through the coating, leaving only condensation on the wall. This property significantly improves the microclimate of the room.
- Dirt and dust stick less to surfaces painted with silicate paint - due to their properties, they simply repel them, which greatly facilitates the cleaning process.
- The paint does not fade from heat or exposure to direct sunlight, maintaining clean and rich tones.
- Mold and fungi do not grow on silicate mixtures; they are unattractive to various parasites.
- The composition of silicate paint is completely environmentally friendly and does not contain elements harmful to health.
- They can be used for application to plaster, brick, concrete, wallpaper, plaster.
The disadvantages are the following:
- High price;
- Difficulty in applying to textured surfaces;
- A fairly complex dyeing technology that requires certain skills.
In general, silicate paints are the best choice for the kitchen due to their strength, reliability and durability. A varied color palette allows you to choose the right option for any kitchen.
Deep and rich shades
Latex paint
Latex paint is a water-based emulsion familiar to many, to which latex compounds have been added. It is often used specifically for the kitchen area, despite the fact that its cost exceeds even acrylic.
The main bonus of this paint is the ability to wash it using mild abrasives and brushes with non-metallic bristles. This allows you to clean even the most dirty areas, for example, above the hob or sink.
Does not lose its appearance even under harsh operating conditions
The benefits of latex paint also include:
- High wear resistance . Latex paint is the most durable among the washable ones. Some types can withstand fairly intense cleaning, which not all paint mixtures allow.
- The paint produces virtually no odors , and residual odors after application disappear in a matter of seconds.
- Good drying rate. The paint dries completely in twenty minutes; in rare cases (for example, if the room has high humidity), this period can last up to two hours.
- The latex mixture can be used to paint any surface - concrete, polystyrene foam, wood, wallpaper and even tiles.
- The paint allows air to pass through, which completely eliminates the appearance of bubbles and unevenness.
What about the downsides?
Unfortunately, it couldn’t have happened without them either.:
- High price. Finishing your kitchen with latex paint will cost you a pretty penny. Unless, of course, you try to save money and buy products from an unknown manufacturer. However, in this case there is no need to talk about quality.
- Latex attracts certain types of microorganisms that cause mold . Therefore, we recommend that you treat the surface with a special antiseptic primer before applying paint.
Choosing paint composition for kitchen furniture
To begin with, it is worth understanding what requirements there are for coating paints and varnishes that are used in the kitchen. The surface, in addition to its aesthetic function, must have the following properties:
- resistance to abrasion, chips, scratches and moisture;
- ease of cleaning;
- good tolerance to high temperatures.
All this must be taken into account when purchasing dyes.
There are paints on the market that create a very durable surface. But in order to correctly understand the term “resistance to external influences”, it is necessary to take into account both the scope of application and the human factor. For example, the top layer will withstand a moderate impact from a dropped appliance, and not intentional pressure or sudden movements with a fork or other sharp objects.
Not every paint is suitable for repainting kitchen doors. Here you choose from:
- acrylic coatings;
- enamels for car repainting.
IT IS IMPORTANT TO KNOW! It is necessary to distinguish between film facades and those made of pure acrylic; they are also called acrylic glass or even plastic. They differ significantly both in the production process and in their wear resistance characteristics. At home, you can only use a film-type acrylic substance (that is, cover a specially prepared surface with acrylic paint).
Renewing a furniture set with acrylic paint and varnish is usually cheaper. This coating lasts longer than PVC films that are applied to chipboard and looks more presentable. No need to use edges. The process itself is quite simple: the paintwork is simply applied and dries quickly.
Automotive paint provides the greatest durability. Visually it looks smoother. It tolerates heat and temperature changes very well. In very rare cases, chips occur.
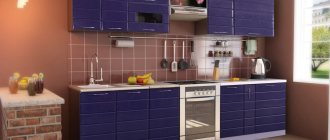
Choice of colors
So, if you decide to repaint your kitchen set and decide what color it will be, be prepared for the fact that you will have to change the textiles on the windows and the upholstery material on the upholstered furniture. You can choose one color or several, which is becoming very popular; it is important that the color scheme is in harmony with the overall interior. For those who have taste, it will be easy, but for those new to this business, it will be a little difficult.
Neutral solution. This includes all varieties of beige, as well as brown, black, gray and white. When combining these colors, it is quite difficult to make a mistake; you just need to carefully combine dark tones. The most common option: the upper cabinets are light in color, the lower ones are dark. This combination is more suitable for classic interiors.
It is important to remember that it is better not to combine only dark or only light colors. Don't forget about bright colors. So, black can be combined with red, light green, mint, pink, beige, white - with blue, lilac, blue, beige - with red, lilac - with cappuccino color, burgundy - with cream, white, wood color, etc. Two bright or two neutral colors are an interesting option, but you should rely on your taste here. The theme of vegetables and fruits will look no less interesting.
Surface preparation work
The panel is cleaned with soapy water without using too much water. The front side is wiped with a sponge. The clean façade is wiped dry and degreased with medical alcohol or white spirit.
A hair dryer and a plastic spatula are used to remove film from the panels, if any. The hot air flow causes the film to bubble, and in this form it can be easily removed with a spatula.
When the old coating is removed, the panel is sanded with fine-grain sandpaper. The treated surface is wiped again with a damp sponge and wiped dry with a cloth.
Elimination of defects
Chips, cracks, and scratches are removed with putty. If there are no defects on the surface, then this step is skipped. It is recommended to apply the putty material with a plastic spatula. The metal surface will be scratched. Automotive putty is used.
When all defects have been eliminated with putty and its layer has dried, the surface is treated with fine-grain sandpaper and wiped off dust.
Primer treatment
Before painting kitchen panels, they are treated with a primer to enhance the adhesion of the paint to the facades. Primer compositions are selected for the material of the set: plastic, wood, MDF. The material is applied 2 times. The second coating layer is applied to the dried first one.
How to understand what shade you will get
Choosing the right tone can be difficult. In the TEX Colors for interior decoration catalogue, you can choose the appropriate shade. In order to find out how a specific color sample will fit into the interior, you can first purchase a sample of tinted paint in a small package (0.9 - 1 l) for a test color. After applying paint to the kitchen wall, you can make an objective conclusion about how well the result corresponds to initial expectations, and, if necessary, buy another sample. There is no need to be afraid of non-standard shades or unusual combinations. Paints with complex textures provide a lot of scope for realizing your fantasies.
Painting facades
Before painting the facades, you should dismantle them, remove the handles, fittings, and cover the decorative inserts and hinges with masking tape so that nothing gets in there during painting. After this, you need to lay newspapers or film on the work surface so as not to stain the floor or kitchen table with paint. Before painting, you should also wear protective equipment: gloves, goggles and a respirator. Even if the paint is non-toxic, dust cannot be avoided during the sanding process.
It is better to remove the doors before restoration
Grinding
Before painting the kitchen unit, you should remove the old coating. In this case, it is necessary to treat the surface with sandpaper, first coarse-grained, and then fine. A grinding machine will greatly facilitate manual labor. You can also use nail polish remover. To remove PVC film you will need a hair dryer. With its help, you need to heat the film from the front side and carefully remove it from the facade. Please note that during the work a rather pungent odor will be released, so it is advisable to choose a non-residential premises for this procedure. After sanding, you need to remove dust from the surface with a damp sponge or rag, and then degrease it with a special solvent.
A sanding machine will help you quickly prepare the surface for painting.
After sanding, be sure to clean everything from dust.
Primer
Primer for plastic or wood differs in composition, so before updating the kitchen facade, consult with a sales consultant in choosing the right product. The quality of the primer determines how well the painting will proceed. The substance must be applied in 2 thin layers. After each application, it is recommended to wait until it dries completely and then leave the product for a day.
Before applying the composition, arrange the parts so that it is convenient for you
Coloring
To properly paint kitchen facades with your own hands, you need to cover the surface with enamel in 2-3 layers using a brush with soft bristles or a roller, strictly adhering to one direction. In this case, a spray can will be very effective, as it is easy to distribute the paint evenly. When using multiple colors or shades, the borders can be protected from paint using tape. After painting, you must also wait until it dries completely. The estimated time is usually indicated on the can or spray paint can.
Grooves and recesses must be painted especially carefully
Finish coating
A substance called glisal is often applied to the surface of the product after painting to give it a glossy shine. The product must be diluted with water in the proportion specified in the instructions and applied to the facade. The glaze method will help create decorative patterns. Using polyethylene, a damp sponge and a hard-bristled brush, you need to move from one area to another, drawing chaotic lines and patterns. After work, you should leave the product to dry for a week. There is also an option to open the kitchen facades with regular varnish. It can be glossy or matte, but it is advisable to choose a transparent substance. Both glisal and varnish have a pungent odor, so it is necessary to ventilate the kitchen after work. When the product is dry, all that remains is to assemble it and attach the updated facades back to the set.
An ideal glossy finish can be achieved by applying several layers of varnish with intermediate polishing after each layer has dried.
What could be nicer than giving new life to an old but beloved product? Anyone can feel like a designer and restorer; all it takes is desire and creative inspiration. You can paint the kitchen set with your own hands by watching the instructional video, as well as photo instructions presented on the website.
How to choose
A lot depends on what kind of mixture you take - its quality determines the final result.
First of all, we urge you not to skimp on this point - an unknown manufacturer is unlikely to be able to guarantee you a good composition, ease of application and durability.
It is very difficult to choose from so many colors
In addition, there are often fakes, the use of which is simply dangerous to health.
Therefore, turn to trusted brands. The best acrylic paints are produced by brands such as FARBITEX PROFI, Alpina Renova, PARADE W4 - all of them have proven themselves to be of high quality and excellent range.
We recommend choosing silicate paints from companies such as BAUMIT SILIKAT COLOR REPRO, PUFAS FASSADEN-SILIKAT, TIKKURILA FINNGARD SILIKAATTIMAALI. Of course, they cannot be called the most affordable, but the result will definitely justify itself.
Trust trusted manufacturers
Among latex paints, brands such as VD PROFILUX PL-04A, Tikkurila Euro 7, VITEX SATIN ECO have proven themselves well.
It’s more difficult with the assortment of rubber paints - of these, only FARBEX received unequivocally positive reviews. Perhaps the reason is that the product is relatively new and not all manufacturers have learned to work with it.
Saving can lead to disastrous results
As for general recommendations, we will be categorical here - you should only purchase paints in large stores that value their reputation. In small shops or markets, there is a very high probability of purchasing a fake, which is unlikely to please you with its quality.
In addition, in such places you will often not be able to provide quality certificates, and the products may be stored incorrectly - at too high or low a temperature. This will also affect its characteristics.
Be sure to check the tightness of the packaging - if anything is in doubt, it is better to refuse the purchase.
And pay attention to the structure of the paint itself: the thickness may vary depending on the type and manufacturer, but the mass should be smooth, homogeneous, without foreign elements.
We hope our tips will help you choose the right paint and make a beautiful and reliable renovation in your kitchen!
Set of tools and materials
Tools and materials are selected before painting the kitchen facade with your own hands:
- aerosol CM;
- protective equipment for hands (gloves) and eyes (goggles);
- to protect interior items from accidental drops of paint - carpentry tape, film;
- detergent, liquid, cloth;
- for degreasing – white spirit, medical alcohol;
- fine-grain sandpaper;
- primer composition for wood;
- to eliminate defects - putty, plastic spatula;
- acrylic varnish in an aerosol can;
- to create patterns - stencils;
Conventional dyes are applied using hand painting tools:
- roller;
- brushes of different sizes;
- special container for KM.
DIY kitchen cabinet painting: step-by-step process
To begin, empty all furniture of food and utensils, dismantle hanging structures, disassemble modules: remove doors and glass, unscrew drawers, remove all fittings.
Attention ! If you have the opportunity to paint in a separate room or outside, it is better to take advantage of it. In addition to toxicity, aerosol enamel, even with careful handling, can accidentally paint another nearby surface.
Before painting, cabinets and doors must be thoroughly washed to remove grease and soot, otherwise the paint will not adhere to such a surface. If the cabinet fronts are covered with PVC film or veneer, which begins to peel off, heat the edges of the film with a hairdryer and remove the unnecessary layer.
Further actions:
- Using sandpaper or a sander, carefully clean the inside and outside surfaces of the cabinets, shelves and doors . We remove all minor defects and process the wood until it is perfectly even.
- If there is a layer of old paint, remove it using a hair dryer, solvent and a grinder.
- Remove dust from the surface. It is better to use a dry soft cloth or brush for this.
- Degrease the wooden surface with a solvent and let the substance dry.
- We treat the wood with a primer and leave it for a day until it dries completely.
- If there are chips, cracks and other defects on the surface, we fill them with wood putty . When the composition has dried, sand the treated areas with sandpaper.
- If you plan to use several colors, cover the areas that do not need painting with paper or masking tape.
- We apply paint. If you use an aerosol composition, be sure to cover all surfaces on which the color may come in contact. Spray the mixture evenly over the wood to avoid stains. When using regular alkyd paint, you need to paint slowly, moving the roller or brush in one direction.
After the paint has completely dried, the quality of the work done will be clearly visible. If gaps are visible, apply another 1-2 layers of paint.
The process of painting a cabinet with a brush can be seen in more detail in the video:
Safety
Minimal protection when painting walls.
When carrying out paint and varnish work with your own hands, you need to follow the simplest rules:
- Be sure to wear safety glasses and rubber gloves to prevent dye from getting on your skin and mucous membranes. Hair is hidden under a headdress.
- Use only serviceable, stable ladders and stands.
- The air in the room should flow freely at all times. But you should not allow drafts to form.
Painting the walls in the kitchen with your own hands is a complex but very interesting process. The final result directly depends on the efforts you put in and the patience you show.
Required Tools
Old kitchen furniture needs preparation before painting. It is not recommended to apply coloring compounds to a poorly treated surface, as this will reduce the life of the headset and make it unsightly. For preparation you will need the following tools and materials:
- fine sandpaper (to remove surface defects);
- solvent (to remove the old layer of paint);
- primer (to improve adhesion);
- putty (to repair cracks and chips);
- masking tape (it will protect surfaces that do not require painting);
- plastic corner to match the paintwork used;
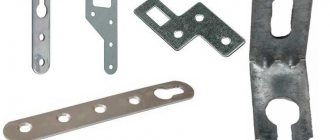
- spare fittings (hinges, handles, shelf supports, etc.).
For work, you may also need a hair dryer, a grinder (grinder with a grinding attachment), spatulas, rags, containers, scissors, and a screwdriver for removing old fittings.
Sandpaper Solvent Masking tape
Preparing the headset
This stage involves freeing the upper and lower modules from dishes, food and other kitchen utensils. The structures are dismantled, the facades are separated from the buildings, the parts are separated, and the fittings are removed. Painting is carried out in a well-ventilated area; it would be even better to do the work outdoors.
Cabinets and doors are thoroughly washed to remove typical kitchen dirt - grease, soot, traces of dried water drops. Achieving good adhesion is important because the paint layer applied to a clean surface will last longer. If the PVC film peels off, MDF facades require treatment. Using a hair dryer, the film can be heated and removed completely. The gluing technology involves carefully treating only the corners of the parts with glue, since the abundance of the composition on the front side will affect the evenness of the surface. Therefore, by heating the corners, you can achieve rapid peeling of the film. The surface will need to be sanded to level and remove any remaining adhesive. Solvent, rags, a sander or sandpaper may come in handy here.
Dust after processing must also be removed. A dry cloth or large brush is suitable for this. Another option is a vacuum cleaner set to air blowing mode. The wooden surface that will be painted needs to be degreased (a solvent will do). After treatment, the surface must dry so that any remaining product does not come into contact with the paint. Primer treatment is a mandatory stage of surface preparation. The applied composition must dry, and you need to refer to the manufacturer's instructions. Putty is used to seal cracks, deep scratches, and chips. If they are absent, the puttying step can be skipped. The treated surface must be smooth, so the dried layer of putty is sanded. The final touch is to seal the areas that do not require painting with tape.
The process of painting MDF furniture
You should not start painting without experience. It is better to practice painting individual neutral areas to develop general skills and understand the technique. It is most likely impossible to thoroughly understand how to paint MDF without practice.
The main tools for applying the coloring composition are a special spray gun or brushes. If the choice falls on brushes, then it is better to give preference to the softest ones possible, preferably with strong and flexible bristles.
It is important to think through the process of drying the painted product in advance - there should be enough space, and the room should be ventilated, with a temperature of about +20 degrees or more. Only in this case will the paint actually lie as expected.
The main stages of painting MDF facades:
Stage 1. Prepare the MDF surface.
At the first stage, it is necessary to thoroughly clean the panel to be painted. Traditionally, you will need to degrease, remove contaminants - dust, debris, and also dry the MDF board. Separately, it is necessary to mention sanding - this is a mandatory step, which is necessary for maximum adhesion of the paint to the surface.
By the way, for large-scale work, it is much more expedient not to manually clean every 10 cm of surface, but to use automatic devices - a grinding machine or similar units. It is important to take safety precautions when sanding. For example, in order to avoid hewn particles of the MDF surface from getting into the respiratory tract, it is worth working in a respirator. By the way, it will also be useful during the process of painting or varnishing - the smell in this case can be quite pungent.
Stage 2. Elimination of the consequences of grinding.
As already mentioned, during the cleaning process a lot of small particles appear that cannot be wiped off the MDF sheet with one movement of a rag. This is where vacuum cleaners, compressors, or at least thick brushes come to the rescue.
When all the debris has been removed, it is worth checking the surface for smoothness. If there are protruding particles, they will have to be removed separately.
Stage 3. Applying primer.
A primer is not always necessary, but it is definitely never superfluous. In other words, if we are not talking about oil paint, then you can do without a primer, although its presence will be beneficial in any case.
Ideally, two different compositions should be used for the primer, which are applied sequentially one after another. First you need to wait for the first layer to dry before applying the second. The main condition here is to avoid excessive accumulations of primer in certain places. Such “puddles” will eventually form unevenness and interfere with accurate, high-quality and uniform painting.
Preliminary calculation of the primer is made according to the principle of 100 g of composition per square meter of MDF surface.
Using brushes to apply primer is not the best solution, because the fluff will leave marks anyway, and the point of primer is to make the surface smooth.
In terms of application, attention should first be paid to the sides and ends of the product, and only then move on to the main area.
Stage 4. Cleaning the primer.
Here you will no longer need sandpaper, but softer materials. For example, a thick sponge or washcloth is ideal. There are special construction sponges designed just for such purposes.
The most important thing here is to ensure that the surface becomes as uniform as possible, without receiving mechanical damage in the form of scratches, even the smallest ones.
Stage 5. Re-dust removal.
We repeat stage 2 - use a vacuum cleaner or hairdryer to remove small particles formed when cleaning the soil.
Stage 6: Re-priming.
This stage is additional and is not always used. The main task of re-priming is to achieve the most uniform, dense surface and at the same time a more dense, rich color when painting MDF boards. In addition, due to the thickening of the surface, the strength of the product increases.
Stage 7. Preparation of the coloring composition.
What exactly will be done at this stage directly depends on the characteristics of the chosen paint. We recommend that you always carefully study the packaging, consult with sellers and visit the websites of manufacturers of certain formulations.
Stage 8. Direct staining.
If you use a brush, then it is better to take a composition that is thicker than what would be suitable for a sprayer. At the same time, the sprayer certainly gives a more uniform, predictable result when painting.
The ideal option is two layers of paint applied in different directions.
If we talk about calculating the consumption of the coloring composition, then on average about 80-150 g are allocated per square meter.
Stage 9. Varnishing.
A completely optional step in some cases and inevitable in other cases. Painting of furniture facades must be completed with varnishing. Only in this case can the durability and attractive appearance of the product be achieved.