Necessary materials and tools for repairing a stool
For different stages of work you may need:
- a grinder or special drill attachments for grinding and polishing;
- sandpaper;
- power saw or file;
- iron;
- shoe knife;
- vice;
- brushes, varnish, paint;
- self-adhesive furniture edge;
- epoxy resin;
- screwdriver;
- pliers;
- nuts;
- open-end wrench;
- bolts;
How to repair a stool seat
If the seat has lost its presentable appearance, it can be restored or, in extreme cases, replaced.
For restoration, many materials are available in the house - a piece of thick fabric, foam rubber, etc.
How can you return the “marketable” look to the seat of an old stool:
- sand the top layer and cover it with fresh paint or varnish;
- make soft upholstery;
- cover with vinyl film.
Restoring a stool that can serve for many years is not at all difficult.
The first step will be removing the old finish. You can use solvents or a grinder (a drill with a grinding wheel will do). When the top layer is removed, the surface must be cleaned with a polishing wheel or fine-grained sandpaper.
The updated chair, covered with a beautiful varnish, looks no less neat than when purchased.
Now all that remains is to choose the finishing method. The simplest thing is to cover it with film. Its service life is 3-4 years. You need to glue it evenly, avoiding the appearance of air bubbles. One edge of the film is pressed to the surface, the other is stretched, straightening it with a rubber spatula.
For painting you will need special brushes.
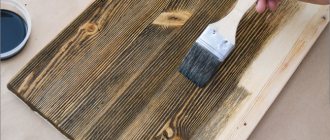
If you plan to paint or varnish the seat of a wooden stool, the surface can be treated with putty. After it dries, prime it (or treat it with varnish stain) and decorate it in the way you like.
Replacing holey or worn upholstery is a matter of one hour.
To replace a soft seat, you will need to remove the upholstery and filling (replace it if necessary), and clean the surface. Then a new filler is placed on the glue, and the sheathing is secured with a furniture stapler.
Advice. To replace the seat, you need to cut out a new part with a saw or a fine-toothed bit.
Taping furniture edges to the ends of the seat
This procedure requires self-adhesive furniture edges. Its reverse side is covered with hot-melt adhesive, which after drying holds perfectly and is not afraid of water. You will need a minimum of tools: an iron and scissors.
Make sure you have all the necessary tools available.
How to repair a stool with your own hands:
- cut off the edge - the size of the tape should slightly exceed the length of the perimeter of the stool;
- fix the seat;
- heat the iron;
- apply the tape to the end part so that the edge of the furniture is in the center (the edges of the tape protrude beyond the edge at the same distance);
- apply a hot iron to the edge, move it slowly with slight pressure;
- check the tightness of the edge pressure;
- iron the lagging areas again, adjust the position of the edge;
- trim the tape at the joint and iron it.
Sand the furniture with a special tool.
If the edge moves during operation, it’s not a big deal. When reheated with an iron, the glue will melt, and all the nuances can be corrected.
Getting rid of excess furniture edges
To remove protruding edges, you need to use a shoe knife. The tool is led from the corners to the center, the return movements are performed without cutting.
If the chair is antique, then it must be restored very carefully.
Now you need to round off the sharp corner of the edge with fine-grained sandpaper.
Repair instructions for fixing legs
The main problem is loss of stability. This can happen due to loose legs or cracks in them. Both problems can be easily fixed at home.
You can make a stool from a log of wood.
How to secure legs with a nut or bolt
The first reason for loose legs is a damaged thread on a stud or fastening strip. This is easy to determine by sight. If the thread of the bar is damaged, you need to unscrew the pin 1 cm, insert it into the bar and secure it with a new nut.
Advice. For work, pliers are used. To avoid damaging the thread, place a piece of leather between the pin and the tool. If it is impossible to unscrew it with pliers, then you need to step back a few mm from the end part of the stud, apply edges under the open-end wrench, then unscrew the stud.
Another way:
- unscrew the pin;
- insert the damaged end into the leg;
- twist.
The chair is made with carved legs or a back, and the seat is reinforced so that it can be used for its intended purpose for a long time.
You can replace the old stud with an 80 mm bolt. To do this you will need an open-end wrench. If you plan to replace the seat, then it is worth replacing the fastenings with new 12 mm screws. Before installation, it is advisable to drill holes at the mounting points. Their length must match the length of the screw. Use a drill with a diameter half the diameter of the fasteners.
Features of repairing a cracked leg
The best material for repairing cracks is epoxy resin. It remains viscous for a long time, so you don’t have to rush.
A cracked leg can be replaced.
Resin is poured into the threaded hole or cracked area. Since the material is viscous, you may need to spread it with a screwdriver or a wooden stick.
You can replace the stool's upholstery.
If a threaded hole is being repaired, the stud is also coated with resin. The product dries within 24 hours.
How to glue a chair leg
1.
Carefully remove the leg from the nest, being careful not to split the wood.
2.
Remove old glue and apply fresh glue.
3.
Place a weight on the seat. Remove any excess glue that appears.
Old chairs, made of solid wood at the end of the last - beginning of this century, usually have simple connections between the front legs and the seat. They are simply tenoned into the frame under the seat. A chair of this design always becomes loose easily. Even if such a defect has already been eliminated once, a new repair will be required in a few years. After all, the chair is subject to load not only from above: it is moved, tilted, rearranged, which is why simple adhesive seams are destroyed. Here the leg literally becomes a lever, which sooner or later will definitely separate the adhesive seam. To make the whole structure stable again, remove the wobbly leg from the frame and then re-glue it.
At the upper end of the leg, completely remove the old glue with a knife or chisel, being careful not to scratch the wood.
Damaged trunnion
If the trunion (the upper, sometimes tapered end of the leg that is inserted into the seat socket) is slightly damaged, make a “bandage” from a strip of paper that should not be wider than the length of the trunion. For greater stability, coat individual turns of paper with glue. Finally, glue the leg into the cleaned socket on the underside of the seat.
Useful tips and tricks
The finished stool can be painted with waterproof paint. Acrylic compounds are suitable. It is best to paint with a roller. The legs are covered without unscrewing.
An interesting solution would be to decorate the seat using decoupage technique. You will need water, PVA glue, napkins or newspaper clippings. The glue is diluted in a 1:1 ratio with water, and the cut-out images are immersed in this mixture.
Decorate the chair with pillows.
Using a brush, apply to the cleaned surface and smooth to expel air. After drying, the stool seat needs to be covered with 3-4 layers of varnish.
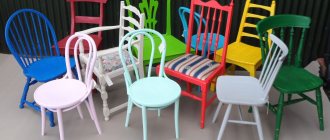
Get creative with chair painting.
Painting stool legs
If you need to paint the legs of a stool, as in my case, then it is best to do this work without unscrewing the legs from the fastenings. In this case, there will be no need to hold the legs while painting and hang them to dry. To protect the seat of the stool from paint, you can cover it with newspaper, having previously cut holes in it for the legs. If the newspaper is torn in places, these areas can be closed by sealing them with masking tape or a piece of newspaper using glue.
It is best to paint the legs using a roller with waterproof paint. Then the surface of the legs is smooth and without smudges. If you don't have a roller, you can use a brush. When the paint is completely dry, the stool is ready for use.
After restoration with my own hands, the stool changed beyond recognition and became a decoration of the kitchen room.

