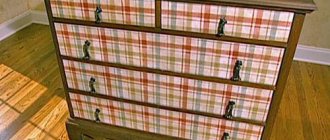
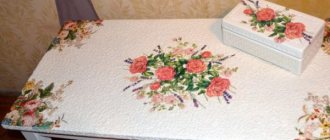
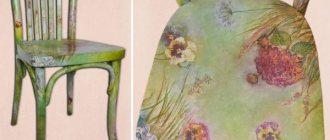
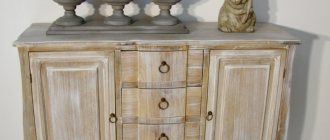
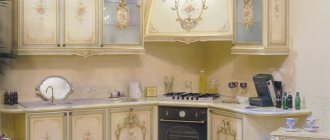
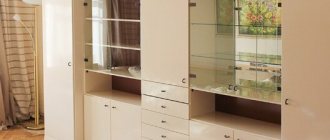
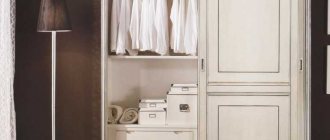
Several centuries ago, a special technique for decorating furniture appeared in Medieval Germany. In those days, not everyone could afford to have decorative items or hand-painted items. Often they simply decorated boxes, chests of drawers or cabinets with paper drawings, covering them with a layer of special varnish. This is how decoupage appeared, which is still popular today. This is a surface decoration technique that imitates artistic painting.
This is a surface decoration technique that imitates artistic painting.
Ease of execution allows even people without artistic skills to turn any interior item into a work of art. For decoration, lace, paper napkins, and fabrics are used, which can be used to decorate any surface, be it wood, glass or plastic. Decoupage of furniture in the Provence style is especially popular. There are other trends: shabby chic, Victorian and ethnic, simple.
Ease of execution allows even people without artistic skills to turn any interior item into a work of art.
To decorate various objects this technique is used:
- special napkins;
- postcards;
- wallpaper;
- printed illustrations;
- lace;
- various fabrics;
- old newspapers.
There are other trends: shabby chic, Victorian and ethnic, simple.
Modern craftsmen combine various techniques and materials in their works to decorate objects. They combine different types at the same time.
Modern craftsmen combine various techniques and materials in their works to decorate objects.
Types of decoupage
- Volume.
With this method, the elements are specially glued to each other or multi-layering is achieved using a modeling mass. Used to decorate children's rooms, create three-dimensional pictures, and restore furniture.
- Straight.
An applique or design is glued onto the pre-painted surface of the part, then covered with a fixing layer of varnish.
- Smoky.
This type of decoupage imitates artistic painting. This effect is achieved thanks to special techniques for using paint. A slight haze is drawn along the clear boundaries of the picture, and the image merges with the background.
- Decopatch.
This technique combines decoupage and patchwork. It differs from the others in that it is not a whole picture or element that is pasted on, but small pieces of one image. Used for decorating jewelry and accessories, figurines.
- Back.
Used to decorate glass objects. To do this, the image is glued face down to the surface and coated with varnish on top.
They combine different types at the same time.
To give the product a unique look, decoupage masters often use special techniques:
- abrasions are created;
- craquelure varnish is applied, which after drying becomes covered with cracks;
- to give a different color, the surface of the object is tinted with spots of a different paint;
- create gold or silver leaf;
- imitate darkening by drawing shadows.
An applique or design is glued onto the pre-painted surface of the part, then covered with a fixing layer of varnish.
Style Features
According to professional designers, one cannot help but like Provence. This direction is characterized as light and romantic. The palette is dominated by light colors, bright accents are present, but in very measured doses.
Every needlewoman who likes simple but sophisticated echoes of country can make original decor in the Provence style with her own hands.
Features of Provence style:
- Natural materials in room decoration;
- Plaster is most often chosen for wall decoration;
- All interior items have an aged appearance (naturally or artificially);
- Wooden beams are considered a mandatory component of ceiling finishing;
- Lots of light in the room;
- The interior items contain forged elements;
- An abundance of flowers: prints in finishing materials and textiles, as well as fresh flowers.
Provence is an environmentally friendly style, which is why natural materials predominate in this design. And don’t forget, this applies not only to finishing materials, but also to textiles. Provence does not tolerate synthetics in any form; taffeta and organza are alien to this style. But natural linen and cotton with unobtrusive floral motifs have become an integral part of it.
The Provencal current originates in the southeastern French province of the same name in the 15th-17th centuries.
Stones or precious woods are used as flooring. In modern Provence, you can most often find an alternative option - tiles. In addition, laminate with a wood pattern is in demand.
The abundance of sunlight contributed to the rapid fading of bright colors, which is why soft and discreet pastel shades are so popular in the Provence style.
When choosing finishing materials for walls, forget about wallpaper. Stone, wood, and, of course, plaster - this is the set necessary for Provence. An important point: the plaster is applied quite roughly, and this is also a distinctive feature of the style.
Floral patterns, among which the rose occupied a special place, gradually became a decoration not only for ceramic products, but also for other household items.
Interior doors must be white. Doors with imitation soot look very impressive. In general, patination is considered a characteristic method of finishing in this interior.
The rustic style places special demands on window openings. Ideally, they should occupy the entire wall, from floor to ceiling. Wood imitation is required. Weightless flowing curtains in light shades and with a delicate floral print are chosen as a frame for the windows.
Provincial simplicity and the absence of pompous gloss have made the French variety of country music universally in demand not only in country houses, but also in city apartments in modern metropolises.
Another important feature of French country style furnishings is the curved shapes. Tables, cabinets, chests of drawers and chairs must have smooth curves. In addition, absolutely everything is decorated in Provence: from walls and furniture to flower pots. Delicate pastels and discreet floral prints reign throughout.
The vintage appearance of the set can be emphasized with your own hands by additionally treating the surfaces.
And, of course, it is impossible to imagine Provence without wooden furniture with an aging effect. Believe me, decorating furniture in the decoupage style will make any interior cozy and enjoyable to spend time in.
Pastel colors and the dominance of light shades visually make the room even more spacious.
Step-by-step master class on decoupage
Having taken a short excursion into the past, we understood the essence of this technique and are now ready for creative experiments.
It must be said that decoupage is a rather painstaking task that requires perseverance and the ability to mentally form an image of what is being created and then brought to life. But at the same time it is very exciting and allows you to have a pleasant and useful time.
Required material
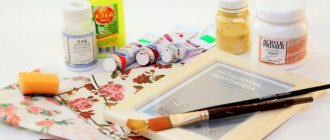
Everything for decoupage
To carry out decoupage on kitchen furniture we will need:
- Pore filler (if there are cracks on the furniture);
- Fine sandpaper (for cleaning the surface);
- Glue for decoupage or PVA glue;
- Not too hard flat brush (for applying glue);
- A jar of acrylic varnish (matte or glossy, for wood or plastic work);
- Scissors
- Cuttings from newspapers or magazines, beautiful napkins for decoupage, pictures or photographs printed on a printer - everything here depends only on your taste and imagination.
Napkins for decoupage
Step 1: prepare the surface
Whether it is decoupage of a kitchen set or decoupage of kitchen cabinets, first of all it is necessary to properly prepare the surface.
This is done very simply:
- If there are small cracks, we get rid of them using a foam filler.
Important! For more serious defects, putty should be used.
- After the previous stage, you need to wait for the filler to dry. Then we protect the surface of the furniture with fine sandpaper.
- It is also advisable to apply a primer, giving it time to dry. This is done to level the surface so that the design fits perfectly.
Note! If you are going to decoupage an old kitchen set, or rather its glass doors, then you need to first degrease the glass using detergent and wait until it dries.
Step 2: preparing the drawing
Now is the time to start preparing the image. Everything here is individual: we cut out the top layer of napkins for decoupage, or a text/picture from a magazine/newspaper/wallpaper, or an image pre-printed on a printer.
Advice! If the image you choose for decoupage is quite large, use a large-format printer - this will avoid joints, which would otherwise look very ugly.
Step 3: Apply Glue
First, apply glue to the drawing itself (the paper or napkin should be well saturated with glue). Then we carefully apply glue to the surface itself, based on the size of the cut out design. Apply the design to the area to be decorated and, using the same brush or roller, smooth out small folds and air bubbles (if any appear).
Important! If decoupage on a kitchen set or other kitchen furniture involves the use of napkins, then PVA glue will work perfectly. But if you use thicker paper, you will need to stock up on special glue for this decoration technique.
Step 4: varnish
After the previous step, you need to let the surface dry. Then we cover the furniture with acrylic varnish in several layers (usually 3-4 layers). Layers of varnish are applied at intervals of one hour. This work must be done in order to protect the jewelry from all kinds of damage.
This is where the decoupage work ends, and the result is an updated and unique design of kitchen furniture!
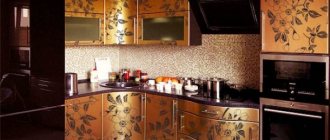
Kitchen set after decoupage
Beautiful decoupage of dining table and stools
Types of technology
Decoupage can be done in different ways and using different materials: all kinds of paints, specific varnishes, as well as napkins, textiles, wallpaper and even eggshells.
Decoupage is a surface decoration technique that imitates artistic painting.
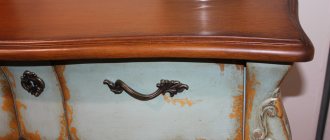
The most popular method of decorating furniture is using crackle varnish. It is applied to the surface in a thick layer, and sometimes in several layers. And as it dries, cracks appear, reminiscent of the surface of antique interior items. Thanks to this feature, tables, cabinets and chests of drawers fit perfectly into the Provence style.
Ease of execution allows even people without artistic skills to turn any interior item into a work of art.
There are other ways to artificially age furniture:
- Mechanical impact. Using various tools, cuts, cracks and scratches are made on the surface. An important nuance: before starting work, you should make a diagram of the expected “damage”, otherwise it will be clear that the furniture is new, but damaged, and this is a completely unsuitable option for the style.
- Chemical reactions. Chemicals are applied to the surface that can “corrode” wooden furniture. Vinegar and ammonia are most often used; with their help, you can seriously change the appearance of interior items.
- Thermal impact. High temperature and sometimes open fire are used; in some cases, furniture is exposed to a special blowtorch. If you choose this method, be very careful not to harm your health or damage the furniture.
- Numerous liquid products. They are applied with brushes, rollers, sponges or spray, depending on what effect you want to achieve as a result.
For decoration, lace, paper napkins, and fabrics are used, which can be used to decorate any surface.
It is thanks to the decoupage technique that you have the opportunity to radically change the appearance of furniture, make it unique in its kind, and complement a typical piece of furniture with elegant designs and ornaments.
Modern craftsmen combine various techniques and materials in their works to decorate objects.
Before you start work, you should think in advance about what exactly and how you will use for decoration. And also prepare the surfaces in the proper way.
Necessary tools for decoupage boxes
Necessary materials for creating a box using decoupage technique
The box decoupage technique involves the use of the following items:
- preparing a box (you can use a blank purchased at a specialized store);
- napkins for decoupage technique;
- sandpaper;
- PVA glue;
- decoupage glue;
- acrylic paints;
- sponge;
- wax candle;
- tassels;
- screwdriver;
- adhesive tape or tape;
- various decorative elements;
- acrylic primer.
Example of a decoupage card
Process description
- We prepare the surface for work: sand and prime.
- We paint it.
- Glue the selected images.
- We fix the “applications” with varnish.
- If there is a need and desire, we use additional methods of decoration: patination of relief elements, use of two-step craquelure, spraying, etc.
- Final multi-layer varnish coating.
Before you start decorating, you need to properly prepare the selected items.
Characteristic features of furniture finishing in Provence style:
- The predominance of vegetable and floral motifs: olives, wine, and, of course, lavender.
- Bleached interior items - the image is applied exclusively to a light surface.
- Application of artificial aging technology.
- Scuffs and scrapes on surfaces.
- The predominant calm palette: olive, white, delicate shades of blue, wheat, beige, lavender and pink.
- Author's painting of furniture items.
To give a product a unique look, decoupage masters often use special techniques.
The decoration of interior items and accessories deserves special attention. Elements woven from wicker, all kinds of forged elements, as well as beautiful openwork pillowcases, woven lace and wooden figurines fit perfectly into the overall design concept.
Tools and materials
Even with certain artistic skills, it is difficult to realize decoupage ideas without the necessary tools and devices. Depending on the technology, the set of tools may vary.
Before you start decorating, you need to properly prepare the selected items.
So, what is needed to decoupage furniture in the Provence style?
- Acrylic paint. Usually white is chosen, but if desired, you can purchase any other light shade.
- High quality brush. An important condition: during the work, the lint should not fall out, otherwise you can ruin everything. When choosing a size, give preference to the average: the brush should not be too large and not too small.
- Clear varnish. This consumable will be used at the final stage; it covers the finished work.
- Bronze or gold plated paint. Choose a shade based on personal preference.
- Matte glaze. Choose one that is made from polyurethane.
- PVA glue. To work, it must be diluted with water.
- Various stencils. This is not necessary, but it is better to have them at hand, then you can easily make the missing image yourself to make the picture complete.
- Sandpaper of different grits.
Prepare the necessary materials: acrylic paints, glue, decoupage varnish, brushes, napkins.
Preparing the structure
First, you should remove the glass from the furniture, if any. You also need to remove drawers, shelves, and remove all handles. If desired, you can unscrew the hinges and remove the doors to make them easier to handle. After this you need to do the following:
- carefully treat all surfaces with coarse sandpaper, especially for polishing - there should be no gloss left;
- walk with a damp cloth, let dry and repeat the procedure with fine-grain sandpaper;
- degrease with white spirit or acetone;
- coat with ready-made primer or water-soluble glue;
- After a few hours (from 2 to 5), when the surfaces are dry, cover them with acrylic paint.
How to choose the right furniture paint for different surfaces
If one layer is not enough, you can apply a second one. In this case, it is recommended to create the look of careless painting with stripes, as if it was done with a rough, hard brush at the beginning of the last century in Provence. In some places you can leave islands that are not completely painted. Painting can be done using a foam sponge or roller.
The priming brush should be placed in a jar of water to prevent it from drying out. If the paint is thick, it can be slightly diluted with water (up to 5% of the total volume).
Clean the surface of the product with sandpaper
Degrease with white spirit or acetone
Treat with primer
Cover with acrylic paint
Step-by-step instruction
Let's consider the procedure for decoupaging a cabinet in Provence style.
First of all, think about the pattern that will be applied to the surface. In accordance with the invented design, a stencil is made from low-density paper. After this, acrylic paint is applied to the prepared surface (cleaned of dirt and dust, and thoroughly cleaned). It should be applied in two layers.
The surface is covered with a primer; after it has dried, you can proceed to painting the main background.
After this, the prepared images are applied to the places previously determined for them, and a layer of glue is applied over the images. It is better to do this procedure using a small brush - it will be more accurate, and you will definitely not miss the attached pictures. The glue must dry completely, so the surface is left for at least one hour.
The pattern is straightened with a brush, being careful not to damage it, then it is glued with another layer of glue, applying it on top of the pattern.
Then a clear varnish is applied and left for several hours until completely dry. After the clear varnish has dried, another layer of varnish is applied, but this time it is water-based. With the help of a regular hairdryer and water-based varnish, it is possible to create an amazingly beautiful effect of blurred paint.
After the process, it is recommended to leave the furniture for at least three hours.
A layer of bronze or gold paint is applied along the contour of the resulting pattern. This seemingly unnoticeable little step will give your closet an antique charm and make it look luxurious.
A prerequisite: after each of the steps described above, it is important to let the cabinet (table or chest of drawers) dry thoroughly, then there will be no problems with the subsequent stages of work.
The above method of creating decoupage is considered the easiest to implement. Even a person who does not have the slightest artistic skills can create a masterpiece in this way. Fortunately, today you can purchase all the necessary materials to create unique images on pieces of furniture.
Decoupage furniture in the Provence style allows you to create a corner of southern France in your room.
Another interesting technique for applying images is called spattering. Thanks to it, you get interior elements that are ideal for the Provence style. The process is also considered easy to perform. You will need dark paint and a stiff bristled brush. After the image is applied to the surface of the cabinet, table or chest of drawers and covered with a top layer of varnish, a brush, previously dipped in paint, is brought to it and a gloved hand is passed over the bristles.
Important: the direction of movement is towards you. Thus, a unique dot pattern remains on the surface.
After the varnish has dried, the furniture can be used for your pleasure.
Decoupage technology involves performing a series of actions on furniture, after which the interior items get an aged look. This process is completely simple, and even a beginner can cope with it. It is this finishing that allows you to end up with a unique, almost antique item that fits perfectly into the Provence style.
Necessary tools for decoupage boxes
Necessary materials for creating a box using decoupage technique
The box decoupage technique involves the use of the following items:
- preparing a box (you can use a blank purchased at a specialized store);
- napkins for decoupage technique;
- sandpaper;
- PVA glue;
- decoupage glue;
- acrylic paints;
- sponge;
- wax candle;
- tassels;
- screwdriver;
- adhesive tape or tape;
- various decorative elements;
- acrylic primer.
Example of a decoupage card
