By the way, some of the material will not be repeated, since you can find it in expanded form on other pages of our website (follow the links in the text). This will allow you to tell more useful things in the step-by-step guide.
Design, manufacturing and equipment
To begin with, after all, a little theory and even linguistics.
It’s not a fact that you will read all the materials about shelves, so let’s repeat: NOTE! It’s most correct to say: in the singular “shelves”, not “shelf” and not “canopy” (we have a shelf in our room, but a canopy above the bed), in the plural - “shelves” (shelves in the closet, shelves in the steam room , yes in the army).
The structure of a shelf can be described as a wooden platform, a lounger or even a conditional perch, consisting of one or several tiers, which, in turn, can consist of separate parts , or can form a monolithic stationary structure.
Moreover, parts can be either individual tiers or their components. In the latter case, we are talking about a solid frame and removable flooring .
The simplest shelf is a high lounger with a step for ease of climbing onto it. An excellent solution for lovers of Russian baths, who are frequented by professional steamers.
But the prevalence of the sauna in Russia has led to the fact that the shelves in the bathhouse and steam room began to be multi-tiered, under the ceiling, and the vertical parts of the “steps” were sewn up tightly. All this is correct and appropriate, but only for a Finnish bath.
This is not the place or time to discuss the winning (or losing) of the bathhouse option, in which the owner is trying to combine two modes ; for this, you can read something from the section on stoves, where a lot was said about the modes and their compatibility. But, as a fact, many make shelves in the bathhouse with their own hands for both types.
IMPORTANT! In a Russian bath, the preferred position is lying down, but you can also sit. In the sauna, it is preferable to sit higher and sweat profusely, but lying down is also not prohibited.
Of course, the difference between a lounger and a seat is only in width. You can’t lie on a narrow shelf; on a shelf that’s too wide, it’s uncomfortable to lean on the backrest; it’s too far away.
Arrangement of shelves in a bathhouse: this is more comfortable to lie on
And sit on these
As for how to build shelves in a bathhouse with your own hands, more on this a little later, but now we can say that the work is not too difficult, especially if you don’t bother , put everything on screws with a screwdriver and don’t worry too much about the future, in which the metal joints in the wood will definitely become loose.
BY THE WAY! Here is an important point of self-determination: should it be attached to the wall or should it be a separate structure?
The price of the issue is rot, which forms in a poorly drying joint with the wall.
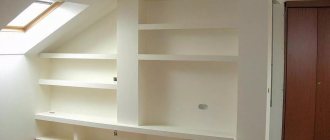
Dimensions
Despite the fact that we have already published a detailed discussion of the issue of how to make shelves in a bathhouse correctly, choosing the optimal size, we will briefly go over the most significant points .
So, the dimensions of the shelf in width and height are determined solely by the type of use.
If it is intended exclusively for sitting , then a width of 45 to 60 cm, with a height of 35 to 50 cm, will be enough for you.
If you plan to steam while lying down on the shelf, the minimum width will be 60 cm, but there is simply no maximum - the sunbed can be a meter or two in width. The best thing is to measure the desired width of the material at hand and lie on these boards or something similar, trying it on for convenience.
An ordinary Russian shelf is 70-90 cm wide. In height - 80-110 cm. Or you can measure by the knuckle of the thumb or the first phalanx of the middle finger (from them to the floor or the plane of the lower tier on which the sailor will stand).
Scheme
It's time to get specific. So, what exactly does any shelf consist of? There are two main structural elements in it: the frame and the flooring.
Above it was said about the fundamental difference between the width of the shelves and the number of tiers for the Russian and Finnish steam baths, so we will give diagrams of the regiments in the bathhouse for each case. Since the difference is only in the frame, the flooring separately - it is the same for both types .
An important point about any frame: among experienced bathhouse attendants there is still debate about whether the frame can be attached directly to the wall or must it be free-standing?
The main argument of those who are in favor of a free-standing frame is that when mounted on a wall, the joint soon begins to rot.
However, we know of a compromise option in which the mounting on the wall is done with a gap - you install bushings, for example, ceramic ones, which are used for the same separation of thermal insulation slabs from the wall.
Frame in a Finnish sauna
The frame of the regiments in the Finnish bathhouse looks something like this:
As you can see, in this case it is proposed to start from the specific height of the ceiling in the steam room, because the countdown is carried out precisely from it. At the same time, it is precisely this height that suggests a very common mixed form - this is when both steam is generated and the temperature is high, as in a dry-air bath.
CAREFULLY! The combination of high temperature and humidity is difficult for the human cardiovascular system!
In general, the layout of shelves in a bathhouse can be easily distinguished precisely by their height and width . The height of the step, if it is intended for sitting, will be about 45 cm. And for the approach of the steamer, 70-90 cm are needed. Therefore, either one of the steps will be narrow/folding/portable, or this is a sauna option, not intended for one person was lying, and the other was floating.
Another characteristic feature of a sauna shelf in a bathhouse is that the frame is covered in height with clapboard. This is done because the Finns do not need to leave space for the soaring person to freely position his legs - his feet with their toes go slightly inside, under the shelves, while achieving the very correct vertical position of the soaring body.
BY THE WAY! It is a common belief that if you cover the height of the shelves with clapboard, this will significantly reduce the volume of the steam room that the stove heats (and accordingly, increase its power). There is truth in this, but only in the case of hermetically sealing the space under the shelves. And this is bad - how to ventilate? And if you ventilate, then there will be no “volume reduction”.
Scheme in a Russian bath
Frame
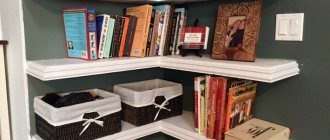
Here there is one interesting point: two-tier Russian shelves can look like three-tier ones ! This is due to the deceptive footstool that is placed near the high shelf. This bench can be mobile or stationary. But it’s still better to have a mobile one.
An ordinary two-tier shelf consists of an upper shelf, intended for hovering, and a lower one, on which the hovering person stands with his feet. At other times, the lower one can be used as a seat.
Below we present several more options for shelves in the bathhouse, showing their possible location (having one stationary shelf and two sliding ones, or all three sliding ones, we get the following options):
Flooring
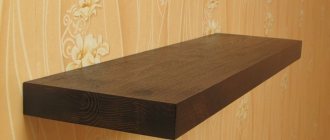
Let's talk briefly about flooring. Despite the fact that the most common option is a processed strip laid along or across the long side of the seat with a smoothed edge and a gap of 1 to 5 cm between the elements, you can find options without gaps at all or made from boards with irregular geometry (unedged sanded board or croaker).
A log shelf looks exotic, but how long will it take to dry?
ADVICE! Whatever guides you when choosing a flooring design, take into account the fact that you need to dry it after each procedure. And the gaps are made not for the sake of beauty, but for the sake of ventilation and speeding up the drying process.
Railing
A useful, although not obligatory, element for regiments. In general, the railings in the steam room are used in two cases: as a fence for the stove - so that visitors do not accidentally approach it at a dangerous distance and touch it. This applies to steam rooms with metal stoves without brick or stone lining.
The second use of railings is for rigging shelves. They create additional convenience for steamers when ascending and descending, and also make staying on the top shelf safer. And also, if they are placed parallel to the shelf, then while sitting on the shelf you can put your feet on them, this adds convenience and your feet receive more warm air and steam.
Such railings look something like this:
What to make better from: choosing the material
What is better to make? It is clear that it is made from wood, to which, in fact, there is no alternative, but which species are most suitable? We have already written about this, so now it will be very brief.
Coniferous species should absolutely not be used in a sauna where temperatures are high, in a Russian bath - if desired, and in mixed modes it is also not worth using at all.
Cheap aspen and linden are worthy competitors of expensive abasha , because in addition to low thermal conductivity, it is not highly resistant to water, mushrooms, etc.
You can experiment with other hardwoods, taking into account their thermal conductivity (the higher the density, the higher the thermal conductivity - the easiest way to decide by eye), rot resistance and other characteristics. For example, oak is dense, but does not deteriorate in water. Like larch, which, by the way, does not emit resin.
Tree species used for making stands, bath chairs, backrests
Wood characteristics table
Wood plays an important role in the interior and design of the bathhouse. Different types of wood behave completely differently at high temperatures and high humidity. Therefore, you should carefully choose the material for making shelves.
Abash shelf texture
| Wood | Photo | Description |
| Pine and spruce | Pine and spruce can be used to construct bath loungers, provided that the pre-dried boards are of excellent quality. In Finland itself, saunas are made from these types of trees; resin secretions do not appear at high temperatures if the board is well dried and treated. Pine and spruce give a special coniferous aroma, which has a beneficial effect on the general condition of a person. The rather high price of other types of wood forces many steam lovers to give preference to wall coverings made from inexpensive pine boards - clapboards, bath shelves, and backrests. IMPORTANT: the only condition is the absence of knots or cracks on the surface of the boards, good quality of drying of the material, carefully processed surface of the planks. | |
| Aspen | Aspen - used for making bath shelves, as it does not release resin when heated. It has special fame among the people as a tree that successfully resists evil spirits and bad energy. The high cost of the material does not allow the production and widespread use of aspen bath seats, beds, and backrests. | |
| Linden | Linden is an excellent material for making bath loungers. The structure of the wood is dense, has sufficient hardness, and low thermal conductivity. Linden lends itself well to technical processing; the design details of shelves and backs made from it are very durable. | |
| Abash (Abachi) | Abash is the most expensive and beautiful material for making bath loungers. African oak is not afraid of high sauna temperatures. Loungers made from it do not burn the human body, since the material has low thermal conductivity and heats up very slowly. A successful advertising campaign made abash the most purchased wood for making bath shelves and saunas in the homes of wealthy nouveau riche. |
Combination of several types of wood at the same time
Prices for edged boards
How to make shelves in a steam room yourself and correctly
Well, we’ve come to the instructions. We bring to your attention three options for how to make shelves in a bathhouse in a steam room with your own hands - corner, folding and removable.
Angular: Step by Step Guide
So, make a corner shelf for your bathhouse with your own hands. This means that you will stretch it along two adjacent walls. Exactly what length is up to you to decide based on the dimensions of the steam room. As you understand, we cannot adapt to your specifics, so we will give one example of how to make shelves in a bathhouse , and you will act by analogy.
The first step is to build a drawing. To do this, we measure the room and determine the size and number of tiers of the future shelf.
In our case, the shelves are corner, three-tiered, with dimensions of 280 by 220 cm . It has three tiers on the short side and two on the longer side. The first two tiers are the L-shaped structure itself, a solid one that has to be made. Fans of Russian baths don’t have to worry about the third tier - it’s only needed in the sauna.
The figure shows a plan with a top view and with drawings of supports on one and the other side of the L-shaped structure. Your task is to make a drawing yourself to fit the dimensions of your steam room. Focus on the following:
ATTENTION! Mortise-tenon joints provide rigidity. It is enough to make a cut in the beam 20 mm deep to make the connection much stronger. Afterwards the tenon and groove are additionally attached to self-tapping screws.
The depth of the grooves is 20 mm throughout. The board used was 75 by 50 mm, processed, that is, its linear dimensions could have decreased during the leveling process.
Please note that the structure is made autonomous from the wall. When installing in a steam room, you do not need to attach the shelf in the bathhouse to the wall; they will stand autonomously, only point-wise fastened to the wall with corners with a gap of 1 cm .
The first stage after drawing the drawing is calculating the amount of material. Assume that there will be 5 large supports, 4 small ones. Or, proceed from the ratio of one support per half meter.
The next stage is preparing the lumber. You can even use cheap spruce or pine for the frame is better for flooring .
IMPORTANT! It is better to cut lumber in the following way: first the longest parts, then the shorter ones. And, on the contrary, take first from the shortest available pieces. You can get confused and find out in the store how long the timber is sold in order to calculate with the least amount of waste.
When the parts are ready, grooves are made in them. To do this, you should make a pattern and go over it with a milling cutter in the right places. Ideally, the inserted part should fit fairly easily, but should fit tightly so that the connection can be lifted by hand without it falling apart.
ADVICE! Distinguish between parts where defects are acceptable and where they are unacceptable. It is clear that the first refers to parts invisible from the outside, and the second to seats, flooring, and cladding.
It is better to take galvanized ones that do not rust
The bars inserted into the groove are fastened from the outside with self-tapping screws - directly along the connection. The fastening of the remaining parts of the shelves in the bathhouse is done end-to-end and also with self-tapping screws. However, some may prefer corners.
The finished support should be sanded, after which it is covered everywhere with impregnation for saunas (you can read more about impregnations suitable for steam rooms here). It is advisable to do this: soak it, dry it, lightly sand it, soak it again.
Please note that for now we are just assembling the supports, each separately . We have not yet gotten to the point of assembling the shelves, because we will be doing this directly in the bathhouse. In the meantime, work can be carried out in a workshop outside.
The next stage is assembling the frame without flooring . You will need a plumb line and a level to ensure everything is level. In this case, the supports are assembled onto connecting crossbars, which will later become a support for the flooring.
The difficult point is the jibs, which are needed for the future flooring at the junction of two shelves at an angle of 90 degrees. Through this jib from below, you should later attach the boards, edged at 45 degrees, to the shelves in the bathhouse.
You can begin to sheathe the finished frame with boards, but first you should install it in the bathhouse and install the corners between the wall and the structure. Only then can you begin to equip the flooring .
The first step is to mount the canopies - these are boards that will be under the knee of the person sitting on the shelf. The canopy is made from an ordinary linden board for a shelf, rounded on both sides, which is cut on one side to a flat surface. Then a 40 mm long block is glued from below to such a board, also straight on one side and rounded on the other. See picture below.
In the same picture you can see the chamfer removed after the visor has dried. It should be removed so that there is nothing digging under the knees.
Next, you screw all the other flooring boards onto self-tapping screws from below, not forgetting about the gaps, which are best set using inserts of the required thickness. All flooring boards are also prepared in advance - sawed, sanded, impregnated with the same composition for baths or saunas - as described above.
Since in this design each tier forms a kind of niche, you can safely sew up the gaps between the tiers - this is done with clapboard or shelf board.
IMPORTANT! Don’t forget about the gaps, and leave them wider in the vertical panels so that air can pass through more easily, so that there are no “pockets” where steam does not get in, and therefore they do not warm up.
Folding
The only difference between the folding shelf and the design described above is that you will not screw the flooring with self-tapping screws to the transverse bars of the frame.
Folding shelf
Instead, the drop shelf deck will be assembled as a free-standing structure - the boards are attached to cross beams that are not connected to the frame . Since this creates protrusions, the easiest way is to make grooves in the frame for them, which, moreover, will increase the rigidity of the structure and prevent it from moving.
ADVICE! For a bathhouse, it is better to take stainless steel parts - both hinges and screws.
Below we show a diagram of how to attach the hinges to the timber and flooring. With this installation method, you have no chance of getting burned on the heated hinges, unless, of course, you stick your hands in