0
4963
Not every user is comfortable working with a laptop at a regular desk. It has been proven that productivity is higher if the workplace is equipped with all the necessary tools. To increase comfort, you can make a laptop table with your own hands from available materials. The process is simple and financially beneficial.
Plywood or wood?
You can make a folding laptop table from different materials :
- chipboard;
- MDF;
- plywood;
- natural wood.
Each individual option has its own advantages. If you are interested in a budget option, try using plywood. Its advantages include:
- ease of use;
- high technical characteristics;
- low cost.
MDF or laminated chipboard will cost a little more . But the table will turn out stylish and original.
Most people prefer natural materials. Therefore, when making furniture items, preference is given to wood. This table will please the owners:
- beautiful texture and texture;
- environmental friendliness;
- long service life.
Which option to choose is up to you. The main thing is that as a result of your efforts you get a functional table with high technical performance and an attractive appearance.
Decorating the stand
A DIY laptop stand does not require any special decoration. The main decoration of the stand is the original curve and interesting shape of the structure.
But stickers are perfect decorating the design You can choose a soft foam option. This will not only save the surface of the device from scratches, but will also give the product some original touch. After all, the modern market is literally replete with stickers depicting characters from computer games, graffiti, and cars. In addition, you can always order a personal print with your photo.
A DIY laptop stand will serve as an excellent organizer not only for your favorite device, but also for its accessories. It will free up more free space and improve the performance of your laptop.
. In addition, such a stand will be an excellent addition to the interior of the room and will make it easier to use the laptop.
Drawing
Before making a piece of furniture, it is necessary to make a preliminary drawing. It indicates the exact dimensions of the table and the materials used to make it.
If you can’t make a drawing yourself, you can find a ready-made sketch on the Internet, you can contact specialists in this field, or simply use a special program for furniture makers. The last option is the simplest. After you draw or print a finished sketch of the future table, you will need to transfer it to the wooden surface of the prepared materials.
Attention: before making the table, you should once again carefully calculate the dimensions and place control points on the material.
The best laptop tables without cooling
Laptop tables are divided into bedside and bedside tables. The latter are able to move closely to almost any furniture, which makes them very comfortable. Such tables are indispensable for a small apartment. Bed models are more suitable for those who prefer to work lying down or semi-sitting, but do not like full-size models. In this section we review four tables - two bedside tables and two bedside tables, which can safely be called the most comfortable and high-quality. Due to the lack of cooling, their price is low, which is also a big plus.
Tools and materials
To make a folding laptop table, you will need to prepare the following tools:
electric jigsaw;- drill;
- hacksaw for metal;
- screwdriver;
- ruler (long);
- self-tapping screws
Materials you will need:
- tabletop material (plywood, boards, chipboard sheet);
- furniture glue;
- pencil.
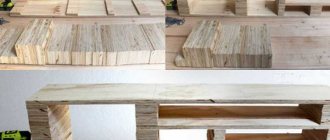
Making a countertop
The tabletop consists of two parts:
- movable, size 490x300 mm;
- fixed, 260x300 mm.
Both parts need to be made from furniture board. Then they should be closed with slats on the end sides. It is recommended to round the edges of the tabletop with an electric jigsaw, then process it around the perimeter with a router. The product can be equipped with a support bar that will prevent the laptop from sliding off the table. Recommended plank size: 260x20x10 mm. Instead of a strip, you can use removable dowels inserted into blind holes.
Assembling the legs
At the next stage, you need to make 4 legs 295 mm long and 4 legs 184 mm long. Each pair of legs is connected by two legs, one of which is installed along the edge of the structure, this increases the stability of the table on soft surfaces.
The legs and legs are connected using dowels or screws. In the second case, to improve the aesthetics of the product, special plugs are used to cover the unsightly screw heads. In the places where the fasteners are installed, blind holes with a diameter of 10 mm and a depth of 5 mm are drilled, screws are inserted into them, and then closed with plugs made from the same wood from which the legs are made. The plugs are attached using glue. If the edges of the plugs protrude above the surface of the legs, they should be carefully cut off with a chisel.
The holes for connecting the legs to the frame are drilled at a distance of 14 mm from the edges of the legs, and the edges themselves are rounded. Thanks to this, the legs can be easily folded and unfolded. In the frame for attaching the legs, holes with a diameter of 6 mm are drilled at a distance of 20 mm from the inner edges. The outer edges of the legs are cut at an angle of 65 degrees, which ensures the stability of the table on a flat surface.
How to make it foldable?
When starting to make a piece of furniture, you should put a drawing, materials and tools nearby. The most difficult thing in the work process is cutting out the shape of the future product. Here you need to use a jigsaw . It is better to give preference to electric tools. With them you will get the job done faster. Using an electric forehead, you can make straight or rounded edges of the product.
Attention : at each individual stage of manufacturing a laptop table, it is worth checking the drawing. The drawing transferred to wood must completely coincide with the sketch on paper.
The manufacture of the table begins with the tabletop.
Here you can use a solid sheet of plywood or chipboard , or you can make it from wooden slats.
When making a tabletop from wooden slats, you will need to prepare 8-9 slats 50 cm long. For the supports, you will need two 60 cm slats. One end on the supports is rounded. We lay these slats on the table and glue the tabletop. The ends of the slats are coated with glue very carefully . As a result of your efforts, you will get a stacked tabletop attached to two supports. Let it dry for 6 hours.
After making the table top, you can start cutting out the legs . Please note that the longer the legs are, the more stable the product will be.
When starting the assembly process, do not rush to screw everything on at once, attach all the elements of the product, check whether the legs fold properly or if something went wrong. Once you have the legs aligned correctly, make marks with a marker where the hinges will be attached.
Attention : when screwing in the screws, do not overdo it. The countertop will be thin and the screws may come out.
If you need a table with a slight slope, the front legs will need to be slightly filed . To prevent the mobile device from moving off the tabletop during operation, a small bar is attached to the front.
The main advantages of a folding laptop table include its mobility;
- functionality;
- light weight;
- simplicity of design.
Next, our furniture must be processed using a grinding machine or sandpaper . This should be done carefully and slowly. To get rid of large imperfections when cutting, coarse-grained sandpaper is suitable, and to give the product a perfectly flat and smooth surface, you should use fine-grained paper.
To prevent the mobile device from overheating, some users integrate a cooling system .
This is quite easy to do: a hole of the appropriate size is made in the tabletop, a cooler from an old computer is attached and covered with a plastic grill on top. The fan is connected to the outlet using a block.
Model selection
Almost all laptop desks have an identical design, consisting of a tabletop and four support posts. If we look at the products in more detail, we can distinguish several varieties:
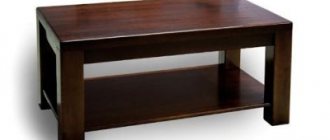
- Classic monolithic. Self-made models are characterized by strength and durability. To create the body, beech, ash and other hardwoods are used. The main requirement for the material is resistance to mechanical damage. The optimal thickness is from 20 mm. The design includes a tabletop and 4 legs, which are fixed with furniture corners and screws. Such tables are suitable not only for working on a laptop, but also for reading and serving breakfast in bed.
- With rising part. The products are equipped with special elements that hold the work surface in an inclined position. The table consists of 2 parts that differ in size. The smaller one is motionless, suitable for installing a mouse, the larger one is complemented by a pair of hinges and stop plates. Thanks to the adjustment, the tabletop can change position.
- Transformer. This laptop table consists of a large tabletop, folding legs, armrests, and cup stands. On the working surface there are special grooves in the shape of boomerangs, which reduce hand strain during printing. The main feature of the model is the presence of a large number of elements that can be easily removed and added.
- On wheels. A convenient mobile piece of furniture that can be moved from place to place. The laptop is securely fixed to the surface to prevent accidental falls. Portable designs are quite spacious and can be supplemented with shelves and drawers.
How to assemble a simple coordinate table with your own hands, tips for craftsmen
The easiest way to make a laptop table with your own hands is monolithic or on wheels . Transformers, as well as models with rising elements, are more complex and therefore require appropriate experience. Beginners are recommended to take advantage of detailed master classes.
Most PC users prefer tables with rounded legs and tabletop edges. The designs are safe to use and look elegant.
Classical
On wheels
With rising part
Transformer
Finishing
After making the table, it must be treated with sandpaper so that there are no burrs or flaws on the product. To extend its service life and add aesthetics, it is recommended to paint or varnish the folding table.
When choosing paint, choose a color that best suits the overall interior of the room. There are no special requirements for this material. The main thing is that it does not emit harmful toxins, is of high quality, and dries quickly.
The paint should be applied in several layers . If you are making a product from natural wood, you must take into account that it absorbs moisture well. Therefore, each layer of applied material must dry, and only then it is recommended to apply the next one.
Attention : when painting natural wood with a brush, it is recommended to brush it along the grain. Be careful to ensure that there are no leaks. It will be difficult to get rid of them in the future.
And the last final stage of decorating the table will be varnishing . It will give the product a shiny and smooth surface and protect it from high humidity and sudden temperature changes. For these purposes, you should choose a high-quality matte colorless varnish.
Advice : if the thirst to create is still looking for a way out, try making a sand painting table, an elegant coffee table or a children's table.
DIY laptop cooling pad made of plexiglass
The cooling type has a slightly more complex manufacturing scheme. To do this you will need: a piece of plexiglass (about 30 x 30 cm), a jigsaw, coolers, a drill and screws.
The manufacture of such a stand is carried out in the following sequence:
- The first step is to measure the dimensions of the device and apply them to the plexiglass. It is also worth considering that there will be a bend at one edge, so it is better to add an extra 4-5 cm in transverse size.
- Using a jigsaw, we cut out the shape for the base of the product.
- Next comes the most technically difficult stage - bending the plexiglass.
The easiest way
give the base the required shape by heating it over a regular kitchen burner. The plate itself must be brought to such a temperature until it begins to bend under its own weight. After this, using pliers, you can slightly adjust the shape of the stand. For faster cooling, simply hold the product under cold running water. To make using the laptop stand as comfortable as possible, you can stick rubber pads on the bottom plane of the structure. This will also prevent scratches on the table.
After complete cooling and hardening of the base, it is necessary to process its edges with sandpaper: give it symmetry, remove burrs. Now you can begin preparing and installing the coolers needed for the laptop. Their size and number depend on the laptop model and the number of ventilation holes in its bottom edge.
Before installing the fans, it is necessary to prepare the base itself, or rather, make technical holes for air circulation. This job is easiest to do with a jigsaw. After cutting the holes, it is better to sand them.
Also at this stage, the mounting holes are prepared. They are placed as marked on the coolers.
- The next step is painting and varnishing the surface .
Regular car aerosol paint is best suited for this. It will lie evenly on the entire stand and create a very interesting texture. To achieve maximum effect, you can apply two layers with an interval of one day to dry completely.
- The final step is to secure the fans to the surface of the base.
To do this, it is enough to have a screwdriver and screws of the required diameter. It is worth considering that coolers must be installed with their backs facing the surface so that the air flow is directed away from the stand. Next, all the elements are connected to each other and brought out using a USB cable. Therefore, it is necessary to purchase a wire of sufficient length so that it reaches the connector.
The best laptop tables with cooling
Laptops often experience cooling problems. For the gadget to work as it should, it needs to stand on a hard surface and not have the bottom come into contact with the fabric. However, even these precautions may not be enough if the laptop has not been cleaned for a long time or if it is currently running some kind of productivity program. In this case, tables with cooling will help - they have special fans built into them that blow cool air over the device and thereby save it from overheating.
