Does a newborn baby need a changing table? What are they? How to make a diaper changer with your own hands?
The list of dowry for the baby, which parents must prepare even before his birth, is very extensive. It includes a stroller, a crib with a bed, a bath, clothes, children's cosmetics and a first aid kit, so to speak, the essentials. Sometimes this list also includes a changing table. Is it needed? Is it convenient? Is it possible to make it with your own hands?
Do you need a changing table or chest of drawers?
Some couples, most often those who are going to become parents for the first time, consider a changing table a luxury, a pampering, and not at all a necessity. Like, if you have extra money, why not spend it?
Others are experiencing a shortage of living space; it seems to them that there is simply nowhere to fit such a piece of furniture in a one-room apartment. They would like a diaper changer, but cannot afford one.
And the thing, by the way, is very convenient!
The changing table is safe for the baby and convenient for the mother.
- It provides convenience for mom. The baby has to change clothes a certain number of times a day - for a walk, from a walk, again for a walk and from a walk, at night. That's not counting the endless diaper changes, food stains or spit-up items. If we assume how many times and for how long mom needs to spend bent over the sofa, for example, her poor back! But they often suffer during pregnancy and childbirth. The diaper is located at such a level that the mother does not have to bend
- It will ensure safety for the baby. If it is a changing table or chest of drawers, as a rule, the space under the changing table is allocated for baby cosmetics, diapers, and wet wipes. You can remove them with one hand and hold the baby with the other. After all, after four months, when he learns to roll over and then crawl, the risk of falling from a sofa or a regular table increases in that single second for which the parent leaves to take something necessary for a hygiene procedure or changing clothes
- It will become a place for massage and gymnastics. Massage and gymnastics, therapeutic or restorative, are required for a baby up to one year old. Doctors insist that they be performed on a hard, level surface. The sofa, as an option, disappears immediately. But the diaper changer is just the thing
- On the changing table it will be convenient for the doctor to examine the baby. In the first year of life, the staff of the children's clinic will periodically visit the baby
Obviously, a diaper changer would be nice to have. But in stores the prices for it are off the charts: changing tables and chests of drawers sometimes cost twice or three times more than usual! There is no need to be upset, you need to be enterprising and try to make a piece of furniture with your own hands!
Examples of finished tables
Today, furniture stores provide a wide range of ready-made changing tables, so we recommend that you do not spontaneously rush to make your own product, but first familiarize yourself on the Internet with all existing types and specific models presented on the websites.
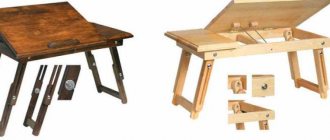
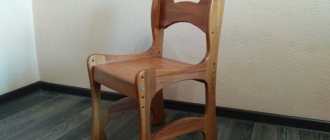
You can make a more complex design for the changing table.
Thus, making a changing table with your own hands is not difficult, you just need to carefully understand the manufacturing features. This will save the family budget and allow you to take into account all the requirements for the product.
And most importantly, you will be confident in the quality and safety of furniture for your baby. In addition, a homemade piece of furniture will have special value for your family, creating comfort and a special atmosphere of love and warmth.
Up to what age do you need a changing table?
Manufacturers of changing tables write in the instructions that they are intended for children up to twelve months. But in practice, parents describe some discrepancies:
- There are diapers with a length of only 70 cm. These cease to be comfortable for babies aged 6-9 months
- If the length of the diaper is 90 or 100 cm, it can also be used for a child older than one year who still wears diapers and does not know how to change clothes himself
The changing table is intended for children from birth to one year.
Definition with material and design
As we have already said, the materials from which the product will be made must be absolutely harmless to the newborn. Therefore, it is best to choose natural wood; it is the most durable and safe material, however, its cost is quite high.
From a wide variety of changing tables, you should choose the one that suits you best.
The design also depends on your needs and placement options. If the living space does not allow, of course, it is better to choose a hanging or folding option, but if you want the most convenient and comfortable changing table with a storage system, choose a chest of drawers.
Types of changing tables: photo
Before you make a drawing of a baby diaper, prepare the necessary materials and tools, and actually start making the structure, you need to decide what it will be like.
- The simplest option is this soft changing board, which can be installed on a regular chest of drawers, a table, placed on a sofa, carried and transported. As a rule, it is soft, covered with waterproof material on top. The sides on the sides of the board ensure the safety of the baby
- The next type of diaper changer is a whatnot. A wooden, metal or plastic frame is complemented by several drawers or shelves, as well as a hard or soft changing board
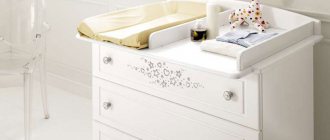
- An even more convenient option is a chest of drawers with a changing station. The children's chest of drawers is roomy, wide and stable. Most often, this is an ordinary children's chest of drawers, equipped with a removable changing area. The advantage of a chest of drawers is that it will last much more than a year. Disadvantage: it requires a lot of space
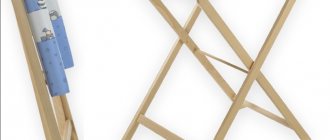
- The hanging diaper is a very ergonomic design. Usually, it is attached to the wall and reclines as needed. It is equipped with pockets for storing children's things.
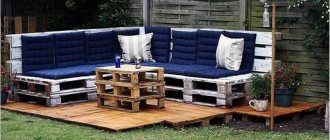
- It is not easy to make a transformer diaper yourself, but it is possible. It would be great if it could later be turned into a children’s desk, at which a child from one year old will play and create.
Changing board.
Changing table - whatnot.
Hanging and folding changing table.
Pelenator - chest of drawers.
Step-by-step instruction
When planning the assembly of the classic and most functional model of a changing table, namely a chest of drawers with internal drawers and a hinged lid (removable if desired), work begins with drawing up a diagram, selecting and calculating materials, preparing tools and premises. The process itself is divided into separate stages:
- Marking and cutting of workpieces.
- Processing of edges and surfaces. Unlike ordinary chests of drawers, such products have a minimum of protruding corners; their sides are necessarily rounded.
- Sequential assembly of the frame, drawers, fastening of guides and the table itself.
- Preparation of the mattress, decoration.
Drawing of a dressing table for making it yourself, stages of work.
In the classic version, the chest of drawers is equipped with ordinary drawers (2 in the top row + 2 or 3 common bottom ones), but there are no restrictions. The general requirements include only the need for a higher back wall and a protrusion of the sides up by 10 cm. When assembled, the folding part of the changing table must be closed.
Marking and cutting blanks
Edge processing and corner rounding
Assembling the frame and fastening the guides
Assembling the box
Installing drawers in a chest of drawers
Preparing the mattress
Create a drawing
Ready-made drawings of changing tables for newborns are freely available on various online resources. In the absence of experience in carpentry work, it is not recommended to deviate from the dimensions indicated in them. If you need to make adjustments or design your own model, programs like PRO100, Astra, Basis-Furniture Maker, WOODY are a good help. These same services help calculate the required amount of material and draw up a cutting plan for sheet plates.
The height of the chest of drawers remains standard, the main level is maintained within the range of 80–110 cm. The depth is selected taking into account the height of the child; when unfolded, the length of the changing pad should be at least 70 cm (optimally 90–100 cm). The width of the chest of drawers can be any, but models in the range from 80 to 100 cm are considered the most comfortable.
Preparation of materials
A jigsaw is best suited for cutting blanks for a changing table. If you are confident in the sketch, slab materials can be cut in the warehouse at the time of purchase. Mandatory requirements of the technology include rounding the edges of individual parts, treating open areas with sealing and antiseptic compounds, followed by covering with tape.
Taking into account the rounding of the parts, it is difficult to calculate the exact length of the tape, so it is recommended to purchase it with a small margin.
The preparation stage ends with drilling holes for fasteners, after mandatory checking of the markings. In addition, the locations of corners, intersection ties, guides or confirmations are marked on the blanks with a pencil. All necessary points on the sides or edges must “mirror” each other; deviations from a single level of more than 1 mm are not allowed.
Lay out the workpieces, make markings according to the drawing and drill holes for fasteners
Frame
The finished parts are assembled into a single structure using a screwdriver or hex key. The table assembly procedure is standard:
- The chest of drawers is assembled sequentially. At this stage, the bottom, sides (if there are separate elements), and the back wall are screwed to the sidewalls with fixed guides.
- Using confirmations, the internal shelves are fixed.
- The boxes are assembled separately and the evenness of each is checked. The second part of the guides is fixed on the outer sides of the drawers along pre-marked lines.
- The smooth movement of the drawers is checked, and if there are no problems, the fittings are fixed on the facades.
Regardless of the method of arrangement of the internal shelves, at each stage of assembly, using a square and a building level, the evenness of the structure is checked.
Install the guides on the side walls of the chest of drawers
Sequentially assemble the product box
Collect boxes
Fix the fittings
Table installation
The folding table is assembled and mounted last. Maximum reliability of fastening the horizontal part and sides is provided by ordinary metal corners. Installation is completed by tightening the double-sided bolts, which are finally tightened after checking the stability, evenness and smooth tilting of the shelf-lid.
Tips for making a welding table with your own hands, work procedure
To avoid mistakes, you should study the video instructions explaining what and how to make a changing table with your own hands. Any defects are eliminated directly at the installation stage. The chest of drawers is put into operation only if there are no distortions or deflections.
Secure the back wall and install the changing table
What to make a changing table, chest of drawers from: materials
As for the choice of materials, parents, first of all, should be guided by safety criteria.
- For the frame, it is best to choose wood, MDF or chipboard. Natural wood is the number one environmentally friendly material, but it is heavy and expensive. MDF and DPS are cheaper, and now they are quite durable and practical
- A soft changing board consists of a base - the same MDF or chipboard, filler and a waterproof surface. As a soft filler, you can use foam rubber, a hypoallergenic material such as holofiber, or simply a terry towel folded in half. As a waterproof layer, you can use raincoat fabric or ordinary medical oilcloth. To prevent the baby from floating, a natural diaper will be placed on top
- Stains, varnishes, and paints used for the diaper must be environmentally friendly, non-toxic and must be certified. It would be ideal if they were marked with something like “Can be used in a child’s room.”
- Bolts, retractable mechanisms, and other accessories are selected as needed. All these details are well hidden so that the baby does not get injured
IMPORTANT: When buying materials for a swaddling device in a store, you should familiarize yourself with the quality certificates for them
How to make a folding, wall-mounted changing table?
Folding changing table.
The changing table on the wall is almost invisible when assembled. But since it has no support on the floor, you need to be smart to make it strong and safe.
- The wall-mounted changing table must be mounted on a strong wall, not made of plasterboard, for quick installation. You need to be sure that the structure will not break out under the weight of the child.
- The changing cover, which folds down, must be placed on gas lifts so that it does not spontaneously fall off or slam shut.
- It is recommended to install several shelves inside the part of the pelenator attached to the wall. Firstly, they will provide the frame with additional strength. Secondly, they can be used to store baby wipes, powder, massage oil, etc.
Drawing of a folding swaddling device.
IMPORTANT: A folding baby changer is often hung in the bathroom. The humidity in this room is high. Therefore, the paint for it is chosen to be water-repellent, so that the frame material does not swell and become a breeding ground for mold.
How to make a hanging changing table?
A hanging stationary table also allows you to save space - you can place a basket for toys under it, for example.
The structure consists of:
- changing boards
- side skirts
- supporting corners
Hanging changing table.
All this can be cut out from chipboard yourself, having decided on the dimensions and sketched out a drawing.
As with the folding baby changer, you also need to ensure that this one is securely attached to the wall.
Additional details
It wouldn’t hurt to equip the changing structure with additional shelves and holders that can be placed on the sides.
After all, we are making a changing table not for dolls ourselves, but to care for a living child, and it is advisable to do some procedures without delay.
Additional holders will help you store various essentials, such as powder, in a convenient place, which can greatly speed up the process of caring for your baby.
Select the remaining parameters depending on your desires and preferences.
How to make a portable changing table?
A portable changing machine is, in fact, a changing board that can be easily installed on any surface, including the sides of a bathtub or crib.
In order to do it, you need:
- chipboard sheets
- sanding mesh
- jigsaw
- fastenings (screws)
- wood primer
- dye
Portable pelenator.
- For the base of the changing table you need a board 80-90 cm long, 60 cm wide
- The length of the side panels should correspond to the length of the base, and the height should be 7 – 10 cm
- You can make sides only along the length of the changing board, or you can add another one along the width, where the baby’s head will be. Accordingly, it will be 60 cm in length and 7 cm in height.
- The boards for the structure are sanded, treated with primer, and then painted
- Fasten the structure with screws
Portable padded changing station.
IMPORTANT: For a portable pelenator you need to cut and sew a soft mattress
General design of a changing table: dimensions and diagram
Making a changing table and chest of drawers with your own hands is not difficult. There are drawings and diagrams on the Internet, thanks to which the preparation process is minimized. It is often enough to download a ready-made cutting drawing and visit any furniture workshop with it, where you can purchase a ready-made board and cut the parts on the spot.
Many mothers doubt how to swaddle their baby correctly: loosely or tightly. Read about the features of wide swaddling.
When choosing sizes, take into account the features of the chest of drawers and the height of the baby’s mother, since most often she will have to do the swaddling. During operation, it should stand straight and not bend over the tabletop, so you need to adjust the height of the structure to suit ease of use.
Making blanks for the table
The classic design of such a chest of drawers provides for a height of no more than a meter, a width of about 50 cm and a length of 80 cm. The top shelf for changing is folding. This table has three large drawers for linen and personal items, and on top there is one row for storing small things for changing: powder, sanitary napkins, new diapers or nappies.
For consideration, let’s take a design of a chest of drawers 400 mm wide, 960 mm high, 800 mm long. The height of each large drawer is 204 mm, the height of each small drawer is 130 mm.
Did you know? Popular US supermarkets Macy's even have changing tables for public use in the men's restrooms. This is done so that young fathers can not interrupt their shopping and change their child’s diapers right in the store.
We will need:
- fronts of large drawers 183x764 mm - 3 pcs.;
- fronts of small drawers 183x371 mm - 2 pcs.;
- walls of large drawers (front and rear) 710x150 mm - 6 pcs.;
- walls of small drawers (front and rear) 710x150 mm - 4 pcs.;
- sides of drawers 450x150 mm - 10 pcs.;
- folding shelf for changing 322x765 mm - 1 pc.;
- horizontal partition between small boxes 187x500 mm - 1 pc.;
- shelves and bottom of the chest of drawers 768x500 mm - 3 pcs.;
- plinth 768x100 mm - 1 pc.;
- rear side 768x175 mm - 1 pc.
- bottom of small boxes 347x450 mm - 2 pcs.;
- bottom of large boxes 740x450 mm - 3 pcs.;
- back wall of the chest of drawers 795x795 mm - 1 pc.
Forming grooves
A groove is a recess into which the protruding part of another object is inserted when joined. In our design, grooves will be made in the sides and back wall so that the ends of the tabletop can be inserted into them later.
Important! Some craftsmen advise using two or more blades inserted into one hacksaw to form grooves.
This will provide a quick way to make grooves without spending additional processing time. To select them, use a simple chisel or a convenient end mill for a grinder. It is better to make the indent from the bottom edges at a height of 20 mm, the depth is 7 mm, the width for convenient entry of the end of the tabletop is 8 mm.
Formation of places for fastenings
To attach to the partition, you need furniture corners measuring 20x20 mm, which are attached inside the structure to the upper partition.
In order for there to be a gap under the table for air access and easier cleaning, you need to attach four legs made of plastic or metal to the structure. The recommended height of the legs is 50 mm; in case of distortion in the height of the floor or the chest itself, it is possible to use telescopic plastic legs that can be twisted to the required height.
The fastenings themselves do not require any special preliminary preparation work. You can use any rounded lid or small saucer as a stencil for rounding corners.
Assembling the changing table
If you have prepared parts and the necessary tools, the assembly process is simple:
- we assemble boxes from walls, bases and facades;
- install the guides (with the wheel towards the back wall) on the inner walls of the chest of drawers;
- we connect the sides of the chest of drawers to each other;
- install the back wall of the chest of drawers on the frame;
- We install a folding cover for changing.
DIY mattress for changing table
To sew a mattress for a changing table, you need:
- padding polyester, holofiber, terry towels
- waterproof raincoat fabric or medical oilcloth on a fabric basis
- thread and needles (sewing machine)
Mattress for changing table.
- The width of the mattress is the width of the table plus the width of the two sides. If the board is 60 cm and the sides are 7 cm, then the mattress will be 74 cm wide
- Mattress height – changing board height
- The soft base is cut exactly to the size of the changing table, the raincoat fabric is cut out with a margin of 0.5 cm on each side plus seam allowances
- Cover the filler with raincoat fabric or oilcloth. Run two vertical lines along the mattress so that the distance between them is equal to the width of the changing board
IMPORTANT: If the baby changing table has a headboard, it is also done for the mattress