Share on social media networks:
A place for drying dishes is a must-have attribute of any kitchen today. Often, a dish dryer is mounted in a kitchen unit, becoming a built-in part of the furniture structure. The rapid development of scientific and technological progress, which brought dishwashers into our lives, could not overshadow the trend of using dish dryers. Although an automatic dishwasher does all the work for us: washing, drying, sometimes the dishes only need to be rinsed. This can also be done manually.
But where to dry the dishes, because the daily use of cutlery is limited to a set number, often there is only enough dishes for two people? It is convenient to place a small number of plates that are used every day in the dish drainer. This will provide convenient and quick access to it. In this article we will tell you what types of dish dryers there are, as well as how to make a dish dryer yourself.
Types of dish dryers
There are two main subsections of drying:
- Built into a kitchen set;
- Placed independently of the set (external drying rack for dishes).
Types of stands:
- Built-in. These include:
- Those that are built into the upper wall tables.
- Those that are built into the lower bedside tables.
- Independent. These include:
- Dryers that are placed on the countertop.
- Wall-mounted.
- Hanging on roof rails.
In most kitchen sets, the dryer is a built-in element in the cabinet - this is an ergonomic and practical solution. All cutlery is hidden behind the front of the bedside table, does not occupy the work area and does not attract the attention of guests. Therefore, there is no need to make a dish dryer with your own hands. But this doesn't always happen.
Types of dryers
Dryers are divided into several categories depending on design features, material and the place where this device is installed.
Built-in
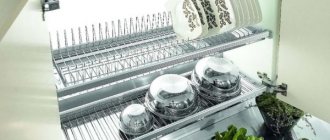
Traditional designs include dryers that are installed in a wall cabinet in a kitchen unit, suspended above the sink sink. Although such a design option can also be mounted in floor cabinets, if such a solution for organizing the drying of dishes was supplied to the furniture design developers by the customer. Built-in type dryers can be straight or angular. The last option is made for corner wall cabinets.
In this case, dryer designs can be stationary or retractable. Simple models have two tiers: the bottom for plates and the top for mugs and cups. A tray for draining water must be installed at the bottom. Manufacturers offer models where there is a pallet under each tier. This is the best option for a built-in dish dryer. It costs a little more, but from a practical point of view it is better.
Today in stores you can find dish dryers with a complex design, which have several compartments for different utensils. For example, dryers are equipped with additional compartments for glasses, spoons and forks.
Speaking about the pros and cons of this model, it should be noted that in design terms this option is the optimal one. The dryer is not visible because it is hidden by the kitchen facades. But there is also a negative side to this device: the humidity inside the cabinet is always high, which negatively affects the quality of the kitchen set. It is the cabinet where the dish dryer is located that fails the fastest. Therefore, this variety is recommended to be used as an auxiliary element. That is, the dishes in it need to be dried when the water has already drained from it. To ensure good ventilation, craftsmen make holes in the back wall. Sometimes facades are shortened at the bottom by inserting a decorative grille there.
Tabletop
There is a huge variety of design solutions in this category. Since this device is always visible, manufacturers try to pay great attention to the design of the dryer. Today the market offers one-, two- and three-tier designs, with or without additional compartments for cutlery. There are stationary, folding and retractable models. There are different sizes of dryers: compact and large.
The place of permanent installation is the sink or countertop next to the sink. Depending on the design of the kitchen, especially the sink, you should select tabletop dryers so that they do not stand out from the overall interior concept of the room.
If the kitchen sink is located next to a window, or there is no wall cabinet above it, then the dryer installed next to it will be open to dust. Therefore, it is recommended to look for a dryer with a lid in stores. Most often this is a plastic product with a plastic tray.
Read also: Yogurt maker
Mounted
These are lattice structures that are attached to the wall with rails or installed inside a wall cabinet. There is a small assortment in this category, because most often such models are single-tier. It is better to hang such devices on the wall. Their installation is determined by installing the brackets that come with the device; they are secured to the wall above the sink using self-tapping screws and plastic dowels. After which the mesh is installed on two brackets.
Mounted models with hooks are attached to the roof rails. Dish dryers are selected based on the amount of free space. Dryers of a removable design can also be installed on the internal surfaces of kitchen doors.
Number of levels
Single-level dryers are inconvenient because they place all the dishes on one plane without disassembling them. And if the family is large, then there may not be enough space. Therefore, the optimal solution for any kitchen is multi-level designs. Most often, dryers have two levels, so large dishes can be placed separately from small items. In this case, you need to select models that will fit the largest plates. Therefore, the best option is designs with height-adjustable tiers.
Dryer Troflex
This type of dish dryer is a mesh, lattice or perforated board. They are made of stainless steel or plastic. This device is installed directly on the sink, on one of its bowls. It is not attached to anything, but rests with its edges on the edges of the bowl. In this case, the water flows directly into the sink. In addition, you can put not only dishes on such a drying rack, but also washed vegetables and fruits.
This device is always at hand. After use, wipe it dry and place it next to the sink or put it in the drawer of the kitchen cabinet. Manufacturers offer Troflexes in the form of a rolling mat, which is assembled from silicone or plastic rods. These models come in different colors, so choosing the right product to match your kitchen design will not be difficult. But in any case, such dryers do not carry a design burden; they are invisible and light in weight.
Dryers built into wall cabinets
This type of dryer is the most common. As a rule, they are placed in cabinets that are located above the dishwashing area. This little trick from furniture designers makes it possible to reduce the number of movements that housewives make when washing dishes. By placing such a dryer under dishes in the sink area, the housewife can simplify the care of her furniture and reduce the frequency of washing it. This way, drops of water from the plates will flow into the sink and not onto the work surface.
Classification:
- Drying with or without a frame.
- Single- and multi-level structures that extend for drying tableware, including corner drainers.
With or without frame
In order for cutlery to dry evenly, it is necessary to create favorable conditions in the bedside table in which the dryer is built in:
- As a rule, they are produced without a bottom edge, thereby ensuring good ventilation of the cabinet.
- To make the structure more stable, dryers are equipped with a special frame that functions as the bottom of a cabinet.
- Occasionally they are made with a bottom, where two holes are made, from which a lattice is formed.
Important! Both types of dryers are suitable, both with and without frames.
Single-level frame
Frame drying, which ensures the strength and stability of the structure, is made for a specific model of bedside table from high-strength material. When choosing this type of dish dryer, you must know the parameters of your product and the thickness of the material used for manufacturing. It is not possible to regulate here, so it is simply necessary to know all the parameters. Often, do-it-yourself dish dryers for cabinets are made from 18 and 16 mm chipboard.
Important! The main environment for using single-level dryers is horizontal hanging cabinets. Their main difference is in the equipment with gratings. You can place both plates and glasses on them.
Multi-level
Multi-level dish dryers consist of two parts:
- Top rack for glasses and cups.
- Bottom grid for plates.
Important! The placement of the gratings may vary depending on the customer’s wishes.
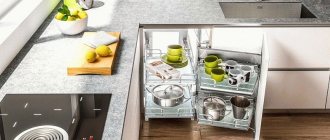
Corner dryers can be identified as a separate subsection adapted for drying dishes. Thanks to the L-shaped design, the interior space of the corner bedside table can be used more efficiently.
Important! A characteristic feature of corner dryers is their design. They are made only with two doors, and they are intended only for installation in bedside tables of a standard size of 60 by 60 cm.
Rules for installing a dryer in a closet
Installing a dish dryer with your own hands means choosing the right one for the size of the cabinet. Since its standard depth is 30 centimeters, the device is selected in accordance with the resulting dimensional indicator. In this case, a dryer with a width of 28 centimeters is purchased, the remaining two centimeters are left for closing the cabinet doors.
There is a wide variety of designs for built-in dryers, therefore, they are mounted inside the cabinet in different ways. Here it is important to install the fasteners exactly at the level, and then put meshes or gratings on them. Therefore, kitchen sets that go on sale or are made to order come to the customer or buyer with a dryer already assembled inside. But if the task is to install a dish dryer in a cabinet that is already hanging assembled, then you will have to make an effort:
Read also: Jokes about Olivier salad
- First of all, the installation level of the device is determined. To do this, you need to assemble it and insert it into the cabinet, holding it with your hands. Thus, a convenient height for operation is established. The device is now removed and disassembled.
- The fasteners are attached to the side walls, so even at the fitting stage, marks are made on the sides with a marker for the places where the screws will be attached.
- The brackets are attached to them using self-tapping screws that come with the dryer. The main thing is that the fasteners are located at the same horizontal level.
As for the installation of wall-mounted models, first of all, as in the previous case, you should decide on the installation height.
- A horizontal line is drawn along the height with a marker, to which one of the two brackets is applied so that its mounting hole, located above, coincides with the line marked on the wall.
- The bracket is installed exactly vertically, after which two points are placed on the wall through the holes.
- From a point on the line to the right or left, depending on where the dryer is installed, the width of the device is plotted, where dots are also placed.
- Now holes are drilled into them, into which plastic dowels are driven.
- All that remains is to attach the brackets to the mounting location and tighten them with self-tapping screws to the wall surface.
- The last step is to place the nets or gratings on the brackets.
The dryer is assembled strictly according to the instructions that the manufacturers attach to the accompanying documents.
Floor structures
A retractable drying rack in a floor cabinet would be appropriate in a kitchen equipped with a dishwasher. Due to the fact that it is quite difficult to provide ventilation in lower cabinets, dishes that are placed in such a cabinet must already be dry.
The dishwasher does this job perfectly. Consequently, the dish dryer located in the lower cabinet of the set will rather serve as a place for practical storage of cutlery - everything is at hand and in one place.
Important! Dryers that are built into floor cabinets can also be either single- or multi-level.
Separate dish drainers
The advantage of stationary types of dryers, which do not depend on the configuration of the kitchen furniture, is that they can be installed in any place convenient for you. This can be either a work surface or an apron rail. Such dryers are popular among housewives of more outdated models, with characteristic furniture parameters that differ from modern standards.
Important! Such dryers are characterized by their small dimensions. Some types can be easily transformed to suit the conditions: they can be installed either in a cabinet or on a tabletop. By the way, you can easily make a dish dryer with your own hands.
What materials are dryers made from?
Dish drying systems can be made from various materials.
Metal constructions
The most common are metal structures. In this case, the material must undergo processing - galvanization or enamel coating. This is important when operating in conditions of high humidity.
Metal dish dryer
Prices for metal dish dryers
Metal dish dryer
Most often, stainless steel is used, which has a coating that protects it from corrosion (it is important that there are no chips or other defects). These dryers last for a long time, they are durable and functional. Most steel models look very stylish. But stainless steel systems are not cheap. Used in the production of dryers and aluminum. A big plus is that metal products require virtually no maintenance.
Plastic products
Plastic products are cheaper than metal ones (especially stainless steel). Stylish, bright interior items are made from this material. It is important that polymer models are completely unaffected by water, corrosion and rotting. But their other characteristics often leave much to be desired.
Plastic dryers
Prices for plastic dish dryers
Plastic dish drainers
The mechanical strength of plastics is low. Over time, plastic loses its appearance. Dirt collects in the scratches and chips that form on the surface.
Wooden crafts
In some interiors (for example, country or Provence), stainless steel or plastic dryers will look ridiculous. In this case, you cannot do without wooden structures.
Built-in wooden dish drainer with two shelves
Despite the fact that wood is largely susceptible to the effects of water, steam and temperature fluctuations, with proper pre-treatment of products they acquire the necessary resistance to impact and decent durability. Of course, it is desirable to minimize direct contact with water from such dryers.
Wooden dish drainer
Combinations of materials are also used in the manufacture of dryers.
The choice of type of dryer is purely individual. The main thing is that the design is easy to use and its appearance does not cause dissonance with the design of the kitchen space. The cost of a model is influenced by the material from which it is made, its size, and design.
Important! Products produced under well-known brands cost the consumer significantly more than those whose brand is not very well promoted.
Wooden dish drainer
Assembling a dryer for kitchen appliances, like constructing any other piece of furniture, consists of several stages:
- Pre-cut the prepared pine or spruce bars using a jigsaw.
Important! On average, their size should be 1 cm for cylindrical sticks and 2 cm for slats and 1 cm for cylindrical sticks.
- Sand all surfaces of the parts thoroughly.
- At the base of the structure, drill holes for the side crossbars that will hold the dishes.
- Assemble the frame by connecting the longitudinal and transverse structural elements.
- Glue the side partitions located at an angle.
- Make the surface waterproof by re-priming, sanding and covering it with several layers of varnish.
Using your imagination, you can create an exclusive dish dryer with your own hands to suit the interior of your kitchen. Such a product will serve not only as an indispensable item, but also as a bright addition.
Dryer selection criteria
There are several items you should pay attention to when buying a kitchen dryer.
Materials
There is little variety here, because the main requirement for the materials from which dish dryers are made is strength and moisture resistance. Therefore, manufacturers offer devices made from the following materials.
- Steel products coated with chrome or enamel. The first option is better because chrome plating is a layer with long-term use. In this regard, enameled structures lose. Unfortunately, the enamel does not withstand frequent shock loads, which is common for a dryer.
- Made from stainless steel. Expensive model, but with a long service life. In addition, such a dryer will require special maintenance.
- Plastic ones are the cheapest, but light and bright products. Unfortunately, they do not have a long service life. The products are made of durable plastic, but there are also very cheap devices on the market that will not last even a year.
- Wooden. Wood is often used as a material for making dryers. It is coated with special water-repellent compounds, so it copes well with water and moisture. True, manufacturers recommend periodically coating wooden devices with protective mixtures to extend their service life. In addition, wood fits perfectly into any kitchen interior design.
Read also: How to choose an enamel pan
Pallets are made of stainless steel or plastic. Both materials have virtually no wear life. In addition, they are hygienic and easy to clean.
Size range
The dryer option in terms of size is a small model range, which is determined by the range of 40-80 centimeters with a gradation of 10 centimeters. And the larger the size, the more dishes will fit on the dryer. For example, only 12 plates fit on a drying rack 40 centimeters long. And for a device 60 centimeters long – already 18.
However, some models have standard sizes. For example, the dimensions of built-in structures, or, more precisely, their width, are determined by the width of the wall cabinet. It has a standard size of 60 centimeters. Although designers claim that 60 centimeters is the optimal size for desktop structures.
When choosing a multi-tiered model, you need to pay attention to the distance between the levels. It should not be less than 30 centimeters; this will allow you to install plates with a larger diameter on the lower tier. Devices longer than 60 centimeters are made with two pallets. The latter must be removable or retractable.
Alternative option
The dish drainer does not necessarily have a wire rack or mesh. Today, rugs with dimensions of 30x40 or 50x60 centimeters have appeared on the market. They are spread out near the sink and wet dishes are placed on them. As soon as the water has drained, the dishes are put on the shelves, and the rug is rolled up and put in a drawer.
Today, manufacturers offer rugs made from different materials:
- Rubber, silicone, plastic with a ribbed or corrugated surface. Water collects between the ribs, which can be easily drained and the mat dried or wiped dry.
- Fabric, which includes fiber made from synthetic fibers. Such rugs absorb moisture, after which they have to be dried. But in terms of workmanship and service life, they are not inferior to models from the first category.
Drying pencils
A very original souvenir for the kitchen can be made if you use the most unexpected items. For example, an interesting dryer for kitchen utensils can be made from pencils:
- As a base for the stand, take a wooden kitchen cutting board or just a piece of wood.
- Mark the holes on the board. The holes should be located in the place where the racks will be placed in the dryer to hold the dishes.
- Pencils are used as stands.
- Drill holes with a drill and insert pencils, pre-lubricated with glue, into them.
The original DIY dish dryer is ready!
Important! If you use pencils with colored bodies, you will get a very cheerful and positive little thing that can serve as a gift.
Plastic bottle dryer
Another option for making your own dryer is to use a plastic water bottle. Its production will not require financial costs, because, for example, for a summer house you simply don’t want to spend money on expensive items.
Operating procedure:
- Take an empty five-liter water bottle, either round or square will do.
- Cut the neck of the bottles not on a conical plane, but where there is already a constant width.
- Cut the bottle in half lengthwise and create a structure by inserting several trimmed longitudinal halves (one into the other).
- Upon completion, simply secure all connections for strength using a stapler.
Video material
Even a simple housewife can cope with the task of making a dish dryer with her own hands. Drying done yourself will become a real source of pride in any kitchen. Especially if you think about its original and bright design.
Constructions
- A single-level drying rack can only hold plates and comes in both wall-mounted and table-top versions.
- The two-tier drying rack is divided vertically for plates and horizontally with a shelf for cups.
- The dryer for all cutlery has compartments for knives, spoons, and forks.
- A universal drying rack can also become a place for permanent storage of dishes.
Freestanding
Drying racks on the wall or on the table will perfectly decorate the interior.
There are a great many such models, as can be seen from numerous photos.
Peculiarities:
- There are samples with and without pallets of different shapes, single-tier and two-tier. You can even buy models with separate sections for forks, knives, and spoons.
- We will attach the free-standing structure directly to the kitchen sink. Most often this is a steel grid dryer.
- We will place a compact wall dryer above the sink. It is also advisable to hang it above the work surface if the dryer has a tray.
- Improved models have a slope towards the bowl, from which water flows directly into the sewer.
Two-tier freestanding drying rack
- A large tabletop drying rack can even accommodate a festive dinner set. We rarely use it, as an additional one, and daily load - on hanging models that do not take up much space.
- A spacious floor drying rack is a convenient cabinet with pull-out sections for plates, cups, bowls and other utensils.
Built-in
It is much more convenient to equip a cabinet for drying with your own hands above the sink itself.
Peculiarities:
- The dryer built into the sink is an additional wing of the sink. The perforations on the wing retain water perfectly. But it’s always inconvenient to store dishes here, because the sink is constantly in use.
- There is also an analogue model of a modern built-in dryer - troflex.
- Place dryers for pot lids on the inner door of the kitchen cupboard or on the wall near the hob.
- As a compromise, you can build the dryer into a special drawer. The main thing is to place the pallet correctly so that the furniture does not swell from water.
In modern kitchen sets, such a place for a drying rack is required.

