Door sizes
When making doors for sliding wardrobes, there are no size restrictions, since the doors are adjusted to the existing dimensions of the openings. Therefore, the doors can be made to any size, depending on the existing dimensions, both in width and height. Despite this, there are some recommendations, depending on what the production technology allows.
So:
- The minimum width of the sashes is considered to be 50 cm, although it can be made narrower, but they will warp or jump out of the guides when moving.
- The maximum width of the sashes is about 110 cm. However, such sashes are much harder to move.
- The most optimal sizes range from 60 to 90 centimeters.
- The profiles are 5.5 meters long, so it is possible to make wardrobe doors of any height. In this case, you should pay attention to the rigidity of these profiles and especially the handle profiles.
- The number of sliding wardrobe doors depends on the actual dimensions of the sliding wardrobe itself. The width of the doors should be such that they overlap each other, otherwise the inside of the cabinet will be visually accessible to everyone.
Almost no size restrictions
Materials and tools
To make a door for a compartment-type cabinet you will need (using the example of a frame hinged system):
- Filling: slab wood materials, frosted glass or mirror with a thickness of at least 4 mm, protected with film.
- Upper and lower guides (two-track for standard door installation).
- Side profile C for open handles, H for closed handles.
- Frames for framing a door, including the top one with a channel for screwing in assembly screws, the bottom one with the same channel but with a higher shelf, and the middle one, used when assembling doors from different materials or individual parts.
- Upper roller, selected taking into account the type of side profile of the handle, 2 pieces for each sash.
- Support roller mechanism, 2 pieces.
- Assembly self-tapping screws.
- Silicone sealant used in the manufacture of sliding wardrobe doors made of glass or mirrors.
- Schlegel is a sealing strip glued at the owner’s request into special grooves in the side profile of the handle in order to soften the impact of the doors and protect against dust.
Additional elements include stoppers, closers, end caps or locks. Such components are purchased based on the capabilities and desires of the owners and are optional. The same applies to straight and shaped stops used when assembling sliding wardrobe doors from laminated chipboard with your own hands.
Due to the high demands on dimensional accuracy, all panel materials are cut using special equipment at the time of purchase. If this is not possible, an electric jigsaw is used to cut laminated chipboard. The same tool is used when cutting profiles and frames (an alternative is a hacksaw) provided that a special saw is installed. To drill holes in the profile, you will need a drill or drilling machine; to clean its edges, you will need a file with a frequent notch. Installation and tightening of self-tapping screws, door adjustment are carried out using a screwdriver, hex keys and 6 mm bits. At all stages of cabinet assembly, a level, plumb lines and other measuring tools are used.
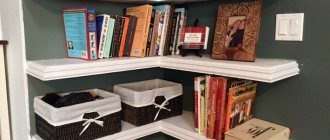
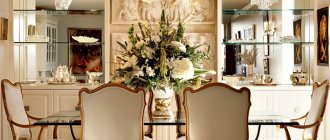
Variety of models of two-door wardrobes, examples of placement
Sliding system design
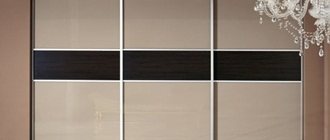
Chipboard
Tinted glass
Frosted glass
Mirror
Sash designs
The design of wardrobe door leaves includes the following elements:
- Bottom profile.
The lower profile has deeper sidewalls - Top profile.
Upper profile for sliding door leaf - Profile handle.
The handle can stand on both sides - Intermediate profiles. These profiles are placed between parts of the door leaf, but you can do without them - if the door is solid and not composite
The photo below shows the assembled frame. The door material is inserted into the grooves of the profiles, which can be glass, mirror, chipboard and other materials as desired.
Sash design without filling
Intermediate profiles do not need to be installed if the door leaves are not of impressive size. The thickness of the material can be from 4 to 10 mm. If the materials are thin, they are installed using sealing gaskets.
The movement of the shutters is ensured by rollers, which are mounted both at the bottom of the structure and at the top. The entire load falls on the lower rollers, and the upper rollers act as guides so that the blade does not deviate vertically.
Rollers for wardrobe doors
The rollers are fastened using special fastening elements.
DIY bath screen: professional installation secrets
- If desired, you can use a plastic profile to create the structure.
- When you go shopping for materials, take a photo of your bathroom. This will make the choice easier.
- If you decide to decorate the product with tiles, use cement mortar rather than glue. It's cheaper, but does the job just as well.
- Do not use tiles and panels in light pastel colors to decorate the structure. In the future, they will require too much care, as they will become very dirty.
- Mosaic pieces (colored chips) are ideal for decoration. They will help transform the interior of the bathroom.
- Do not forget to check the structure after installation for strength.
So, now you know how to make a screen for a bathtub. But are you ready to work, waste time, effort and money? Or maybe it’s easier to make a pleasant purchase? The screens presented in the range are beautiful, practical and durable. Finding the right option will not be difficult even with a limited budget.
Source
Guides for wardrobe doors
To ensure the normal functioning of the wardrobe doors, it is necessary to install guides along which the rollers move. There are lower and upper guides, the designs of which are different.
The top guide for the wardrobe door The bottom guide is made of metal
The shutters are installed in their place as follows: first, the rollers are inserted into the upper guides until they stop, after which the lower rollers are inserted into the lower guides.
In the image below you can see the entire structure.
Assembly diagram
Manufacturing materials
Today, the main materials used for the manufacture of sliding wardrobe doors are wood, MDF boards, metal, glass, plastic, and combined materials. Natural wood is used when installing accordion doors, pencil cases and books. This material goes well with a classic interior, emphasizing the high status of the owner of the house. This is an environmentally friendly, reliable material, but it is quite expensive. Most often oak is used for these purposes.
MDF is the most common and has established itself as an inexpensive and versatile material. MDF boards are amenable to shaped processing of any complexity, which allows you to create doors of any shape and style.
Glass and mirror doors are designed to visually increase the space of the room. They are suitable for modern and high-tech styles. The peculiarity of such doors of dressing rooms is that, without entering the dressing room, you can see its contents. The doors are also supplied with frosted glass, decorated glass, patterned glass, glossy glass and structured glass.
Combining materials allows you to adjust the final result to the specific needs of the customer. Combinations can be varied: plastic with metal, glass with MDF or wood, glass and plastic, mirror panels with frosted glass.
The working mechanisms are made of steel and aluminum. Steel systems are cheaper than aluminum ones, but they are fragile and quickly fail. The reason for this is often the small thickness of the canvas. Thin rails of lower support systems quickly deform. Aluminum systems will last longer, although they are much more expensive than steel ones. What is certain is that any system, regardless of its cost, will last a long time if handled with care.
Working door systems are equipped with rollers or bearing mechanisms. Often the standard equipment is equipped with roller elements that do not have bearings, but they can be replaced with higher-quality parts for compartment doors to the dressing room with your own hands.
MDF
Mirror chipboards
Wooden
Glass
How to calculate sizes correctly
Self-production involves two approaches. The first option comes down to measuring the opening, after which a decision is made on the number of sashes. After this, you should contact a company that practices manufacturing doors for sliding wardrobes, but first you need to make inquiries so that the company does not sell components taking into account their installation, which is quite rare. Company managers will be able to calculate exactly what components are needed and in what quantity. Even though everything is very simple, you should not count on managers to do it for free.
The second option is complete independence from various types of managers, since it involves an independent search for all the elements, especially since in construction stores everything can be found in a wide range. It may take a little longer, but it will be much cheaper.
Calculation of wardrobe doors. Details.
Doors
The width of the sashes is chosen so that access to the handle is free, while one sashes should not overlap the other sashes too much. If two doors are enough for a wardrobe, then the width of the sides is calculated as follows: take the width of the opening and add the width of the profile to it, after which the resulting dimensions are divided by 2.
For example, with an opening width of about 1500 mm, the profile width is added to this value, for example 26 mm, for a total of 1526. Then the resulting value is divided by 2 and the result is 763 mm. The width of the handle profile may differ, so the actual value of this parameter is substituted.
Profiles may be different, so they must be measured individually
If it is planned to install 3 sashes, then double the width of the handle profile is added to the calculations, which is expressed as 2000 + (23x2) for a total of 2046. Then this amount is divided by 3 - 2046/3 and the result is 682 mm.
The height of the sashes is determined as follows: take the actual height and subtract about 45 mm from this value to obtain the required height of the sashes. The side profiles are adjusted to this height. So, the dimensions of the valves are determined.
Filling
The filling (material) of the sashes is located in a frame assembled from profiles. To calculate the length and width of the filling material, proceed as follows: the width is determined using a simple arithmetic operation - the double value of the width of the side profiles, as well as the top and bottom, is subtracted from the total width and length when determining the length.
Measuring the width of profiles
If the filling material is thinner and a sealant has to be used, then this must also be taken into account.
In short, first of all, you need to carefully think through everything and purchase all the components of the future design, which may differ in size, shape, method of fastening, etc. This is the only way to correctly calculate and then install, securing all the elements.
Profiles
The side profiles must have a length corresponding to the overall height of the sash. Horizontal, that is, the upper and lower profiles are cut off, taking into account the width of the handle profile, multiplied by 2.
How to measure handle width
For example, the width of this profile is 23 mm, so the size of the horizontal profiles is as follows: 762-(23x2) for a total of 696 mm.
In the video below you can learn more about the assembly of the door frame.
Cutting profiles and assembling the frame of sliding wardrobe doors
DIY wooden roller door for a shelf
Hello, dear readers and DIYers!
When planning a kitchen and calculating the designs of cabinets and hanging units, you should always take into account the dimensions of the doors. For example, if a closed cabinet is located directly on the countertop, then to open the door you will have to remove everything from the table. In this article, John, author of the YouTube channel “John Heisz - I Build It,” will give you recommendations for making a roller door that will cover a shelf in a kitchen cabinet.
This is a very convenient, ergonomic design that allows you to store frequently used items out of reach of dust and, at the same time, in close proximity to their user.
Materials. — Maple board — Cotton fabric — Sandpaper, liquid nails glue, polyurethane varnish.
Tools used by the author. — Screwdriver — Band saw, jointer, planer — Circular saw, pusher — Miter saw, milling machine — Set of wood cutters — Pneumatic airbrush — Electric spray gun — Ruler, square, tape measure, marker, pencil, plastic roller. Manufacturing process. This door will be made of thin wooden slats fastened together, and it will swing down like a typical roller shutter and then slide inside the cabinet.
The product is made from maple wood. John runs one of the wide sides of the boards on a jointer to evaluate the quality of the grain and the wood itself.
Next, you need to mark a line along one of the long edges of the board, and cut off any irregularities on the band saw.
Now it won’t be difficult to cut all the boards into thin strips. This procedure is performed on a circular saw with a rip fence. It’s even good if there is a little more material than needed. It happens that parts have to be replaced, and the most advantageous design must be selected.
To safely cut parts, John uses a push rod of his own making, which was described in a recent article.
When processed on a thicknesser, all parts acquire their final width and thickness, and several planks can be simultaneously run through at the same time.
The processed boards are laid out on the work surface and sorted by appearance and pattern. The author decides which side of each plank it is desirable to turn outward.
After the planks folded together have formed a single plane, he selects an area on it with the most impressive wood pattern. The craftsman has this opportunity because the planks have not yet been cut to length.
Next, using a large square, John draws the lines for the start and end of the planks. Each plank is 16.5 inches long.
Excess wood is cut off on a miter saw. For convenience and speed of processing, the parts are stacked several pieces in one layer so that the markings are visible.
A radius cutter with a thrust bearing is installed on the milling machine, and with its help the corners on each plank are rounded. The author uses the smallest cutter he has - a 1/8 inch.
The next step is to spray the boards on both sides with a layer of water-based polyurethane varnish. John uses a pneumatic airbrush, powered by an air compressor. Instead, you can use a more compact electric spray gun. This procedure is best done in the fresh air.
Between coats, all surfaces are sanded by hand with fine-grained abrasive paper. This technique allows you to minimize roughness resulting from raised lint and dust.
Next, you can begin assembling the roller door.
This is usually done like this: take a piece of cotton fabric and glue it to the back of each plank. The fabric actually replaces the hinge joints.
So, a strip of “liquid nails” glue is applied to the inside of each segment.
Then the fabric is carefully laid out, the edges of the planks should remain free, because the coefficient of friction of the wood on the guides is much lower compared to the fabric, and the fabric itself will wear off very quickly.
Now the fabric is rolled out over the surface with a roller, so the glue will better penetrate the fibers of the fabric.
To install a finished door in a cabinet, the craftsman must first remove the side rails. They are slats of this shape (with the fold removed, slightly larger than the thickness of the roller shutter slats).
The door is very flexible and not easy to manipulate. The author literally feels for the upper guide and inserts the upper edge of the roller blind into the groove.
After this, the side guides are put in place and the door is ready for use.
By the way, if you noticed, John covered the entire countertop with porcelain tiles. I personally did the exact same thing about 10 years ago. Believe me, this coating really is not afraid of hot objects, and it is very easy to care for. Among the useful functions, everyone at home very quickly lost the habit of cutting food directly on the table. There are also disadvantages: the countertop is very cold, and you should not drop ceramic dishes on it.
John came up with such a beautiful and functional door.
I thank the author for the recommendations on making beautiful furniture roller blinds.
Good mood, good health, and interesting ideas to everyone!
The author's video can be found here.
Source
Become the author of the site, publish your own articles, descriptions of homemade products and pay for the text. Read more here.
Photo report on the assembly
First of all, it is necessary to cut all the profiles intended for the manufacture of the sash correctly, at an angle of 90 degrees, and exactly to size. In the handle profiles you will have to drill all the holes intended for fastening, including for mounting the guide rollers.
As a rule, through holes of different diameters are drilled, and the sizes of the holes depend on the purchased fasteners. Basically, the diameters correspond to 4 mm and 6 mm, as well as 6 mm and 10 mm.
How to drill holes
One hole is drilled in the upper part of the profile, departing from the edge of the profile about 7 mm. There are 2 holes in the lower part, one of them is also located at a distance of 7 mm, and the second is at a distance of 42 mm.
Holes at the bottom of the side profiles
Assembly consists of first installing the filling. If necessary, a sealing rubber band is first installed around the perimeter, which is fixed at the end of the part by simply pressing a finger. The edges of the seal are cut off so that it does not overlap on the other side, but there is simply no need for extra gaps.
Seal on the mirror
When installing mirrors, a protective film is glued to their back side. You can use regular self-adhesive film. Its functions are limited to preventing fragments from scattering when the mirror is damaged.
When using a composite filler, you will have to use a connecting profile. To secure the filling, the material is fixed in the grooves of the profile, sometimes this will require significant force. Often you have to arm yourself with some tools, like a rubber mallet.
Simply insert the filling parts into the grooves of the profile and tap on the end
When the filler is installed in its place, the missing profiles are installed, both above and below.
Top profile installed
The side profile handles are installed last. The installation technology is identical, since the filling goes into the grooves all the way. Finally, the structure is fixed using fasteners. If the holes are drilled correctly, there should be no problems with fasteners.
If drilled correctly
For reliability, all elements are tightened using a special hex key. Without fully tightening, the upper roller is inserted between the screw head and the profile bridge (if the upper part is being fastened), after which the screw is tightened with maximum force.
Insert the upper rollers
Having secured all the elements in the upper part of the structure, move on to the lower part. The fastening is almost identical despite the fact that 2 holes are drilled in the lower part.
Install the fasteners from below
After attaching the profiles, proceed to attaching the lower rollers, while the thrust plates of the rollers are inserted into the grooves and pressed well.
Installing the lower roller - insert the plate into the profile
The spring rises, after which the roller body should go inside. Then a screw is inserted into the hole so that it fits into the socket and tightened with a wrench. In this case, you may need a different size wrench, since this screw may be thinner, but longer.
Press the roller, insert the screw
This screw should not be tightened all the way, since this screw is used to adjust the position of the sash. After installing the sash, you will need to adjust the sash travel, as well as its height position.
Tighten the screw that fixes the roller
By pressing the roller wheel, you can see how it sinks into the body and then returns to its original position. Due to this feature, it is possible to ensure smooth movement of the valves.
After the wardrobe door leaves are assembled, you can begin installing the guides. They should be placed one above the other (bottom and top) without the slightest deviation. To do this, it is better to use a plumb line or laser level.
To accurately install the guides, the top guide is installed first. Fastening is carried out using fasteners, and care must be taken that the shelves of the wardrobe are located at a distance of 10 cm from the door leaves.
Screw on the top guide
Special bumper springs are installed in the lower guides on the sides, which are intended to limit the movement of the sashes. Their number corresponds to the number of sashes, therefore, if there are two sashes, then the springs are installed on both sides.
Door stoppers
It's quite easy to install the bottom rail if you first fix the top one and don't fasten the bottom one, but install the sashes in their place. Although, on the other hand, this simplicity can turn out negatively if you do not approach this process responsibly. It should be taken into account that wardrobe doors are quite heavy and their installation without appropriate fastening of the bottom rail is quite problematic. It is much easier to take a thread and tie a regular nut to one of its ends, thus making a plumb line. It's much easier anyway.
Having aligned the sash vertically, automatically align the bottom guide
Lastly, the schlegel is glued to the sides. It represents a fleecy self-adhesive strip. It is intended to soften the impact of the doors on the side parts of the wardrobe.
The final touch is the Schlegel sticker
You can stop here, since the wardrobe doors are installed and the doors are ready for use.
Manufacturing stages
The standard step-by-step instructions for making doors for a wardrobe with your own hands consists of three main stages:
- preparation of parts taking into account the selected dimensions;
- assembly of the cabinet itself and door panels;
- installation of all profile elements, fastening of roller mechanisms.
When installing large-sized panels in a wardrobe, work should be carried out in a room where furniture is permanently placed. In any case, cutting or drilling of a metal profile is carried out on a flat, stable base.
Preparing parts
This stage begins with the preparation of door panels, namely cutting slab materials and processing the ends:
- Elements made from chipboard are covered with a special tape using an iron or a hair dryer; elements made from natural solid wood are sanded with sandpaper and varnished.
- Glass or mirror parts are covered with film over the entire area with mandatory protection of the edges with silicone sealant. Properly fixed material should cover the entire perimeter of the fragile inserts and depart from the edges of the frame by 2–3 mm; the excess is cut off at the assembly stage.
- Cutting a profile with guides is often carried out after carefully marking perpendicular lines, exclusively from the back side, without removing the protective film (if any).
- Accidentally damaged edges are carefully sanded with a finely cut file.
- Holes in the horizontal guides fixed inside the wardrobe are drilled with a diameter of 3 mm, 25–35 cm apart.
- Recesses for the final fastening of the frame are made on the vertical section of the handle profile, with an 8 mm indentation at the top, 8 and 42 mm at the bottom.
The recommended hole diameter on the inside is 5.5 mm, on the outside wall - 10 mm. Accordingly, to obtain them during the first through pass, drills with a diameter of 5 mm are used. From the outside, the hole is drilled using a larger diameter nozzle.
When cutting parts, it is recommended to check the parameters of parallel sections. According to the rules, they must completely match. The cut profile should be laid out on the floor or a flat area in order to check the dimensions, mark the drilling points and determine the correct rotation of the handles (relevant when working with the C-profile).
Styles and colors of beautiful sliding wardrobes, popular designs
Fixing the guides
Particular attention is paid to installing guides directly in the cabinet. These elements are fixed using plumb lines and adjusted vertically to the nearest millimeter. The upper horizontal guides are fixed first, after checking their evenness - the lower ones. The method of their location depends on the type of side profile. When installing doors with asymmetrical C-profiles, the lower guide is shifted from the facade line until it coincides with the inner strip of the upper guide. When using an H-profile, all horizontal guides are located in the same plane and coincide with each other.
Frame and profile assembly
The assembly pattern of the door leaf depends on its type. When using glass inserts, the silicone sealant is installed first on the end. After this, all elements of the canvas are connected by middle frames. Unlike the seal, which is easily pulled on with your fingers, difficulties may arise at this stage; in particularly difficult cases, the filler is tapped with a rubber hammer (which is not always possible when working with a mirror or glass). The upper and lower frame profiles are secured to the already assembled canvas using similar efforts.
The side profile is installed last, starting from the top:
- To fasten the frame, carefully insert a screw into the previously drilled hole, with the pointed tip protruding 10–15 mm.
- This tip is directed into the groove of the frame upper profile and tightened with a hex key to a 3-4 mm gap.
- The fork of the upper support roller is inserted into the resulting space, after which the screw is tightened until it stops.
- The process of assembling the cabinet doors is completed by securing the bottom of the frame at a distance of 42 mm from the edge and fixing the support roller (in a similar way, but without carefully tightening it).
Methods of decorating mirrored facades of sliding wardrobes
Some craftsmen approach the assembly process differently: first they fasten the door frame without filler, after checking the work, this structure is partially unscrewed and filled with glass or chipboard. A description of this method can be easily found on thematic resources; the basic rules for assembling and fixing the profile remain unchanged. To avoid mistakes, it is worth assembling the wardrobe doors, as recommended by the manufacturer of the sliding systems, and clarifying this point in advance.
Types of cabinet doors - opening systems, materials, facades
It’s hard to imagine an apartment or house in which there is no closet for storing clothes and other things. When selecting a piece of furniture, it is important to take into account not only the contents inside the storage system, but also the specifics of the part of the façade of the product. One of the main facade elements are doors. The furniture industry offers consumers different systems for opening cabinet doors; before choosing a specific model, it would be nice to get acquainted with the positive and negative properties of each type.
Today's storage systems can have the following types of cabinet doors:
- swinging open;
- sliding:
- folding;
- lifting
Wardrobe with double doors
The opening system with swinging leaves is a traditional design. Despite the long presence of the model on the furniture market, hinged cabinets do not lose their great popularity.
The design of double doors is incredibly simple and consists specifically of the panels themselves, door handles and parts that are used for fastening. The doors are installed on the walls on the sides of the cabinet. Iron furniture hinges serve as fastening elements. To access the space inside the cabinet, you need to grab the door handles and move the doors to the side.
Basically, in swing-type models, the number of door leaves corresponds to the number of sections; a wide section with a bar is equipped with 2 doors.
The width of one door leaf that swings open should not be more than 65 cm; wider leaves will place a dangerous load on the door hinges, which usually leads to distortion or complete failure of the fittings.
On the furniture market you can now find models of double doors equipped with improved fittings - automated built-in closers, hinges.
The advantages of swinging systems are as follows:
- variety of models;
- good visibility when the canvases are open, the opening angle can reach 130;
- no noise when opening the doors;
- good value;
- long service life (up to fifty years).
The main disadvantage is that free space is required to open the door leaves.
Swing-type door opening designs are very often used in the designs of wardrobes for dresses, in kitchen units, and in built-in storage modules.
Wardrobe with compartment doors
By request, the next post will be on the topic - a children's closet for two. We believe you will like it.
Sliding door opening systems include door leaves, guides, roller mechanisms, and opening limiters. This device ensures the opening and closing of doors by moving the door leaf along the upper and lower guides, while one of the leaves slides behind the other.
The main positive qualities of sliding systems:
- preservation of free space - no additional space is required to open the doors;
- beautiful appearance.
Disadvantages of sliding mechanisms:
In the next article we will talk about the topic of a built-in oven for the kitchen. Let's try to describe this topic in more detail.
- The service life of the door system depends on the material of the rail. Thus, the average service life of a sliding mechanism with steel guides will be approximately 7 years, aluminum rails will usually last up to twenty-five years;
- very high price of the system;
- presence of noise when moving doors;
- incomplete view of the shelves (one part of the cabinet is covered with door panels);
- reducing the useful volume of shelves due to the installation of guide rails. The difference between the internal and external depths of the cabinet can reach about 7cm.
Sliding opening systems are used in the designs of wardrobes and closets.
Folding Wardrobe Door System
Accordion doors are considered a unique alternative to sliding opening systems. The action of the folding mechanism is as follows - the front facade part is fully folded according to the accordion principle. Unlike sliding systems, accordion door designs use only a guide located on top. The door leaf in folding opening systems is not considered solid; it has several leaves that are connected to each other by fastening elements, with each part having a separate fastening to the upper guide.
Care and operation
Regardless of the choice of model and material, any design requires careful operation and high-quality care. This will protect the product from damage and maximize its service life.
Wooden fillers and their derivatives are afraid of temperature changes and high humidity, so the elements must be protected at the production stage with special impregnations and insulating agents; heaters should not be placed nearby, and it is recommended to wash only with a slightly moistened cloth without using aggressive liquids and powders.
The use of roller mechanisms involves periodic lubrication of their moving elements. In addition, the lower guide bar quickly becomes clogged and the rollers may break, so you should clean the grooves with a vacuum cleaner.
You need to wash and polish only with household chemicals that are suitable for the surface material. As a result of using other options, mirrors become dull, paint or plastic finishes change color, etc.