Definition with necessity
To figure out what furniture can be restored. You need to understand that the costs of specialists will be appropriate for antique furniture. It is better not to take risks with it to avoid harm.
Ordinary old furniture that has lost its former attractiveness and was purchased at a shopping center can be restored manually yourself.
What does restoration of wooden furniture give the owner?
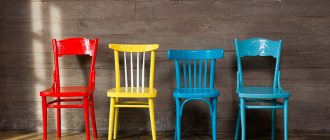
Old furniture, into which a piece of soul was invested during creation, should not die. Such things are an elegant decoration for any private home, any spacious apartment. Intelligently refined wooden furniture can become a key accent in the interior and inspire the creation of interesting design solutions - from classicism to Provence.
pros
Saving time and money. There is no need to use the services of cargo taxis, movers and restorers.
Confidence in the result. Cost control, selection of desired materials and the ability to follow all instructions personally.
Implementation of ideas. Furniture can be customized to your personal ideal. In the creative process, new thoughts may arise and a desire to correct what has been started.
For example, add intensity in color or add accessories. And the need to coordinate every change is eliminated. And after accepting the job, it is unlikely that changes will be made.
Disadvantages of restoration
It is preferable to leave it to specialists to give new shapes to old furniture or work on small details. A person without experience who does not know the nuances of work can completely ruin items.
Saving personal time. By handing furniture over to professionals for restoration work, you can forget about it and wait for the finished result.
DIY work requires an investment of energy in your free time; evenings and weekends will be devoted to the process. If you don’t treat your business as a hobby, then soon the activity will begin to burden you.
Eurobook sofa - 130 photo recommendations on how to make and assemble a comfortable and compact sofaAssembling furniture with your own hands - 105 photos and a detailed video of how various furniture elements are assembled
Do-it-yourself bookshelves - ideas for building shelves and shelves quickly and easily from scrap materials (155 photos and videos)
Allocation of special territory. Giving new life to old furniture is a dusty task. Chemical compounds, sawdust and dirt will fill the room.
It is necessary to allocate space for freedom of action. It is advisable to carry out work in non-residential areas: street, garage, workshop.
If restoration work is carried out in an apartment, then one room should be completely circled, and the floor should be covered with cellophane or paper.
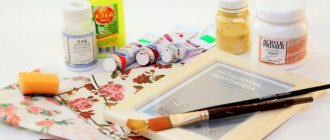
Required materials
An individual list of materials should be selected for each piece of furniture. But there is a standard set of devices that will be universal for almost all ideas.
It is recommended to make a list in advance. You can use equipment rental because professional tools significantly save time, effort and give a higher assessment of the quality result.
- White table: 115 photos and videos describing the selection and construction of cool and easy-to-use tables
Do-it-yourself tabletop: video instructions for making a tabletop + 140 photos of the most modern ideas
Corner sofas - 130 photos and videos on how to choose and where to place modern original corner sofas
For DIY work you will definitely need: a sanding machine, a construction vacuum cleaner, an electric jigsaw, a screwdriver and a construction hair dryer.
Small details should include: sandpaper, brushes with rollers, several spatulas of different sizes.
To maintain health safety, buy good protective gloves and a respirator. Don't forget about removers, wax, paint, mixtures for sealing cracks.
Materials for work can be found in specialized stores, or use advertisements. Often the necessary compounds are sold at a reduced price, the remains from repairs do not match the color.
Time spent
It is impossible to accurately calculate the time spent. For example, you can spend one day on small items. Larger works may take several months to complete.
- Do-it-yourself computer desk: 150 photos of making corner tables and features of the choice of materials
DIY ottoman - step-by-step guide to the best homemade ottoman options (video + 125 photos)
Coffee table: simple and stylish design options and design ideas for coffee tables (115 photos)
Deadlines are calculated based on the working material. Each composition has a certain drying period.
It is necessary to carefully read the instructions and strictly follow the advice and instructions for restoring furniture. If the recommendations are not followed, the final result will decrease in quality.
Before each application of a layer of varnish, you need to be sure that the previous one has dried completely. To save time, buy mixtures that do not require long drying. It's a good idea to read reviews before purchasing.
Plan all your purchases clearly. This will help you avoid unnecessary trips to the store. The necessary materials should be purchased immediately and kept on hand.
Basic methods and types of work
Removing trim
Cycling is the answer to the question of how to restore a wooden table with your own hands.
As already noted, the process begins with the removal of finishing coatings. Wooden structures are most often coated with varnish or paint.
When it comes to furniture, the most common surfaces are coated with polish, natural or synthetic clear varnish, or latex paint. Such coatings should be washed off with alcohol, acetone, and organic solvents.
Brushing is only suitable for dense wood species.
If we consider the work in a wide range, then we can distinguish the following methods of removing finishes:
| Method of removing paintwork | Peculiarities |
| Cycling | In simple terms, scraping is scraping something off a surface. The operation is performed with a special tool according to certain rules, otherwise the surface may be completely damaged. Can be used on flat, level areas, as well as on threaded or milled elements if you have the appropriate skill and tools |
| Washing | Paints and varnishes are dissolved in solvents of various compositions. This effect is applied when they are removed. For work, alcohol, acetone, complex organic compounds and special removers are used. |
| Brushing | Brushing is cleaning the surface with a stiff brush. Most often, a tool with metal bristles made of brass or steel is used, but it is possible to use natural or polymer bristles. The method is not suitable for all types of wood and types of work; it is considered a rough method of removing paint |
| Burning | If you imagine how to restore wooden windows, then you understand what we are talking about. Most paints soften and melt at elevated temperatures, so it is often practiced to treat the surface with a blowtorch or a hair dryer, followed by cleaning with a chisel or scraper. Of course, this method is unacceptable for restoring antique furniture, works of art or expensive items. |
| Grinding | The finishing layer can be removed by sanding the surface with emery cloth or other abrasive. This is a rather crude processing method. |
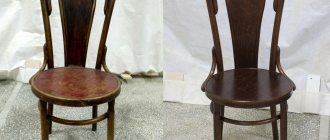
Before restoring a wooden chair, its surface is cleaned of varnish by sanding.
Important! If you have to work with old furniture, a musical instrument, a gramophone, a box or other elegant object, then you should mainly use washing. Moreover, most old varnishes can be removed with alcohol or acetone.
Elimination of defects
Chips are considered one of the most common flaws.
When the preliminary measures to remove the finish have been carried out, we are presented with a bare wooden surface, on which numerous flaws are clearly visible. Most often these are cracks, scratches, breaks, chips, nail holes, missing or broken parts.
If we are dealing with complex structures, such as a furniture set or a log house, then the work may concern not only the wooden parts. An example of this is the restoration of the foundation of a wooden house, without which restoration work will not have an effect.
Renovating an old log house is a complex task.
Cracks are the most common defect. To eliminate them, it is customary to use EDP epoxy glue or wood putty.
When working with glue, you should act carefully; it is diluted in accordance with the instructions and heated to 50 - 60 ˚С. The part itself is also heated. Heated, fluid resin is poured into the crack in one or more steps, since the material can absorb the resin like a sponge, gradually drawing it into the crack.
Once the crack is filled with epoxy, you should wait a few days or even weeks, as the glue shrinks some during the polymerization and drying process. Only after this the excess is removed using sandpaper, stone or file. Epoxy resin not only fills the crack, it permeates the smallest capillaries and strengthens the entire structure, consolidating the old material.
It is convenient to use a syringe for filling.
In addition, resin can be used to simulate irretrievably lost or destroyed fragments. To do this, formwork is made from paper, foil or film and filled with resin, which is then brought to the desired shape by grinding or milling.
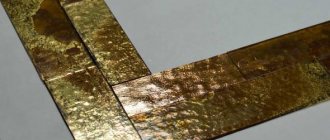
Lost parts have to be cut out again. It’s good if there is an example of an original spare part, otherwise you will have to invent this part, and this will no longer be an entirely accurate reconstruction. Insets are also used, when a destroyed fragment is cut out and replaced with a similar insert from the same or similar wood/EDP.
The table fragment has been replaced with an EAF insert filled with decorative elements.
In wide cracks, which are also called fractures, strips or wedges of wood are sometimes inserted with glue, and the gaps are filled with resin or putty. This area is then sanded and becomes indistinguishable from the rest of the surface.
All kinds of dents and cavities are most often repaired with putties. In the construction department you can find a great variety of compounds for working with wood, the price of which is quite satisfactory. A sales consultant will help you choose a specific product.
The process of filling dents and potholes.
Important! Of course, the work is not limited to just eliminating wood defects. Often it includes replacing upholstery, fittings, fasteners, restoring threads, etc.
Sequencing
Each piece of furniture has its own step-by-step instructions. To figure out how to restore upholstered furniture with your own hands, you should add a little to the list.
But just like with a set of tools, there is a standard set of actions.
Disassembling items
The very first step will be to disassemble the furniture. The work process will be much simpler if you disassemble it as much as possible. Remove the doors, unscrew the handles, take out the shelves, preferably unscrew the frame parts.
But don’t get carried away; parts stuck to the glue should not be disturbed. There is a risk that during assembly it will not be possible to repeat the fastening of the elements. It is advisable to remove all fittings.
To simplify the assembly process, you should photograph the fastening points in advance. Label the accessories and put them into bags.
Removing the top layer of varnish
To remove paint and varnish material, use sandpaper, a hair dryer or varnish remover. A smooth surface should be achieved using any convenient method. Methods can be combined. The main thing is to come to a result.
Don’t forget about your health and use a respirator, gloves and goggles. Since the work is very dusty, particles of chemical compounds will fly in the air.
Working on defects
Using specialized mixtures for grouting chips and scratches. The next step is to smooth out all the cracks and smooth out the uneven surface.
For scratches, grout is used, large cracks are filled with furniture wax, abrasions should be filled with putty.
Features of restoration of solid wood furniture
The process of restoring furniture is quite labor-intensive, and its implementation requires special knowledge and skills. The team at Nikolay Dremin’s workshop knows no difficulties in their work! Our specialists solve any problems with confidence.
The main stages of restoration of antique wooden furniture include inspection, disassembly and cleaning of varnish and household dirt, restoration of damaged elements, removal of cracks and chips, polishing and assembly.
A special feature of solid wood furniture is the unique texture of the material and natural color. It is these factors that complicate the restoration process. In addition, restoration of antique samples is impossible without complete disassembly and cleaning of the items.
Finish coating
If you want to preserve the original wood pattern, then use varnish, wax or oil as a finishing coat. When completely changing the color, choose paint or enamel for furniture.
When choosing bright and light shades, pre-paint the parts white. With this move, the paint will lay beautifully in the chosen tone.
Reviving the appearance
The idea behind the restoration of the nightstand is to keep the original look as close as possible, but we also wanted to freshen it up with something new and understated. First, we return the worn legs to their black color using glossy wood paint. We coat the external surfaces of the bedside table with a matte water-based varnish in oak color. The varnish did an excellent job.
When applying varnish, you can use either a brush or a roller - it all depends on the shape of the surface that we are treating.
As for some innovation, the color scheme played a role here. We painted the interior space of the cabinet, which can be used for books or any other accessories, in a matte yellow color. The result was a very harmonious combination of shades.
Now that all the parts are ready, we return them to their original places - we have a brand new stylish bedside table.
Desire and ingenuity allowed us to resurrect a time-worn bedside table. We are convinced that the restoration process itself is not labor-intensive and expensive, but rather simple and exciting, and besides, it is always pleasant to admire the result of your work.
Restoration of old furniture
Before starting work, you should carefully think through or even sketch in color what the finished product will look like. Study photos of furniture restoration with your own hands and head to a specialized store for materials.
The list of goods includes: brushes (for paint and varnish), paint, paints and varnishes, sandpaper (hard and soft), primer, paraffin, spray bottle, glue, masking tape and napkins for decoupage.
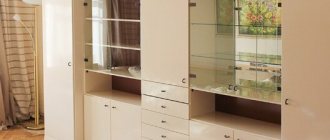
Restoring an old cabinet
Once the bedside table has been reassembled and all its fastenings have been replaced or strengthened, you can start transforming its appearance. Restoring a bedside table with your own hands can be done in different ways. But if you are not going to use dark opaque paint for this, then it is wiser to first coat all surfaces with one layer of colorless acrylic varnish. This will prevent yellow spots from appearing.
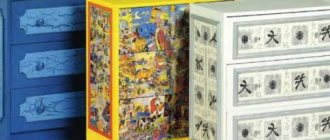
Then you can paint your furniture, use the decoupage method, laminate and veneer its surfaces, or simply treat it with stain and varnish. In addition, if desired, these techniques can be combined and supplemented with others. For example, it is now fashionable to artificially age furniture using the craquelure technique. It all depends on your personal tastes and preferences.
Of course, painting furniture is the simplest and most affordable restoration option. It can be used by people who do not have drawing skills, and the use of stencils will help give your cabinet a unique and very original look. Ideas can be gleaned from fashion magazines, but floral and folklore motifs are especially relevant. A bedside table intended for a children's room can be decorated with funny animals, flowers or cartoon characters. You can even involve children in this work. Such furniture, improved with your own hands, will become much more valuable for kids.
Related article: How to adjust the front door closer: tools, recommendations
Decorating a bedside table using painting
To make the cabinet look antique and worn, you should use acrylic paints along with liquid silver and silver leaf.
Before applying the paint, the bedside table is washed again, degreased with a weak soda solution (1 tablespoon per 2 liters of warm water) and dried thoroughly.
Then the primer is applied in 2 layers, allowing each of them to dry completely. The easiest way to prime the surface is with a small foam roller or sprayer. Next, the background paint is applied. It is best to use acrylic paints, as they dry very quickly and do not have an unpleasant odor. To apply an image to a varnished surface, use automotive spray paint.
First, paint the inside of the bedside table. Using a brush, apply paint to the corners and joints of the walls, and then paint the surfaces with a roller. This technique will help you avoid drips. The bedside table must be painted at least 2 times.
After the paint has dried, the outside of the bedside table is treated in a similar way. Then you can start painting. Now you can purchase ready-made stencils. They are sold in art supply stores. But you can create the pattern yourself. To do this, print out the design you like on a printer and copy it onto thick cardboard. The thicker your stencil, the longer it will last.
Then remove the places where the paint will be applied using a stationery knife or nail scissors. The stencil is applied or glued to the surface with masking tape and paint is applied with a sponge or roller. It is necessary to remove the cardboard before the coloring composition dries. But this should be done extremely carefully so as not to damage the drawing.
In the same way, you can decorate the cabinet with relief patterns. In this case, decorative plaster is used instead of paint.
Decorating with decoupage and craquelure
Decoupage is the decoration of a surface using images printed on paper. At its core, this technique is very similar to ordinary children's appliqués. Only the drawings are applied to special paper, which after drying becomes almost invisible. But if you do not have the opportunity to purchase special sets, then you can use ordinary disposable table napkins with a pattern. It must be remembered that the lighter the pattern, the paler the image on the surface of the bedside table will be.
Related article: Replacing cold glazing with warm glazing - we do it ourselves, following the recommendations
Before restoring a bedside table using this technique, it is also better to paint it. Then you need to prepare the selected images. They should not be cut out, but the edges should be torn off, trying to make them as fluffy as possible. This will help the application become less noticeable on the surface of the furniture. Then the drawing is completely dipped into glue (special or colorless PVA) and fixed in the desired place on the bedside table. Using a large, dense brush, the image is smoothed out, removing air bubbles, creases and folds.
Paint the cabinet with your favorite shade of paint, apply the prepared designs and cover the entire surface of the furniture with varnish.
After the application has completely dried, the entire surface of the furniture is coated with transparent varnish. But you can achieve a much greater decorative effect if you use craquelure varnish.
Craquelure is an effect in which a network of characteristic cracks appears on antique items. This technique is nothing more than artificial aging of furniture. If you decide to use it, you can get a bedside table that will look like a real antique.
The craquelure composition is applied to a painted or varnished surface without waiting for it to dry. Under the influence of special substances, the furniture becomes covered with cracks, but the protective properties of the paint do not suffer at all.
This way you can achieve amazing effects. For example, when it seems that gold shines through a dark varnish layer damaged over time. The intensity of surface cracking depends on the composition of the varnish. More detailed instructions can be found on the packaging of the product or from the seller upon purchase.
These are not all the ways you can restore the appearance of furniture. Restoring a nightstand is a creative work that largely depends on your imagination, imagination and patience.
The best posts
- DIY bed design
- How to unwind a cable from a reel
- The most unusual interior styles: ways to decorate an apartment and house differently from others (61 photos)
- How to glue wallpaper in the corners of the kitchen: correctly glue the corners with wallpaper, decorate the outer corner, non-woven trellises, instructions, video
- DIY plasterboard ceiling installation - video tutorials and installation instructions
- Features of nursery design for two girls (+35 photos)
- Mittens with jacquard pattern with diagrams and descriptions
- Relief patterns with knitting needles with diagrams and descriptions
Step by step steps
Furniture disassembled from its fittings should be sanded. To make the work progress faster, it is better to use a grinding machine, but in the absence of this, the process can also be done manually.
Cover the top layer with a primer before painting. Apply in one layer and set aside until completely dry. The time is selected according to the instructions, usually a minimum of three hours.
Parts that are not planned are sealed with masking tape for painting. Paint is applied to exposed elements in one layer. After drying, the paint layer can be repeated to enhance the color intensity.
To achieve the scuffed effect, rub the necessary areas with a wax candle.
The next layer of paint should be a tone lighter than the previous one. Alternatively, add a little white paint and mix. Having sealed the joint lines with masking tape, it is permissible to paint the protruding areas in a different shade.
For the decoupage technique, details are decorated. The finished napkin with a pattern is moistened with water, straightened out until smooth and covered with PVA glue.
At the finish, apply two layers of varnish, remembering to dry each layer completely.
Surface treatment, preparation for restoration
The first thing to do is remove the old varnish and sand the wood surface before applying fresh varnish. Don't forget about other elements: legs, glass, handles - remove them before processing.
The choice of removing worn varnish fell on an extraordinary method using improvised means: newspaper, iron and spatula.
How to remove old varnish using an iron and newspaper
- Take one sheet of newspaper, place it on the surface, apply a heated iron and wait about a minute.
- Then, with a sharp movement, we tear off the newspaper, and without hesitation, scrape off the varnish with a spatula.
- We perform this procedure the required number of times, depending on the area of the surface being restored.
- Afterwards, you need to carefully go over all sides of the cabinet with sandpaper, getting rid of irregularities, burrs and remaining marks from the iron.
If the legs are also subject to restoration, then we sand them too.
Recommendations
For quick renovation, there are ways to restore furniture yourself:
Simply sand it with a sanding machine and coat it with clear or light varnish.
Get rid of dirt, sand with light sandpaper and paint.
You can get rid of defects using drawings. If you don't have artistic skills, use a stencil. The patterns are applied with acrylic paints and covered with clear varnish.
Using the decoupage technique.
Preparing furniture for restoration work
It is necessary to conduct a thorough inspection of the bedside table before proceeding with repairs and restoration of its appearance. Remember that only high-quality furniture made from solid wood can be restored. But if the wood is hopelessly dry and covered with cracks, then it would be wiser to send the bedside table to a landfill.
However, some furniture parts can be replaced. For example, remove the door and put drawers instead of shelves. The result depends entirely on your skills and imagination.
First, the furniture must be completely disassembled and cleaned of any remaining decorative coating. To do this you will need the following tools:
- a set of screwdrivers (both Phillips and flat blade);
- spanners;
- carpenter's knife;
- flat metal spatula;
- hammer.
For a children's room, when restoring a bedside table, you can use bright colors, drawings with animals, birds or the child's favorite characters.
If you do not trust modern means, you can use the old recipe. For it, take 4 parts of natural beeswax, melt it over low heat and add 3 parts of turpentine. The resulting mastic is thoroughly stirred and, without waiting for it to cool, rubbed into the furniture. But it is worth remembering that such a product has a strong and very pungent odor. Therefore, it is not recommended to cook it in the kitchen.
Small scratches can be removed with iodine. In addition, you can now find a special marker in stores that visually smoothes out minor defects. But this method is only suitable for restoring furniture made of dark wood.
All chips and gouges must be carefully filled with a compound intended for working with wood. Now you can buy putty in different colors. If you plan to cover the bedside table with dark opaque paint or veneer, then you can use an ordinary white product. Otherwise, it is better to choose a putty that matches the surface of the cabinet.
Article on the topic: Cross-stitch pattern of a girl: a man and a woman in a hat, sets in red, with a jug and on a bicycle, with an umbrella
The composition can be tinted yourself if you add a few drops of water-based paint. After the putty has completely dried, the surface is once again treated with fine-grained sandpaper.
Secrets of eliminating minor flaws
When restoring a cabinet, you can combine several techniques, for example, craquelure and decoupage.
If the veneer on the surface of the cabinet is still suitable for use and is swollen only in one place, this defect can be eliminated without changing the entire decorative coating. Puncture the bubble and inject wood glue underneath it. A medical syringe with a fairly thick needle is suitable for this. Then iron the surface through a sheet of paper folded several times. Without allowing the bedside table to cool, place a weight on the damaged area and leave it for about a day. But this restoration method is not suitable for varnished furniture. Under the influence of temperature it can swell, and under pressure it can crack.
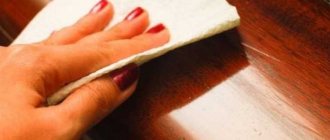
But if a whitish stain appears on your bedside table, for example, from a hot cup, it can be removed using car polish. Take a little mastic onto a soft rag and rub it into the stain with light circular movements. The abrasive substances included in such products remove a thin layer of deteriorated varnish. And fatty waxes will polish the surface. You just need to act extremely carefully so as not to cause even more damage to the furniture.
Old wooden drawer guides can be lubricated with paraffin, wax or ordinary soap. This method will make it easier for them to move in the grooves.
Who is suitable for furniture restoration at home?
Restoring furniture on your own gives old furniture a second life. Interior items can be updated beyond recognition, according to your taste.
DIY repair of cabinet and wooden furniture with your own hands is suitable for those who want to preserve their favorite things and save money.
Work on updating furniture, if desired, can be carried out even in an apartment. Even a beginner can handle the technique. The main thing is to be able to use carpentry tools and follow all instructions.
Small jobs can be completed in a couple of days. By following all stages of restoration, your favorite furniture will last for another year.
Furniture restoration price
The price of repairs and restoration of solid wood furniture is determined by the volume of work and the quality of its execution.
Calculated by time, plus the cost of consumables. With us, delivery in Moscow is included in the price automatically.
Our services.
1. Restoration can be cosmetic, aimed at temporarily restoring decorative and functional qualities (gluing, replacing fabric, renewing). We provide it extremely rarely.
2. Elimination of traces of unsuccessful minor repairs. Most often, minor repairs are carried out at home, by random performers, using improvised materials. Nails, unsuitable glue, bad varnish. Leads to the need for further complete restoration. Since the restorer will have to eliminate not only minor natural damage, but also traces of unprofessional intervention, repeated repairs are often more expensive than the initial ones.
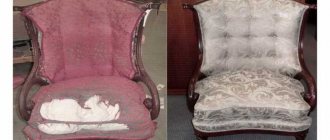
3. Complete restoration. Professional repair is designed to restore the strength of a chair, armchair, table, cabinet for many years. Strengthening the frame, re-stretching springs, restoring worn or replacing deformed parts, conservation, repairing wooden carvings - this is not a complete list of furniture restoration measures.
4. Comprehensive service. This can be cosmetic repairs, modernization, complete restoration while preserving historical and artistic value.
Complete restoration of the varnish on the countertop in a workshop is more profitable than the work of a private craftsman at home to eliminate each scratch separately.
| Filling the recess with hard wax of the required color, followed by polishing with a soft cloth | Operating time 5-10 minutes | Price 100-200 rubles for 1 scratch. |
| Not a deep scratch on the varnish. The varnish layer is sanded down to the bottom of the scratch, then a special, quick-drying varnish in an aerosol package is applied locally. | Working time 1-2 hours | Price from 1000 to 3000 rubles. Per decimeter. |
| One or more deep scratches, white spots on the varnish, general abrasion of the tabletop. Complete removal of varnish, sanding to bare wood, spray coating of the entire part with varnish. | Working time 2-3 days | Price from 5,000 to 10,000 rubles per 1 sq. meter. |
You can get advice from a restorer about restoration technologies, price, restoration time, delivery conditions and guarantees through our mail
Photos of DIY furniture restoration
Tell your friends