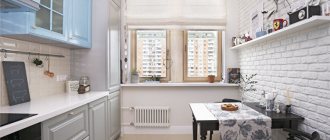
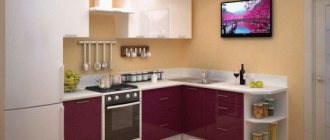
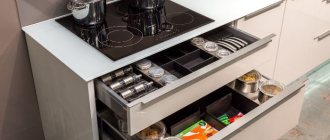
At first glance, it may seem that making a kitchen set yourself from scratch is a difficult task that only an experienced craftsman can complete. However, if you approach the study of this issue thoroughly: understand the sequence of processes performed, their nuances, take into account the standard ergonomic requirements, understand what the drawings of kitchen furniture contain, then it is quite possible to equip the kitchen on your own.
Kitchen furniture drawings
Preparation
The advantages of making furniture yourself are as follows:
- It is possible to choose the ideal furniture sizes for an existing room, taking into account its area, configuration and the presence of planning features.
- It is possible to use every free centimeter of the room to your advantage.
- The set will be made according to an individual drawing, that is, it can be called exclusive.
- The furniture will be of high quality and durable due to the selection of reliable fittings and control of each stage of manufacturing parts and assembly of the structure.
- There is an opportunity to save money.
The process of making a furniture set yourself consists of several stages.
Table 1. Stages of manufacturing a kitchen set.
| Stage | Description |
Stage 1 | Making a sketch |
Stage 2 | Room measurements |
Stage 3 | Production of drawings and specifications of parts |
Stage 4 | Selecting a design and purchasing material |
Stage 5 | Cutting parts and processing ends |
Stage 6 | Purchase of fittings selected at the design drawing stage |
Stage 7 | Assembly |
The first thing you need to do is draw a sketch of the room, which needs to reflect the overall picture.
Table 2. How to draw a sketch.
| Illustration | Description |
Step 1 | Mark the door and window openings. |
Step 2 | Display the location of structural elements (arches, niches, projections, suspended ceiling). |
Step 3 | Mark the location and configuration of the headset. |
Step 4 | Determine the location of the dining group - usually by the window. |
Step 5 | Determine the location of equipment and household appliances. |
Note! If a multi-level suspended ceiling is installed in the room, then when arranging furniture you should take into account its configuration.
It is recommended to “sketch” several sketches so that you can compare and choose the best option, which will still leave enough free space in the room.
Interface of the designer program for kitchen design
Instead of the usual paper, you can use computer programs that allow you to set furniture parameters and arrange them in three-dimensional space, taking into account the characteristics of the existing room. We will tell you how to do this in a special article.
A drawing will be created based on the sketch.
Video - How to draw a sketch of a headset by hand
General scheme for measuring the corners of a room when installing furniture from wall to wall
It would not be amiss to highlight a rather important point when measuring a room - its corners.
Ideally, in a room with high-quality finishing, the angles between the walls should be 90 degrees. When this is so, then, usually, when installing, for example, a kitchen unit, there should not be any special problems.
But sometimes it happens that the angle between the walls is not straight, but turned (obtuse) or acute.
How to determine the angle between the walls in order to make the necessary adjustments to the future project?
Experienced craftsmen purchase special electronic devices with laser pointers for this purpose. However, most often, measurers use various improvised devices.
Classification of kitchen modules
Before you start developing a drawing, you need to decide on some key parameters: material of manufacture, type and material of facades, number of modules.
Frames made of laminated chipboards are very popular due to the low cost of the material. The front layer protects the material from moisture penetration, but the sections of the slabs are especially vulnerable and require high-quality protection - treatment with a sealant or application of a protective PVC film.
Kitchen cabinet made of laminated chipboard
MDF is the most popular material, since in addition to its affordable cost, it is flexible and elastic, and also allows for fine processing.
Facades can be made using the following materials:
- films imitating any textures and materials;
- veneer;
- strong, durable and easy-to-use plastic;
- in the form of an aluminum frame with tempered frosted glass or plastic inside.
Laminated chipboard facades can imitate any type of wood
Depending on their location, cabinets can be wall-mounted or floor-mounted. When developing a drawing, take into account that a cabinet may not be required above the stove. At one end, the wall and floor drawers can be replaced with a pencil case.
Prices for laminated chipboard
Laminated chipboard
What to consider when arranging furniture
It is recommended to design a kitchen with a basic knowledge of ergonomic requirements that will allow you to create a safe, comfortable and functional space. In particular, when arranging furniture and equipment in the kitchen work area, take into account the rule of the “working triangle”, in which the main elements (stove, sink and refrigerator) are visually arranged so that when these main points are connected, a triangle is formed.
Work triangle in the kitchen with an island work area layout
The essence of this arrangement of the main points in the kitchen is to reduce the unnecessary actions of the housewife in the process of performing the technological process of cooking.
A properly organized work triangle allows you to rationally use time and energy in the kitchen
It is worth noting that the visual shape of the triangle can vary significantly depending on the chosen layout of the headset. For example, in a kitchen with a linear arrangement of furniture in the work area, the surface of the dining table is used as the third point. This principle also works with the island type of layout.
It is most successful to follow the rule of the working triangle with a U- or L-shaped kitchen layout.
The basis of the working triangle is to organize interaction between three main points
It is necessary to arrange the equipment so that the distance between them is not too small - it will be crowded, or not too large. It is ideal when the “working triangle” has equal sides, but this does not always happen. Therefore, we can note the optimal distance between working points: from 1.2 to 2.7 m.
Note! The distance between the stove, sink and refrigerator should be at least 60 cm.
Table 3. Organization of the “working triangle” for headsets of various layouts.
| Layout type | Description |
| Single row | With this arrangement of furniture and equipment, a triangle will not work, but in order to make the process of working in the kitchen as functional as possible, it is recommended to place the sink between the refrigerator and the stove. On both sides of the stove there must be a working plane of at least 40 cm. The main working plane (at least 60 cm) is organized between the refrigerator and the sink. |
| Double row | If the furniture is located parallel, then one row is equipped with a stove and a sink, and the opposite row is equipped with a refrigerator with a work surface. |
| L-shaped | The most convenient and spacious layout option is a headset that allows you to use a free corner in the room. In this case, the sink is placed between the stove and the refrigerator, which are installed in opposite corners of the unit. |
| U-shaped | This method of arranging a kitchen unit requires a lot of free space. But on the other hand, it is an excellent solution in small rooms, when all the free space is allocated for the set. With this layout, you get three rows of furniture. In this case, the sink is installed in the middle (often near the window), and the stove and refrigerator are on opposite sides. |
| Ostrovnaya | The island is used to install the stove, and the refrigerator and sink are on the main line. |
Note! When choosing a planning solution, take into account that there should be enough free space between the lines of the set or from the working furniture to the dining area.
Duration and conditions of measurement
We always try to reduce the production time of furniture, because you want to get a new kitchen set as quickly as possible. A specialist can measure your kitchen the very next day after submitting your application. He will arrive with samples of materials, colors, examples of fittings and countertops for the kitchen. The process of measuring, selecting materials and designing furniture takes 1.5-2 hours.
Together with a specialist, you can choose materials and accessories to suit your budget. Such a kitchen set will cost much less than ready-made furniture. As a result, you will receive the ideal kitchen design project for your space and will not overpay.
We will provide:
- 3D visualization of furniture in the room;
- detailed plan of the room and kitchen with a detailed layout;
- detailed estimate.
After your consent, the measurer will immediately conclude a contract for the manufacture of furniture between you and our company.
The services of measuring and drawing up a kitchen design project are free. We do not take advance payment; you pay only upon receipt of the finished kitchen set.
Additional terms:
- Traveling around Moscow - 300 rubles.
- Travel outside the Moscow Ring Road up to 5 km - 500 rubles
- Travel outside the Moscow Ring Road up to 15 km - 1000 rubles
- Travel outside the Moscow Ring Road over 15 km +30 rubles/km
What sizes do you need to know?
To develop a drawing of a kitchen set, you will need to take measurements in the kitchen.
Table 4. Room measurements.
| Illustration | Description |
Step 1 | Measure the height of the room |
Step 2 | Measure the length of the room in three positions: at the level of the lower cabinets, at the level of the apron and at the level of the top point of the wall cabinet. |
Step 3 | Measure the distance from the corner to the beginning and end of the ventilation hole. |
Step 4 | Measure the distance from the corner to the gas pipe. And the distance from the pipe to the wall. You also need to know its diameter. |
Step 5 | Measure the distance from the corner to the edge of the window sill or window opening. It must be at least 60 cm. |
Dimensions to consider when developing a kitchen drawing
After determining the dimensions of the room, you can begin to select the optimal sizes of cabinets, taking into account the acceptable average values based on ergonomic requirements and the anthropometric features of the average person.
Recommendations for choosing the height of a base cabinet depending on a person’s height
Thus, the height of the floor cabinet is 850 mm and the depth is 500 mm. The width of the cabinets ranges from 300 to 800 mm. The depth of the countertop is selected depending on the depth of the household appliances. Usually it is 600 mm.
When choosing the width of wall cabinets, they are guided by the width of the lower cabinets - the value should be the same. The top point of the wall cabinet should not be higher than 2100 mm. The depth of the hanging box is from 300 to 350 mm. The distance between the lower and upper modules is 550 – 600 mm and corresponds to the height of the kitchen apron.
Floor cabinet detailing
Note! When developing a drawing of a kitchen unit, for each element you will need to develop a detailed drawing indicating the main dimensions, locations of fasteners and the method of fixing the parts together. A separate drawing is developed for the drawers that are part of the floor cabinets.
The principle of assembling elements of a kitchen set
So, for a floor stand you will need to specify the parameters of the sidewalls, back wall, bottom and lid, and facade.
Video - How to correctly measure a kitchen space
We pay attention to details
A specification that will indicate all the elements of the set: wall and floor cabinets, drawers and shelves, as well as all the parameters of their parts, will allow you to correctly draw up a drawing. Detailed information is necessary for cutting parts when contacting a specialized furniture workshop. The list should give the specialist information about the shape and size of the part, as well as the ends to which PVC edge tape needs to be applied.
An example of the design of a list of parts for cutting - the ends to which the PVC edge needs to be glued are marked in color
In the kitchen, furniture is subjected to serious operating loads, including exposure to moisture. When making furniture from laminated chipboard, MDF or other similar materials, the sections must be protected from moisture.
The PVC edge can be matched to the furniture or contrast with its shade
At home, you can use melamine end tape, which is fixed using a regular iron, but it is not durable and is not resistant to mechanical stress. As practice shows, a more reliable option is PVC tape, which is applied using special equipment. At the same time, in order to save money, thinner and inexpensive edge tape is used for inaccessible places.
Melamine Film Application Process
Note! Each cabinet size must be adjusted to the nearest millimeter. Otherwise, it may turn out that the headset will not fit into the given space.
The most important kitchen measurements
For future kitchen furniture, measurements are needed:
- length, width, height of the room;
- windows - width with height, distance from the floor to the window sill, from the wall to the window opening, the protrusion of the window sill from the wall;
- doors - height with width, distances from the opening to the walls, from the door to the window;
- distances from walls to communications (pipes, ventilation shafts, gas valves, meters, etc.);
- pipe diameters;
- thickness of skirting boards;
- spaces between walls with sockets, switches;
- niches, protrusions, volumetric objects.
You also need distances to sewer drain pipes, dimensions of boilers, boilers, and refrigerators. In other words, to create a custom-made kitchen, measurements of each element of the room are required.
Features of creating a drawing of a corner kitchen
Designing a headset in this case starts from the corner. If the room is rectangular, then the main part of the furniture is located along the long wall, and the steel furniture is located adjacent to it. Usually the entrance opening is located on this wall, so it is necessary to install the furniture so that it does not interfere with the passage. Often the final module has a rounded shape.
Trapezoidal corner module is more spacious and convenient
The corner module can be L-shaped or trapezoidal. More often it is used to place a sink, less often - for a hob. In the second case, it is better to choose a module in the form of a trapezoid, although it takes up more space. If you plan to install a sink, then a washing machine and dishwasher are installed in the lower cabinets. The front edge of such a module forms an angle of 45 degrees.
If you don’t know what to put and where, how to place a set with everything you need in a small kitchen, we advise you to carefully study the special article and then apply the knowledge gained from it in practice.
Detailing Features
As noted earlier, detailing is required to facilitate the assembly process, accurately understand the parameters of each element and order services for cutting parts. The cutting map must contain the following information:
- Number of details.
- Shape of parts.
- Dimensions of parts.
- Types of fasteners.
- Markings of places and methods of fixing parts.
- Information about the ends to which the edge will be applied.
- The presence of texture on the facade and its direction.
Specification of kitchen elements
Detailed details must be taken to a specialized company, where, based on the specified data, they will cut the selected material. At this stage, the necessary accessories are purchased.
Note! In the process of developing a drawing, the main criterion is the thickness of the material from which the kitchen modules are made. So, the floor cabinet has a height equal to the height of the sides minus the thickness of the tabletop. The depth of the tabletop consists not only of the depth of the shelves, but also the thickness of the facade. You should also provide a few centimeters by which the tabletop will protrude above the bottom row of furniture.
Prices for different types of MDF panels
MDF panels
Expert advice
There are a few guidelines to keep in mind when taking measurements. How accurate they are determines whether the assembled headset will fit into the space allocated for it and how functional it will be.
It is recommended to consider the following:
- To measure the perimeter of the room, indicators are taken at three points: at the location of the baseboards, at the height of the working surface (800 - 950 mm), at the height of a person’s height.
- When measuring the height of a room, it is better to take several measurements in different places and choose the smallest one.
- Measuring from the angle of the distance to the protruding structures, communication vents, window and door openings, select one starting point.
Recommendations for measuring the room
- It is advisable to register all dimensions in millimeters.
- In case of an uneven wall, when choosing the size of the headset elements, a gap of 50 - 70 mm is provided. Subsequently, the gap is closed with a decorative plinth.
- The distance above the floor is 100 mm. For furniture made of MDF and laminated chipboard, which will be installed on a flat, durable floor, a distance of 60 - 70 mm is acceptable. For furniture made of solid wood, the distance is 120 - 150 mm, and if the floors are painted wooden or parquet, then the distance should be 180 - 200 mm.
- The distance between the top point of the wall cabinet and the ceiling is 250 mm.
- If there is a ventilation hole on the wall, the height of the headset should not be higher than the bottom edge of the hole.
- If you have a gas riser, it is important to ensure maximum free access to it.
Not a single apartment is complete without a dining table, and even modern bar counters cannot completely replace this traditional attribute. It is installed in kitchens or dining rooms; its dimensions and materials depend on the desires and financial capabilities of consumers. How to make a dining table with your own hands? Read in the special article.
Creating a kitchen project
Having made the necessary measurements of the room, as well as photographed it, you can safely go to furniture stores.
When creating a kitchen project, there are many important points to consider:
- room geometry:
- niche location:
- location of the ventilation duct and its shape;
- maximum functionality of the room;
- type of ceiling (perhaps during the renovation process it is planned to install a stretch ceiling, which will change the parameters of the room);
- width and height of the apron;
- size and position of large equipment;
- the relationship of the set with other pieces of furniture in the room and other elements;
- position of sockets.
For a person inexperienced in developing design ideas, taking measurements will help them understand the features of their kitchen space.
For you, the best recommendations for creating a harmonious interior are here.
Clearly express your requirements and wishes and better understand the extent to which they can be realized.
The measurements provided in combination with photographs will ensure more informative advice in the store.
Perhaps some interesting options will be offered that may not come to the mind of an ordinary person without a hint, due to the lack of special skills and knowledge. We invite you to watch a video on how to take measurements correctly in the kitchen.
