Updating polished furniture
Today you can rarely find painted furniture. Wardrobes, chests of drawers and tables covered with oil paints are becoming a rarity. Mostly modern apartments are furnished with polished products. It's beautiful and practical. But such furniture also ages over time.
The polishing becomes covered with cracks and chips. The time for replacement is coming. But maybe it’s worth holding off? This article discusses options on how to update polished furniture.
Required materials and tools
Updating polished furniture, like any other activity, requires the use of various materials and tools. So, you will need:
- sandpaper cloth;
- solvents used for varnishes and paints;
- paints. It is better to take acrylic or alkyd. You choose the color at your discretion.
- brushes, rollers, rags;
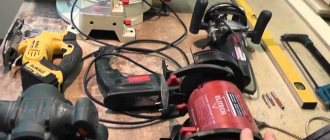
- construction hair dryer (if network);
- polishing machine (also, if available).
Prepare everything in advance so that the creative process is not interrupted.
Progress
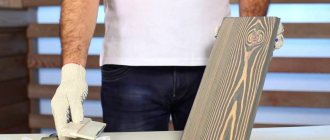
If the furniture itself is still quite durable, the polish is just worn out, then you can update it. You can also change the color to match the overall color scheme of your interior. First of all, you need to get rid of the old polish. For ease of operation, it is necessary to remove the doors and shelves. It is advisable to disassemble the entire structure into parts, so the work will be done more thoroughly and accurately. Remove all fittings from the parts. If it has lost its respectable appearance, it will need replacement. In modern furniture stores you can easily find any fittings. You can choose the size and design you need. Then we start polishing.
If you don’t have a hair dryer, then you shouldn’t remove all the old polish. It will take a lot of time. We remove chips on the polishing surface using sandpaper. First we work with a coarse-grained canvas, then we use paper with a fine grain. Gradually, slowly, you need to wipe out all the chips and cracks. For ease of work, you can wind the canvas onto a round wooden block, securing it with nails. Its thickness should be such that the block can be easily held by hand. The main thing is to achieve a matte polishing surface; the paint will stick to it better. Cover the grooves that appear at the chip site with putty.
If you have a hair dryer, the job of removing the old layer of varnish will be easier. This is very important, if the surface of the old polish is covered with cracks, then it is better to remove it. This work must be done using a hair dryer. Starting in small areas, heat the surface. Then use a spatula to remove the layer of old varnish. Try to do this work as carefully as possible, without damaging the surface of the furniture. This will add extra work to you.
Then polish the surface cleaned of old polish with the same sandpaper. You can use a grinding machine, so the work will be done faster and better. But do not forget that there will be much more dust. So it is better to use a mask to protect your respiratory tract and eyes.
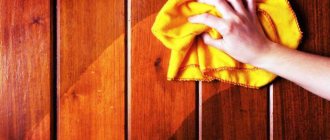
Then you need to degrease the surface. This can be done with a cloth and solvent. You can also use a solution of washing powder. In this way you can get rid of not only greasy stains, but also various contaminants.
If cracks are found on the surface of the wood itself, cover them with wood putty. The repaired area needs to be cleaned again.
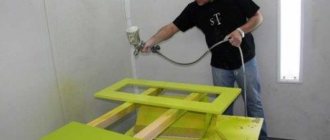
Cover the degreased surface with acrylic or alkyd paint of the selected color. These paints dry quite quickly compared to oil paints. This will speed up repairs, which is very important in a city apartment. It is better to paint large parts using a roller, it will be much faster and more accurate. Make sure there are no drips or gaps. Don't forget to paint the interior surfaces. Wait for the paint to dry completely. Then coat the surface with varnish.
Polishing furniture with professional means
To remove scratches from polished furniture, you can contact professionals who will perform all the required work as quickly and efficiently as possible. However, you can remove some defects yourself using special tools. The simplest remedy is considered to be a furniture touch, which helps eliminate scratches not only on wood products, but also on laminated surfaces. Thanks to a wide range of shades, you can easily choose the desired option.
Alternative option
You can update polished furniture in another, alternative way. It is less labor-intensive, but after restoration your furniture will be ironed no less effectively. For this you will need self-adhesive film. Buy it at the store. Manufacturers offer a wide selection of colors and textures of this film. For every taste and budget.
For this work you will need:
- self-adhesive film;
- scissors and knife;
- ruler;
- paint roller, it is easy to smooth the surface of the film;
- flower spray;
- rags.
At the first stage, you will also need to disassemble (if possible) the furniture into parts. Remove all fittings. Then wash the surface with soapy water to remove dirt from it. Next you need to degrease the parts. You can use a solvent or alcohol solution. After the preliminary work has been done, we proceed to pasting.
Before applying the film, spray the surface with cold water. To do this, it is convenient to use a regular flower spray. This will make the job easier. The film will not adhere instantly to a wet surface. This will allow you to avoid unevenness and distortions. After covering all surfaces, use a soft cloth to smooth the film. Try to prevent the creation of air bubbles, otherwise all the work will go down the drain.
As you can see, you can update polished furniture yourself at home. This will not require a lot of money and time. The main thing is that you can make your own, more original design. You can create furniture that matches your interior.
Don't forget about the accessories. If you have changed the appearance of a cabinet or chest of drawers, then old handles and other small parts may not fit. In this case, it will be better to purchase new fittings. This will significantly improve the appearance of your “new” furniture.
By doing this simple work, you can create your own masterpiece and save on furniture purchases. And to get a beautiful interior detail, and even for little money, is the dream of every housewife.
Source: mebelvbloge.ru
The use of folk remedies
It is important to know how to remove scratches from furniture using folk remedies, since specialized products are not always available. You can remove defects on unvarnished light surfaces using walnut kernels. To do this, you need to split half the kernel and carefully rub it into the desired place for several minutes. After treatment, you need to wait for 5 minutes and then rub the furniture with a cloth.
You can use mayonnaise, preferably homemade, to remove fine scratches. However, when using this remedy, you should try not to affect undamaged areas.
How to restore old furniture yourself: simple, accessible methods and advice from FORUMHOUSE experts
“Imagine a picture: an elegant woman with makeup, in a tight skirt and very high heels, stands by a garbage dump in work gloves and, with an ax in her hand, breaks out the top of the bed,” this is how a user of our portal with the nickname ELIZA describes one of her successful hunts for old furniture. Restoring old furniture is an amazing hobby that allows you to create real masterpieces from scrap finds and cheap furniture panels. In this article we will cover:
- How to restore old furniture with your own hands
- Stages of restoration of wooden furniture
- Furniture restoration at home with an aging effect
stain
Knowing how to remove scratches from furniture, you can achieve very good results in restoring a wooden product. Stain is considered a very good remedy, which allows you to eliminate mechanical damage to the surface of the wood. This product has a unique ability to penetrate deep into the structure of wood, painting it from the inside, while other paints and varnishes create a film exclusively on the surface of the furniture.
As a result of treating the wood with stain, the scratch will remain, but it will not be visible at all, since it will acquire exactly the same color as the rest of the furniture surface.
Do-it-yourself restoration of old furniture
This is what FORUMHOUSE users get at home, where instead of a carpentry workshop there is a small kitchen, and the set of tools is the most common one that everyone has.
To make a furniture masterpiece out of an old bedside table, you need:
- clean the old surface;
- prime and putty it;
- paint;
- varnish;
Cleaning old surface
One of the most difficult processes is removing layers of old paint or varnish from furniture.
If the paint is in good condition (not chipped, not a toxic color), then you can paint the top with fresh paint. But the catch is that the old paint can fall off.
Old paint is washed off with special removers (you can buy them in hardware stores). The manufacturer's instructions indicate for which materials it can be used. Before applying the remover, it is recommended to disturb the structure of the coating - scratch it with a nail or other sharp object. You need to apply the remover with a wide but thin brush. After this, the furniture should be covered with waxed paper and left for half an hour to two hours (if the old furniture was covered with polyester compounds). This work is performed with gloves and a mask, in a well-ventilated area.
After keeping the furniture covered with the remover under the paper for the required amount of time, you can proceed to removing the exfoliated surface with a spatula.
Then the furniture needs to be sanded with a soft disc sander, or just sandpaper. The goal is to get a clean and necessarily slightly rough surface.
Special means
You can get rid of defects in a matter of minutes using specialized furniture compounds. Some of them have a fairly high price, but in stores you can always choose an option that suits the cost.
stain
This is a material in the form of a liquid or emulsion that is applied to wood to give it a specific color. Products of this type are very relevant for eliminating various shallow abrasions, especially those that affect only the surface layer of varnish.
Treating a wooden tabletop with stain
It is advisable to apply stain to the entire countertop and door, otherwise the treated area will stand out strongly. You should paint an inconspicuous area of the furniture first to make sure the color matches. Afterwards, you can saturate the product completely, and polish it as it dries.
Regular liquid paint
It is better to completely paint old furniture that has a lot of scuffs. To do this, you can purchase alkyd or acrylic paint in the color you like. After thorough sanding and degreasing, the surface is painted and dried, then coated with a finishing wood varnish.
Painting old furniture
Oil polish
If the furniture had a layer of polymer composition on top, for example, polyurethane, you can cover up the scratches using a special oil polish. First, the area with the defect is cleaned until smooth with fine-grain sandpaper, dipped in mineral oil, and then covered with polish. It forms a smooth, shiny surface, carefully filling cracks.
Watco wood polish
Mastic
Another composition with which scratch restoration is carried out quickly and reliably. Mastic restores gloss on damaged substrates, repairs mechanical defects: chips, cracks, marks from animal claws. You can buy the product ready-made or make it yourself:
- Melt 40 g of beeswax in a water bath.
- Add 30 g of turpentine.
- Combine the mass with 10 g of alcohol.
- Mix everything and remove from the stove.
- Treat the furniture with a warm mixture using rags.
Primer and putty
Why you shouldn’t skip this stage - without it, restored furniture will quickly lose its aesthetic qualities, scratches, indentations, and chips will appear on it. Therefore you will have to:
- Degrease the product with any alcohol solution, you can even use vodka.
- Apply the solution to a clean cloth and thoroughly, without skipping, treat the entire surface of the furniture.
- Prime with acrylic primer (it has suitable adhesion and strength properties). You can prime with a thin roller or a bristle brush. FORUMHOUSE restorers usually apply two coats of primer: the second after the first has dried.
- It is recommended to apply the putty with a rubber spatula. The order of work is as follows: apply - wait until it dries - sand it - apply again. And so on until a perfectly smooth surface is formed.
Application of polish
Furniture polish will help remove scratches and minor damage, give the surface additional shine, and also remove dirt. This product contains a main component that determines its main task and scope of application. Often, furniture polish is made from silicone or wax.
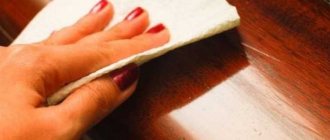
Before carrying out the treatment, you need to wipe the surface of the furniture with a dry cloth or wash it, then apply the product and rub it thoroughly over the surface until it shines.
Coloring
Before painting, it is better to apply a thin layer of primer to the furniture again - this way the paint will adhere better and stick well. All you have to do is wait for the primer layer to dry and proceed to painting.
- Apply the first layer of paint with a comfortable, small brush. The most important thing is that the bristles do not come out of it.
- Leave until completely dry, possibly for a day.
- After this, sand with fine-grain sandpaper.
- Apply a second coat.
Furniture pencil
How to fix scratches on furniture? This question is asked by many people when there are various defects on interior items made of wood. A furniture pencil will help you quickly and easily paint over damaged surfaces. Among the main characteristics of this tool, the following should be highlighted:
- you can match it to the shade of the furniture;
- helps to quickly level the surface;
- the texture is very soft, so the possibility of deformation of the furniture is excluded.
- it very quickly levels and paints over potholes;
- invisible on a matte plain surface;
- applied in several layers.
After this product has completely dried, the area of application should be wiped with a damp cloth to smooth out the edges. When applied to lacquered furniture, cover this product with clear nail polish to restore the gloss.
How to restore old polished furniture?
Nowadays, lacquered furniture is in trend, because it has an attractive appearance and enhances the decoration of the room. However, such furniture has a disadvantage - it is prone to scratches. To avoid unnecessary expenses on a new interior element, you can try to restore an existing one.
Restoration services are currently provided by most furniture companies. You can restore interior items at home by following a number of guidelines.
How to remove scratches
Depending on the material used to make the furniture, suitable means are chosen to combat the unattractive appearance. You can use:
- vegetable oil;
- wax for wood surfaces;
- special pencils for camouflage;
- cosmetic pencils or regular markers;
- stain;
- alcohol;
- furniture polishes;
- shoe polishes;
- clear nail polish;
You may also need: paint brushes, soft sponges and a piece of clean, lint-free cloth.
Nuances of recovery
Restoring lacquered furniture is an excellent option for restoring it in order to update the appearance of interior items. Basically, to eliminate a scratch you just need to remove the varnish from the problem area and apply a new coat of varnish. This method helps remove all types of damage.
Unfortunately, there are problems worse than scratches. The varnish coating gradually begins to darken and become cloudy, as a result of which the furniture sets lose their attractive appearance.
If the problem is darkening of the varnish coating, then there will be a need to eliminate the old layer of varnish and apply a new one. Such manipulations can be successfully carried out independently.
Methods for carrying out restoration measures
Analysis of the degree of wear of lacquered furniture
First, you need to analyze the current conditions of the furniture to be repaired. A good reason to start the restoration process will be deterioration in the appearance of the headset, including darkening in the thread area. In addition, a common reason for restoration is small cracks on the surface.
In cases where such defects are not very pronounced, they may not harm the appearance, but, on the contrary, add solidity to it. In the case of severe defects, there is a need for restoration measures, which are organized by a professional from a specialized workshop, or they can be carried out independently at home, while preserving the antique qualities of the furniture.
If something goes wrong, you can cover the product with paint at any time, although then the unique pattern inherent in the wood will be hidden by the paint and the furniture will lose its presentable appearance.
Products for restoring lacquered furniture
There is an opinion that it is supposedly possible to restore the previous state of products only by treating them with alcohol. Without a doubt, alcohol can remove the top coating and repair the damage, but such a measure can lead to irreversible results.
In this regard, during restoration you should pay attention to more reliable methods, including:
- Shellac polish - this material emphasizes the refined structure of wood, enhancing it with an unusual shade. Varnish is one of the most ancient methods of restoration, which is a varnish that is similar in thickness to water. To restore the furniture, it is coated with varnish in 40-60 layers, which allows you to achieve an unusual noble shade.
- Nitrocellulose varnish - this material is used for the restoration of large areas. Nitrocellulose varnish is applied through a special spray bottle, which very quickly covers the area to be restored. At a lower speed, the particles of the product would solidify individually. For this reason, it is not recommended to use standard sprayers, as they will create areas with an accumulation of bubbles. Thus, such material should be used exclusively in a specialized studio.
- Pentaphthalic varnish - this substance is famous for its ease of use, so it is convenient to use at home. It does not require a special application procedure and dries very quickly. Pentaphthalic varnish needs to cover the surface with at least 4 layers, with the first one serving as a primer. After completion of the restoration, it is necessary to sand the treated area. To achieve a semi-matte effect, the varnish should be applied with a cotton pad, and to obtain a glossy shine, use a brush.
After determining the type of restoration product, you need to select a color scheme. If desired, it is possible to coat the product with colorless varnish or bright paint.
Source: restavracija.pro
Useful tips
Oddly enough, amateur attempts to repair chips or restore more serious damage to furniture sometimes cause more damage than simply tinting or painting a furniture touch.
For example, you should not use water-based dyes to fill scratches, cracks and swelling of furniture veneer. Do not use iodine, strongly brewed tea, an aqueous solution of potassium permanganate, watercolors, gouache, or car varnishes. As an exception, you can temporarily mask scratches on furniture with walnut.
All of the above can hide the damaged area for a while, but, as a rule, it causes swelling of the decorative coating due to swelling of the wooden base of the furniture.
The largest chips and even breaks, which often happen on armrests or the ends of doors, cabinets, especially kitchen furniture, can be treated by applying a repair varnish layer to the entire front surface. In this way, it is possible to preserve the mirror of the lacquered surface, and this is the most important thing in the restoration of wooden furniture. If you repair chips and the entire panel of furniture with “solid” varnish, then the damaged area may not be visible even with the most careful examination.
Do-it-yourself restoration of Soviet furniture
Did your grandmother leave you antique Soviet furniture from the 30s? Did your parents reward you with an old wardrobe from the 60s? Don't rush to get rid of them! In this article you will learn how to restore Soviet furniture with your own hands, or more precisely, how to update old furniture so that it again begins to please your eyes. Photos of successful experiments are attached. So…
What does the DIY conversion of Soviet furniture consist of?
Stage 1: replacing furniture fittings
The most annoying thing about old furniture is poorly closing doors. If you are going to take on such a thing as remaking Soviet furniture with your own hands, then first you will have to buy new fittings, find material for sealing loose holes (you can use putty, dowels or corks), get a screwdriver and a screwdriver, and then work hard to repair doors.
We also advise you to take a closer look at the rest of the fittings. Sometimes simply replacing old-fashioned handles can be enough to completely transform your furniture. As for the wobbly legs of chairs and tables, any workshop can put them in order.
Stage 2: furniture cleaning
Before moving on to remodeling Soviet furniture, it should be thoroughly cleaned. Do-it-yourself restoration of Soviet furniture begins with removing dirt and grime, which is recommended to be done using an ordinary sponge, soap made from any vegetable oil, and warm water. To clean the most problematic areas - corners and cracks - use a soft toothbrush; for narrow crevices - a wooden dowel, pointed at one end.
Stage 3: repairing old furniture
The worn and chipped surfaces of Soviet furniture need to be put in order. For sanding, use sandpaper or a special sanding tool (who has what). Any cracks can be carefully repaired with putty, after which the area will need to be sanded again after drying.
How to update old furniture - painting furniture
Let's start with the most popular and easiest way to update old furniture. Here you will learn how to paint Soviet-era furniture.
Furniture should only be painted if it is made of cheap wood (pine). If your Soviet furniture is made, for example, of oak, then painting it is highly not recommended, since this will forever reduce its value.
Do-it-yourself restoration of Soviet furniture is usually done with oil paint. How to paint furniture correctly:
- Apply the paint with light movements in a thin layer along the wood grain.
- Let dry for about 12 hours.
- Clean the surface with sandpaper, wipe off dust and apply a second coat.
If you are restoring Soviet furniture from the 50s to 70s, which was made in a minimalist style, then black, as well as light pastel colors, are perfect for painting it. With this finish it will become an excellent accessory for a modern interior.
If you want to take a more creative approach to painting furniture, but you don’t know how to paint by hand, then use templates. They are sold in stores, they can also be printed from the Internet and cut out on thick paper. Before applying the design to the furniture, the stencil should be secured with adhesive tape.
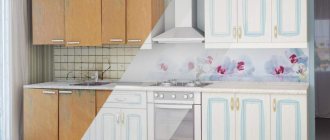
Painting furniture - before and after photos of old furniture:
Restoring a chest of drawers with your own hands:
Also read: Soviet furniture: history of development, styles and photos
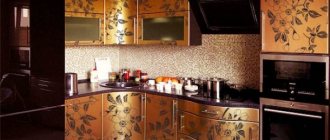
How to update an old cabinet:
How to repurpose an old nightstand and chairs:
It has become very fashionable to paint furniture with thin lace. Simply attach the lace fabric to the surface of the Soviet furniture, then apply paint. The result is amazing!
Remaking old furniture through varnishing
If Soviet furniture is made of valuable wood, then, as we said above, it is better to cover it with a fresh layer of varnish than to paint it over. How to update old furniture through varnishing?
Firstly, when remaking or restoring Soviet furniture with your own hands, it is best to use oil varnishes. They are suitable for all types of wood and form very durable, shiny and moisture-resistant coatings. The only negative is the long drying period (up to 12 hours). For comparison: shellac varnish dries in 1-2 hours, and nitro varnishes dry in 30-40 minutes.
General rules for remaking old furniture:
- The varnish can be applied with a brush or a piece of thick, lint-free cloth folded 2-3 times;
- The varnish is applied in 3-5 layers, and after applying each new layer, the drying time should be increased;
- Excess varnish should be squeezed out on the edges of the jar, and the brush can sometimes be washed in an alcohol solution.
Remaking Soviet furniture with your own hands in the photo:
How to update old furniture with craquelure varnish
We also want to give you an example of a special varnishing method, which is performed using a special varnish - craquelure.
For remodeling old furniture today, there are many varieties of craquelure varnish: with a patina effect, gilding. The most common one is applied in a thick layer over the main layer of paint, after which it is coated with a different color to highlight cracks. Also, craquelure varnish can consist of two components: the first is applied to age the surface being treated, the second is applied to create decorative cracks.
Restoring Soviet furniture using craquelure is perfect for lovers of antiquity and country style. As, indeed, our next method is decoupage.
other methods
Try brewing strong black tea. It should infuse for several hours. Moisten a cotton swab with tea leaves and wipe the damaged areas. Wait until it dries, repeat the procedure. The only negative is that you will have to repeat the steps a couple of times. If you smoke, take your time to get rid of the ashes.
Take a small amount of ash, add the same amount of ash. Dissolve in a small amount of water until a paste forms. Spread the resulting mixture over the scratches. The ash mixture can be used for light-colored pieces of furniture. Regular paraffin should be kneaded and rubbed into the surface. I wash off the remains using a soft, lint-free cloth.
DIY decoupage of Soviet furniture
Mastering the decoupage technique will help you turn old Soviet furniture into a real designer masterpiece. Decoupage of old furniture is performed using the following tools:
- Fine-grit sandpaper;
- Alcohol;
- Primer;
- Brush and glue for decoupage;
- Roller or sponge;
- Material for decoupage - newspaper clippings, old postcards, letters, drawings, book pages
The Internet will help you find inspiring ideas and materials for decoupage. For example, we especially like these 2 examples of how to update an old chest of drawers using decoupage:
Have you chosen the right pictures? Next, you can start updating Soviet furniture with your own hands using decoupage. This process consists of the following steps:
- Surface preparation with sandpaper;
- Cleaning with a cloth soaked in alcohol;
- After the surface has dried, apply a primer (3-4 layers);
- If materials for decoupage will be used only in places, then the furniture must first be painted to create a background;
- If the furniture will be completely covered (for example, with newspapers), then you can immediately begin applying glue after the primer has dried;
- Thin paper can be immediately applied to the glue, while thicker paper should first be thinned with sandpaper and soaked in water;
- The wet paper is blotted with a towel on both sides and applied to the glue;
- After gluing all the materials, you should walk over the surface with a roller or sponge to remove any remaining glue;
- The last stage is applying varnish to the dry surface.
Original furniture in Provence or vintage styles is ready!