Adhesives and adhesives for mirrors
To glue a mirror, you need to select reliable and proven adhesives that can primarily withstand the product’s own weight. It is also worth considering temperature changes and humidity. Mirrors are a functional and aesthetic decorative element. Therefore, they are present in any home with rare exceptions.
When buying a mirror surface, the master is faced with the question of mounting it on the wall, furniture or door. There are several mounting options. Construction stores offer the buyer a wide range of adhesive mixtures for work. However, it makes sense to talk about the most popular ones.
There is no need to be afraid of such a method as gluing; in many cases this is the best choice for many reasons.
Soudal glue
Soudal mirror adhesive is one of the popular adhesives that can withstand prolonged exposure to moisture. It is made on the basis of synthetic rubber. Used for decorative finishing of mirror surfaces in rooms with high humidity: bathrooms, kitchens, swimming pools.
Advantages of Soudal glue:
- Resistant to moisture.
- High adhesion to most surfaces.
Before gluing the mirror to the wall in the bathroom, you need to read the instructions on the packaging of the product. When installing, keep in mind that this adhesive contains a solvent.
Tytan glue
You can glue a mirror in the bathroom using Tytan glue. This is a specialized adhesive composition, which is a mixture of rubber and synthetic resins.
Advantages:
- Possibility of gluing glass plates to surfaces made of different materials. It can be concrete, metal, ceramic tiles, wood, drywall.
- High strength index.
- Elastic seam, adhesive mass fills all voids.
- Resistance to prolonged exposure to moisture.
Before applying Titan glue, it is necessary to degrease the working area. The easiest way to apply it is with a special gun.
Loclite glue
To glue the mirror to the tile, you can use two-component Loclite adhesive. It is a mixture of acrylic ester and activator. This American brand is considered effective and reliable in the market among its competitors. When using it, you need to connect the components with identical parts. Apply evenly to the surfaces to be bonded.
Tile adhesive
You can try gluing the mirror in the bathroom using tile adhesive. This method is considered unusual, even original. When choosing a dry mixture, it is important to read the recommendations indicated on the packaging. If it does not indicate that the glue is not suitable for gluing mirrors, then it can be used.
To make the connection reliable, it is necessary to perform work according to a certain scheme. The decorative layer may need to be removed.
There are step-by-step instructions for this:
- Preliminarily mark the place where the mirror plate will be located.
- Remove the old tile, being careful not to destroy the surface underneath.
- Clear the wall. Knock off the old mortar.
- Prime the surfaces.
- Attach a horizontal bar to the bottom of the marked outline. Install a metal border on top of it.
- Attach another horizontal bar to the top.
- Install side curbs.
- Mix the dry mixture with water using a mixer. Apply tile adhesive to the free area of the wall with a spatula in an even layer.
- Slowly glue the bottom edge of the mirror plate to the glue. Place plastic crosses around the edges.
- Gently press the glass onto all surfaces.
Press the plate with your palms for 15-20 minutes so that the glue has time to set. Ultimately, wait for the tile adhesive to dry completely. The time period is indicated on the packaging. Remove the crosses and rub the seams.
Mounting double-sided tape
You can glue the mirror to different surfaces using mounting tape. With its help, you can fix the mirror plate on the wall without affecting the facing material.
It is a double-sided adhesive tape that needs to be secured to the back of the mirror plate. Next, you need to lift it to the required distance from the floor, set it level, lean it against the wall, press it with your palms, and hold it there for 5 minutes. It is necessary to clean the working surface from dust in advance and degrease it with alcohol.
Mounting tape is not suitable for large reflective panels. It won't support their weight.
Special compounds and liquid nails
If you have no experience in such a matter as attaching a mirror to a wall, then a hardware store can recommend liquid nails. This is another option that is safe for facing materials and provides reliable fastening. It is a special glue that firmly holds any objects together on vertical planes.
Installation:
- Using liquid nails, stick the metal profile to the wall along the contour of the glass.
- Fix plasterboard with increased water resistance on top of the profiles.
- Attach the mirror object to the prepared surface with liquid nails. It is enough to apply the adhesive mass along the contour in dots.
Liquid nails can withstand greater loads than mounting tape.
Glue "Titan"
In the market of construction mixtures and adhesives, this composition has established itself as the best and most reliable. It is designed to work with various types of surfaces. Including tiled flooring. The mixture is based on rubber and natural resins. Thanks to these components, tight adhesion of the contacting planes is ensured. Features of the adhesive composition “Titan”:
- formation of a seam that is resistant to moisture;
- ease of use and ease of application;
- high percentage of adhesion;
- high strength;
- availability.
Mechanical fastening method
If the master could not find something to glue the mirror to the wall, he can use hardware. To do this, you need to select fasteners depending on the weight of the glass plate. This type of installation is suitable for fixing large mirrors.
Procedure:
- Make holes in the wall using a hammer drill or drill, depending on the surface material.
- Hammer in the dowels.
- The screws on both sides must be equipped with rubber gaskets so as not to damage the mirror surface. Screw them through the prepared holes.
If the glass does not have mounting holes, you can make them yourself.
To do this, you need to perform a number of actions:
- Use a sharp object to mark the centers for future holes.
- Using a diamond drill, start drilling. Allow the drill to cool frequently to prevent the glass from breaking.
- Using fine sandpaper, sand the edges of the holes.
It is important to perform all movements carefully, without pressure, so as not to damage the integrity of the plate.
How to glue a mirror on a mirror
Sometimes situations arise when you need to connect two mirror surfaces to each other. This is an unusual gluing method that requires the purchase of special glue for mirrors. You can glue mirrors with their edges to increase the size of the reflective surface or glue them with their surfaces facing each other. The first option is acceptable for connecting small glasses, since fastening the edges is considered less reliable.
How to glue a mirror to a wall
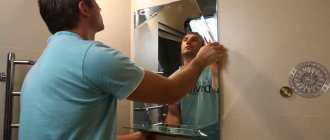
Once it has become known whether it is possible to glue the mirror to the wall, it is necessary to begin work.
To do this, there is the following step-by-step instructions:
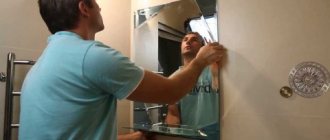
- Prepare the surface for gluing. Clean from debris, degrease with medical alcohol or gasoline.
- Transfer the dimensions of the mirror to the wall. It is necessary to mark the dimensions with a marker so that you can see where to lean the plate.
- Apply glue to the back side of the mirror surface in dots along the contour. There should be approximately 2-3 cm of allowance left from the edges. Form a grid of glue on the central part of the product.
- Attach borders made of metal profiles along the edges of the frame marked on the wall.
- Install tiled crosses between the borders and the glass plate. Additionally, you can apply mirror glue to the wall.
- Carefully lean the mirror against the wall starting from the bottom mark. The movements must be carried out smoothly and the pressure must be controlled.
- The technician will have about 5 minutes to adjust the glass surface. After this, the glue will harden.
After the main adhesive mass has hardened, the borders are removed and the crosses are removed. The seams along the contour are filled with silicone or acrylic sealant.
For wallpaper
When gluing a mirror product to a wall with wallpaper, some problems may arise. If you lean the reflective plate against it over its entire area, it may not be in tight contact with the wall. Because of this, the integrity of the connection will be compromised, and the glue will not be able to firmly connect the materials. One option for creating a strong bond is to prepare the base.
Step-by-step instruction:
- From a sheet of DPV, cut out a rectangle with dimensions not exceeding the reflective surface. This can be done using a hand saw or jigsaw.
- To fix the fiberboard on the wall, you need to mark the places for fastening elements on it and accurately transfer them to the wall. Drill holes in the wall using a hammer drill or a drill in the fiberboard.
- Using dowels and screws, secure the sheet material made of wood fibers to the wall, while recessing the caps.
- Apply glue to the wood along the contour, departing 2 cm from the edges.
- Slowly place the glass piece against the prepared base. Hold for about 15 minutes with your palms, pressing lightly.
The heavier the mirror weighs, the more glue and fastenings for the fiberboard will be needed.
Concrete wall
You can attach a reflective surface to a concrete wall using tile mortar or special glue. Step-by-step instructions have been provided above. It is important to prime the concrete surface in advance to increase the quality of adhesion. A good solution is acrylic primer. It is better not to soak it with universal concrete contact; the adhesive composition may not withstand the weight of the mirror and peel off.
For paint
To attach a mirror to a painted surface using special glue, preparation is necessary. It consists of removing the decorative layer, cleaning and degreasing the working surface. Priming with a deep penetration compound is necessary, or a primer with increased adhesive characteristics is recommended.
Classification of silicone sealants
Depending on the differences in the chemical composition, all sealants are divided according to their technological purpose:
- Construction - neutral reagents are used as glue hardeners. The sealant is used for sealing cracks on the outside of buildings, as well as for interior work: sealing window frames, wooden and plastic structures.
- Roofing – highly resistant to aggressive environmental factors, effective for sealing metal and ceramic roofing coverings.
- Plumbing - the composition is enriched with fungicidal preparations. The adhesive is designed for waterproofing cracks between plumbing fixtures and walls.
- Universal - highly adhesive acid-curing compounds, used for installation of ventilation, drainpipes, window frames and air conditioning systems. It is undesirable to use them in rooms with high humidity, since they do not have antiseptic properties and are not suitable for working with plastic and metal without an anti-corrosion coating.
- Adhesive mixtures for plastics – have a neutral composition and high adhesion to polyvinyl chloride and acrylic.
- Hydraulic sealants – recommended for sealing equipment parts made of non-ferrous metals, cast iron, and ceramics.
- High-temperature with acid curing - for sealing parts of steam heating and hot water pipes, heating boilers, fireplaces.
- For interior and exterior work on sealing joints of building elements made of marble and other natural stones.
- Glass sealants are characterized by high adhesion to glossy surfaces and are used for exterior and interior work. May have a pronounced acid or neutral cure.
- Adhesives with a neutral composition - for joining products made of polyvinyl chloride, acrylic and gluing to plastered surfaces, concrete, glass. They are odorless and do not cause metal corrosion.
How to glue a mirror in the bathroom
Knowing what kind of glue to use to glue the mirror on the walls, you need to talk about the features of working in the bathroom. Constant exposure to moisture and changing temperatures entails rapid destruction of adhesive joints. The adhesive mass must be resistant to humidity and not afraid of temperature changes.
On tiles
Mirrors in the bathroom are somewhat more difficult to glue than in other rooms. This is due to the classic covering of most bathrooms - tiles. Features are associated with the last stage of the work - filling the seams with sealant.
Step-by-step instruction:
- Apply glue to the back side of the reflective plate. Leave about 2 centimeters from the edge. Fill the center with a lattice of adhesive mass.
- Place the mirror against the wall, starting from the bottom.
- Make a support in advance so that the product remains suspended without falling.
When the glue dries, you need to seal the seams with sealant. Acrylic is used for this.
Myths about mirrors
The most common reason why people seek to rid their homes of mirrors is various mystical legends, originating from the “door to another world” to the source of “energy absorption.”
So, for example, when a person sleeps, his soul temporarily leaves the body. And if there is a mirror in the bedroom, then the soul may accidentally get lost and go on a journey through parallel worlds, where the reflective surface will let it through. In other words, a person sleeping in front of a mirror risks remaining soulless.
It is worth mentioning that in ancient times this did not apply to women, especially redheads, because they were believed to have no soul. Also, many believe that children under one year old should not come close to a mirror - it can jinx them.
In addition to causing everyday troubles, there is a legend according to which a mirror is a portal connecting the past, present and future. That is, if you really want to, you can travel back in time and... not return. Find yourself between two worlds. Never find peace.
But still, these are just myths. Scientific justification is no less interesting than superstitions and largely justifies them. We also know from school biology courses that people tend to figure out what they don’t know. But in the end, instead of a complete picture, the worlds are just a deception, a deception of oneself.
Who knows, maybe both scientists and mystics are right?
And yet, there are objective reasons to remove the mirror in certain places.
How to glue a mirror to a closet
One of the most popular questions that owners of apartments and private houses ask during renovations is how to glue a mirror to a cabinet door. Initially, you need to think about what will be used for gluing. Having decided what to use to glue the mirror to the cabinet, you can begin further work.
Experienced craftsmen recommend using mounting tape to avoid damaging the front surface of the furniture. In this case, the tape is easier to remove later, although it will be a hassle. If glue is used, traces will remain if you want to dismantle it.
Step-by-step instruction:
- Mark the dimensions of the glass on the cabinet door. A black marker is suitable for this. You can remove the door from its hinges in advance to make it easier to work with. Wipe the surface with a cloth moistened with medical alcohol.
- Cut several small strips of tape and place them along the contour of the mirror plate, at a distance of about 30 cm from each other.
- Additionally, apply mirror glue to its back.
- Remove the protective layer from the mounting tape and lean the glass against the prepared cabinet door.
Quickly adjust the position of the mirror product using the marks. Knowing how to attach a mirror to a closet, you can decorate the interior and make the furniture more varied and functional.
Proper Use
- Using the sealant during work is simple and convenient: you need to install the tube in a special gun, cut off the tip of the spout with a knife and screw on the dispenser that comes with the glue.
- The substrates to be joined must be thoroughly cleaned of dust and dried.
- Excess material must be removed immediately with a wet cloth and from hands with soapy water. Dried sealant can only be removed mechanically.
How can I mount it on the wall?
You can decorate a section of the wall with small, lightweight items using double-sided tape. Adhesive tape is also useful for mounting heavy products as additional fixation:
- Pre-level the surface of the base;
- clean and degrease the back of the mirror and the wall;
- stick strips of tape onto the reflective layer;
- remove the protective film from the tape and apply glue to it spotwise;
- Place the mirror on the installation site and press lightly.
On the cabinet door
Using reflective sheets, you can decorate the insides or sides of cabinets:
- remove the door and lay it horizontally;
- mark the future location of the mirror;
- stick several strips of adhesive tape, apply glue in solid lines between the adhesive tape;
- remove the protective layer from the tape, place the mirror on the door and press it.
If the product is light, after 30 minutes you can hang the door back on its hinges. Leave a large mirror in a horizontal position for a day.
To metal
Before gluing the mirror to the metal, you will have to make the right choice of adhesive from several types.
The most effective include:
- High temperature silicone. Withstands sudden changes in temperature (not only above zero), prolonged exposure to oils and washing liquids.
- Moment Crystal. An effective adhesive that returns to its original state after deformation.
- Epoxy adhesive. Two-component substances that are used to combine different or one property of materials. By mixing the two components, you can get an adhesive mass that hardens under the influence of room temperature.
- After choosing an adhesive, you can begin gluing the mirror onto a metal surface.
Step-by-step instruction:
- Degrease the metal using a solvent or medical alcohol, clean it from dirt, rust, and plaque.
- Clean decorative coatings with a grinder or grinder.
- Apply glue to the back of the reflective plate.
- Heat the glass evenly with a hair dryer to 30 degrees. It is important to slowly increase the temperature so that the mirror surface does not crack.
- Place the plate on a metal surface and hold for 5-10 minutes.
For reliability, you should pay attention to pre-treatment with epoxy primer. It will protect the metal from corrosion and provide better adhesion.
Thanks to additional heating, a more reliable connection and faster setting are obtained. The entire technology for working with cold welding can be read here.
What types are used for installation?
Depending on the properties of the surface on which the decorative element will be installed, all adhesives can be divided into several types:
- Solvent-based mixtures are easy-to-use materials that are inexpensive. They may contain substances that destroy the reflective layer, so when purchasing, always read the information on the packaging: the adhesive must be designed to work not only with glass, but also with mirror surfaces.
- Silicone is a chemically neutral material, most suitable for installing decorative panels.
- Based on hybrid polymers - provides high adhesion to joined surfaces of any type, but are significantly expensive.
On laminated chipboard or chipboard
To stick a mirror on laminated chipboard or chipboard, you can use mounting tape or liquid nails. The principle of operation is the same as with other surfaces. It is better to leave the glued structure overnight under a light load to create a stronger connection.
When it became clear how to glue a mirror to a cabinet, tile, metal, wood, concrete, or to walls with wallpaper, it was easy to carry out repair work yourself and decorate the interior. Pay enough attention to the choice of glue and follow the detailed instructions. You can't skimp on fasteners when it comes to large mirror plates.
Spectacular examples in the interior
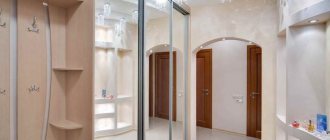
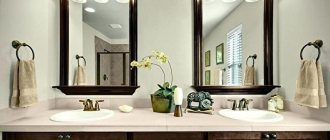
The mirror must be selected taking into account the existing interior and the overall design of the room. Below you can see several examples with the help of which the deficiencies in the configuration of the room were corrected or the emphasis was placed on successful features of the layout.
The mirror can be mounted on almost any surface. The main thing is to correctly calculate the amount of fasteners and make sure that the wall can withstand the load.
Did you manage to solve your problem using the recommendations from the article?
Yes!
51.52%
No. More answers required. I'll ask in the comments now.
27.27%
Partially. There are still questions. I'll write in the comments now.
21.21%
Voted: 33
The best adhesive composition
Many craftsmen claim that the best glue for mirrors is silicone sealant. There are two reasons for this:
- Resistance to external irritants. For example, dust, temperature fluctuations, humidity and other factors.
- This composition is of very high quality - it has a long shelf life, it is tensile strength, mobile, hard, and also has a high density
Important! What should we know about silicone sealants? They are all vulcanized materials that are designed to seal.
Classification of silicone sealants
Such compositions can be classified as follows.
When ready for use:
- There are one-component sealants. This means that they are ready for immediate use.
- Two, three or more components. This means that they must be mixed before use.
Based on composition:
- Made from silicone.
- Polyurethane.
- From thiokol (polysulfide).
- Made from acrylic.
Important! The compositions were listed in descending order of qualities useful in construction.
Sealants in construction
So is it possible to glue a mirror with silicone sealant? The answer is yes. It is not surprising, since silicone sealants are widely used in construction work.
Important! It is also worth noting that sealants are widely used in structural glazing - they are used to strengthen materials for glazing facades and windows. Sealants are also often used as construction putty.
Silicone adhesives have many advantages:
- UV resistance.
- Resistant to changing weather conditions.
- Resistance to aggressive environments.
- High adhesion to many types of building materials. You don't even need to use a primer (primer).
- Excellent motion accommodation.
- Valid at any temperature.
- They have a complex composition.
Which mirror shape should you choose?
According to the advice of Feng Shui designers, the best shape for a bathroom mirror is a circle. Since ancient times, our ancestors believed that a round mirror, which has mystical properties, can protect a person from damage and the evil eye. The round mirror was a kind of symbol of magic.
According to Feng Shui, a round mirror can restore a person’s aura and also helps it improve. Even scientists have confirmed the beneficial effect of a round mirror on a person’s well-being, since when a person looks in a round mirror, he calms down and relaxes. That is why a round mirror is a symbol of harmony.
Psychologists believe that a person associates a round mirror with a loaf, flatbread and the sun.
Also, a large and round mirror in the bathroom will help to visually increase the volume of space, so if your bathroom is small in size, you just need to hang a round mirror in it. And you don’t need to worry about the fact that a large mirror will often fog up - a higher power hood will help you cope with this problem.
Which mirror shape should you choose?
If you listen to designers and Feng Shui experts, then the best choice is the Best mirror shape - a round mirror. It has long been believed that a round mirror protects its owner from the evil eye and damage, and has mystical properties. Such a mirror was a symbol of magic.
The best mirror shape is a round mirror.
According to the principles of Feng Shui, such a mirror restores our aura and helps it improve. Even scientists have confirmed the beneficial effects of a round mirror on a person’s well-being. When we look in a round mirror, we relax, calm down. After all, a round mirror is a symbol of harmony.
According to psychologists, a round mirror is associated with the sun, flatbread, and loaf of bread.
A round and large mirror in the bathroom helps to visually increase the volume of space. Therefore, it is better to hang such a mirror in the interior of a small bathroom. Don't worry about a large mirror fogging up and having to be wiped constantly. Just turn the hood up stronger.
