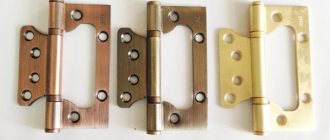
Hettich concealed hinges, four main types
The German company Hettich produces four main types of hidden hinges, let's look at the advantages and features of each line.
The Hettich company produces hinges in the series:
Sensys (Sensis) - the main and most popular series of hinges from Hettich.
Almost all models in this series have door closers, but there are also models without a self-closing function. Such Sensis hinges without a damper are needed for specific cases. For example, if the door is heavy, or for some other reason a closer is not needed in the hinge. Sensys hinges without closers visually look exactly the same and cost about 25 rubles less per piece.
A hinge damper and a door closer mean the same thing, a self-closing function!
Intermat (Intermat) - this line of loops is much cheaper, in some models the difference is two times and can be approximately 200 rubles.
Intermat hinges come without closers, but you can install an additional damper on any of them. Sensys and Intermat hinges have the same mounting plate; both options are convenient because they can be quickly installed.
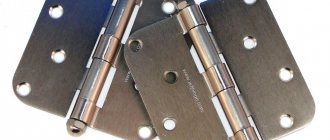
The hinges of these series come at different angles, there are many different types, from 15-20 options for each series. Slideon is the simplest and cheapest option among the Hettich door hinge lines.
These hinges are more difficult to install and require the use of a tool, primarily a screwdriver, to secure them. They do not have a self-closing function, that is, the presence of dampers, and this line has a small selection, only three options for loops of this line.
On average, each loop in this series costs approximately 70-80 rubles; see our website for more accurate and detailed prices.
Perfect (Perfect) - this series is intended for specific and rare cases and tasks.
For example, if you need to fasten a door at an angle of 90 degrees. These hinges are also suitable for cabinets with false panels, short consoles and for mounting under glass. This series is also produced without dampers.
The self-closing function is provided in hinges through a special mechanism called a damper or closer. Sensys series hinge it is built-in, but in the Intermat it is superimposed and can be placed on the hinge as an additional element.
The main differences between some types of hinges and others are different purposes, designs and additional functions.
In the shop-hettich online store you can always buy any type of hinge from Hettich from 4 production lines in any volume.
source
Kitchens to order from the manufacturer in St. Petersburg
When ordering, most people are logically concerned with the questions “which kitchen fittings are best?” and overall quality of kitchens . And in this matter we cannot ignore furniture hinges - as a rule, the main fittings in a kitchen set. But since everyone wants the best price/quality ratio , it cannot be considered separately from cost. And in this review I will compare furniture hinges with door closers. A hackneyed phrase, clarifications and names in which are not always specified. You will find out what the difference is with economy class hinges for a price that differs from 4 to 7 times and it will be easier for you to decide whether it is worth it. For example, I take overhead loops: Blum cliptop blumotion and Boyard. It is worth noting that simple loops can also include nameless loops and those with little-known names. This is what they look like:
You can immediately note the convenience, accuracy and durability of adjusting the “Blum” hinges thanks to the left adjustment screw firmly fixed in the body.
And when viewed from the side, you may even get the feeling that Chinese hinges are stronger and more reliable. This is wrong. Apparently different alloys are used + the quality of assembly and the accuracy of fitting of the components play a role. The Austrian ones have never called us or confronted us with a warranty issue, which cannot be said about economy fittings.
Investigation from the inside shows that the accuracy of Blum's manufacturing is much higher. All bushings, hinges, housings are adjusted and do not play. The seals are made so that there is no possibility of falling out during operation. The absence of backlash means that the facades do not need adjustment after a long time. The kitchen doors hold all the gaps and tilts set by the assembler. Simple hinges, even in a new state, have micro-plays in the latch, at the base of the closer piston, at its head, in each hinge.
Number 1 shows the gaps that can be seen in the photo. The more free movement, the more the facade will “sag” over time and adjustment will be required. After a long time, adjustment does not help and you have to change the hinge or twist the fastening in the kitchen body. Gaskets 2 have an assembly gap and may even come off before installation or during operation. Then the central hinge made of 5 plastics begins to play a lot and it is extremely difficult to adjust the doors to the required gaps.
Such questions have never arisen regarding Austrian products. Compare for yourself.
In the general plan, differences in length are visible (4). Little things, but Blum sometimes fits into places where a simple loop wouldn’t fit. For some reason, the cup (3) is made by most companies in the form of a simple loop as in photo (3) and takes on less load from the weight of the facade, placing it on the screws. While the soft-closing closer built into the Blum hinge is at the same time a fulcrum for the weight of the façade, relieving the load on the self-tapping screws.
I can also note the convenience of removing and installing the facade with expensive hinges thanks to the perfect latch on the edge (on the right) While in an economy version such a latch can “stick”, play, be difficult to press, or the spring may even fall out.
I would also like to note the BLUM mounting strips with precise settings, which protect the kitchen body and ensure the exact position of the doors throughout their service life: There is simply nothing to play with and they reduce the human factor (of the assembler). Any housewife can adjust such hinges with one hand!
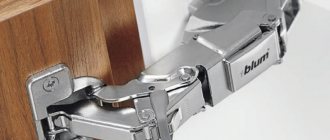
The main advantage of the Blum furniture hinge with a closer compared to Boyard, FGV, GTV, TDM, Hettich is the absence of a piston and the built-in closer in the hinge cup! The video at the end shows the difference in how the loops work. It is this unique design that ensures smooth closing at any angle and time of initial opening, be it 5 or 45 degrees! When buying simple hinges, put up with light pops and the absence of a closer at façade opening angles of less than 15 degrees! This is a design feature; the piston in the loop simply does not have time to extend and the closer does not work. A useful feature of premium hinges will be the door closer shut-off latch (first photo). This will allow you to customize doors of different sizes - each in its own way! I have not encountered any broken Bloom hinges. And how many broken simple hinges fly into the trash during the warranty period?.. Is it even possible to use this if EVERYTHING IS SO BAD? Don’t be discouraged, if your budget does not accommodate expensive hinges, then the “steady hands” of the installer and assembler will help out, and there is a 98-99% chance that your hinges will at least survive 3-4 years without replacement. It’s up to you to decide where to pay 50 and where 350 rubles. I wish you to know and understand WHAT you are ordering. Long-term service for your fittings!
Installing hinges is knowledge that is not important to us.
Most furniture makers understand everything about the hinges: the hole for the cup is milled 22 mm from the end of the facade, the platform is attached 37 mm from the end of the side panel (Fig. 1). It is these dimensions that are duplicated on almost all templates.
But if you look at the technical manuals of branded hardware manufacturers, for example, Blum, Hettich, etc., you will find amazing and verbose instructions there on how to correctly calculate the installation of hinges. New terms appear there, such as fugue, overlap, distance.
Let's try to figure out what it is and why. For example, let's take Hettich loops (Fig. 2).
When opening the door shown in Fig. 2, its edge extends beyond the body to a distance F (Fig. 3). This is how loops are designed.
If, for example, wall 2 (an adjacent closet or other facade) is located close to sidewall 1, then the door will rest against this wall and will not open.
- Well, I discovered America! – the reader will exclaim, – Why are there gaps between the facades?
And yet, Blum, Hettich and others consider it necessary to warn us about this. Shown in Fig. 3 shift is called “ minimal fugue”
" It is clear that the door will open without problems if you initially move it in the opposite direction by a distance F (Fig. 4).
Adjacent doors (Fig. 4 B) need to be moved apart into a double reveal so that they do not run into each other if they are both opened at the same time. In the case of inset doors (Fig. 4 C), the interfering wall is the side of the cabinet itself.
The minimum reveal depends on the design of the hinge; in principle, it may differ among different manufacturers, that is, you need to look at the specifications. The reveal also depends on the thickness of the material (Table 1).
A quick glance at the presented meanings of the fugue is enough to understand that it has no special meaning.
In fact, what is 0.5 mm or 0.8 mm for the most common door thicknesses of 16 - 18 mm, if the gaps between the facades are usually at least 3 mm? It is worth considering the reveal for thicknesses of 22 mm or more.
In addition, adjusting the hinge allows you to move the door by ±2 mm, which is a multiple of the reveal.
Maybe the fugue value will allow us to calculate the distance to cup C? Also no, fugue, as can be seen from the table. 1 is the same for any distance.
In the end, nothing prevents you from hanging the door flush with the side, that is, with a reveal equal to zero, if it is a free-standing cabinet.
Is it possible to move the door more than the minimum opening? Easily. This usually happens, with gaps of 3 mm between the facades, the facades are shifted from the contour of the body by no less than 1.5 mm.
So why is she there at all? Well, for general development. True, Hettich claims that the fugue is needed when calculating distance. Okay, we'll deal with this in the next article.
source
Adjustment in planes
Vertical adjustment
Vertical adjustment of cabinet hinges is the action with which you should begin adjusting furniture fittings. This adjustment is necessary if the door hangs crookedly - it sticks out from the general contour of the furniture, or if there are two doors, one is located higher than the other.
Vertical adjustment of the facade is carried out in 4 successive steps:
- Open the furniture door and look for the hinges. If there are plugs on them, remove them.
- On both hinges, tighten the bolts located closer to the edge of the sidewall. They are responsible for the vertical position of the furniture facade. Both bolts should initially be set to the same value in order to know where to adjust next.
- Close the front door and look at its location in space relative to the overall dimensions of the cabinet. If the upper corner is tilted to the right, it is necessary to tighten the adjustment bolt on the upper hinge more strongly, while on the lower one it must be unscrewed.
- Repeat steps 2-3 until you achieve the optimal position of the facade.
Adjusting the vertical clearance
At this point, the vertical adjustment of the hinges on the cabinet doors is completed, you can proceed to the next stage - adjusting the height of the furniture facade.
Adjusting the door height
To adjust the height of the doors, two screws are installed on two oblong-shaped “ears” - the hinge itself is pulled through them.
Height adjustment is made with two screws
The setup is done in 3 steps:
- Loosen the adjusting screws on all installed hinges.
- Raise or lower (depending on what is necessary) the facade, and then fix it.
- Tighten the screws at low speeds almost all the way, without stripping the threads.
After adjusting the facade in height, you can begin adjusting the doors along the plane.
Adjusting the height of the façade
Before adjusting the height of the cabinet hinges, it is advisable to select self-tapping screws with a fine thread pitch - they provide more precise adjustment of the position of the facade.
Adjusting hinges according to plane
Adjustable furniture hinges allow you to change the position of the facade in the plane - this is useful if either there is poor pressing of the door to the furniture body, or when pressed, the door seems to bounce in the direction opposite to the pressure.
If such a situation arises, just turn the second adjusting bolt located on the hinge. First, tighten the bolts towards you (2-3 mm is enough), then check for a gap between the facade or doors and, if necessary, make further adjustments.
Adjusting door leaves according to plane
Do not be afraid to tightly tighten the bolt that regulates the position of the facade in the plane. It is on it that most of the weight of the structure is supported, and it itself is fixing. Use a Phillips screwdriver to tighten, being careful not to damage the threads.
Furniture hinges with a closer: operating principle, how to install and adjust
Good day to all! It's time to talk about furniture hinges with door closers. This is an extremely interesting and very useful piece of equipment.
It has its own characteristics and a number of undeniable advantages. Among the key advantages, I would note versatility and multifunctionality.
But so that the installation of these components for facades does not disappoint you, I propose to discuss in detail door hinges equipped with a closer mechanism. We will talk about their operating principle, installation features, types, and why adjustment is needed and how you can do it yourself.
Currently, purchasing such devices is not difficult. Not long ago I had the opportunity to buy a set of hinges in St. Petersburg myself, but cities such as Voronezh, Moscow, Yekaterinburg, Minsk (Belarus) and Kyiv (Ukraine) offer an assortment no worse than St. Petersburg. The only question is what exactly you will buy and how competently you will use the capabilities of the accessories. And sometimes it happens that people complain that the loop is not working and urgent repairs are required due to their poor quality. But that's not always the case. Sometimes the master himself is to blame.
Myths about installing furniture hinges with a closer
Quite often on the Internet you can find “life hacks” that allow you to save money or time when installing hinges. However, such recommendations are not always justified, and in some cases, they can even be harmful.
Not every “life hack” will be useful
Myth one
Closers are not suitable for all doors in the kitchen, but only for the most frequently used ones. This is a rather dubious recommendation. The fact is that you always get used to good things quickly. If you have already developed a habit of a certain type of opening doors, which also close smoothly and silently, then all other facades in the house will close with some “go-ahead”. At such moments, irritation will arise. Therefore, you should not limit yourself, install such accessories on any desired furniture, because their cost is not so high.
You can install fittings in the form of self-closing hinges on almost all furniture
Myth two
To save money, it is better to combine different types of fittings on doors, installing one of the hinges equipped with a closer, and the second without it. This is a wrong recommendation. The fittings installed on the door must belong to the same category, and preferably be produced by the same manufacturer. The fact is that the mechanism of action and rigidity of hinges with a closer and conventional ones are different. If initially after installation there are no problems with setting up the awnings, then after a few days of operation they will certainly appear, for example, deformation, skewed doors.
Saving on accessories such as hinges can negatively affect the reliability of the entire structure
The only justifiable saving option is to install regular hinges on a façade that opens upwards and has a locking mechanism. The fact is that such a mechanism will not allow the closers to function normally, so ordinary hinges are more appropriate in this case.
Sliding wardrobe with lighting: modern ideas on how to connect it yourself
The key difference between this hardware and its analogues is considered to be silent and smooth operation. This follows from the operating principle and design of the mechanism. There is an additional device inside it. It is also a shock absorber or a special closer. Due to this design, the doors on the furniture façade close neatly and there is no characteristic bang or impact.
There is a spring inside the housing. And this spring has the appropriate filling. Depending on it, the mechanism can be gas, oil or viscous silicone medium.
Based on the peculiarities of the application of this fittings, such hinges are structurally:
They are successfully used for standard and corner cabinets. The same 45-degree corner hinges are great for organizing kitchen furniture and are used for corner cabinets.
The fittings are capable of opening doors at different angles, including 180 degrees and a full 270 degrees. Here a lot depends on the design of the furniture itself and the need to open the cabinets wide.
The operating principle itself is based on the following. The spring is covered with a special liquid, which, when closed, gradually flows into the sleeve located in the capsule of the closer itself. Due to narrowing or expansion (opening and closing), the outflow of fluid provokes the movement of the piston. The valve adjustment determines how quickly the door closes completely.
Advantages
When planning to use such hinges for a false panel or for a kitchen, you are making the right decision. It's easy to explain. By purchasing products from brands like JET or GTV, you get a number of objective advantages. Namely:
Scope of application
The design of almost any item, including lids or doors, also contains hinges. The shock absorber and door closer in this device are not mandatory, but desirable elements, although they are often used separately:
- In wardrobes where hinges are not needed, but a closer is useful.
- In shelves and drawers that open upward, where the closers (aka shock absorbers) are usually more massive, and the hinges are standard.
- In display cases and other glass furniture, where recessed hinges are not used.
You can often find interior items with doors made of glass, which is enclosed in a wooden or metal frame. Such a frame, especially one made of wood, is quite suitable for cutting the installation cup of the hinge into it.
Most other products need hinges with a closing device, for example, children's wardrobes or desks, the doors of which fall off due to careless use. Also included in this category are office and commercial furniture and kitchen sets.
Tips for choosing wheels for furniture and rules for calculating loads
Wall-mounted coat hooks for the hallway: which ones are better to choose?
- smooth and silent closing of doors;
- long service life;
- ability to withstand loads;
- high-quality fastening on the facade;
- work even with heavy doors;
- possibility of regulation;
- a wide range of;
- availability of excellent manufacturers on the market;
- protection against leakage of oils and working fluids.
By adjusting the operation of the closer valve, you can speed up or slow down the process of opening and closing furniture doors. By applying a slight force, the sash will close itself using its own weight.
Construction and materials
In the manufacture of this type of fittings, materials based mainly on cold-rolled steel are used. Some hinges with a closer function additionally have a lock. To accomplish this, alloys of copper, zinc and aluminum are used.
It is also important to create an anti-corrosion coating so that the fittings do not rust under the influence of moisture and other aggressive environments. The most relevant solution is brass plating.
There is also a decorative coating, for which different enamels and imitation of bronze, chrome, nickel or gold are used.
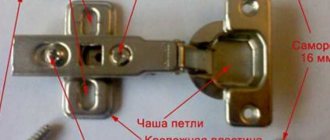
Structurally, refined hinges include:
- installation site;
- strike plate;
- cup;
- spring mechanisms;
- overlays;
- movable types of hinges;
- built-in dampers;
- shock absorber
Based on their purpose, hinges are made from different materials and with different designs or structures. For example, if special hinges with finishing are used for glass doors, there is no bowl.
Adjusting furniture hinges with your own hands
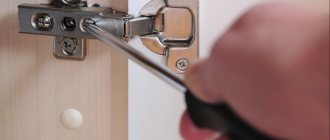
According to the diagram for installing furniture hinges, a mounting plate is separately attached to two 3x16 mm screws and a bowl (also to two screws), on the side of the frame and on the inside of the door, respectively. After the furniture is placed in the designated place, they begin to hang the facades. To do this, the arm of the hinge with the bowl is threaded into the fastening bar and tightened with a fixing screw. There is no need to tighten the fasteners too much near the plank - all of them are involved in the process of adjusting the furniture hinge with your own hands.
Leading manufacturers
If you have experience purchasing and installing hinges with special closers from different manufacturers, including those mentioned in this article, be sure to leave feedback. It will be interesting to find out whether these brands are really that good, or whether they also have their drawbacks.
To choose hinges with a closer function, you need to decide the purpose of their use. After all, there are different overlaps, sizes and corresponding configurations. The standard is the popular overhead type hinge with 4 hinges, the mounting holes of which fit a 35 mm bowl. Such hinges are universal and are actively used in the production of all kinds of furniture.
As for filling, gas will be the cheapest option, and silicone and oil fillers are the leaders in terms of reliability.
The following companies are currently considered leading brands:
- Boyard. She's just Boyard. Domestic accessories of high quality with a huge range and reasonable prices. A simple secret to success;
- GTV. Very durable, move smoothly and blend perfectly with different furniture. Adjustment and installation are extremely simple;
Rack with attachment
An example of a rail on which furniture is hung
A fairly common method of attaching wall cabinets lately, which includes two main components: a mounting rail in the form of a perforated metal strip with bent edges and a metal hinge in a plastic case with a hook for hanging from the rail.
The mounting rail (can be up to 3000 mm long) is attached to the wall using dowels with self-tapping screws at the required height; the hangers are fixed inside the hanging cabinet in the upper corners so that their hooks protrude beyond the dimensions of the rear wall. Structurally, the hinges provide adjustment of the hooks in height and forward and backward using built-in screws.
Peculiarities:
- Hanging upper cabinets using a rail can be done by one person without assistance in a shorter time.
- The design simplifies the work when hanging several closely spaced cabinets: they can be moved towards each other along the mounting rail and connected with bolts.
- Adjustment in the hinges allows you to change the height of the cabinets and the distance from the wall up to 20 mm.
The design features of the mounting rail provide the possibility of attaching it to hang furniture at many points, which lightens the load on the walls. This is a valuable quality when hanging furniture on plasterboard, gas silicate, or slag concrete; in this case, using a slats is the best option.
- The design of the slats does not allow the top of the cabinet to fit tightly against the wall, which is a positive factor when lowering the bottom of the cabinets onto the apron and a disadvantage if the cabinets are located above the finish of the work area.
- Wall-mounted kitchen cabinets can be easily removed and moved along the mounting rail.
How to properly embed a sink into a countertop with your own hands: step by step with photos
If, when purchasing fittings with a door closer, you do not see who exactly made it, I recommend abandoning such hinges. Go to the same Leroy Merlin. Good selection and always available hinges from leading manufacturers.
Also look at the number of cycles that the manufacturer guarantees. It’s good if this parameter is in the range from 60 to 200 thousand.
Step by step installation process
The considered method of attaching hanging cabinets is used for hook hangers with mounting rails.
- Before carrying out work, remove the front doors, if there are no installed fasteners, cut off fragments of the rear wall in the required places and install hook hinges. The hooks should protrude 3 - 5 mm. from the plane of the back wall of the cabinet.
- Lean the cabinet against the wall at the required height and mark its upper boundary, using a building level, transfer this mark, outlining a line along the perimeter of the entire wall where the cabinets are hung.
- Apply a fragment of the mounting rail to the hanger in the final suspension position and measure the distance from the top of the cabinet to the top of the rail.
- This difference is transferred to the wall by drawing a line for the upper border of the batten, parallel to the first line (usually it is 30 - 50 mm lower.)
- Place the mounting rail on the line and drill through the mounting holes into the wall. It is most practical to first do this at one point and secure the rail with a dowel and a self-tapping screw; during further work it will not need to be constantly supported.
- Next, hammer in the dowels and tighten the screws, completely securing the rail.
The mounting holes in the mounting rail often have a diameter larger than the screw head. This allows you to drill holes through it for the dowel without removing it from the wall; when installing it on self-tapping screws, you will have to put washers on or use special types with wide heads.
- The frame is hung on the rail and set using adjusting elements in one line along the level at the required distance from the wall. If necessary, they are fastened to each other using self-tapping screws or intersection ties.
- The final stage of installation is hanging the doors and adjusting them.
Installation
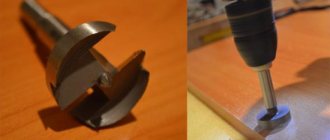
To install hinges with a closer, the insertion method is used. To work you will need a drill, a screwdriver (preferably a screwdriver), a milling cutter and a ruler with a pencil.
If the door is small and light weight, you can limit yourself to one hinge. But it’s better when paired elements are mounted.
The work is performed in the following sequence:
- Markings are made on the door for fitting installation points;
- If you plan to install 3 hinges, one must be placed strictly and evenly between two elements (top and bottom);
- Hinges cannot be installed in the area where the fittings will join drawers or shelves;
- The overlay elements should be attached to the facade and the bowl body should be outlined;
- A special hole is made in the circled area using a milling cutter;
- Next, holes for the screws are drilled;
- The strip is mounted and the fittings are installed on the screws;
- The special hinge platform is mounted on the body of the furniture itself;
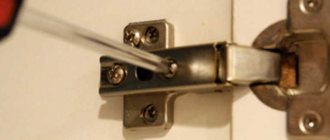
- The position of the curtain wall is adjusted using the central screw.
Regardless of the angle of rotation, there are no significant differences in the installation of fittings.
A little practice and watching a visual video will allow you to quickly master the technique of installing hinges with a closer.
Adjustment
When installation is completed, the structure should be adjusted in vertical and horizontal planes. Due to this, the facade will fit more tightly, become even and allow the doors to open and close perfectly smoothly. Still, the presence of different gaps between furniture parts causes some irritation. Do you have it too?
As for adjustment, several rules and recommendations are followed:
- first you need to adjust the gaps in the vertical plane, and then in the horizontal;
Required materials and tools
Installing a door hinge will require disassembling the mechanism, so you will need tools to perform delicate, neat procedures. In addition, other manipulators will be required for general work with the door. A complete list of all tools for installing an overhead hinge model is as follows:
- Screwdriver with a Phillips bit.
- Set of screws.
- Building level.
- Ruler or tape measure.
- Screwdriver.
- Drill.
- Pencil or erasable marker.
- Cutter with a diameter of 35 mm.
The standard layout of a door hinge involves its disassembly into three components:
- The base is in the form of a strip, which is responsible for attaching the hinge to the cabinet panel.
- Cup, which is mounted on the working door.
- The hinge body is a moving part that connects the door to the cabinet body.
The door hinge mechanism is installed using mounting screws screwed into the holes of the mounting plate and cup. The operating parameters of the device are determined by the adjusting screw in the housing. Thus, the hinge mechanism has up to six mandatory fasteners, which are best prepared in advance as spare ones.
Modern double beds with upholstered headboards: which one to choose
The presence of a closer allows for the most precise adjustment. It is performed in the vertical, frontal and horizontal plane.
Moreover, such hinges save even in situations where the floor itself is uneven. By adjusting, it is possible to compensate for this shortcoming, and as a result, the furniture with doors still looks perfectly level.
What can you say about such hinges with a closer? Share your impressions in the comments.
Thanks to everyone who is with us! Don't forget to subscribe and invite your friends to join us!
source
Types of hinges with closer
Manufacturers try to regularly update the fittings they produce, which is why there is a huge variety of furniture hinges on the modern market. Today there are 3 main types of loops that are especially popular.
An example of what door closers look like
Table 3. Types of hinges with closer
Shock absorbers (dampers) for furniture can be installed together with conventional and complex hinges (with a closer). They prevent the door from slamming by absorbing the impact. Thanks to shock absorbers, any furniture will close silently. Dampers for furniture are:
- invoices;
mortise.
The damper is an excellent addition to self-closing hinges
- screw or glue to one of the surfaces of the cabinet;
- cut into the end of the housing.
Furniture hinges with a closer: varieties, installation nuances
Furniture hinges with a closer are expensive fittings with a complex design. Thanks to the shock absorber built into the hinges, the doors will close independently. The closer ensures tight fixation of the sashes, and smooth closing reduces the likelihood of mechanical damage. Hinges can be different, each type has characteristic features that are important to consider before purchasing accessories.
Furniture hinges with closer
Purpose of awnings with closers
Such fittings are widely used in furniture production today. Thanks to the self-closing design, the furniture will retain its appearance during long-term use and will become less susceptible to any damage.
The hinged door closer can be installed on a variety of furniture
Table 2. Designs that are most often equipped with self-closing hinges
Adjusting the location of the hinges does not cause difficulties even for a person who has never worked with furniture fittings
