What is the hanger holder called?
Topic: What is the name of the stick in the closet?
| dima-24 June 26, 2013, 20:44 |
| Good people, what is the name of the crossbar in the closet where the hangers (hangers) hang? And where can I buy or order it? Thank you in advance! :))) |
| Pages: 1 |
| Pages: 1 |
Only registered users can leave messages login register
Forum rating for the month
Regular forum topics:
Click on your nickname in the upper right corner of the site
Ignore user:
Click on the nickname of this user in any of his posts, follow the link
The topic you created has disappeared:
Most likely it has been moved to a topic with a similar meaning. Click on your nickname in the upper right corner of the site, follow the link “My latest comments”
How to insert an image into a post:
I can't rate posts:
Rating of posts will be enabled automatically, depending on the date of registration on the site and the number of your comments
Post rating buttons do not work on iPhone and iPad:
Source
What types of closet rods are there?
There are two types of standard, or typical, cabinet rods (named after the profile shape):
- oval is the most typical; most of the cabinets are equipped with these rods. The oval shape is not accidental: it allows it to withstand more severe loads than the round one. Mounted on specially shaped rod holders.
- round - usually a chrome-plated pipe with a diameter of 25 mm, secured with flanges. It holds weight well, but is inferior in reliability to a similar oval barbell. For this reason, its length, as a rule, does not exceed 60 cm.
Cabinet rods are made from the following materials:
- aluminum is a lightweight and durable material. Used for light items (shirts, trousers, belts, ties), as it does not withstand heavy loads.
- Chrome steel is a very durable material, suitable for clothing of any size and weight. If the hanger hooks are made of metal, they can scratch the chrome plating and cause the rod to rust. Therefore, it should only be combined with plastic or wooden hooks.
- wood is a classic material that has both advantages (pleasant appearance and durability) and significant disadvantages: gradual sagging under the influence of the weight of clothing and moisture, as well as the formation of dents from hanging hangers for a long time. Nowadays it is rarely used;
- plastic is lightweight and visually attractive, suitable only for light clothing. It is rare and, as a rule, in inexpensive cabinets.
Different models of cabinets use longitudinal (pantograph lift) or transverse (microlift) rods. Standard rods are installed using both the first and second methods. Almost all types of rods can be found on sale in Ikea stores.
Not all crossbars have a strictly straight shape. Some cabinets use L-shaped standard rods with an oval profile, one end attached to the wall and the other to the adjacent wall or top shelf.
Using a pull-out rod allows you to make the cabinet flatter and more convenient for placement in small rooms. Professional furniture makers call this type of rod a “microlift.”
A separate subtype of the retractable rod is the “pantograph lift,” which extends in the vertical direction, that is, from top to bottom. The pantograph bar can be smoothly lowered and raised thanks to a hydraulic mechanism. When lowered, the bar is firmly fixed, so there is no need to support it with your hands when hanging or removing clothes.
A retractable microlift, or trombone, is often used as a transverse rod. The length of the microlift can be changed thanks to a retractable mechanism. With a large amount of stored clothing, the microlift makes it difficult to access things located at the back wall of the closet.
Types of rods and their installation
Types of rods To hang coat hangers in your closet, you need to create the appropriate conditions - install a clothes rod in the closet. And first you need to understand the types of barbells.
Standard closet rod If we talk about a typical clothes rod, then it should include a standard closet rod. There are two varieties of this type of furniture fittings:
The oval bar is a classic example of a clothing bar. It is fixed on rod holders designed for fastening an oval rod inside the cabinet. Due to its oval shape, such a rod can withstand higher lateral loads. For example, wearing a lot of heavy outerwear can put a fair amount of pressure on the barbell. And just an oval bar can easily cope with such a load.
A round rod is, in some way, one of the options for using a round chrome-plated pipe with a diameter of 25 mm. Fixation of such a pipe is carried out using flanges. Practice has shown that this version of the clothes rail confidently holds the weight and performs its functions. Although, if you look from the position of “what is more reliable?”, then it is definitely better to install an oval rod in openings with a width of more than 600 mm.
Retractable rod (microlift) The retractable rod is used in cases where it is necessary to hang clothes on hangers in closets less than 550 mm deep. It is with a closet depth of up to 550 mm that it is necessary to change the direction of hanging clothes on hangers. And the retractable rod or, as it is also called in narrow furniture circles, “microlift” is precisely intended for the transverse placement of clothes inside the closet. Retractable rods come in lengths from 250 mm to 500 mm. In general, you can easily choose the most optimal microlift size for your closet.
Pantograph The lift pantograph is used to place clothes under the ceiling of the closet. A special mechanism allows you to lower the pantograph lift bar to the level of human height in order to remove or hang hangers with clothes. This mechanism is especially popular in the design of wardrobes, where there is a need to hang short clothes on hangers in “two tiers”. It is the pantograph lift that allows you to easily and effectively cope with this task.
Features of installing a clothes rail in wardrobes Since installing a clothes rail usually does not cause any difficulties, now we will talk about how to properly install a clothes rail in a closet so that it later brings benefits and is used for its intended purpose.
So, you already know that there are three most popular types of closet rods:
- Standard closet rod,
- Retractable rod (microlift),
- Elevator pantograph.
There are also two types of rod installation: longitudinal and transverse. Figure 3 visually shows what each installation option is.
For longitudinal installation, a standard rod and a pantograph lift are used.
For transverse installation, the same standard rod and retractable rod (microlift) are used. And the choice of installation option for the rod is influenced by two factors: the depth of the wardrobe and the width of the opening of the section in which the rod will be installed.
The influence of cabinet depth and opening width on the installation of the rod. The thing is that for the classic (longitudinal) installation of a clothes rail, it is necessary that the internal useful depth of the wardrobe be at least 530 mm. If the depth of the cabinet is, say, 450 mm, then it will not be enough for the longitudinal placement of hangers.
Transverse installation of a standard clothes rail I decided to consider this topic due to the fact that this particular option for installing a standard clothes rail is, in a certain sense, non-standard. Usually, it is customary to install a retractable rod (microlift) in a transverse position, but not an oval or round rod for clothes. But, in my opinion, this particular option for installing the rod transversely is more reliable and effective, since the microlift in the closet is supported only by four screws and may not withstand a large pile of clothes.
It's a different matter if you install a regular clothes rail in a transverse position (see Figure 4).
By and large, it doesn’t matter whether you use this option or install a microlift. You must understand that each mechanism is designed for a certain load. After all, you can install a more powerful microlift by screwing it with larger self-tapping screws.
The full version of the article can be downloaded by clicking on the link>>
Dimensions of clothing rails
To choose the optimal location for the rod, you need to start from two factors - the width and depth of the closet section intended for hangers with clothes. Longitudinal installation is possible only in cabinets with a depth of at least 530 mm. Even if the cabinet depth is 480 or 460 mm, it will not allow standard hangers to be placed longitudinally.
In closets with a depth not exceeding 50-55 cm, hangers with clothes can only be placed parallel to the back wall of the closet. Standard lengths of retractable rods are 500 and 250 mm.
At what height should the barbell be hung?
Pantograph bars allow hangers to be placed under the ceiling without the need to stand on tiptoes or on a chair. They are often used in tall wardrobes or wardrobes and allow you to hang not too long clothes in two or more tiers.
Standard rods can also be installed in 2 or more levels, but their use is associated with obvious inconveniences.
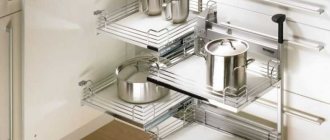
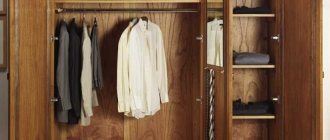
Shoe hanger
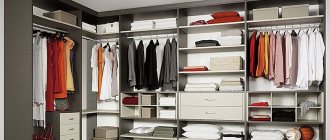
Some people are more accustomed to storing shoes in boxes, others select drawers or add mesh shelves to the wardrobe. In addition to these options, it is also possible to store shoes in a suspended state so that the tops of the boots do not wrinkle - using special hangers-holders.
As a rule, when developing the internal filling of a sliding wardrobe, several types of hangers are used. Many manufacturers offer a basic set of rods and hooks, trying to maximize the useful space of the cabinet when planning, combining it with shelves and drawers.
Source
How to install a clothes rail in a closet
To install the rod, you need to do a few simple steps:
- apply markings: attach the fasteners to the walls, making a small indent from the top shelf, then mark with a pencil the contours of the fasteners and the locations for the holes;
- drill holes of the required depth using a drill stop or wrapping electrical tape around the drill;
- attach the fasteners to the outlined contours and screw in the screws.
Installation of a rod with a ceiling mount
If self-tapping screws, hangers, or brackets are chosen for fastening, then installing the rod using the ceiling method, to the ceiling, is done as follows:
- mark the place of fixation;
- drill holes;
- screws or screws are screwed in.
Anchor bolts are installed as follows:
- Make holes of the required diameter.
- The fastener is secured by driving or screwing.
There are many designs of rods that allow you to hang clothes evenly, compactly and maintain their presentable appearance. Special devices have been developed for each type of clothing.
Did you manage to solve your problem using the recommendations from the article?
Yes!
51.52%
No. More answers required. I'll ask in the comments now.
27.27%
Partially. There are still questions. I'll write in the comments now.
21.21%
Voted: 33
How to make a closet rod with your own hands
When making your own closet, the rods need to be selected and placed so that the weight of the clothes placed on them does not exceed their capabilities, and the closet space is used as rationally as possible.
It is important that the rod rests entirely on the supporting planes of the holder. To calculate the length of the rod, you need to subtract a gap of 5-6 millimeters from the distance between the opposite walls. For example, if the distance between the walls is 600 mm, then the length of the rod will be 600 - 6 = 594 mm. The rod mounts are marked horizontally in the middle of the wall, measuring the distance using a tape measure.
The easiest way to choose a material is wood that is durable and easy to process. You can take an ordinary gymnastics stick or cut a round or oval barbell yourself using a plane or knife. All excess from the sides is sawed off from the finished stick, the surface is cleaned with sandpaper, degreased and, if desired, varnished. The fastening can also be made from what is at hand. For example, a regular beer stopper is suitable for this purpose.
It’s even easier to purchase a ready-made steel pipe, the necessary fasteners and screws in the store. To adjust it to the desired length, all excess is sawed off with a hacksaw.
If the cabinet already has rod holders, first of all pay attention to whether they have a round or oval cross-section and whether they have a thread. If there is a thread on the inner surface of the fasteners, you need to measure its diameter and depth and subsequently cut the same thread on the rod using a thread cutter. To make it easier to screw in the threaded rod, you should slightly increase the gap between its ends and the cabinet walls.
Bar for a sliding wardrobe: types of crossbars for clothes
Rods in the closet are necessary for compact placement of things so that they do not wrinkle. Hangers with clothes - dresses, blouses, shirts - are placed on a crossbar, which keeps them in “excellent shape.” There are bars only for trousers, there are for belts and ties.
In the article we will tell you what other characteristics the rods differ in, what materials would be better from, and how to make them yourself.
Closet rods
Crossbars differ in materials, type of structures and method of their arrangement. The table shows the most popular types.
| Rod material | Type of rod mechanisms and fastenings |
| Chromed steel - characterized by increased reliability. |
- can withstand heavy loads,
- long service life
| Retractable — installed in cabinets with a shallow depth: up to 50 cm. It is located perpendicular to the bottom on the ceiling of the wardrobe. One part of the model extends. | |
| Metal alloys - most often used in organizations. Suitable for placing theatrical costumes, as well as for clothing racks in stores. They are highly durable, but the crossbar does not have a top covering | For accessories - belts, scarves, ties and other small items. Usually installed on doors |
| Made of wood (were popular in the USSR) - durable, but there are disadvantages:
| Pantograph, or a folding clothes rail. Attaches to the sides of the cabinet section. The mechanism works like an elevator, you can lower it to a convenient level and quickly get the thing you need |
| Galvanized steel - used in tubes for storing ties, scarves and belts. Galvanic coating protects steel from corrosion and increases service life | For trousers "Ikea" - provides ideal order for storing jeans and trousers According to the location of the rod, it can be:
|
Manufacturing materials
Crossbars are made from different materials: metal, plastic, wood. For a long time, hangers made of wood in the form of oval rods were in fashion. The material is highly durable, but its service life is short because it does not tolerate moisture.
Recently, most crossbars are made from aluminum and steel. High-strength steel is coated with chrome as standard. Aluminum structures are lighter in weight, their production technology is simpler, but they cannot withstand a large number of things. Such strips are not suitable for outerwear.
Products made from iron have gained the greatest popularity. They are easy to use, practical, and can withstand heavy clothing, but they have a drawback - the trample hooks gradually spoil the chrome surface, and this leads to rust.
Plastic bars are intended for light shirts, blouses, skirts, ties, and scarves. They are located at the bottom of the cabinet. They are budget-friendly.
Dimensions of clothing rails
The length of the rod depends on the width of the cabinet. For example, in a standard wardrobe, its length does not exceed a meter.
The average length of retractable bars is from 25 cm to 50 cm.
The size of the Ikea retractable structure is 50x35 cm. It is convenient for shirts and light items.
You should not install a crossbar longer than one and a half meters, as it may not hold up and break under the load of clothing. The maximum length for round rods is 1.5 m.
Oval bars are stronger than round ones, so they can be made longer. There are also telescopic rods with variable size and a load of up to 10 kg. Example on video.
Wall rod
0
Rods that are attached to the wall like a home horizontal bar are sold in many furniture stores. You can easily hang a set of ironed shirts and trousers on them for a week. This measure allows you not only to get closer to ideal order, but also to unload your closet with clean clothes. Such a rod can be easily deployed and “hung” from the ceiling.
0
0
0
At what height should you hang the barbell?
The height of the crossbar depends on the length of the clothing:
- long clothes - 180–200 cm;
- things of medium length - from 140 to 170 cm;
- short clothes - 100–120 cm.
The most comfortable height:
- with a height of 180 cm - 200 cm,
- with a height of 160 cm - 190 cm.
The distance from the cabinet ceiling to the crossbar must be at least 4 cm.
If you need two longitudinal bars, mentally divide the closet space into two halves and imagine how long things will hang on the top bar and how long on the bottom bar. At this distance, attach the rods.
The crossbar for belts and ties should be fixed on the side wall or on the door if the wardrobe is a wardrobe.
How to install a clothes rail in a closet
The installation method depends on the furniture parameters. If the crossbar needs to be placed in a narrow cabinet, it is better to use a longitudinal fastening. If the cabinet is deep enough, you can perform a transverse installation.
Installation of the longitudinal crossbar
First option:
- Place one end of the rod blank in the holder, measure the distance from the cut of the blank to the plane where the holder is attached to the wall. In our case it turned out to be 3 mm.
- Do the same on the other side.
- Measure the distance from wall to wall (w), subtract the sum of the distances to the holder from the resulting number. This will give you the length of the rod (d).
- Saw off the steel tube (I recommend using a 25 mm universal Joker pipe) with a grinder or a hand hacksaw to size.
- Calculate the distance from the back wall of the closet to the rod: usually 25–28 cm (depending on the size of the clothes and the dimensions of the hangers).
- Make holes for the wall socket with a screwdriver or drill (depending on the cabinet material) and secure the holders with 4x16 mm screws.
- Place the crossbar on them.
Consider the distance from the cabinet ceiling to the rod holder - 4–5 cm.
Second option.
Method of installing a wooden crossbar in a wardrobe.
- Drill holes at the ends and in the walls of the cabinet.
- Place the beam against the wall.
- From the outside, drill the self-tapping screw so that it fits into the hole in the end.
Such fasteners are dangerous because the crossbar can crack along its entire length when drilled.
Installing the crossbar
In the transverse position, a retractable microlift rod is often installed. It is attached to four screws screwed into the top of the cabinet. This mechanism is applicable for light items.
If you are going to hang outerwear and at the same time want to install it across the closet, choose a pipe not with a microlift, but a standard shape: oval or round. It will be more reliable.
Classification by purpose
Wardrobe hangers have a variety of functional purposes. This parameter makes adjustments to the appearance of the product. This fact should be taken into account when choosing a model.
Criteria for choosing doors for dressing rooms, variety of their designs
The tripod is a wardrobe hanger on wheels - the most common option for public institutions. Installed on the floor, easily moved to any place. It is distinguished by the presence of a vertical base, which is equipped with special hooks of various configurations for clothes, bags, umbrellas and hats.
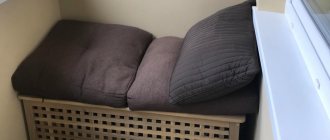
A hanger in the shape of a chair is characterized by the ability to neatly place outerwear without the use of additional hangers. In addition, a comfortable place to rest, wait or change shoes is offered. An ideal option for a small hallway, especially relevant for families with children or elderly people.
The stand is impressive in size. Capable of holding a significant amount of things. Thanks to the presence of hooks, you can neatly arrange your clothes using hangers.
The model with a stand is designed to accommodate not only clothes, but also umbrellas and other long items. It can be equipped with wheels or installed permanently. Often supplemented with elements for storing small items. Shelves and stands are an indispensable option for a small hallway.
The basket hanger is characterized by the presence of an impressively sized base. It can be used to store all kinds of items depending on the location. For example, in a children's room you can put clothes on the hanger itself, but put toys in the basket.
The suit hanger model was created specifically for business people. Designed for neat placement of trousers, jackets, shirts. Ideally fits into a dressing room or office.
Chair shaped
Hanger-basket
Costume
Rack
Tripod
How to make a closet rod with your own hands
Self-made crossbars, in fact, are no different from already installed ready-made structures.
They may differ in the materials used. The store sells standard crossbars with ready-made fasteners, but in any garage you can find suitable devices for modifying them yourself.
- steel tube with a diameter of 25 mm, a length of 100–120 cm (for example, cuttings of pipes from a metal ladder or a forged bench);
- pipe connector - you can take a sleeve from a car bearing;
- two metal plates of rectangular or oval shape;
- drill;
- screwdriver;
- self-tapping screws;
- welding machine;
- Bulgarian;
- spray paint.
- Paint the tube with spray paint.
- Use a grinder to saw the connector into two parts.
- Weld each part to the metal plates - the fasteners are ready.
- Drill holes at the bottom and top of the resulting part - this blank is the flange.
- Make markings for the holders on the cabinet walls.
- Secure the holders with self-tapping screws.
- Carefully insert the ends of the pipe into the holders.