1
95357
Any furniture wears out and becomes unusable. A wooden bed is no exception, even if it is made of high quality materials. After some time, you may notice that the bed is creaking, what should you do in this case to eliminate the unpleasant sound? First you need to establish the cause of the squeak, and only then take action.
Minor clarifications and comments
Since we need to use some size to make the bed, we chose standard dimensions for our case. Be sure to adjust your measurements to the dimensions of your mattress. In our case, we make a base for an orthopedic mattress, which has the following dimensions: length 200 cm, width 160 cm, thickness 20 cm. The height of the bed is calculated taking into account the mattress used.
It is not advisable to make the base of the bed from a board; it is better to assemble it from bars connected along the length.
What do we need during manufacturing?
- Pine timber.
- Particleboard (chipboard) laminated for furniture.
- Board material (MDF).
- Various fasteners (dowels, plugs, self-tapping screws, Euro screws or confirmants, eccentric clamp).
- Edge material.
- Glue.
In addition to everything else, we will need carpentry tools and fixtures, and of course skillful hands and a quick-witted head.
Tools and materials
The next step, after drawing up a detailed diagram of the future product, is to prepare tools and consumables for work. The materials we need are:
a certain amount of chipboard;
the following tools :
First stage
At the beginning, we prepare the materials and necessary tools. The most suitable material for our base is pine timber, which can be purchased at a hardware store or at a sawmill. Its dimensions are 50 mm by 50 mm. The base for the mattress will be furniture laminated chipboard, and we will make decorative elements of the bed from the slab material.
To calculate what length of timber to buy, you need to understand where it will be used. The timber will be used to strengthen the base, to support the base on which the mattress will rest. In our case, the most optimal size for the length of the beam is 4.5 meters. You need a couple of such bars. Since the elements made from beams will not be visible in our bed, you can purchase unplaned timber. It is better if it is cut to size on site. Such timber will be more convenient to transport.
Be sure to check how it was stored before purchasing the timber. It should be stored under cover. Pay attention to how it was laid, whether spacers were used between layers. Otherwise, you may end up with low-quality material, with mold, darkening or cyanosis. Such timber is often severely deformed due to drying.
If the timber was stored in unsuitable storage conditions, do not buy it, because you can choose a more suitable, high-quality material. For example, laminated veneer lumber. Such timber costs much more, but the quality of your product will increase significantly. Here you should not save money. After all, we do it for ourselves, our loved ones.
The next stage is preparing the base parts
The head of the bed needs to be made beautifully and neatly. The head back will be made of slab material and furniture chipboard. Make sure that the texture of the headboard material is directed from top to bottom or bottom to top, that is, it is transverse. It is good to process the bottom edge with a milling cutter according to the prepared sketch; this will give the finished product an aesthetic appearance. Take all this into account when cutting the material.
We make the holder from a block 20 cm long. It is fixed across the width and in the center, at a height of 15 cm from the bottom edge. We secure them with self-tapping screws and put them on glue.
The holder is fixed in the center of the beam. It is necessary to fix the racks on the sides of the head cloth. They are made from slab material.
The profile is connected to the headboard using prepared glue and dowels. It is necessary to apply glue not only to the dowels, but also along the entire length to the end of the head sheet.
At the top, on the headboard, we fix an additional decorative profile. Fix it in the same way as you strengthened the bed posts. Although this technology can be simplified a little. Only glue can be used. Do not use dowels. But double fasteners, reinforcing each other, will allow your product to be more reliable and durable.
If you have the capabilities and desire, and most importantly certain skills, then you can make racks in the form of columns using turned wooden elements. This will additionally give the product a more aesthetic appearance. The only point is that the turned part needs to be flattened with a plane for more convenient attachment to the side of the headboard.
The side opposite the headboard, called the footboard, is made according to a similar pattern as the headboard. The main difference in fastening the small backrest to the drawers is that it is done using eccentric ties. To ensure that the fastening elements are not visible from the outside, minifixes are used.
On the side of the large backrest, fastening is much easier, because most often this side of the bed is placed against the wall. Here, even if the confirmation hats are visible, it practically does not matter much.
The longitudinal parts of the bed base are the drawers. They are manufactured by first preparing the structural holes. A hole for a mini fix can also be used here. Then, at a height of eight centimeters, you need to glue the base block and secure it with self-tapping screws.
Failure options and fixes
To repair a bed at home, you must first find out the cause and type of damage. Most often it is necessary to restore the legs, slats, frame of the product, as well as the spring mattress. The technology for carrying out work is different in each case.
Leg repair
If the entire structure is attached to the legs, then bed repairs must be carried out very carefully. When parts become loose, the fasteners must be tightened. If they break, it is better to completely replace them. To do this, the nuts are unscrewed, damaged components are removed, and others are installed in their place and clamped with fasteners. Ready-made parts can be purchased or made independently. If the master is a beginner, then the first option is preferable.
Distinctive features of beds with a lifting mechanism, their advantages
If the legs become loose, the fasteners need to be tightened
If a leg breaks, a complete replacement of the part is required.
Lamels
Most often, children's beds have to be repaired. The reason is that this type of furniture for a child is not only a piece of recreation. He can play on it, jump, do what he likes. This often causes damage to the lamella. If the damage is minor, then it is enough to fix the element with glue. Otherwise, the part is replaced. Moreover, now you can purchase not only the lamella itself, but also its holders, which are most often damaged.
If the damage is minor, then it is enough to fix the element with glue
In the event of a serious breakdown, the failed part will have to be replaced.
Frame frame
Although this part does not experience maximum stress, failure of the bed frame is common if it lasts more than 3-4 years. The problem may be as follows: the crossbars that connect the backrests pop out. The reason for this is the wear of the coupling bolt. To correct the situation, you need to drill several holes in the end of the cross member. After this, insert guide pins into the outer holes, and a tightening bolt into the middle one.
Another type of failure is the loss of the metal fitting connecting the front backrest and the crossbar of the furniture. To solve the problem, you should simply fix the element in its place. To do this, wind the thread around the foot in the opposite direction to the twist. The diameter of the product should be slightly larger than the size of the loosened hole.
Before fixing the part, the hole is coated with glue, and then the component is installed in place. A screw or self-tapping screw is also screwed into the back of the furniture, securing the footing on the back side. Once it has hardened, the bed can be used.
After 3-4 years of use of the product, the tightening bolt may fail, which will lead to breakage of the bed frame
If the cause of the breakdown is associated with a fallen out fitting, you should fix the element in place by winding a thread around it and lubricating the loose hole with glue
Lifting mechanism
Different types of lifting mechanisms are installed in beds, therefore their repair schemes are not the same. Before starting work, the type of structure is determined and a visual inspection is performed. The algorithm for repairing the bed lifting mechanism is as follows:
- First, the structure must be removed and disassembled. It is advisable to photograph the entire process or write down the sequence of unscrewing the parts so as not to get confused during assembly.
- Conduct a visual inspection of the mechanism to identify broken parts.
- Replace damaged components and assemble the structure.
- Place the product in place.
A simple bed with a lifting mechanism, DIY assembly step by step
To prevent the lifting mechanism from breaking for a long time, it must be periodically lubricated. Thanks to this, the friction of the fragments, as well as their wear, will be reduced. In addition, the protective oil film will prevent rusting and corrosion processes.
To ensure that the lifting mechanism lasts as long as possible, it must be lubricated periodically.
Bed base installation sequence
The main technological elements of the base are the drawers and backrests.
If they are made, you can assemble the base in the sleeping area, at the place where the bed is installed. The supports and main beam can then be attached. Then the base for the mattress is laid on top.
The next stage is attaching the supports with self-tapping screws to the main beam. Then holders are installed on the backrests and a beam is attached to them. Next, the base for the mattress is installed. It consists of 2 halves made of pre-polished particle board (chipboard).
At this point, the assembly of the bed base can almost be considered complete. In conclusion, we add that the base elements need to be made somewhat smaller. Following this simple rule will allow you to easily dismantle and reassemble the base if necessary.
Making a frame for a podium bed
The base of the podium bed can also be made of wooden beams. Also, to assemble such a bed, a board twenty-two millimeters thick is used. It is used for the manufacture of external elements and cross bars.
Assembling the bed base
The walls of the drawers built into the base are made of boards sixteen millimeters thick.
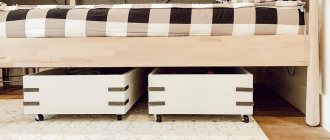
The bottoms of built-in drawers can be made from centimeter plywood. This design consists of three pre-made blocks that make up the main part of the bed. The third block divides the main structure into two compartments in which the drawers are placed.
Headboard blocks can be secured using wing nuts. This solution will allow this structure to be easily disassembled and assembled in the future. First of all, it is necessary to assemble the blocks using pins with a diameter of 8 millimeters.
The necessary holes are pre-drilled for these pins. All connections of the block parts must be coated with glue and immediately, without waiting for the glue to dry, the assembled structure is tightened using clamps.
The middle block is significantly shorter than the outer ones. It is secured by four spacers. Recesses are made in the upper edge of the panels of the central block. These recesses are needed for the central strip that passes through them.
Horizontal load-bearing bars must be secured with self-tapping screws and glue. After this, you can install the main bars, onto which the entire main load will be distributed.
When making a bed of any design with your own hands, the final price turns out to be significantly cheaper than a similar bed offered in a retail chain. Therefore, we advise you to weigh the pros and cons, roll up your sleeves and begin an interesting and exciting task - making a bed with your own hands.
Slat base for mattress
Special slats and lamellas are installed on the bed frame, which in combination with the mattress create conditions for “quality” sleep. Moreover, the effectiveness of the slats is maintained not only with orthopedic, but also with conventional products. What are lamellas used for:
- They reduce the load on the mattress, enhance its quality, and extend its service life.
- They have springy qualities and elasticity, in which the load is distributed correctly.
- The spine takes the correct position during sleep.
- Special holders are used as fasteners, which is why the bed does not make noise or squeak when moving.
- Their location ensures natural ventilation of the mattress.
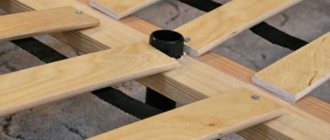
Professionally made lamellas, or latoflex, are wooden elastic strips made of bent-glued multilayer plywood. The thickness of each part is 0.8 cm, and the width can range from 5.3 to 6.8 cm. As a rule, their shape is slightly curved. Install Latoflex across the base of the bed at a distance of 2 to 6 cm, but not greater than the width of the bar used.
A single bed requires 15 slats, and a double bed requires 2 times more. Moreover, in the latter case, an additional middle support bar must be installed, and the slats are attached in two rows. Thus, one bed provides two orthopedic beds.
What can slats be made from? Traditionally, latoflex is made from the following types of wood:
The slats are attached to the bed frame using lath holders, which can be made of plastic, polypropylene or rubber, tape or metal stands.
To make orthopedic base slats with your own hands, you can use boards of the desired size after appropriate processing. Craftsmen who make their own beds offer different ways to attach them to the frame:
- The generally accepted option is with self-tapping screws.
- An original shock-absorbing method of attaching slats using thick edge tape.
- Install the slats into the grooves created by attaching specially prepared bars to the frame.
DIY bed frame: step-by-step instructions
You can easily find and buy in one of the many furniture stores a bed that fully corresponds to your ideas about the ideal place to sleep - if only you had the money for it. However, the situation is that the mattress accounts for on average only a fourth to fifth of the cost of the bed. Everything else has to be paid for the frame, brand and additional decorative elements.
Figure 1. Bed frame size chart.
But with a little preparation and basic skills in working with carpentry tools, you can make a bed frame yourself, saving an impressive amount of money. The bed frame can be made of metal or wood. Wood, of course, is more convenient and easier to work with, but a metal product, especially when it comes to a double bed, looks stylish, chic and solid.
How to detect the source without dismantling the bed
It will be much easier to determine why the bed creaks if two people look for the reason at once. One of them will loosen the furniture, and the other will listen. The cause of the creaking, as has already been found out, can be different elements of furniture, therefore, in order not to completely disassemble the structure, you can resort to some of the methods described below. The bed creaks - what to do:
- First, remove the mattress. Take out the base. It consists of slats located across the bed under the mattress;
- Place the mattress on the floor and check. The cause of the squeaking is the springs located inside. Stand on the mattress, walk around it, sit down. If there is no creaking sound, then the problem is different;
- The mattress sometimes rubs against the bed itself, coming into contact with the walls of the frame. Put it back and check. Stagger or sit down, a creaking should appear;
- Press on the orthopedic base and pump slightly. The source can be wooden slats that are not fastened correctly or if they have cracks or chips. Often, in inexpensive bed models, the self-tapping screws or screws used to attach the slats to the base cause squeaking;
- Sometimes the reason is not in the foundation, but in the frame. Then you need to carefully check the entire bed. Shake it in different areas. It is possible that the entire structure has become loose and additional fasteners will be required to enhance the strength of the frame;
- Beds with a lift mechanism can also squeak. An unpleasant sound appears in the mechanism itself. Repairing it is quite complicated, so it is recommended to replace it;
- The legs also sometimes make an unpleasant sound. It appears due to their contact with the floor when the bed is uneven. This can mainly be determined by looking at the legs of the bed. Most likely, some of them will not reach the floor. In this case, you can put special stands under them. It is also common that the legs do not fully contact the bed frame, they rotate and creak;
- Check the support bars. They are necessary for installing an orthopedic base and mattress. They are attached to the base and are made of wood or metal. You need to press on the slats and listen to see if a creak appears or not.
Check if the floor is squeaking. There are cases when the sleeping place is located on a wooden floor. Over time, the boards begin to creak and the sound seems to be coming from the bed. The sleeping place must be moved away and checked whether unpleasant sounds are heard in another place.
Preparation for production
First of all, it is necessary to resolve the issue of the dimensions of the mattress. Of course, everyone would like to have a huge and comfortable bed in their bedroom, but you have to be content with what you have. The mattress can be single, one-and-a-half or double. At this stage, the choice is yours. If the optimal solution is found, you can start working.
As an example, we will consider the procedure for manufacturing a wooden frame for one of the most popular options - a spring mattress 2000x1800x220 mm.
Figure 2. Diagram of a double bed.
This is quite enough for two people of average build.
First of all, you need to pay attention to the choice of material for the frame. If you decide to make a frame from wood, then choose high-quality material that has undergone appropriate processing (must be confirmed by a certificate) and has no external defects.
Prepare tools for work:
- electric drill and drill bits;
- jigsaw;
- furniture stapler and staples;
- scissors;
- construction knife;
- Screwdriver Set;
- hammer.
It is necessary to add tolerances to the dimensions of the mattress - 1-1.2 cm on each side.
For the frame itself, a calibrated planed board 3 cm thick is used - this material will produce a product of sufficiently high strength.
To make a frame for the previously mentioned mattress, you will need:
- 2 boards measuring 2070x300 mm for the sides;
- 2 boards 1810x300 mm for the back and front back.
Shutdown
Next, all the blanks need to be covered with stain. Apply a quick-drying polyurethane-based varnish on top in 2 layers. Now you can assemble the bed frame by twisting the pieces. After the frame is assembled, 2 or 3 load-bearing beams are laid on the support beams of the rear and front walls. They must be attached to the support beams at an angle of 45 ° using self-tapping screws. If the timber is not enough, you can tighten a couple of slats together.
Stepping back 2 cm from the back or front wall, lay 25 slats on the supporting structure in increments of 4 cm and screw them. For greater reliability, you can screw 2 legs to the supporting beams. Place the selected mattress on the frame. The total height of the structure will be half a meter. As a result, if everything was done correctly, you will get the following: Fig. 2. This durable and reliable design will fit perfectly into the interior of any bedroom.
DIY metal bed base
Installation diagram of a metal bed frame.
The metal frame is more difficult to manufacture, because requires skills in working with a welding machine, grinder and other relevant tools. Frames come in the following types: Fig. 3.
Prepare materials for making the frame:
- corner 40x40 mm and channel 65x32 mm for the frame;
- profile pipe 20x20 mm for racks and crossbars.
In this case, the dimensions of the frame also depend on the size of the selected mattress. Most often, frames are made in the following sizes:
- length - 190, 195, 200 cm;
- width - 80, 90, 120, 140, 180, 200 cm.
First of all, the backs are made. Cut the blanks from the profile pipe and place them on a flat horizontal surface. Securely fix the workpieces and only then start working with welding material. During the process, periodically check the diagonals and right angles - the opposite sides of the frame must have exactly the same length.
Take a channel and a grinder. Make 2 central and 4 side brackets for attaching the frames. Each bracket is equipped with a tenon with a bevel of approximately 5° to the vertical. The frames of the future bed will be laid on them.
The finished brackets must be welded to the backs of the frame at a distance of 350 mm from the floor. They will bear the main load, so they must be welded with a continuous seam along the contour.
Next you need to make the frames. For this, a corner and a channel are used. Take a channel and cut the blanks. The length of the workpieces must correspond to the length of the side of the frame. Connect them using a corner. On the horizontal flange of the corner, cut off the areas for joining with the channel. These joints must be welded with a continuous weld.
Procurement of materials and hardware
Calculation of materials must be done depending on the size of the mattress. For double beds, mattresses are sold with a width of 140–200 cm and a length of 190–210 cm. We will give an approximate list of materials for a bed 140×200 cm, this is the most common size.
Table. Materials for making a bed
| Name | Description and quantity |
Lumber | Boards 200×20×3 cm – 2 pcs. for making bed sides. The same boards, only 140 cm long, are needed for the headboard and footboard, 3 of them are required. In addition, you will need 2.7 m of 50x50 mm timber and six meters of 50x30 mm slats. Boards 50×10 mm 15 pcs are placed under the mattress. 138 cm long. It is recommended to increase this amount by approximately 5% due to the fact that the boards may have critical damage that must be cut out during cutting. If possible, it is better to purchase lumber passed through a four-sided surface planer with polished surfaces. They will cost a little more, but they will save you from many problems. You won’t have to create dust and noise in the house, or be afraid of defects and inaccuracies. In addition, for high-quality wood preparation you need to have complex and expensive woodworking machines; they cost much more than a wooden bed. Buying such equipment is beneficial only for professional carpenters. |
Fasteners | If previously all the wooden parts of the bed were assembled on tongues or in a tongue/groove connection, now modern technology is used. It greatly simplifies and speeds up the bed assembly process, and the quality is in no way inferior to traditional technologies. To make a bed, corners 70×60 mm – 4 pcs., 35×30 mm – 8 pcs. are required. and 20×15 mm – 15 pcs. The large ones are used to secure the side boards to the headboard and footboard, the medium ones hold the bars for the cross boards under the mattress, and the small ones are needed to secure the legs to the sidewalls. All fasteners are installed in invisible places and do not spoil the appearance of the bed. In large corners, two holes must be drilled along the bend line; self-tapping screws are screwed into them to secure the legs. |
Hardware | The bed parts are fixed with black wood screws 3×30 mm (110 pcs.), yellow 4.5×40 (10 pcs.) and dowels Ø8 mm, 10 mm long. |
paints and varnishes | The bed needs to be varnished at least twice, buy the appropriate amount of materials. If desired, the surfaces can be impregnated with stain before varnishing - it emphasizes the beautiful structure of the wood. The varnish must be furniture varnish for interior work. |
This is not a final set of components for all cases; the same bed model can be assembled in different ways; accordingly, a different list of additional elements will be required. We specifically chose a manufacturing option that does not require a workshop or a long list of special equipment and tools.

