Rules for determining the height of mirrors and calculation examples
In large bathrooms, mirrors can occupy the entire wall, in standard ones - 1.5 m above the sink.
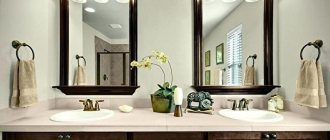
Installation height of a bathroom mirror above the sink
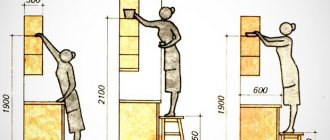
Small reflective surfaces in the bathroom above the washbasin are placed at eye level of an adult so that you can see the reflection up to the shoulders. And if there are children in the family, then you can determine the location for the reflective surface using simple calculations.
If you add 2 cm to the height of the tallest family member, you can get the level of the upper edge. And the bottom edge is at least 120 cm from the floor.
At this distance, children 5-6 years old will be able to look into the mirror on their own if adults provide a small bench for them to stand on. And younger children simply won’t be able to reach it and accidentally break it.
The installation height of the top edge should not be higher than the level of the doorway.
Options for installing a full-length bathroom mirror
Tall reflective surfaces expand the space and look presentable, but are not appropriate in every bathroom. To install such a ceiling-high canvas, there must be a free wall, which is rare in small bathrooms. On the wall where the sink is located, you can install a reflective surface across the entire width of the wall. But if it is placed on the sides of the washbasin below its level, the view will be unattractive.
When installing high mirrors, special attention should be paid to the reliability of the fastening.
Other useful recommendations
Before installing a mirror in the bathroom, it is important not only to determine the optimal dimensions of the product, but also to take into account a number of equally important points. So, if you are short, hang the canvas at such a height from the floor that you can reach the top point of the glass with your hand. In this case, you will not have any problems while washing the mirror when cleaning the bathroom. There are a number of other tips that deserve attention:
- if the bathroom is not well lit, choose a backlit mirror;
- For wet rooms, glass without any framing is best suited;
- take a couple of minutes to mark the wall for mounting holes before installing the product;
- when choosing the shape and dimensions of a new canvas, be guided by the proportions of the bathroom;
- To expand the functionality of the product, prefer mirror designs with a shelf.
Following simple recommendations will help you properly hang a mirror structure in your home so that all inhabitants of the house or apartment can comfortably use the mirror without splashing it with water.
Harmonious mirror arrangement
The mirror must fit into the existing interior. Therefore, when selecting and installing it, you need to take into account the size of the room, its design and the location of furniture and plumbing itself. It is important to hang the canvas correctly; this will add light and harmony to the room.
If the interior allows, you can install a large or small mirrored cabinet, which will eliminate the need to attach open shelves for cosmetics, soap, etc. In small bathrooms, such a cabinet installed above the washbasin will save space, and in large bathrooms, a tall cabinet with reflective doors up to the ceiling with lighting will also be a wonderful decoration.
A reflective surface with an original frame or colored coating will help create a harmonious space. Sometimes designers recommend installing small matte additional mirror surfaces next to the main one.
The mirror can be of any shape:
- Square or rectangular. This is a classic option and has a larger reflective surface compared to others.
- Round or oval, which are best suited for small rooms.
- Complex shape. Suitable only for large rooms, made to order and preferably after consulting a designer.
The reflective surface must be installed so that it is completely open. A shelf with accessories under the mirror or other objects should not block visibility.
When choosing, it is better to give preference to moisture-resistant mirror canvases or heated ones; they last longer in conditions of high humidity and look more aesthetically pleasing.
Choosing the shape of a mirror above the bathroom sink
When choosing a mirror shape to improve the design of a room, many factors are taken into account:
- A mirror wall visually doubles the room; what is reflected in it is also important. On the contrary, there should be no framed mirrors or doorways, otherwise a certain “corridor” will be formed, which adherents of some teachings consider the entrance to the other world.
- An oval or ellipse favorably emphasizes streamlined plumbing fixtures, the best solution for a hygienic room.
- The round shape, especially in a wide frame, resembles a porthole or the window of a bathyscaphe. This visual technique is good to use when decorating a bath thematically. A regular round mirror without a frame will fit well into any interior.
- Free form - for lovers of abstraction, not everyone likes something in the form of a large amoeba on the wall. But if the entire design concept revolves around the theme of denial of right angles and constructivism, this is an interesting way to play with the original interior.
- The main standard is a rectangle, but it can also be hung vertically or horizontally. It all depends on the space occupied. Square mirrors are used less frequently.
The height of the placement of the canvas is determined individually in each case, based on the characteristics of the interior and design of the room.
The sink is often mounted directly on the mirror wall, without taking into account the relationship to the floor surface, but according to the average height of those using it. The main difficulty is cutting round holes for water and sewer pipes. The easiest way is to bring it from another wall or cover it with a cabinet under the sink.
The mirror itself has always been one of the central details of the interior.
If you purchase a solid mirror sheet, its dimensions can be precisely adjusted to fit the niche you occupy - from the washbasin to the top. In this case, you need not just glass with amalgam, but protected glass, especially for the bath.
With the right approach, you can use it to visually enlarge the space of a room or play up the design of the room, giving it your own unique flair.
Markup rules
In order to securely fasten the canvas to the wall, you must first apply auxiliary markings:
- draw an upper or lower axis, which will be the installation boundary of the corresponding edge;
- determine the place for the middle of the canvas, and then outline the corners;
- mark the fastening points with a marker;
When taking measurements, it is necessary to take into account all previous measurements and the height above the washbasin.
What distance should be between the sink and the mirror?
The height of the lower edge of the mirror from the washbasin should be 30-40 cm. This distance is enough to prevent splashes of water from flying onto the reflective surface.
It can be positioned lower if the sink is built into the countertop and is located at a sufficient distance from the wall with the mirror.
Placement nuances depending on the type of product
Finding a place to hang a mirror in the bathroom is rarely a problem. Usually there are few options. The main areas for placement are:
- Mirrors above the washbasin are the most logical solution for the convenience of hygiene procedures and makeup application.
- A cabinet with a mirror allows you to organize your space. At the same time it serves as a storage place for hygiene products, cosmetics, and detergents. If you install a mirror above the sink with hidden shelves, there will be no need for additional furniture.
- Built into a wall or niche. Pros: saving space without sacrificing comfort. The location always looks advantageous, but may require additional costs. In addition, if the canvas breaks or gets tired, it will be much more difficult to change it than just attached to the wall. The recommended depth for such an arrangement of built-in products (including wall tiles) is 6–8 mm.
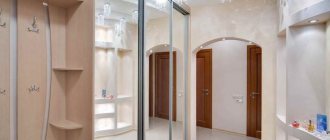
- Full height. The product can be free-standing, attached to a wall or door. It expands the space, looks impressive, and gives you the opportunity to see yourself from head to toe. When choosing at what height to hang a mirror in the bathroom, you should keep in mind that a product that is too large (up to the ceiling) is not always convenient. And it’s more difficult to keep it clean. It is better if its height is level with the top border of the door frame.
Criteria for choosing lighting for a bathroom mirror, connection rules
When looking for a place to install a mirror in a bathroom, you need to consider what objects will fall into the reflection zone. It is highly undesirable to hang it opposite another canvas. Otherwise, mutual multiple reflection will create the effect of an endless corridor.
Above the washbasin
Cabinet with mirror
Wall mounted
Full length
Tools and fastening methods
After marking is completed, you can begin installation. The two main methods of fastening are mechanical (screws, bolts, etc.) and chemical (glue, tape, other adhesives).
Bolts and decorative screws
Bolts and screws are the most reliable fastenings. Suitable for any canvas, even large ones. Mirrors are sold with holes for fastening and a set of fittings already drilled at the factory. Therefore, you won’t have to drill into the canvas itself, just the wall.
Such fastenings are also used for mirror cabinets. Decorative screws are preferred. They are more aesthetically pleasing than bolts and are secured with rubber gaskets that prevent damage to the glass.
Special staples and hooks
The good thing about the mounting method with brackets and hooks is that you don’t have to drill the mirror; holes are made only in the wall where the profiles are attached.
The canvas is clamped with brackets, which have special holes for fixing to holders or hooks pre-installed in the wall. If such devices are not included with the mirror, they can be picked up on the construction market. This mounting option is suitable for small and lightweight mirrors.
Tile adhesive
At first glance, gluing a mirror is simple. But you need to take into account the characteristics of the surface on which the canvas will be attached and the composition of the glue. This option is good if the wall is prepared as for laying tiles, that is, cleaned and puttied. Then the reflective sheet will either be recessed into the tile or be on the same level with it. This is done simultaneously with laying the tiles.
You should not glue it to the surface of the laid tiles; such an installation will be unreliable. For massive, heavy canvases, this method is unacceptable.
When choosing an adhesive, you need to pay attention to its composition, which may contain aggressive substances that destroy the surface of the amalgam.
Double sided tape
A good option for attaching lightweight sheets directly to the tiles. It is preferable to choose adhesive tape that is moisture resistant and has a good shelf life. The wall and the back side of the canvas must be degreased, dried thoroughly and glued to it with strips of tape. After this, remove the protective film from the adhesive tape and apply it to the wall according to pre-designated guidelines.
To ensure a strong connection between the pieces of tape, silicone moisture-resistant glue is applied. It is possible to fasten the adhesive tape not with long strips along the canvas, but with short ones - glued in a checkerboard pattern.
Liquid Nails
If the mirror is large enough and needs to be fixed to the wall without removing the tiles, and mechanical fastening methods are impossible for some reason, there is only one method left - liquid nails.
When choosing a product, you should definitely pay attention to its characteristics - moisture resistance and lack of aggressive properties. There are special compounds designed for gluing reflective sheets.
Wall and mirror surfaces are degreased. After they have completely dried, the adhesive is applied both to the wall and to the back side of the canvas. On the back surface of the mirror, a layer of glue should run along its perimeter, at a distance of 2 cm from the edge, and in the middle of the canvas it is better to make an adhesive grid. After this, the mirror is pressed against the wall and held for the time specified in the instructions.
Features of installation on tiles
The most popular material used for finishing bathroom walls is ceramic tiles. It looks perfect, can be selected in accordance with the chosen design, moreover, it is easy to glue and lasts a long time. There are several fastening technologies; we will focus on the two most popular.
How to hang a mirror on tiles without fasteners
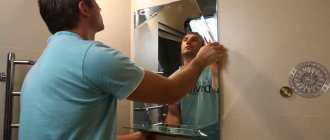
There are several types of mirrors designed for mounting in the bathroom. The mirror can be hung using special mounts, usually included in the delivery kit, it can be drilled directly to the wall or glued, but first things first. Let's start with the classic version - using two fasteners located at the top of the product.
- We prepare the tools, and each owner will have a tape measure for measurements, a pencil for making marks on the wall, a building level for checking horizontal and vertical lines, a ruler, a drill and a screwdriver.
- Making the markings
, and this is an important point, since the mirror should be located strictly in the middle above the sink, the top and bottom of the structure should be at the same level, it is also not advisable to allow distortions - this is ugly, at least.
- Finding the center of the sink
, using a pencil, draw a vertical line.
- By taking simple measurements, we determine the height of the fastenings
. To do this, we find the top point of the mirror, and then measure the distance to the center of the fastener.
- Draw a horizontal line
and mark the locations of the mounting holes.
- Make one hole using a drill
, install a plastic or wooden dowel under the screw, screw in the first fastener.
- Hanging a mirror
, we check the accuracy of the markings, and often, taking into account the unevenness of the wall or mounting strip, the location of the second hole moves.
- Removing the mirror
and similarly to the first, we make a second hole, screw in the second fastener at the same level.
When drilling tiles, if the installation of the reflective accessory is done after finishing the wall cladding, some precautions must be taken. If glossy tiles with a slippery surface were used for finishing, before drilling a hole, this place must be cored using a core or drill. In order not to damage the tile, you should not put pressure on the drill while drilling, as there is a possibility of hitting a hollow brick, which can cause a blow to the tile.
It is important! When starting to drill into the wall, find out if there are any water or heating pipes under the tiles or if there are any wiring connections. Damage to communications can cause many problems.
Option 2 – for liquid nails
You can attach the mirror using liquid nails. Thus, it is installed in niches if there is a plasterboard gasket between the wall and the mirror or on a tiled surface. The product must be moisture resistant and not destroy the amalgam.
Before applying the product, the surface is thoroughly degreased, and control marks are made on the wall - landmarks. It is best to completely circle the mirror. Then an adhesive substance is applied to its back side.
Liquid nails are applied along the perimeter, retreating 2-3 cm from the edge and pointwise or in a grid - in the middle. After this, the sheet is lightly pressed against the wall, torn off for 1 minute and pressed again. The composition will dry within 24 hours. During this time, it is better to fix the mirror with a support.
Optimal size
The largest mirrors for installation above the sink do not exceed 1x2 m in size.
If you carry out approximate calculations, it will become clear what we are talking about: if the height of the sink is 1.2 m, taking into account the small interval between it and the canvas of 20 cm, then such a mirror will be intended for a person 2.4 m tall.
Therefore, to determine the optimal height, you need to make a small sketch on a certain scale and take into account the above recommendations.
The thickness of the canvas is determined depending on the thickness of the tile, but should not exceed 10 mm. The minimum threshold is 2 mm, below which mirrors are not recommended to be used due to their increased fragility.
At what height should I hang a mirror from the sink?
In everyday life, this can be done with the help of special baths, where the obligatory “ingredient” is plasticine.
Such a bath is filled with liquid and attached to the area of the planned hole. Drill in stages, constantly stopping and checking the amount of water remaining in the tray. If necessary, add liquid.
Masters advise periodically dripping a few drops of turpentine onto the resulting hole, and then starting the process again. After the holes are ready, carefully round off the sharp edges with sandpaper, avoiding overheating and damage to the product.
Is it possible to do without drilling?
The mirror, which is not too heavy in weight, can be fixed directly to the tile. Stock up on special glue or double-sided adhesive tape.
If desired, two adhesives can be used simultaneously: then the adhesive is applied over the entire area, and adhesive tapes directed parallel to each other are placed in the center. Then release the tape from the protective covering and attach the device to the wall.
Prepare in advance the line where the structure will be placed and check its horizontalness using a building level. When leveling the mirror sheet, do it quickly, otherwise the device will stick in a crooked position. That is why it is better to use suction cups when installing; of course, for one-time use the pleasure is not cheap, but you can be sure of the final result.
Glue with tape
Ordinary stationery tape is unlikely to fit here, but moisture-resistant tape is just right. To begin, clean the ceramic tiles from dirt and wipe them with a cotton swab dipped in alcohol, set aside until the surface is completely dry, and only then fix the product.
At the final stage, apply sealant along all edges of the device.
Using liquid nails for mirrors
Apply the composition around the entire perimeter of the product, leaving 5–7 cm between portions. Avoid getting liquid nails on the corners, otherwise, when pressed, the substance will come out and ruin the appearance of the frame and the mirror coating itself.
Hold the mirror with your hand with light pressure against the wall for 10 minutes or more.
